
A Slice of Heaven: Why You’ll Fall in Love with This Irresistible Velvet Indulgence
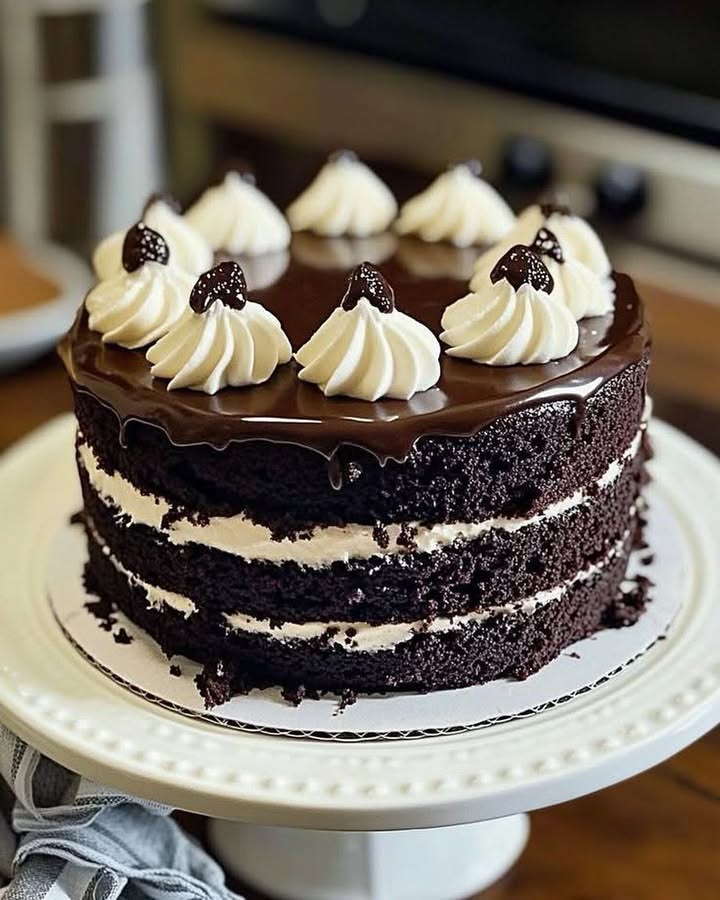
Picture this: a rich, dark chocolate cake that practically melts in your mouth, layered with clouds of whipped cream, and topped with a glossy ganache. Sounds dreamy, right? That’s exactly what happened when I first baked this Black Velvet Cake. It was for my best friend’s birthday – she loves all things decadent and dramatic. Let me tell you, the moment she took her first bite, her eyes lit up like fireworks. Since then, this cake has become my go-to showstopper for special occasions. Whether you’re a seasoned baker or just starting out, this recipe is simple yet oh-so-satisfying.
The Sweet History Behind Black Velvet Cake
While Red Velvet Cake often gets all the attention, its darker cousin deserves some love too. The original Red Velvet gained fame in the early 20th century thanks to its vibrant color and cocoa-infused flavor. Over time, creative bakers started experimenting, swapping colors and flavors while keeping the same velvety texture. And voilà – Black Velvet Cake was born! It’s not just about looks; it’s about creating an experience. Every forkful feels indulgent yet comforting, making it perfect for celebrations or even cozy nights at home.
Why You’ll Love This Recipe
This recipe hits all the right notes. First off, the combination of deep chocolatey layers with light-as-air cream filling creates a heavenly contrast. Plus, it’s surprisingly easy to make! No fancy techniques required – just mix, bake, and assemble. The hot coffee trick (don’t worry, it won’t taste like coffee!) intensifies the chocolate flavor without overpowering it. Whether you’re baking for family dinners or impressing guests, this cake delivers every single time.
Perfect Occasions to Whip Up This Treat
Need a dessert that screams celebration? Look no further. Birthdays, anniversaries, holiday feasts – this Irresistible Velvet Indulgence fits right in. But honestly, why wait for a special event? Bake it on a rainy Sunday afternoon, slice it thick, and pair it with a steaming cup of tea. Trust me, life tastes better with cake!
Ingredients You’ll Need
- For the cake:
- 2 cups all-purpose flour
- 1 cup granulated sugar
- ¾ cup unsweetened cocoa powder
- 1 teaspoon baking soda
- 1 teaspoon baking powder
- ½ teaspoon salt
- 2 large eggs
- 1 cup buttermilk (or milk + 1 tablespoon vinegar)
- ½ cup vegetable oil
- 1 cup hot brewed coffee
- 1 teaspoon vanilla extract
- For the cream filling:
- 2 cups cold heavy whipping cream
- ¼ cup powdered sugar
- 1 teaspoon vanilla essence
- For the ganache:
- 200g chopped semi-sweet chocolate
- 200ml heavy whipping cream
Substitution Options
If you don’t have buttermilk, mix regular milk with a splash of vinegar or lemon juice. For vegans, swap dairy products with plant-based alternatives like almond milk and coconut cream. Instead of coffee, use hot water if caffeine isn’t your thing, though the coffee really enhances the chocolate flavor. Lastly, agave syrup can replace sugar for those watching their intake.
Step 1: Preheat and Prep
Start by preheating your oven to 175°C (350°F). Grease three round cake pans and line them with parchment paper – this ensures your cakes slide out effortlessly later. Now, gather your dry ingredients: flour, sugar, cocoa powder, baking soda, baking powder, and salt. Whisk these together until they’re evenly combined. Imagine the smell of cocoa wafting through your kitchen – pure bliss!
Pro tip: Sift your cocoa powder to avoid lumps and achieve a smoother batter.
Step 2: Mix Wet Ingredients
In another bowl, beat the eggs lightly before adding buttermilk, vegetable oil, and vanilla extract. Pour this wet mixture into the dry ingredients and stir gently. Don’t overmix; we want a tender crumb. As you incorporate the hot coffee, watch how the batter transforms into a silky, dark liquid. Coffee might seem unusual here, but it deepens the chocolate flavor magically.
Step 3: Bake to Perfection
Divide the batter evenly among your prepared pans and pop them into the oven. Bake for 25-30 minutes or until a toothpick inserted comes out clean. While waiting, imagine the aroma filling your house – warm, chocolaty goodness calling your name. Once done, let the cakes cool completely before handling. Patience pays off here!
Step 4: Whip Up the Cream Filling
Grab your stand mixer or hand whisk and whip the cold heavy cream with powdered sugar and vanilla essence. Keep going until stiff peaks form – think fluffy clouds ready to hug your cake layers. This step is quick but crucial for achieving that luxurious texture everyone will rave about.
Step 5: Make the Ganache
Melt the chopped chocolate in a heatproof bowl. Heat the cream separately until it simmers, then pour it over the chocolate. Let it sit for a minute before stirring until smooth and glossy. Ah, doesn’t that shine look tempting? Set it aside to cool slightly before using.
Step 6: Assemble Your Masterpiece
Now comes the fun part – assembly! Place one cake layer on your serving plate, spread a generous dollop of whipped cream, and repeat with the remaining layers. Cover the entire cake with the ganache, letting it drip elegantly down the sides. Finish with decorative rosettes or sprinkles if you’re feeling fancy. Stand back and admire your work – stunning!
Cooking Times Breakdown
- Preparation Time: 20 minutes
- Baking Time: 25-30 minutes
- Cooling Time: 1 hour
- Total Time: Approximately 2 hours
Chef’s Secret
Want extra moist layers? Brush each cooled cake with a thin layer of simple syrup before adding the cream filling. It keeps the cake fresh and adds a subtle sweetness.
An Interesting Tidbit About Chocolate
Did you know cocoa beans were once so valuable they were used as currency in ancient civilizations? Today, we celebrate them in desserts like this Irresistible Velvet Indulgence. Pretty cool, huh?
Necessary Equipment
- Three 8-inch round cake pans
- Parchment paper
- Mixing bowls
- Whisk and spatula
- Stand mixer or hand mixer
- Toothpick for testing doneness
- Offset spatula for spreading ganache
Storage Tips
Store your cake in the refrigerator to keep the cream filling stable. Wrap it tightly with plastic wrap or place it in an airtight container to prevent it from drying out. Bring it back to room temperature before serving for optimal flavor and texture.
If you need to freeze it, wrap individual slices in foil and store them in a freezer bag. They’ll stay good for up to three months. Just thaw overnight in the fridge before enjoying.
Leftovers? Ha! Who are we kidding? But if you do have some, share them with friends – sharing is caring!
Tips and Advice
- Use room-temperature eggs for easier mixing.
- Don’t skip sifting the cocoa powder – it makes a difference.
- Chill your mixing bowl and beaters before whipping cream for faster results.
Presentation Ideas
- Dust the top with cocoa powder for a rustic touch.
- Add edible gold flakes for glamour.
- Decorate with fresh berries for a pop of color.
Healthier Alternatives
Looking for ways to lighten up this treat? Try these swaps:
- Gluten-Free Flour: Substitute all-purpose flour with a gluten-free blend.
- Coconut Sugar: Replace granulated sugar with coconut sugar for a lower glycemic index.
- Greek Yogurt Frosting: Swap whipped cream with Greek yogurt mixed with honey.
- Dark Chocolate Ganache: Use dark chocolate for less sugar.
- Avocado Oil: A healthier alternative to vegetable oil.
- Stevia Powder: Cut calories by using stevia instead of sugar.
Mistake 1: Overmixing the Batter
Overmixing leads to dense, tough cakes. Mix just until the ingredients come together. Think of it as giving everything a gentle hug rather than a vigorous shake.
Tip: Stop mixing as soon as there are no visible streaks of flour.
Mistake 2: Skipping Cooling Time
Rushing the cooling process causes cakes to break apart during assembly. Be patient – let them rest fully before moving forward.
Mistake 3: Using Warm Cream for Ganache
Cold cream won’t melt the chocolate properly, leaving you with grainy ganache. Always heat the cream first!
Frequently Asked Questions
Can I use instant coffee instead of brewed coffee?
Absolutely! Dissolve 1-2 teaspoons of instant coffee in 1 cup of hot water and proceed as directed. It works wonderfully.
How do I prevent my ganache from splitting?
Splitted ganache happens when the cream is too hot. Heat it gently and stir slowly after pouring it over the chocolate.
What if I don’t have buttermilk?
No worries! Mix 1 tablespoon of white vinegar or lemon juice with 1 cup of milk. Let it sit for 5 minutes, and voilà – homemade buttermilk.
Can I make this cake ahead of time?
Yes! Bake the layers a day in advance and store them wrapped at room temperature. Assemble closer to serving time.
Is this cake suitable for vegans?
With a few tweaks, definitely. Use plant-based milk, vegan butter, and dairy-free chocolate for a cruelty-free version.
Why does my cake sink in the middle?
This usually happens due to underbaking or opening the oven door too early. Stick to the recommended baking time and resist peeking!
Can I freeze this cake?
Of course! Wrap individual slices in foil and freeze for up to three months. Thaw in the fridge overnight before serving.
Do I have to use ganache?
Nope! If you prefer something lighter, try dusting powdered sugar or drizzling caramel sauce instead.
How long will the cake last?
Stored properly in the fridge, it stays fresh for up to five days. Though, let’s be real – it probably won’t last that long!
Can kids help with this recipe?
Definitely! Kids can assist with measuring ingredients, whisking, and decorating. It’s a great way to bond and teach them basic baking skills.
A Final Note on Your New Favorite Dessert
There you have it – a guide to creating your very own Irresistible Velvet Indulgence. Whether you’re baking for loved ones or treating yourself, this cake promises joy in every bite. So grab your apron, preheat that oven, and get ready to create something truly unforgettable. Happy baking!
Equipment
- Three 8-inch round cake pans
- Parchment paper
- Mixing bowls
- Whisk and spatula
- Stand mixer or hand mixer
Ingredients
- 2 cups all-purpose flour
- 1 cup granulated sugar
Nutrition

Hi, I’m Olivia Parker, the founder of BakingSecret.com and a lifelong lover of all things sweet and homemade. I grew up in a small town in Oregon, where the smell of fresh cookies in my family’s kitchen sparked my passion for baking. Over the years, I turned that passion into a mission: to help home bakers feel confident, inspired, and creative.
After studying food science and working in several artisan bakeries across the U.S., I decided to create a space where everyone from beginners to seasoned bakers can find reliable recipes, expert tips, and a warm, welcoming community. BakingSecret.com is my way of sharing the magic of baking with the world. When I’m not testing new recipes, you’ll find me exploring farmers’ markets, collecting vintage cookbooks, or perfecting my sourdough technique.