
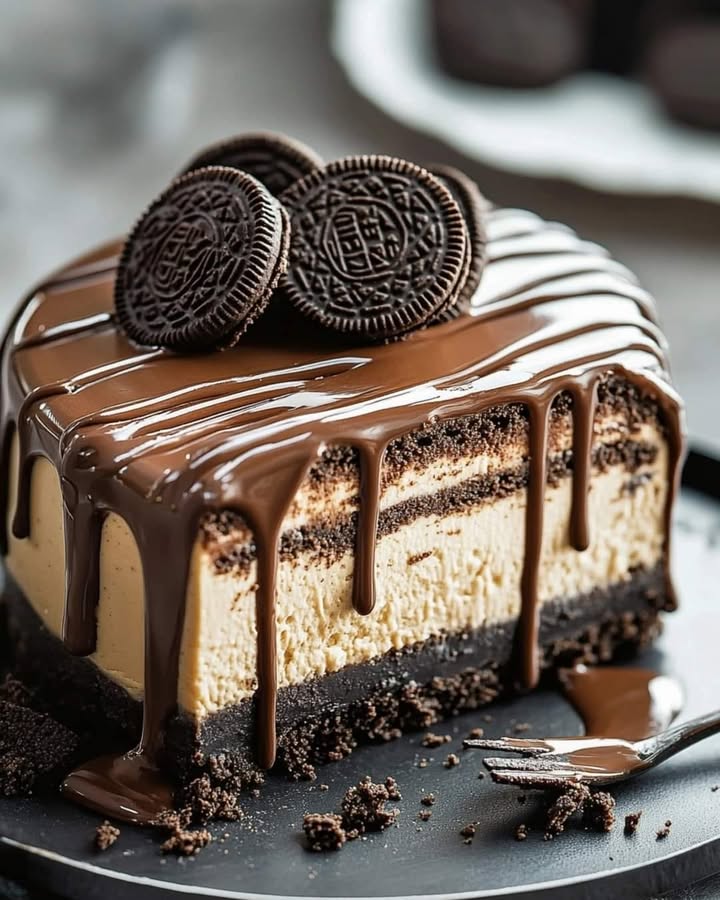
This No-Bake Layered Chocolate Cheesecake is Your New Party Hero
You know that feeling when you need a dessert that looks like you spent all day in the kitchen, but you’d rather be relaxing with your guests? I’ve been there, and that’s exactly why this no-bake Layered Chocolate Cheesecake is my secret weapon. With that crunchy, chocolaty Oreo crust, those two dreamy layers, and that silky chocolate topping, it’s a showstopper. Every single time I bring this to a gathering, people ask for the recipe, and I just smile and say, “Oh, it’s simple!” Let me show you how simple it really is.
A Chocolatey Tale: From Elegant Dessert to Family Favorite
Cheesecake has such a rich history, from ancient Greece to the creamy New York versions we know today. The no-bake style, though? That’s a 20th-century game-changer, a gift to home bakers everywhere! By swapping the oven for the fridge, we get to keep that lovely, creamy texture without any stress about cracking. Layering it with chocolate? That’s my personal twist, inspired by my family’s love for anything with dark, luscious chocolate. I wanted a dessert that felt decadent and fancy but was as easy to put together as my trusty Veggie Cheese Muffins are for brunch.
You Will Absolutely Love This Layered Chocolate Cheesecake
Why is this recipe a keeper? First, it’s a no-bake wonder. Your oven gets to stay off, which is perfect for hot summer days. Second, the contrast is everything: the crisp Oreo crust against the smooth, cool cheesecake layers is pure magic. And third, it’s incredibly forgiving. No need for a water bath or fancy techniques. It’s just mixing, layering, and letting the fridge do its thing. It’s as fun to make as our playful Cheesecake Fruit Roll-Ups, but with a truly elegant finish.
The Perfect Moments for This Decadent Dessert
This cheesecake isn’t just for holidays. It’s your go-to for book club nights, birthday celebrations that need a wow factor, or even a “just because it’s Friday” treat. It travels well in its pan, making it a superstar for potlucks. Need a dessert that complements a savory main course? This rich chocolate creation pairs beautifully after something hearty like our Baked Garlic Parmesan Chicken Meatloaves.
Gathering Your Ingredients for Chocolate Cheesecake Success
For the Oreo Crust:
- 2 ½ cups Oreo cookie crumbs (about 30-32 cookies, filling included)
- 6 tablespoons unsalted butter, melted
For the Cheesecake Filling:
- 4 (8 oz.) packages full-fat cream cheese, softened
- 1 cup powdered sugar
- 2 teaspoons pure vanilla extract
- 2 cups heavy cream, cold
- 10 ounces semi-sweet chocolate, finely chopped
For the Chocolate Ganache Topping:
- ¾ cup heavy cream
- 6 ounces semi-sweet chocolate, finely chopped
- 1 tablespoon granulated sugar
Handy Substitutions for Your Pantry
- Oreo Crust: Use any chocolate sandwich cookie. For a nuttier flavor, try a graham cracker crust.
- Semi-Sweet Chocolate: Dark chocolate (70%) or milk chocolate work, but the sweetness will change.
- Heavy Cream: For the filling, there’s no perfect substitute. For the ganache, full-fat coconut cream can work in a pinch.
- Powdered Sugar: You can blend granulated sugar until super fine, but powdered sugar dissolves best.
Let’s Make This Layered Masterpiece!
Clear some space in your fridge and let’s get started. We’ll build this beauty from the bottom up: crust, a deep chocolate layer, a vanilla layer, and that glorious glossy top.
Step 1: Making the Oreo Crust
First, let’s create that crunchy foundation. Pulse your Oreos in a food processor until they become fine, dark crumbs that smell like childhood. Pour in the melted, warm butter and pulse again. You’ll hear the sound change as the crumbs become coated and start to clump together like wet sand. Dump this mixture into your prepared 9-inch springform pan. Using the bottom of a measuring cup, press it firmly and evenly across the bottom. The firmer you press, the less likely your crust will crumble when you slice later. Pop the pan into the freezer while you work on the filling. This chills the butter quickly, setting our base.
Step 2: Creating the Layered Cheesecake Filling
This is where the magic happens! Start by gently melting your 10 ounces of chocolate. Let it cool slightly so it doesn’t melt the cream cheese. Now, in a large bowl, beat the softened cream cheese with powdered sugar until it’s completely smooth, scraping down the sides. In another chilled bowl, whip the 2 cups of heavy cream and vanilla until you have beautiful, soft peaks. Pro tip: Chill your bowl and beaters for faster whipping. Gently fold the cream cheese mixture into the whipped cream until no white streaks remain. Divide this fluffy cloud in half. Stir the cooled, melted chocolate into one half—watch it turn into a rich, brownie-batter-like dream. Pull your crust from the freezer. Spoon the chocolate cheesecake layer over the crust and smooth it gently. Now, carefully spoon the plain vanilla cheesecake layer on top, spreading it to cover the chocolate completely. The contrast is already stunning! Refrigerate for at least 1 hour to let it firm up before the ganache.
Step 3: Pouring the Chocolate Ganache Topping
For the final, glossy touch, we make the ganache. Place the finely chopped chocolate and sugar in a heatproof bowl. Heat the ¾ cup of heavy cream in a small saucepan over medium heat until it just begins to simmer—you’ll see tiny bubbles around the edge. Pour the hot cream over the chocolate and let it sit for 2 minutes. This allows the chocolate to melt gently. Then, stir slowly from the center outward until you have a smooth, velvety, and dark pool of chocolate. Let it cool for about 5-10 minutes so it thickens slightly. Chef’s tip: Pouring it while too hot can melt the cheesecake layers. Once it’s lukewarm, slowly pour it over the center of the chilled cheesecake. Tilt the pan gently to help it spread to the edges in a perfect, shiny coat. Return the whole pan to the fridge to set completely, preferably overnight.
Timing Your Chocolate Cheesecake
Active prep time is about 30 minutes. The real key is patience during the chilling phases. Plan for at least 1 hour of initial chilling before the ganache, and a final 4-6 hours (or better yet, overnight) for the ganache to set and the flavors to marry perfectly. This makes it an ideal make-ahead dessert.
My Chef’s Secret for the Creamiest Texture
For an unbelievably smooth filling, ensure every ingredient is at the right temperature. Your cream cheese must be truly softened at room temperature (leave it out for 2-3 hours). Your heavy cream for whipping must be ice cold straight from the fridge. This temperature contrast helps the whipped cream hold its structure when folded in, giving you that light yet decadent mouthfeel.
A Little Extra Chocolate Info
Did you know the type of chocolate you use really changes the game? Semi-sweet chocolate, with its balanced sugar and cocoa content, is perfect here. It provides deep flavor without overwhelming sweetness. Using high-quality chocolate with a cocoa content you enjoy eating on its own will make your cheesecake taste even more special.
Tools You’ll Need
- 9-inch springform pan
- Food processor or plastic bag and rolling pin (for the Oreos)
- Electric hand mixer or stand mixer
- Two large mixing bowls and one medium saucepan
- Spatula and measuring cups/spoons
Storing Your Layered Chocolate Cheesecake
This cheesecake must always be stored in the refrigerator. Once the ganache is fully set, you can loosely cover the top with plastic wrap or a dome lid. The cold environment keeps the cream cheese filling firm and safe to eat.
For the best texture and flavor, enjoy it within 4-5 days. The crust may start to soften slightly after day three, but it will still be delicious. If you need to store individual slices, place them in an airtight container with parchment paper between layers.
Freezing is an option for longer storage. Wrap the whole cheesecake or individual slices tightly in plastic wrap, then in foil. Thaw overnight in the refrigerator before serving. The texture may be slightly denser but still wonderful.
Tips for a Flawless Dessert
- Softening Cream Cheese: Don’t microwave it to soften! It can become too warm and ruin the filling’s structure. Plan ahead for room temperature.
- Clean Slices: For picture-perfect slices, dip a sharp knife in hot water, wipe it dry, and then cut. Repeat for each slice.
- Layering: Use a spoon or offset spatula to carefully dollop the vanilla layer over the chocolate. Gently spread it to avoid mixing the two.
Presentation Ideas to Wow Your Guests
- Top with fresh raspberries, a sprinkle of sea salt, or chocolate curls just before serving.
- Serve with a dollop of lightly sweetened whipped cream on the side.
- For a dinner party, garnish each plate with a drizzle of raspberry coulis.
- If you love individual servings, this luxurious filling would also be fantastic layered in glasses for Whipped Chocolate Cheesecake Parfaits.
Healthier & Fun Variations to Try
This recipe is wonderfully adaptable! Here are six ways to mix it up:
- Peanut Butter Swirl: Swirl ½ cup of warm peanut butter into the vanilla layer before adding the ganache.
- Mint Chocolate: Add ½ teaspoon of peppermint extract to the chocolate cheesecake layer.
- Orange Zest: Add the zest of one orange to the vanilla layer for a bright, citrusy note.
- Cookie Dough Chunks: Fold small chunks of edible chocolate chip cookie dough into the vanilla layer.
- Mocha: Dissolve 1 tablespoon of instant espresso powder into the melted chocolate for a coffee kick.
- Berry Topped: Skip the ganache and top the set cheesecake with a layer of fresh, glossy berry compote.
Common Mistakes to Avoid
Mistake 1: Using Cold or Lumpy Cream Cheese
This is the number one reason for a lumpy, grainy filling. Cold cream cheese will not blend smoothly with the sugar or the whipped cream. You’ll end up with tiny white lumps throughout your beautiful layers. To avoid this, take the cream cheese out of the fridge at least two hours before you start. It should feel very soft to the touch. If you’re in a pinch, you can microwave the unopened blocks on low power for 10-second bursts, but room temperature is always best.
Mistake 2: Over-whipping the Heavy Cream
We want soft, pillowy peaks, not stiff, buttery peaks. If you whip the cream too far, it becomes grainy and difficult to fold in smoothly. It can also lead to a filling that weeps or separates later. Stop your mixer when the beaters leave a soft trail that slowly disappears. The cream should look silky and hold its shape when you lift the beater. Remember, you’ll be folding and stirring it more, so it’s better to be slightly under-whipped than over.
Mistake 3: Adding Hot Chocolate to the Filling
It’s so tempting to stir that freshly melted chocolate right into the cheesecake batter. Don’t do it! Hot chocolate will immediately melt the whipped cream, deflating your airy filling and potentially causing the cream cheese to become runny. Your layers will be thin and soupy. Always let the melted chocolate cool to room temperature. You can speed this up by spreading it on a plate. Test it by touching a dab on your lip—it should feel just warm, not hot.
Mistake 4: Not Chilling Long Enough
Impatience is the enemy of no-bake cheesecakes. If you try to add the ganache or remove the springform ring too soon, the layers will slump and the ganache will run everywhere. The cheesecake needs time for the structure to firm up. Respect the chilling times! That overnight chill isn’t just a suggestion; it allows all the flavors to develop and the texture to become perfectly sliceable. A longer chill is one of the easiest ways to elevate your dessert.
Frequently Asked Questions
Can I use milk chocolate instead of semi-sweet?
Yes, you can use milk chocolate, but your cheesecake will be much sweeter and have a less intense chocolate flavor. The layers might also be a bit softer because milk chocolate has more dairy and sugar and less cocoa butter than semi-sweet. I recommend sticking with a good quality semi-sweet for the best balance of flavor and texture. It provides that deep, rich taste that contrasts so nicely with the sweet vanilla layer and the Oreo crust.
How do I prevent the ganache from cracking when I slice the cheesecake?
A cracking ganache usually means it was poured too thick or chilled for too long and became very firm. To avoid this, ensure your ganache is the right consistency when you pour it—it should smoothly coat the back of a spoon. Also, use the hot knife method for slicing: dip a sharp, non-serrated knife in very hot water, wipe it completely dry, and make a clean cut. The heat helps glide through the firm ganache without causing it to shatter. Repeat this for every slice for a perfect presentation every single time.
Why is my cheesecake filling too soft even after chilling overnight?
A soft filling can have a few causes. First, the heavy cream may have been under-whipped, not providing enough structure. Second, the cream cheese might not have been full-fat, as low-fat varieties have more water and less stability. Third, the filling may not have been mixed thoroughly, leaving pockets of unincorporated cream cheese or cream. Finally, ensure your fridge is cold enough (below 40°F). To fix a soft cheesecake, just give it more time in the coldest part of your refrigerator.
Can I make this recipe without a springform pan?
A springform pan is highly recommended because it has a removable side, making it easy to get the tall, beautiful cheesecake out without damaging it. If you don’t have one, you can use a deep 9-inch pie dish. The serving style will just be different—you’ll scoop it out rather than slicing neat wedges. You could also use a regular 9-inch cake pan lined with overhanging strips of parchment paper to act as “handles” to lift the cheesecake out, but this is trickier.
Is it necessary to use powdered sugar, or can I use granulated?
It’s best to use powdered (confectioners’) sugar. Granulated sugar doesn’t dissolve fully in a no-bake mixture, and you risk a slightly gritty texture in your otherwise creamy filling. Powdered sugar contains a small amount of cornstarch, which helps thicken the filling and blends seamlessly with the cream cheese. If you’re in a bind, you can make a version by processing granulated sugar in a blender until it’s super fine, but the texture won’t be quite as foolproof.
How far in advance can I make this cheesecake?
This cheesecake is an excellent make-ahead dessert. You can prepare it up to 2 full days before you plan to serve it. In fact, making it a day ahead allows the flavors to meld and the texture to become perfectly firm. Just keep it covered in the refrigerator. Add any fresh fruit garnishes right before serving so they don’t get soggy or weep onto the beautiful ganache surface.
Can I freeze the finished cheesecake?
Absolutely! To freeze, let the cheesecake set completely in the fridge first. Then, wrap the whole pan (or individual slices) tightly in plastic wrap, followed by a layer of aluminum foil. It will keep well for 1-2 months. Thaw it overnight in the refrigerator before serving. The texture may be slightly denser after freezing, but it will still taste fantastic. This is a great way to always have an impressive dessert on hand.
My crust stuck to the pan! How can I prevent that?
To prevent sticking, make sure you properly prepare your springform pan. Lightly grease the bottom and sides with butter or non-stick spray before adding the crust mixture. Press the crust firmly and evenly. After the final long chill, run a thin, offset spatula or a thin knife carefully between the crust and the side of the pan before unlocking the clasp. This ensures the crust isn’t glued to the metal by any stray butter or filling.
What can I do with leftover heavy cream?
Don’t let that extra cream go to waste! You can use it to make fresh whipped cream as an accompaniment for the cheesecake. You could also use it in a creamy pasta sauce, add it to scrambled eggs for extra richness, or blend it into a soup. For another sweet idea, it’s the key ingredient in many no-bake desserts, much like the creamy component in our other favorite cheesecake recipes. It’s a versatile ingredient to have on hand for creating delicious, nutritious meals and treats.
Can I make this recipe gluten-free?
Easily! To make this a gluten-free Layered Chocolate Cheesecake, simply use gluten-free chocolate sandwich cookies for the crust. Many brands are available. Also, double-check that your chocolate and other ingredients are certified gluten-free, as cross-contamination can sometimes occur in processing. With those simple swaps, you’ll have a dessert that everyone can enjoy without worry.
Your Turn to Make Magic
There you have it! My ultimate, no-fuss, absolutely delicious No-Bake Layered Chocolate Cheesecake. It’s proof that you don’t need to be a professional pastry chef to create something truly spectacular. The joy is in the making and, of course, in the sharing. So grab your ingredients, put on some music, and get ready for the compliments to roll in. Trust me, this dessert is going to earn a permanent spot in your recipe box. Now, go enjoy a slice of your hard work—you’ve earned it!
Equipment
- Grand bol
- Fouet
- Spatule
- Moule à charnière de 9 pouces
- Mixeur électrique ou robot pâtissier
Ingredients
- 2 ½ tasses miettes de biscuits Oreo environ 30-32 cookies, avec la crème
- 6 cuillères à soupe beurre non salé fondu
- 4 paquets (8 oz) fromage à la crème à température ambiante
- 1 tasse sucre glace
- 2 cuillères à café extrait de vanille pur
- 2 tasses crème épaisse froide
- 10 onces chocolat semi-sucré finement haché
- ¾ tasse crème épaisse pour la ganache
- 6 onces chocolat semi-sucré finement haché pour la ganache
- 1 cuillère à soupe sucre granulé pour la ganache
Instructions
- Pulvérisez les Oreos dans un robot culinaire jusqu'à obtenir une fine poudre, puis mélangez avec le beurre fondu et pressez dans un moule à charnière de 9 pouces ; placez au congélateur pour durcir.
- Faites fondre le chocolat et laissez-le refroidir légèrement ; battez le fromage à la crème ramolli avec le sucre glace jusqu'à obtention d'un mélange lisse.
- Montez la crème épaisse et la vanille jusqu'à ce que des pics souples se forment ; incorporez délicatement le mélange de fromage à la crème jusqu'à ce qu'il soit complètement homogène.
- Divisez le mélange en deux ; incorporez le chocolat fondu dans une moitié pour créer une couche chocolat.
- Étalez la couche chocolat sur la croûte, puis versez la couche vanille par-dessus en lissant ; réfrigérez pendant au moins 1 heure.
- Pour la ganache, chauffez la crème épaisse dans une casserole jusqu'à frémissement, versez sur le chocolat et le sucre ; remuez jusqu'à ce que le mélange soit lisse.
- Laissez refroidir la ganache légèrement et versez-la sur le cheesecake ; réfrigérez pour qu'il se fixe complètement, idéalement toute la nuit.
Notes
Nutrition

Hi, I’m Olivia Parker, the founder of BakingSecret.com and a lifelong lover of all things sweet and homemade. I grew up in a small town in Oregon, where the smell of fresh cookies in my family’s kitchen sparked my passion for baking. Over the years, I turned that passion into a mission: to help home bakers feel confident, inspired, and creative.
After studying food science and working in several artisan bakeries across the U.S., I decided to create a space where everyone from beginners to seasoned bakers can find reliable recipes, expert tips, and a warm, welcoming community. BakingSecret.com is my way of sharing the magic of baking with the world. When I’m not testing new recipes, you’ll find me exploring farmers’ markets, collecting vintage cookbooks, or perfecting my sourdough technique.