
My Simple Lemon Cream Cheese Dump Cake Recipe
Last summer, I brought a dessert to my sister’s backyard barbecue that had everyone asking for seconds. People kept coming up to me asking how long I’d spent in the kitchen. When I told them it took me about five minutes to throw together, they didn’t believe me. That dessert was my lemon cream cheese dump cake, and it’s become my secret weapon for impressing guests without breaking a sweat.
I’m sharing this recipe with you because I think everyone deserves a go-to dessert that tastes like you fussed for hours but actually requires minimal effort. This lemon cream cheese dump cake recipe is exactly that kind of dessert. It’s bright, creamy, and has the perfect balance of sweet and tangy flavors that make it ideal for warm weather gatherings.
If you’ve never made a dump cake before, you’re in for a treat. The name pretty much says it all. You literally dump ingredients into a pan in layers without mixing them together. No electric mixer required. No fancy techniques to master. You just layer everything in the right order, pop it in the oven, and let the magic happen. The cake mix on top bakes into a crispy, buttery crust while the filling below stays creamy and luscious.
The reason dump cakes have become so popular is simple. They deliver impressive results with almost zero effort. Busy parents love them. New bakers feel confident making them. Even experienced cooks appreciate having a reliable recipe that doesn’t demand much attention. I’ve made this particular version for church potlucks, family reunions, and casual weeknight dinners. It works for any occasion.
Ingredients You’ll Need
One of the best things about this lemon cream cheese dump cake is that you probably have most ingredients already. Here’s everything you need:
- 1 can (21 ounces) of lemon pie filling
- 8 ounces of cream cheese (one standard block), softened
- 1 box of yellow cake mix (15.25 ounces)
- 1/2 cup of butter (1 stick), melted
- 1/2 cup of powdered sugar
- 1 teaspoon of vanilla extract
- Zest from one lemon (optional but recommended)
Let me give you some tips on picking the right ingredients. For the lemon pie filling, I usually grab whatever brand my grocery store carries. Comstock and Duncan Hines both make good versions. You’ll find them in the baking aisle near the canned fruits. Some stores stock them near the pie crusts. If your store has a generic brand, that works fine too. I’ve tested several brands and honestly haven’t noticed a huge difference.
The cream cheese matters more than you might think. Get the block style, not the spreadable kind in a tub. The spreadable versions have different moisture content and won’t give you the same texture. I always use full-fat cream cheese. The reduced-fat versions can make your dessert a bit watery. Make sure to take your cream cheese out of the fridge about 30 minutes before you start. Softened cream cheese blends much easier with the powdered sugar.
Any brand of yellow cake mix works perfectly. I’ve used Betty Crocker, Duncan Hines, and store brands with equal success. Just make sure you’re getting a standard 15.25-ounce box. Some brands now sell smaller boxes, and those won’t give you enough coverage.
For the butter, I stick with real butter rather than margarine. The flavor is so much better, and since this recipe doesn’t have many ingredients, each one needs to pull its weight. Salted or unsalted butter both work. I usually have salted on hand, so that’s what I use.
Why Don’t You Mix Dump Cakes?
This question comes up every single time I make this dessert in front of someone new. People watch me dump the dry cake mix on top and immediately want to grab a spoon to stir everything together. I have to stop them before they ruin the magic.
Here’s the thing about dump cakes. The whole point is keeping the layers separate. When you leave the cake mix dry on top and just drizzle it with melted butter, something amazing happens in the oven. The butter soaks into the cake mix and creates a crispy, crumbly topping that’s similar to a cobbler or crisp. It has texture and crunch that contrasts beautifully with the creamy filling below.
If you mix everything together, you end up with a dense, heavy cake. It becomes more like a regular cake with filling mixed in. That’s not terrible, but it’s not what we’re going for here. The unmixed version gives you distinct layers. You get the smooth lemon filling on the bottom, a rich cream cheese layer in the middle, and that crispy, buttery cake topping. Each bite has all three textures working together.
I learned this lesson the hard way my first time making a dump cake. I thought the recipe had a typo when it said not to mix. I stirred everything together because it seemed wrong to leave dry cake mix sitting there. The result was edible but disappointing. It looked flat and boring. The texture was all the same throughout. My family ate it, but nobody raved about it.
The next time, I followed the instructions exactly and left everything in layers. The difference was night and day. The top baked into these gorgeous golden patches with crispy edges. The filling stayed distinct and creamy. That’s when I understood why dump cakes have such a loyal following.
Another reason not to mix is that it keeps this recipe truly simple. The moment you start mixing, you need bowls and spoons and more cleanup. The beauty of a dump cake is using just the baking pan. Everything goes straight into your 9×13 inch dish. When you’re done baking, that’s the only dish you need to wash besides measuring cups.
Some people worry that leaving the cake mix dry means it won’t bake properly. Trust me, it will. The moisture from the filling below and the melted butter on top provide exactly what the cake mix needs. Steam rises from the hot filling during baking, and that helps cook the cake mix from underneath. The butter drizzled on top does its job from above. You end up with a perfectly baked topping that’s crispy on top and slightly softer where it meets the filling.

How to Make Your Lemon Cream Cheese Dump Cake Step by Step
Now that you understand why we keep everything in layers, let me walk you through actually making this dessert. I promise it’s even easier than you’re imagining.
First things first. Do you grease the pan when making a dump cake? Yes, absolutely. I learned this the hard way after my first dump cake stuck to the pan like cement. Now I always spray my 9×13 inch baking dish with cooking spray before I start. You can also use butter to grease it if you prefer. Just make sure you get the corners and edges well. Some people skip this step thinking the butter in the recipe will prevent sticking, but that butter goes on top of the dry cake mix. It doesn’t reach the bottom where your lemon filling sits. Trust me on this one. Grease that pan.
Preheat your oven to 350 degrees Fahrenheit. I usually do this before I even get my ingredients out because my oven takes forever to heat up. Yours might be faster, but it’s good to have it ready.
Take your softened cream cheese and put it in a medium bowl with the powdered sugar and vanilla extract. Use a hand mixer or a sturdy wooden spoon to blend these together until the mixture is smooth and creamy. This is the only real mixing you’ll do in the entire recipe. If your cream cheese is properly softened, this takes maybe two minutes. If it’s still cold, you’ll be there a while fighting lumps. That’s why I mentioned letting it sit out earlier. If you forgot and your cream cheese is still cold, you can microwave it for about 15 seconds. Just watch it carefully because you want it soft, not melted.
Once your cream cheese mixture is smooth, set it aside. Open your can of lemon pie filling and spread it evenly across the bottom of your greased 9×13 inch pan. I use a spatula to smooth it out so it covers the whole bottom. You want an even layer so every serving has the same amount of lemon filling. If you’re using fresh lemon zest, this is when I sprinkle it over the pie filling. The zest adds such a bright, fresh lemon flavor that makes people think you made everything from scratch.
Now comes the cream cheese layer. Drop spoonfuls of your cream cheese mixture all over the lemon filling. Don’t worry about making it perfect. I just dollop it around in roughly even amounts. Then use your spatula to gently spread it over the lemon layer. It doesn’t have to cover every single inch. Some spots where the lemon peeks through are totally fine. In fact, I think those spots add to the rustic charm of the dessert.
Here’s where it gets really easy. Take your box of yellow cake mix and pour it directly over the cream cheese layer. Shake the pan gently so the dry mix settles into an even layer covering everything. Don’t press it down. Don’t pat it. Just let it sit there looking like dry cake mix because that’s exactly what it is.
Melt your stick of butter in the microwave or on the stovetop. I usually microwave mine for about 45 seconds. Once it’s melted, drizzle it evenly over the dry cake mix. I’ve found the best method is to pour it back and forth across the pan in lines, kind of like you’re decorating a cake with icing. You want to get as much coverage as possible. Some dry patches are okay, but try to hit most of the surface. The butter will spread a bit as it bakes.
Slide your pan into the preheated oven and bake for 45 to 50 minutes. You’re looking for a golden brown top with some darker brown patches around the edges. Those darker spots are where the butter pooled, and they’re absolutely delicious. They get extra crispy and buttery.
By the way, if you love working with lemon desserts, you should check out my recipe for lemon bars with cake mix. It uses a similar simple approach with cake mix as a shortcut.
Tips That Make All the Difference
I’ve made this lemon cream cheese dump cake probably fifty times by now, and I’ve picked up some tricks along the way that really improve the results.
Room temperature ingredients matter more than you’d think. I mentioned the cream cheese earlier, but it’s worth repeating. Cold cream cheese won’t blend smoothly with the powdered sugar. You’ll get lumps that don’t go away, and those lumps will be in your finished dessert. I take my cream cheese out when I start thinking about making dessert, even if that’s an hour before I actually start baking. It’s impossible to over-soften cream cheese for this recipe.
The quality of your lemon pie filling can make or break this dessert. While I said earlier that most brands work fine, I’ve noticed that some brands have a more artificial lemon flavor than others. If you can, read the label and look for one that lists actual lemon juice in the ingredients. Those tend to taste fresher and less chemical-like. I’ve had good luck with Wilderness and Comstock brands.
Speaking of lemons, that fresh lemon zest I listed as optional? Don’t skip it if you have a lemon handy. It takes thirty seconds to zest a lemon, and the flavor boost is incredible. The zest has all these natural oils that smell amazing and taste even better. When people ask me what makes my version special, the fresh zest is my secret ingredient. You can zest the lemon right over the pie filling layer, or mix it into the cream cheese mixture. Either way works.
Here’s something nobody tells you about dump cakes. The brand of cake mix actually does matter a little bit, but not in the way you’d expect. Different brands have slightly different textures when they’re dry. Some are finer, almost like flour. Others are a bit coarser. The finer ones tend to absorb the butter more evenly and create a more uniform crust. The coarser ones make a crumblier, more cobbler-like topping. Neither is wrong. It’s just a matter of preference. I happen to like Duncan Hines because it’s on the finer side, but my neighbor swears by Betty Crocker for the opposite reason.
What is the biggest mistake to avoid when making a dump cake? Overbaking is the killer. Because there’s so much moisture from the pie filling, people think dump cakes need to bake forever to set up properly. That’s not true. If you bake it too long, the top gets hard and dry instead of crispy and buttery. The edges can actually burn. I set my timer for 45 minutes and then start checking. I’m looking for a golden brown color on top and for the edges to be bubbling. If I’m not sure, I stick a toothpick into the cake mix layer near the center. It should come out with just a few moist crumbs. If it comes out wet with filling, it needs more time. If it comes out completely dry, you’ve probably gone too far.
The toothpick test works a little differently with dump cakes than with regular cakes. You’re not testing the filling layers. You’re testing whether the cake mix on top has baked through. So don’t push your toothpick all the way to the bottom. Just go through the top cake layer.
Funny enough, underbaking is also a mistake, though it’s easier to fix. If you cut into your dump cake and the middle looks soupy, just put it back in the oven for another ten minutes. I’ve done this more than once when I got impatient. The dessert still turns out fine.
Let me share another tip I discovered by accident. If you want an extra-crispy top, use melted butter that’s still pretty hot. Cold or barely-warm butter doesn’t soak into the cake mix as well. Hot butter kind of seeps down into the mix and creates more of that crispy texture we’re after. I actually melt my butter right before I drizzle it so it hasn’t had time to cool down.
If you’re into trying different cake variations, you might enjoy my chocolate birthday cake recipe for your next celebration. It’s a bit more involved than this dump cake, but still totally manageable.
One more thing about timing. Once your dump cake comes out of the oven, let it cool for at least 15 minutes before you serve it. I know it smells incredible and you want to dig in right away. But that filling is molten hot and will burn your mouth. I learned this lesson eating a spoonful straight from the oven. Not my smartest moment. Plus, the dessert actually sets up better as it cools. The cream cheese layer firms up a bit and the whole thing becomes easier to cut into neat squares.
For a completely different but equally easy dessert option, my German chocolate cake ice cream requires no baking at all and still impresses everyone.
If you’re making this ahead of time for a party, you can bake it earlier in the day and leave it at room temperature covered with foil. It actually tastes great at room temperature or even slightly warm. Some people like it cold from the fridge, which I’ll talk about in a minute.
Also, if you’re feeling adventurous with cake decorating, check out this fun mushroom cake for when you want something more whimsical than a simple dump cake.
Creative Ways to Serve Your Lemon Cream Cheese Dump Cake
The wonderful thing about this dessert is how versatile it is when it comes to serving. I’ve served it probably a dozen different ways depending on the occasion and who’s eating it.
My favorite way is still the simplest. I just cut a square and put it on a plate. But if I’m trying to make it feel a little fancier for guests, a dollop of whipped cream on top does wonders. The light, airy whipped cream balances the richness of the cream cheese layer beautifully. I buy the real whipped cream in the refrigerated section, not the stuff in the can. Though honestly, the canned version works in a pinch and kids seem to love it even more.
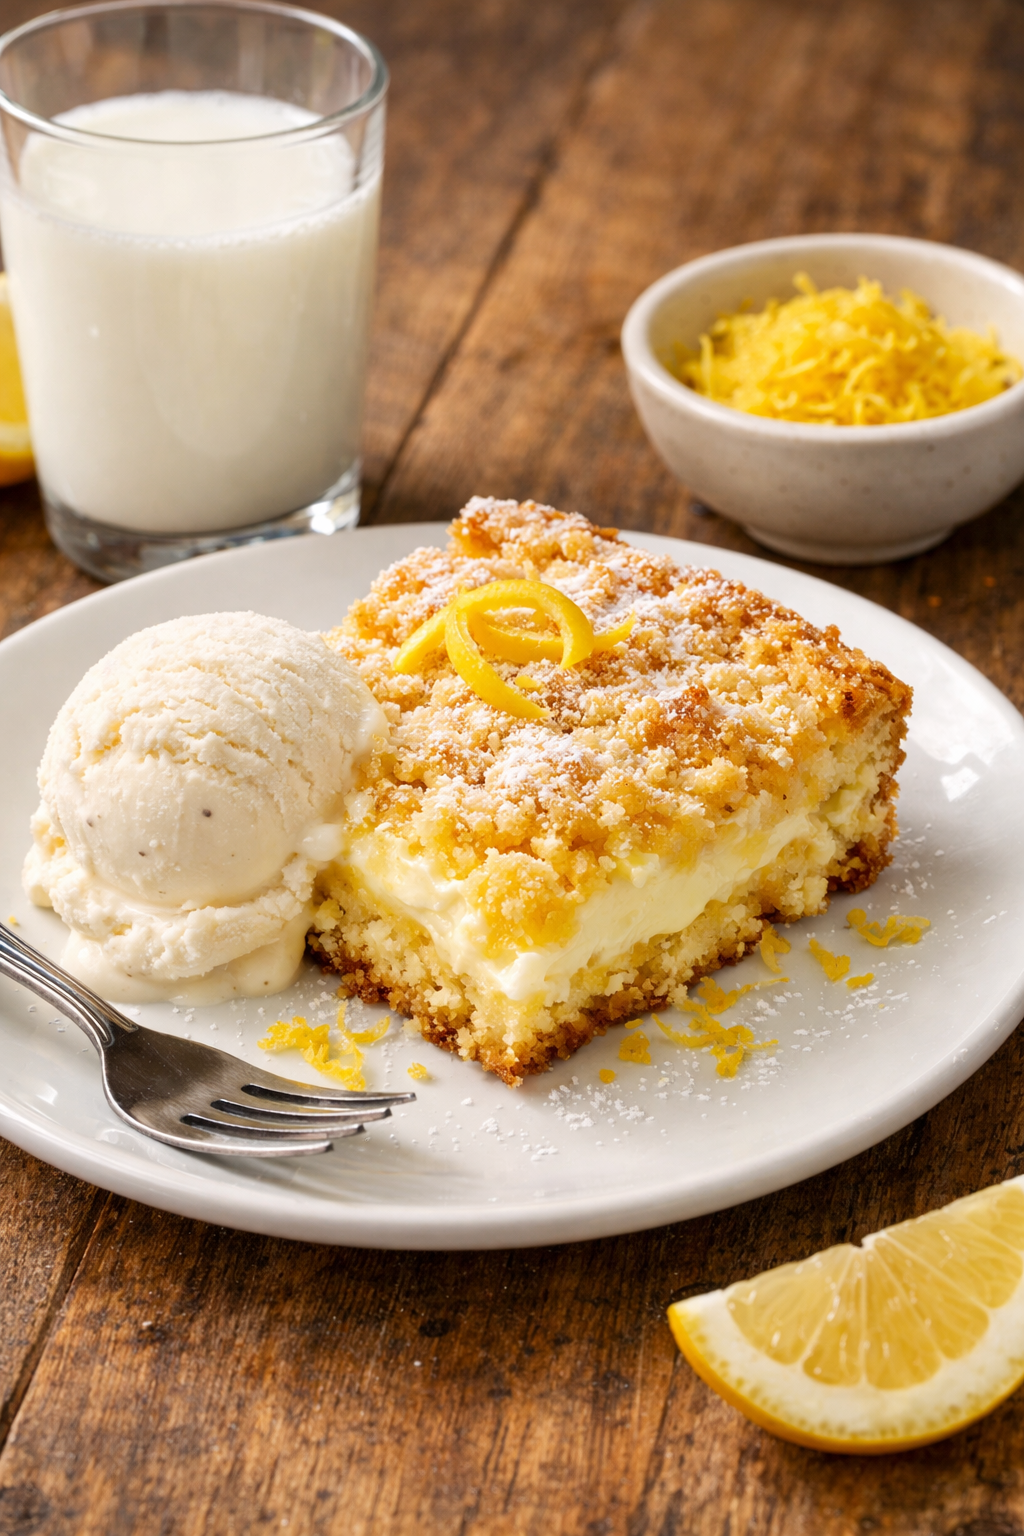
For summer gatherings, nothing beats serving this with vanilla ice cream. The contrast between the cold ice cream and the warm cake is absolutely perfect. I sometimes let the dump cake cool just slightly so it’s still a bit warm when I serve it, then add a scoop of ice cream right on top. It starts melting into all the layers and creates this amazing sauce. My nephew calls it “lemon heaven,” which pretty much sums it up.
Here’s something I tried last month that surprised me. I served it with fresh berries on the side. Blueberries and raspberries both work really well because their tartness complements the sweet lemon filling. I had some strawberries that needed to be used up, so I sliced those and scattered them around the plate. It made the presentation look restaurant-quality, and people thought I’d planned this elaborate dessert when really I was just cleaning out my fridge.
If you want to get really indulgent, try drizzling some lemon curd over each serving. I know that sounds like lemon overload, but trust me on this. The extra lemon flavor makes it taste incredibly bright and fresh. You can buy lemon curd at most grocery stores near the jams and jellies. A little goes a long way. Just a spoonful drizzled over the top transforms it into something that feels gourmet.
During the holidays, I’ve served this with a dusting of powdered sugar on top for a snow-like effect. It’s purely decorative since there’s already powdered sugar in the cream cheese layer, but it looks festive and pretty. I put the powdered sugar in a small strainer and tap it gently over the cake right before serving.
Delicious Variations to Try
Once you’ve mastered the basic recipe, the variations are endless. I love experimenting with different flavors and add-ins.
One of my most popular variations involves adding a graham cracker crust at the bottom. I crush about a cup and a half of graham crackers and mix them with three tablespoons of melted butter, then press that mixture into the bottom of the greased pan before adding the lemon filling. It adds this amazing cheesecake-like quality to the dessert. The graham cracker layer gets slightly soft from the filling above it but still maintains enough structure to give you that classic cheesecake taste. People go absolutely crazy for this version at potlucks.
You can swap out the lemon pie filling for other flavors too. I’ve made this with cherry pie filling and it was phenomenal. The tartness of the cherries works perfectly with the cream cheese. Apple pie filling makes it taste like a deconstructed apple cheesecake. Blueberry is another winner, especially in the summer when everyone’s craving berry desserts.
My sister-in-law makes a version with strawberry pie filling and uses strawberry cake mix instead of yellow. She adds some chopped fresh strawberries to the cream cheese layer, and it’s honestly one of the best things I’ve ever tasted. The fresh strawberries add little bursts of flavor that the canned filling alone can’t provide.
If you want to make this more tropical, try using pineapple pie filling with coconut cake mix. Add some shredded coconut to the cream cheese mixture, and you’ve got yourself a vacation in a pan. I made this version for a summer luau-themed party and it disappeared so fast I didn’t even get a second piece.
For chocolate lovers, you can use chocolate cake mix instead of yellow. It sounds weird with lemon, but dark chocolate and lemon is actually a classic flavor combination. The bitterness of the cocoa balances the bright citrus perfectly. Or you could switch to cherry filling if you want to go full chocolate-cherry, which is always a crowd-pleaser.
Here’s a healthier twist that still tastes amazing. Use sugar-free pie filling and a sugar-free cake mix. I made this for my dad who’s watching his sugar intake, and he couldn’t tell the difference. The cream cheese layer still has powdered sugar, but you could reduce that amount or use a powdered sugar substitute if you need to. By the way, lemons themselves contain beneficial compounds, and fresh lemon juice and zest provide dietary antioxidants that add nutritional value along with flavor.
I’ve also experimented with adding different extracts to the cream cheese layer. Almond extract instead of vanilla gives it this sophisticated, almost Italian flavor. Coconut extract makes it taste tropical even if you’re using regular lemon filling. Just use the same amount as you would vanilla.
For texture lovers, try sprinkling some chopped pecans or walnuts over the dry cake mix before you drizzle the butter. They toast up beautifully in the oven and add a nice crunch. Sliced almonds work great too and look really pretty.
One time I added some white chocolate chips between the cream cheese layer and the cake mix. They melted slightly during baking and created these pockets of creamy white chocolate throughout the dessert. It made it extra decadent and rich.
Storing Your Dump Cake Properly
Do you refrigerate dump cake after baking? Yes, definitely, especially with this recipe. Any dump cake that contains cream cheese needs to be refrigerated. I let mine cool completely on the counter first, which usually takes about an hour. Then I cover it tightly with aluminum foil or plastic wrap and put it straight into the fridge.
The cream cheese is a dairy product that can spoil if left at room temperature too long. I wouldn’t leave this dessert sitting out for more than two hours, especially in warm weather. I learned this the hard way after leaving a pan out overnight after a party. The next morning it smelled off and I had to throw the whole thing away. Such a waste.
In the refrigerator, this lemon cream cheese dump cake keeps well for about four to five days. I actually think it tastes even better the second day after the flavors have had time to meld together. The cake layer softens slightly as it sits, becoming more cake-like and less crispy. Some people prefer it this way. I like it both ways, so I’m happy whether I’m eating it fresh or as leftovers.
You can eat it cold straight from the fridge, which makes it almost like a cold lemon cheesecake dessert. Or you can reheat individual portions in the microwave for about 30 seconds. That warms it back up and makes the top crispy again. I’ve never tried reheating the whole pan in the oven, but I imagine that would work too if you were serving it to a group again.
If you want to freeze it, that’s possible too, though the texture changes a bit. I wrap individual portions in plastic wrap and then put them in a freezer bag. They’ll keep for up to three months. Thaw them in the refrigerator overnight before eating. The cream cheese layer gets a little grainy after freezing, but the flavor is still good. I usually only freeze portions if I know I won’t finish the pan within five days and don’t want it to go to waste.
By the way, whenever I’m looking for more cake and cupcake recipes to try, I always think about how convenient dump cakes are compared to more traditional layer cakes, though both have their place in my baking rotation.
Why This Recipe Works Every Time
The reliability of this dessert is what keeps me coming back to it. I’ve made it in different ovens, at different altitudes, in different pans, and it always turns out. That’s rare with baking. Usually there are so many variables that can affect the outcome.
The reason it’s so foolproof is that dump cakes are forgiving. If your oven runs a little hot, the top might brown faster, but the filling protects everything from burning. If your oven runs cool, it might take an extra five minutes, but it’ll still bake through properly. The moisture from the pie filling creates steam that helps everything cook evenly.
I’ve noticed that this recipe works particularly well for people who claim they can’t bake. My friend Sarah insists she has a black thumb when it comes to baking. Everything she makes either burns or comes out raw in the middle. But she tried this dump cake and it worked perfectly on her first attempt. She called me so excited, like she’d just won a prize. Now she makes it all the time and has started experimenting with different flavors.
The versatility is another reason this has become one of my most-used recipes. It works for so many different occasions. I’ve brought it to church suppers, served it at birthday parties, made it for casual family dinners, and even served it at a baby shower. It fits anywhere. You can dress it up or keep it simple depending on what you need.
Cost-wise, it’s incredibly budget-friendly. All the ingredients are pantry staples or inexpensive items. A box of cake mix costs maybe a dollar or two. Pie filling is usually under three dollars. Cream cheese might be the most expensive ingredient at four or five dollars, but one block is all you need. For under ten dollars total, you can make a dessert that feeds twelve people easily. That’s less than a dollar per serving.
I hope you’ll give this recipe a try and see for yourself how simple and delicious it is. There’s something really satisfying about making a dessert that looks and tastes impressive while requiring so little effort. Let me know in the comments how yours turns out or if you try any of the variations I mentioned.
Frequently Asked Questions
What is the biggest mistake to avoid when making a dump cake?
The biggest mistake is overbaking, which dries out the top and makes it hard instead of crispy and buttery. You want to watch for a golden brown color and bubbling around the edges, which usually happens around 45 to 50 minutes. Another common mistake is mixing the layers together, which destroys the distinct textures that make dump cakes special. Set a timer and check your cake at 45 minutes to avoid going too far.
Why don’t you mix dump cakes?
Keeping the layers separate is essential because it creates the signature texture of a dump cake. The dry cake mix on top, when drizzled with melted butter, bakes into a crispy, crumbly crust similar to a cobbler topping. If you mix everything together, you end up with a dense, heavy cake without those distinct layers. The moisture from the filling below and the butter on top provide exactly what the cake mix needs to bake properly without stirring.
Do you refrigerate dump cake after baking?
Yes, you should refrigerate this lemon cream cheese dump cake because it contains dairy that can spoil at room temperature. Let it cool completely first, then cover it tightly with foil or plastic wrap and refrigerate. It will keep well for four to five days in the fridge. Don’t leave it sitting out for more than two hours, especially in warm weather, to avoid food safety issues.
Do you grease the pan when making a dump cake?
Absolutely, you should always grease your pan before making a dump cake. Use cooking spray or butter to coat the entire 9×13 inch baking dish, paying special attention to corners and edges. The butter in the recipe goes on top of the dry cake mix and doesn’t reach the bottom where the lemon filling sits. Without greasing, the filling will stick terribly and make serving nearly impossible.
Can I make this dump cake ahead of time?
Yes, this dessert is perfect for making ahead. You can bake it earlier in the day and leave it at room temperature covered with foil for up to two hours, then refrigerate it. It actually tastes great cold, at room temperature, or slightly warmed. Some people think the flavors develop even more after sitting overnight. You can also freeze individual portions wrapped in plastic wrap for up to three months, though the texture changes slightly.
What size pan do I need for this recipe?
A standard 9×13 inch baking dish is what you need for this recipe. This size gives you the right depth for all the layers to work properly. If you use a smaller pan, the layers will be too thick and won’t bake evenly. A larger pan will make everything too thin and the cake mix won’t create that nice crispy topping. Glass and metal pans both work fine, though metal tends to brown the edges a bit more.
Can I use homemade lemon filling instead of canned?
You certainly can make your own lemon filling from scratch if you prefer. You’ll need about two and a half cups of homemade lemon curd or lemon pie filling to replace the canned version. Keep in mind that homemade filling might have a different consistency than canned, which could affect baking time slightly. The canned version is convenient and consistent, but homemade definitely gives you a fresher lemon flavor if you have the time.
Why did my dump cake turn out soggy?
A soggy dump cake usually means it needed more baking time or the butter wasn’t distributed evenly over the dry cake mix. Make sure you drizzle the melted butter across as much of the surface as possible so the cake mix can bake properly. If the middle seems underdone when you cut into it, just put it back in the oven for another ten minutes. Also check that you’re using the right size pan, as too large a pan can cause issues.
Can I make this recipe gluten-free?
Yes, you can easily make this gluten-free by using a gluten-free yellow cake mix. Most major brands now offer gluten-free versions that work just as well as regular cake mix. Make sure to check that your lemon pie filling is also gluten-free, though most canned pie fillings are naturally gluten-free. The rest of the ingredients like cream cheese, butter, and sugar are already gluten-free, so it’s a simple swap.
How do I know when the dump cake is done baking?
Look for a golden brown color on top with some darker patches around the edges where the butter pooled. The edges should be bubbling, and when you insert a toothpick into just the cake layer on top, it should come out with moist crumbs but not wet filling. This usually takes 45 to 50 minutes at 350 degrees. Every oven is different, so start checking at 45 minutes and add time as needed.
Equipment
- Medium bowl
- Hand mixer or wooden spoon
- Spatula
- 9x13 inch baking dish
- Cooking spray or butter
Ingredients
- 1 can lemon pie filling 21 ounces
- 8 ounces cream cheese softened
- 1 box yellow cake mix 15.25 ounces
- 1/2 cup butter melted
- 1/2 cup powdered sugar
- 1 teaspoon vanilla extract
- 1 lemon zest optional but recommended
Instructions
- Preheat your oven to 350°F (175°C).
- Grease a 9x13 inch baking dish with cooking spray or butter.
- In a medium bowl, blend the softened cream cheese, powdered sugar, and vanilla extract until smooth and creamy.
- Spread the lemon pie filling evenly across the bottom of the greased baking dish.
- Dollop spoonfuls of the cream cheese mixture over the lemon filling and spread gently.
- Pour the yellow cake mix evenly over the cream cheese layer without pressing it down.
- Drizzle the melted butter evenly over the dry cake mix.
- Bake for 45 to 50 minutes until the top is golden brown with some darker patches.
- Let cool for at least 15 minutes before serving.