
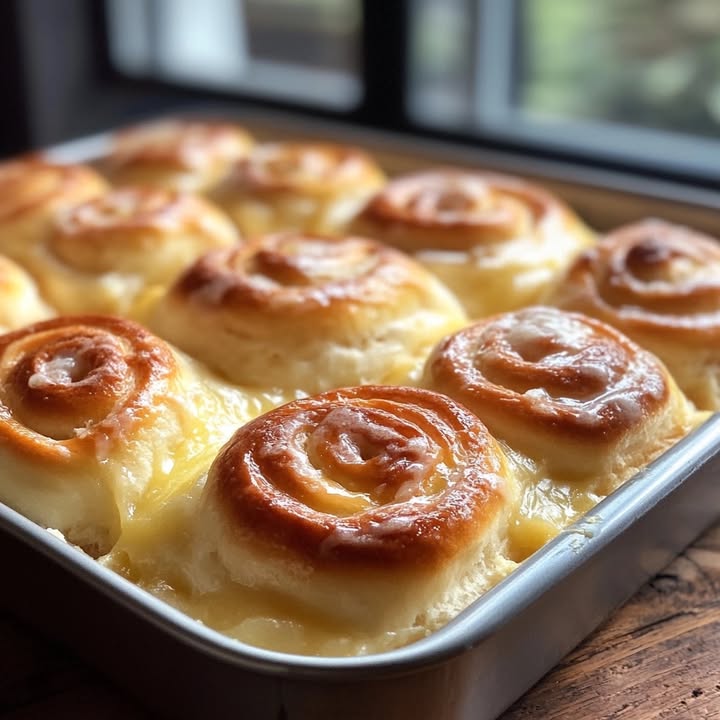
Sunshine on a Plate: My Love for Lemon Sweet Rolls
Is there anything better than the smell of fresh-baked goods filling your kitchen? I wake up dreaming of that warm, yeasty aroma, especially on lazy weekend mornings. But sometimes, the classic cinnamon roll wants a vacation. That’s where these Lemon Sweet Rolls come in! They’re like a burst of spring sunshine, even in the dead of winter. Soft, fluffy dough wrapped around a zingy lemon sugar filling, all topped with a sweet-tart glaze that just melts in. My family goes absolutely wild for them. The second I pull the pan from the oven, a line forms by the counter. Trust me, these are the happy little clouds you want at your breakfast table.
A Zesty Twist on a Classic
Sweet rolls have been comforting us for generations, often leaning on warm spices like cinnamon and nutmeg. But citrus? It’s a bright, modern twist that feels both fancy and cozy. Think of it as giving your favorite comfy sweater a pop of color. I first tried a version at a little bakery during a spring trip, and I was hooked. I spent months tweaking and testing in my own kitchen to get it just right. I wanted that perfect balance: a tender, buttery dough that isn’t too heavy, and a filling that sings with lemon flavor without being sour. This recipe is that happy place. It marries the old-fashioned comfort of a homemade roll with the fresh, lively taste of lemon, making it a tradition worth starting in your own home.
Why You’ll Fall Head-Over-Heels for These Lemon Rolls
Let me count the ways! First, the flavor is pure joy. It’s a beautiful dance between sweet and tangy that wakes up your taste buds. Second, they’re surprisingly simple to make. If you’ve ever been scared of yeast, this is your friendly starter recipe. The steps are straightforward, and the rewards are huge. Third, that smell! Baking these rolls will make your house smell like a professional patisserie. Finally, they’re incredibly versatile. Perfect for a special brunch, a holiday morning, or just because it’s Tuesday and you deserve a treat.
When to Whip Up a Batch of Lemon Sweet Rolls
These rolls have a magical way of making any occasion feel special. They’re my go-to for:
- Easter or Mother’s Day Brunch: They feel festive and elegant alongside a quiche.
- Spring and Summer Gatherings: The citrus flavor is a lighter, brighter alternative to heavier desserts.
- A “Just Because” Weekend Treat: Nothing says “I love you” like homemade pastries on a Saturday morning.
- Potlucks and Bake Sales: They always stand out and disappear fast!
Gathering Your Ingredients for Lemon Sweet Rolls
Let’s get everything laid out. Quality ingredients make a difference, especially with the lemon!
- For the Dough: 3/4 cup warm milk (110°F), 2 1/4 teaspoons active dry yeast, 1/4 cup granulated sugar, 1/4 cup unsalted butter (melted), 1 large egg, 1/2 teaspoon salt, 2 3/4 cups all-purpose flour.
- For the Filling: 1/2 cup granulated sugar, Zest of 2 large lemons, 1/4 cup unsalted butter (softened).
- For the Glaze: 1 cup powdered sugar, 2 tablespoons fresh lemon juice, 1 tablespoon milk, Extra lemon zest for garnish (optional).
No Problem! Handy Substitution Options
Out of something? Don’t panic. Here are some easy swaps:
- Milk: Whole milk is ideal, but 2% works. For a dairy-free version, unsweetened almond or oat milk warmed to 110°F is fine.
- Yeast: If you have instant yeast, you can use the same amount and mix it right in with the dry flour. No need to proof it in the milk first.
- Lemon Zest: This is key for flavor! In a pinch, you can use 1 teaspoon of high-quality lemon extract in the filling, but zest is best.
- Glaze Thickness: Prefer a thicker glaze? Just reduce the milk. Want it thinner? Add a few more drops of lemon juice.
Let’s Bake: Step-by-Step to Lemon Roll Heaven
Put on your favorite apron, and let’s create some magic together.
Step 1: Wake Up the Yeast
Start by warming your milk. You want it just warm to the touch, like a nice bath—about 110°F. Too hot, and you’ll hurt the yeast. Pour it into your mixing bowl and sprinkle the yeast over the top. Give it a gentle stir and let it sit for 5-10 minutes. You’ll see it become creamy and foamy on the surface. This “blooming” is your sign that the yeast is alive and ready to make your dough beautifully puffy. That yeasty, earthy smell is the smell of success!
Step 2: Create the Dough
To the foamy yeast mixture, add the sugar, melted butter, egg, and salt. Stir it all together with a wooden spoon until it looks like a smooth, pale yellow liquid. Now, start adding the flour, one cup at a time, mixing as you go. Once it gets too shaggy for the spoon, it’s time to use your hands. Turn it out onto a lightly floured surface and knead. Push with the heel of your hand, fold it over, and turn. Do this for 5-7 minutes until the dough is soft, smooth, and elastic. Pro tip: If it feels very sticky, add a tablespoon of flour at a time. Don’t add too much, or your rolls will be dense.
Step 3: Let the Dough Rise
Place your lovely ball of dough in a lightly oiled bowl. Turn it once so the top gets a little oily. This prevents a dry skin from forming. Cover the bowl with a clean kitchen towel or plastic wrap. Find a warm, draft-free spot for it to rest. I like to put it in my oven with just the light on. Let it rise until it’s doubled in size. This usually takes about an hour. Patience is key here! You’ll know it’s ready when you gently poke it and the indentation slowly fills back in.
Step 4: Make the Lemon Sugar Filling
While the dough is rising, make your sunny filling. In a small bowl, combine the 1/2 cup of sugar and the zest of two lemons. Use your fingers to rub the zest into the sugar. You’ll see the sugar turn a light yellow and smell absolutely incredible. This process releases the lemon oils and infuses every grain with flavor. Set this fragrant lemon sugar aside, and make sure your 1/4 cup of butter is softened and ready to spread.
Step 5: Roll, Fill, and Slice
Punch down the risen dough to release the air. Turn it onto a floured surface and roll it out into a rectangle about 14×9 inches. Spread the softened butter evenly over the entire surface, leaving just a tiny border at one long edge. Sprinkle the lemon sugar mixture all over the butter. Now, starting from the long edge opposite the border, roll the dough up tightly, like a jelly roll. Pinch the seam to seal it. Using a sharp knife or even unflavored dental floss, cut the roll into 9-12 even slices. Chef’s Tip: For clean cuts that don’t squish the roll, use a piece of dental floss. Slide it under the roll, cross the ends over the top, and pull.
Step 6: The Second Rise and Bake
Place your swirl-cut rolls into a greased 9×13 inch baking dish. They should be snug but not crammed. Cover them again and let them rise for 30-40 minutes; they’ll get puffy and cozy up to each other. Preheat your oven to 350°F (175°C). Bake the risen rolls for 20-25 minutes. They’re done when the tops are a beautiful golden brown and the centers look set. Your kitchen will smell like a dream!
Step 7: The Finishing Glaze
While the rolls are baking, whisk together the powdered sugar, fresh lemon juice, and milk for the glaze. You want it smooth and pourable. As soon as the rolls come out of the oven, drizzle that gorgeous glaze all over the warm tops. The heat will help it melt and seep into all the nooks and crannies. For an extra pop, sprinkle on a little more fresh lemon zest. Let them cool just enough so you don’t burn your tongue, then dig in!
Timing Your Lemon Roll Journey
Good baking is about planning. Here’s your timeline:
- Prep Time: 25 minutes (active hands-on work)
- Rising Time: About 1 hour 40 minutes total (first and second rise combined)
- Baking Time: 20-25 minutes
- Total Time: Approximately 2 hours 30 minutes from start to finish
- Servings: Makes 12 glorious rolls
My Secret for the Ultimate Lemon Flavor
Here’s my little baker’s secret: use organic lemons if you can, and never skip the zest. The brightest, purest lemon flavor lives in the zest, the yellow part of the peel. The juice gives tang, but the zest gives that powerful, aromatic lemon essence. When you rub the zest into the sugar, you’re creating lemon gold. It makes all the difference between a hint of lemon and a true, sunshiny flavor explosion.
A Little Zesty History
Did you know the lemon is actually a hybrid? It’s believed to be a cross between a bitter orange and a citron. This happy accident gifted us one of the most versatile fruits in baking. Adding its bright acidity to sweet dough is a trick bakers have used for centuries to balance richness and add a layer of sophisticated flavor that sheer sweetness can’t achieve. Our Lemon Sweet Rolls are a delicious part of that tasty tradition!
Tools You’ll Need
- Large mixing bowl
- Measuring cups and spoons
- Stand mixer with dough hook (optional, but helpful)
- Rolling pin
- 9×13 inch baking dish
- Zester or fine grater
- Whisk and small bowls
Storing Your Lemon Sweet Rolls
If, by some miracle, you have leftovers, you’ll want to store them right. First, let the glazed rolls cool completely at room temperature. Once cool, cover the baking dish tightly with plastic wrap or aluminum foil. They will stay fresh and soft at room temperature for up to 2 days.
For longer storage, you can freeze them. Individually wrap each cooled roll in plastic wrap, then place them all in a large freezer bag. They’ll keep for up to 2 months. This is perfect for having a ready-made treat anytime!
To reheat, simply unwrap a frozen roll and microwave it for 30-45 seconds, or warm it in a 300°F oven for about 10 minutes. It will taste nearly as good as fresh-baked. For best food quality, always follow refrigerator safety guidelines if you choose to refrigerate them, though I find room temp is best for texture.
Tips for Lemon Sweet Roll Success
- Temperature Matters: Warm milk activates yeast, but hot milk kills it. Use a thermometer if unsure.
- Flour is a Guide: The exact amount can vary with humidity. Add flour until the dough is tacky but not overly sticky.
- Fresh is Best: Use fresh lemons for both zest and juice. Bottled juice won’t give the same bright flavor.
- Don’t Overbake: Pull them out when they’re golden. Overbaking leads to dry rolls.
Making Them Look as Good as They Taste
Presentation is the final fun touch! Serve them on a pretty platter with extra lemon slices or edible flowers. You can drizzle the glaze in a zig-zag pattern for a bakery look. For a brunch, place a whole roll on each person’s plate with a fresh berry on the side. They’re so beautiful, they hardly need any help!
Love These? Try These Other Twists!
The basic sweet roll dough is a wonderful canvas. Once you master these lemon beauties, try these fun variations:
- Orange Cranberry Rolls: Use orange zest in the sugar and sprinkle dried cranberries over the butter before rolling.
- Lavander Honey: Add 1 teaspoon of culinary lavender to the lemon sugar and use honey in the glaze.
- Blueberry Lemon: Scatter a handful of fresh blueberries over the lemon sugar filling.
- Cream Cheese Glaze: Swap the lemon glaze for one made with softened cream cheese, powdered sugar, and a splash of milk.
- Limoncello Glaze: For an adult twist, replace the milk in the glaze with a tablespoon of limoncello liqueur.
- Savory Herb Rolls: Skip the sugar. Fill with softened butter mixed with garlic, parmesan, and Italian herbs.
For more sweet bar inspiration, you have to try the classic combo in these Trisha Yearwood Butterscotch Bars. They’re an old-fashioned favorite for good reason! And if you’re craving more citrus desserts, my Flourless Ricotta Lemon Almond Cake is a stunning, gluten-free option. For cookie lovers, the cozy taste of Maple Brown Sugar Cookies is unbeatable. And when strawberries are in season, this Homemade Strawberry Cream Cheese Pound Cake is absolute heaven.
Common Mistakes to Avoid with Lemon Sweet Rolls
Mistake 1: Using Hot Milk and Killing the Yeast
This is the number one reason dough doesn’t rise. Yeast is a living organism, and water that’s too hot will kill it instantly. If your milk is steaming or feels hot on your wrist, it’s too hot. The ideal temperature is around 110°F, which feels warm but not hot. Use a kitchen thermometer to be sure. If you don’t have one, it should feel like comfortable bath water. No foam after 10 minutes means your yeast is dead, and you need to start over.
Mistake 2: Adding Too Much Flour
It’s tempting to keep adding flour until the dough is no longer sticky. But this creates tough, dense rolls. The dough should be soft and slightly tacky to the touch. It will clean the sides of the mixing bowl as it kneads. If you’re kneading by hand, lightly flour your surface, but let the dough remain a little soft. A sticky dough leads to lighter, fluffier rolls. Remember, you can always dust your hands with flour to handle it, but you can’t take flour out once it’s mixed in.
Mistake 3: Rushing the Rise Times
Patience is a baker’s secret weapon. If you don’t let the dough double in size for the first rise, your rolls won’t be as light and airy. The second rise (after shaping) is just as crucial. This “proofing” gives the rolls their final puff before baking. If you skip it, they’ll be small and heavy. Give your dough the time it needs in a warm spot. If your kitchen is cold, let it rise longer. Look for the visual cue—doubled in size—not just the clock.
Mistake 4: Using Bottled Lemon Juice Instead of Fresh
For the absolute brightest flavor, fresh lemons are non-negotiable. Bottled lemon juice often has preservatives and lacks the vibrant, sunny taste of a freshly squeezed lemon. The zest is even more important—it holds the potent lemon oils. Bottled juice can’t replicate that. Buy a couple of fresh, firm lemons. You’ll use them for both the zest in the filling and the juice in the glaze. The flavor difference is night and day.
Mistake 5: Glazing Cold Rolls
Timing your glaze matters. Pour it over the rolls while they are still very warm from the oven. The heat helps the thin glaze soak slightly into the top layer and set into a lovely, shiny coating. If you wait until the rolls are completely cool, the glaze will mostly just sit on top and can be overly sweet and thick. For the perfect melt-in-your-mouth experience, glaze warm.
Your Lemon Sweet Roll Questions, Answered
Can I make the dough the night before?
Absolutely! This is a great time-saver. After the first rise (when the dough has doubled), punch it down. Instead of rolling it out, cover the bowl tightly and place it in the refrigerator overnight. In the morning, take it out, let it sit at room temp for 30 minutes, then proceed with rolling, filling, slicing, and the second rise. The cold slows the yeast, developing even more flavor. It’s called cold fermentation, and it’s a baker’s best friend for morning pastries.
Why are my rolls dry and dense?
Dry, dense rolls usually point to two issues: too much flour or overbaking. When measuring flour, spoon it into your measuring cup and level it off. Don’t scoop directly from the bag, as this packs in extra flour. Also, keep a close eye on the oven during the last few minutes of baking. Ovens vary. The rolls are done when they are a lovely golden brown on top. An overbaked roll loses its precious moisture, leading to a dry texture.
Can I use a different type of flour?
For the best texture, stick with all-purpose flour. It has the right protein level to create the soft, sturdy structure needed for sweet rolls. Using bread flour might make them a bit chewier, while cake flour is too soft. For a whole wheat version, you can substitute up to half of the all-purpose flour with whole wheat flour. Be aware that this will make the dough heavier and the rolls more hearty, not as light and fluffy.
My glaze is too thin/thick. How do I fix it?
Glaze consistency is easy to adjust! If it’s too thin and runny, simply whisk in a little more powdered sugar, a tablespoon at a time, until it thickens up. If it’s too thick and pasty, add more liquid. Use a few extra drops of lemon juice or milk until it reaches a smooth, pourable consistency. It should ribbon off your whisk. Remember, it will also thicken slightly as it cools on the warm rolls.
Can I freeze the unbaked rolls?
Yes, you can freeze them after slicing and placing them in the pan—this is a fantastic make-ahead trick. After the second rise, cover the pan tightly with plastic wrap and foil, then freeze. The night before you want to bake, move the pan to the refrigerator to thaw slowly. In the morning, let them sit at room temp for 30-60 minutes while your oven preheats, then bake as directed. You may need to add 5-10 minutes to the baking time.
What’s the best way to zest a lemon?
Use a fine grater or a microplane zester. Only grate the bright yellow outer skin. The white pith underneath is bitter, so avoid it. Wash and dry your lemon first. Grate gently over a plate or bowl. You’ll get the most flavorful, fluffy zest this way. Before you zest, a great trick is to rub the lemon on your countertop, pressing down gently. This helps release the oils and makes zesting even easier.
Is there a way to make these less sweet?
If you prefer a more tart flavor, you can reduce the sugar in the filling by a tablespoon or two. You can also make the glaze more tangy by using all lemon juice and no milk, and reducing the powdered sugar slightly. The rolls themselves are only lightly sweetened, so the main sweetness comes from the filling and glaze, which are easy to tweak to your taste.
Can I use melted butter instead of softened for the filling?
I don’t recommend it. Softened butter spreads easily without tearing the delicate dough. Melted butter is too runny and can make the sugar filling leak out during rolling and baking. It also can soak into the dough layers instead of staying put. Take the time to let your butter soften at room temperature for the filling. It makes the rolling process much cleaner and leads to better-defined, gooey layers.
How do I know when the rolls are fully baked?
Look for a golden brown top. The edges of the rolls will start to pull slightly away from the sides of the pan. The most reliable test is to gently press the top of a center roll. If it springs back when you lightly touch it, it’s done. You can also use an instant-read thermometer; the internal temperature should be around 190°F. Avoid overbaking, as they will continue to cook a bit from residual heat after leaving the oven.
What can I serve with lemon sweet rolls?
They are fantastic all on their own! For a bigger brunch, they pair beautifully with savory dishes like scrambled eggs, crispy bacon, or a simple fruit salad. A cup of coffee or tea is the perfect drink alongside. They also make a delightful dessert. Try serving a warm roll with a scoop of vanilla bean ice cream or a dollop of whipped cream for an extra special treat.
I hope this recipe brings as much sunshine to your kitchen as it does to mine. Mastering homemade sweet breads and muffins is one of life’s simple, delicious pleasures. There’s something so satisfying about pulling a pan of these glorious, glazed lemon rolls from your own oven. The process is fun, the smell is divine, and sharing them is pure joy. So go ahead, zest those lemons, knead that dough, and get ready for the compliments. Happy baking
Equipment
- Grand bol
- Fouet
- Spatule
- Plaque à pâtisserie
- Papier sulfurisé
Ingredients
- 3/4 tasse lait tiède (110°F)
- 2 1/4 cuillères à café levure sèche active
- 1/4 tasse sucre granulé
- 1/4 tasse beurre non salé (fondu)
- 1 g oeuf
- 1/2 cuillère à café sel
- 2 3/4 tasses farine tout usage
- 1/2 tasse sucre granulé (pour la garniture)
- zeste de 2 grandes citrons
- 1/4 tasse beurre ramolli (pour la garniture)
- 1 tasse sucre glace (pour le glaçage)
- 2 cuillères à soupe jus de citron frais (pour le glaçage)
- 1 cuillère à soupe lait (pour le glaçage)
Instructions
- Chauffez le lait à environ 110°F et saupoudrez la levure dessus; laissez reposer pendant 5-10 minutes.
- Dans un bol, mélangez la levure activée avec le sucre, le beurre fondu, l'œuf et le sel jusqu'à obtenir un mélange lisse.
- Ajoutez progressivement la farine, une tasse à la fois, et pétrissez jusqu'à obtenir une pâte souple et élastique.
- Placez la pâte dans un bol légèrement huilé, couvrez et laissez lever dans un endroit chaud jusqu'à ce qu'elle double de volume (environ 1 heure).
- Mélangez 1/2 tasse de sucre avec le zeste des deux citrons dans un petit bol pour préparer la garniture de sucre au citron.
- Dégonflez la pâte levée, étalez-la en un rectangle, étalez le beurre ramolli dessus et saupoudrez le mélange de sucre au citron.
- Roulez la pâte en serrant depuis un long bord, pincez la couture et coupez en 9-12 rouleaux.
- Placez les rouleaux dans un plat de cuisson graissé, couvrez et laissez lever à nouveau pendant 30-40 minutes.
- Préchauffez le four à 350°F (175°C) et faites cuire les rouleaux pendant 20-25 minutes jusqu'à ce qu'ils soient dorés.
- Dans un bol, fouettez ensemble le sucre glace, le jus de citron et le lait pour le glaçage et nappez les rouleaux chauds.
Notes
Nutrition

Hi, I’m Olivia Parker, the founder of BakingSecret.com and a lifelong lover of all things sweet and homemade. I grew up in a small town in Oregon, where the smell of fresh cookies in my family’s kitchen sparked my passion for baking. Over the years, I turned that passion into a mission: to help home bakers feel confident, inspired, and creative.
After studying food science and working in several artisan bakeries across the U.S., I decided to create a space where everyone from beginners to seasoned bakers can find reliable recipes, expert tips, and a warm, welcoming community. BakingSecret.com is my way of sharing the magic of baking with the world. When I’m not testing new recipes, you’ll find me exploring farmers’ markets, collecting vintage cookbooks, or perfecting my sourdough technique.