
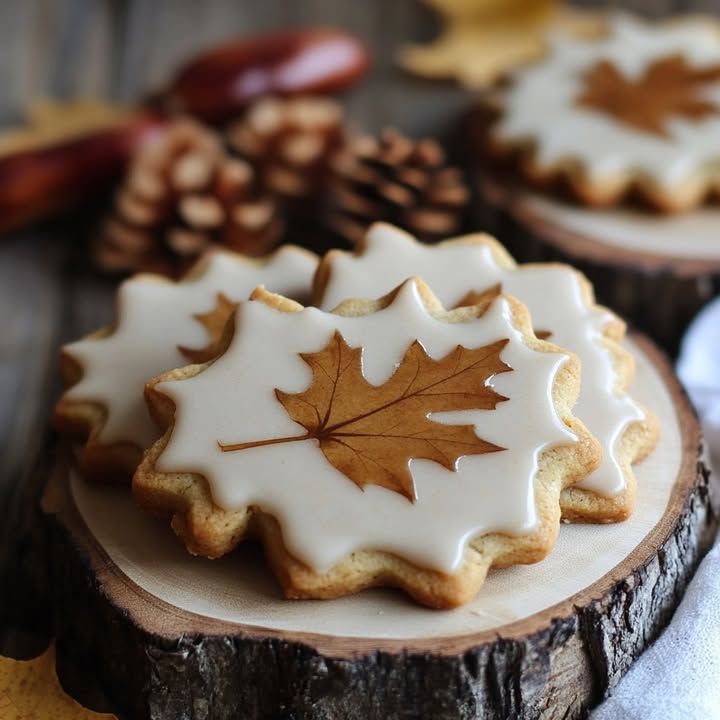
Autumn in a Bite: The Ultimate Maple Iced Cookies
Is there anything cozier than the smell of maple syrup wafting through your kitchen? It’s like a warm hug from a pancake. Every fall, when the leaves start to turn, my family starts dropping not-so-subtle hints for these cookies. The magic isn’t just in the cookie itself—it’s in that double maple whammy from the dough and the icing. One bite, and you’re transported to a sunny, crisp November morning. Trust me, this recipe for Maple Cookies with Maple Icing is the taste of home you need this season.
A Sweet Slice of History: From Tree to Treat
Maple syrup is North America’s original sweetener, long used by Indigenous peoples before European settlers arrived. While we often pour it over pancakes, baking with it is a beautiful tradition that turns liquid gold into lasting treats. My version is a love letter to that tradition. It’s a modern, home-baking twist that takes the deep, caramel-like flavor of pure maple syrup and bakes it into a soft, chewy cookie, then crowns it with a simple, shimmering glaze. Forget the artificial stuff; the real maple flavor here is rich, complex, and utterly irresistible.
Why You’ll Fall Head Over Heels for These Maple Cookies
First, they’re incredibly soft and stay that way for days. Second, the flavor is pure, cozy autumn. But the real winner? They are deceptively simple. You don’t need any fancy equipment or hard-to-find ingredients. If you can cream butter and sugar, you can make these. They are the perfect bridge between everyday snacking and special occasion dessert. Plus, that icing? It’s a two-ingredient wonder that takes these cookies from great to “can I have the whole batch?” levels of amazing.
When to Bake Your Batch of Maple Goodness
These cookies are your secret weapon for so many moments! They’re perfect for a weekend baking project with kids, a thoughtful homemade gift in a pretty jar, or a show-stopping addition to your holiday cookie tray. I love bringing them to potlucks—they always disappear first. They also make the ultimate afternoon pick-me-up with a cup of coffee or tea. Any day that needs a little extra sweetness is the right day for these maple delights.
Gathering Your Maple Cookie Ingredients
Let’s gather the simple, wholesome ingredients that create this magic. Using high-quality maple syrup is the key to the best flavor.
For the Maple Cookies:
- 3/4 cup unsalted butter, softened
- 1 cup brown sugar, packed
- 1/4 cup pure maple syrup
- 1 large egg
- 2 teaspoons vanilla extract
- 2 1/4 cups all-purpose flour
- 1/2 teaspoon baking soda
- 1/2 teaspoon salt
- 1/2 teaspoon ground cinnamon (optional, but lovely)
For the Maple Icing:
- 1 cup powdered sugar
- 2 tablespoons pure maple syrup
- 1-2 teaspoons milk, as needed
No Fuss, No Muss: Handy Substitutions
Out of something? No panic! Here are my go-to swaps. You can use salted butter; just omit the extra 1/2 teaspoon salt from the dough. If you’re out of brown sugar, make your own by mixing 1 cup white sugar with 1 tablespoon of molasses. For a gluten-free version, a 1-to-1 gluten-free flour blend works beautifully. And while I adore the cinnamon, a pinch of nutmeg or cardamom makes a fun, spicy twist.
Baking Your Perfect Maple Iced Cookies: A Step-by-Step Journey
Step 1: Prep & Preheat
Start by preheating your oven to 350°F (175°C). This ensures it’s perfectly hot when your dough is ready. Line your baking sheets with parchment paper. This little step is a game-changer—it prevents sticking and makes cleanup a breeze. I never bake cookies without it! Let your softened butter sit on the counter while you get everything else out. It should be cool to the touch but yield easily to a gentle press.
Step 2: Cream the Wet Ingredients
In a large mixing bowl, combine the softened butter, packed brown sugar, and that glorious pure maple syrup. Beat them together on medium speed for 2-3 minutes. You want the mixture to become light, fluffy, and almost creamy. Watch as the dark brown sugar ribbons through the pale butter. Then, beat in the egg and vanilla extract until everything is silky smooth. The vanilla works with the maple to create a warm, rounded aroma.
Step 3: Whisk the Dry Team
In a separate bowl, whisk together your flour, baking soda, salt, and that optional cinnamon. Whisking is crucial here! It evenly distributes the baking soda and salt so every cookie rises and tastes perfect. You’ll see the cinnamon speckles dancing through the flour. This step takes 30 seconds but makes a huge difference in your final cookie texture.
Step 4: Combine to Create Dough
Now, gradually add the dry ingredients to the wet mixture. I usually add it in three parts, mixing on low speed until just combined after each addition. The dough will start to pull away from the sides of the bowl. It should be soft, slightly tacky, and hold together when pinched. Pro tip: Avoid overmixing! Once you no longer see dry flour streaks, stop. Overmixing can lead to tough cookies.
Step 5: Shape & Bake
Use a tablespoon or a small cookie scoop to portion the dough. Roll it into smooth balls and place them on your prepared baking sheet, leaving about 2 inches between each. Gently flatten each ball slightly with the palm of your hand or the bottom of a glass. This helps them bake evenly. Pop the sheets into your preheated oven and bake for 10-12 minutes. The edges will turn a lovely golden brown, while the centers will still look soft and puffy.
Step 6: Cool Completely
This is the hardest part—patience! Let the cookies cool on the baking sheet for 5 minutes. They are still setting up. Then, transfer them to a wire rack to cool completely. If you try to ice them while they’re warm, the icing will just melt and slide right off. I sometimes speed this up by placing the whole rack in a cool spot in my kitchen.
Step 7: Whip Up the Maple Icing
While the cookies cool, make the easy icing. In a small bowl, whisk the powdered sugar and 2 tablespoons of maple syrup together. It will seem thick at first. Add the milk, just a teaspoon at a time, until you reach a smooth, drizzle-able consistency. It should ribbon off the whisk. Chef’s tip: For a stronger maple flavor in the icing, you can use *only* maple syrup and no milk, but add it drop by drop as it gets very sweet and thick quickly.
Step 8: Ice & Serve!
Once the cookies are totally cool, it’s time for the fun part! You can drizzle the icing back and forth with a spoon, or use a small piping bag for more control. I love the rustic look of a simple drizzle. Let the icing set for about 15-20 minutes before stacking or serving. Then, grab a cookie, pour a glass of milk, and enjoy the fruits of your labor!
Your Maple Cookie Timeline
This recipe is wonderfully quick from bowl to belly.
- Prep Time: 15 minutes
- Cook Time: 12 minutes
- Additional Time (Cooling/Icing): 30 minutes
- Total Time: About 1 hour
- Servings: 24 delicious cookies
A Little Extra Secret from My Kitchen
For an extra layer of flavor, try browning your butter before creaming it! Let the melted butter cook in a saucepan until it turns a nutty golden-brown and smells amazing. Chill it until it’s solid again, then use it as directed. It adds a deep, toffee-like note that pairs magically with the maple.
Fun Fact: It’s All in the Grade
Pure maple syrup comes in grades like Grade A Amber Rich or Grade A Dark Robust. For baking, I prefer a Grade A Dark or even a Grade B if you can find it. These darker grades have a more robust, caramel-like flavor that stands up beautifully to the heat of the oven, giving your cookies a much richer taste than lighter, more delicate syrups.
What You’ll Need to Make Them
No special tools required! Just gather:
- 2-3 Baking sheets
- Parchment paper
- Mixing bowls (large and medium)
- Electric hand mixer or stand mixer
- Whisk
- Measuring cups and spoons
- Wire cooling rack
- Spoon or small piping bag for icing
How to Keep Your Maple Cookies Fresh
To store these soft maple wonders, place them in an airtight container at room temperature. Layer them between sheets of parchment paper to keep the icing from sticking. They will stay perfectly soft and delicious for up to 5 days this way.
If you want to freeze them, I recommend freezing the un-iced cookies. Place the cooled, baked cookies in a single layer on a baking sheet to freeze solid, then transfer them to a freezer-safe bag or container. They’ll keep for up to 3 months. Thaw at room temperature and ice them fresh!
You can also freeze the cookie dough balls! Scoop and shape the dough, freeze on a sheet, then bag them up. You can bake frozen dough balls straight from the freezer; just add 1-2 minutes to the bake time. This means you’re never more than 15 minutes away from a warm, fresh cookie.
Tips & Tricks for Cookie Perfection
- Measure flour correctly: Spoon it into your measuring cup and level it off. Don’t scoop directly from the bag with the cup, as this packs in too much flour and leads to dry cookies.
- Room temperature is key: Using a properly softened egg and butter ensures they emulsify beautifully with the sugar, creating a lighter cookie texture.
- Bake one sheet at a time: For the most even baking, place your baking sheet in the center of the oven. If you must bake two, rotate the sheets halfway through.
- Under-bake slightly: The cookies will continue to cook on the hot baking sheet after you pull them out. Taking them out when the edges are set but the centers look soft guarantees a chewy result.
Making Your Maple Cookies Look Stunning
Presentation is part of the joy! For a festive look, sprinkle a tiny pinch of flaky sea salt over the icing before it sets. You can also roll the edges of the cookie dough balls in coarse sugar before baking for a sparkly, crunchy rim. For a gift, stack them in a cellophane bag tied with a cinnamon stick and twine. On a dessert platter, pair them with other cozy treats like Buttery Raspberry Crumble Cookies for a beautiful color and flavor contrast.
Love These? Try These Other Cozy Bakes!
If maple has you hooked, you’ll adore exploring other comforting desserts. For a decadent, crowd-pleasing pie that requires no baking, my Reese’s Peanut Butter Cup Pie is always a hit. When you’re craving that classic fairground taste, these easy Funnel Cake Bites are pure fried happiness. And for the ultimate holiday comfort dessert, nothing beats a warm slice of Pecan Pie Bread Pudding with its gooey, nutty sauce.
Healthier Twists on Maple Iced Cookies
You can easily adapt this beloved recipe to fit different dietary needs or preferences. Remember, making mindful ingredient swaps can contribute to a better macronutrient balance in your treats.
- Whole Wheat Maple Cookies: Substitute half of the all-purpose flour with whole wheat pastry flour. It adds a nutty depth and extra fiber without sacrificing tenderness.
- Vegan Maple Cookies: Use a plant-based butter stick and a flax egg (1 tbsp ground flax + 3 tbsp water). For the icing, use maple syrup and a splash of plant-based milk.
- Reduced-Sugar Maple Cookies: Cut the brown sugar in the dough to 3/4 cup. The maple syrup will still provide plenty of sweetness and moisture.
- Gluten-Free & Maple Cookies: Use a trusted 1-to-1 gluten-free flour blend. The cookies may spread a bit less, but they’ll be just as soft and flavorful.
- Oatmeal Maple Cookies: Replace 1 cup of the all-purpose flour with old-fashioned rolled oats. This creates a heartier, chewier texture that’s fantastic with maple.
- Maple Nut Cookies: Fold 3/4 cup of chopped toasted pecans or walnuts into the dough before scooping. The toasty nuts elevate the maple flavor wonderfully.
Common Mistakes to Avoid with Maple Cookies
Mistake 1: Using Imitation Maple Syrup
This is the biggest flavor misstep. Pancake syrup or “maple-flavored” syrup is mostly corn syrup and artificial flavor. It will make your cookies taste one-dimensional and overly sweet. The complex, woody, caramel notes of pure maple syrup are what make this recipe special. It’s worth the splurge for the real thing. Your taste buds will thank you.
Mistake 2: Not Letting Cookies Cool Before Icing
We’ve all been tempted to frost a warm cookie. I get it! But if the cookie is even slightly warm, the icing will melt, become runny, and soak into the cookie instead of forming a pretty glaze. It creates a soggy spot. For perfect, set icing that looks as good as it tastes, let the cookies cool completely on a wire rack. This allows their structure to firm up.
Mistake 3: Over-Measuring the Flour
Too much flour is the top cause of dry, crumbly, or cakey cookies. The most common way this happens is by scooping the measuring cup directly into the flour bag, which packs it down. Instead, use the “spoon and level” method. Gently spoon flour into your measuring cup until it’s heaping, then level it off with the flat edge of a knife. This ensures a light, accurate measure.
Mistake 4: Overbaking for a “Done” Look
Cookie doneness happens during cooling. If you bake them until they look fully set and golden all over in the oven, they’ll be dry and hard once cooled. The key is to pull them out when the edges are lightly golden but the centers still look puffy and soft. They will finish setting up on the hot baking sheet. This guarantees that coveted soft and chewy center.
Mistake 5: Adding Too Much Liquid to the Icing
It’s easy to pour in that extra teaspoon of milk to make the icing smoother. But add too much, and you’ll have a runny, translucent glaze that won’t set and will drip right off the cookie. Go slow. Start with just the maple syrup and powdered sugar. Add milk literally a few drops at a time, whisking well after each addition, until it’s just thin enough to drizzle.
If you find yourself baking batch after batch of cozy treats, you’ll want to explore all the cookie and biscuit recipes in my collection for more inspiration.
Your Maple Cookie Questions, Answered
Absolutely! You can prepare the dough, wrap it tightly in plastic wrap, and store it in the refrigerator for up to 3 days. Let it sit at room temperature for about 20 minutes before scooping and baking. The flavor actually deepens a bit with a chill. You can also freeze the dough balls for up to 3 months and bake from frozen, adding a minute or two to the bake time.
This usually points to butter that was too warm or over-creamed. Make sure your butter is softened but still cool—it shouldn’t be melted or greasy. Also, check that your baking soda is fresh. Old baking soda loses its lifting power. Finally, double-check your flour measurement; too little flour won’t provide enough structure to hold the cookie’s shape.
Can I use maple extract instead of syrup?
I don’t recommend it for the dough. Pure maple syrup adds both flavor and necessary moisture and sugar to the recipe’s chemistry. An extract would change the liquid balance. However, you could add *a drop or two* of maple extract to the icing along with the real maple syrup for an extra flavor boost if you really love maple.
How do I get a thicker, more spread icing?
For a thicker icing you can spread with a knife, use less liquid. Start with just the 2 tablespoons of maple syrup and whisk. If it’s too thick to spread, add only a 1/4 teaspoon of milk at a time. For a perfect spreadable consistency, it should be like a thick, smooth paste that holds its shape briefly when drizzled.
My icing is gritty. What went wrong?
Grittiness means the powdered sugar wasn’t fully dissolved. Always sift your powdered sugar before using it to remove any lumps. When you whisk the icing, make sure to do it vigorously for a full minute or two to completely incorporate the syrup and dissolve the sugar. If it’s still grainy, let it sit for 5 minutes and whisk again.
This recipe is designed for a soft and chewy cookie with slightly crisp edges. The brown sugar and maple syrup keep them moist and tender for days. If you prefer a crisper cookie, you can bake them for a minute or two longer, but watch them closely to avoid over-browning.
What’s the best way to pack these for gifting?
Wait until the icing is completely set—at least an hour. Then, place them in a single layer in a sturdy airtight container or tin. If you need to stack them, put a sheet of parchment or wax paper between each layer. For a beautiful homemade touch, tie the container with ribbon and include the recipe card!
Can I add nuts or chocolate chips?
Of course! These cookies are a fantastic base. Fold in 1 cup of toasted pecans, walnuts, or even chocolate chips after you mix the dough. I love the combination of dark chocolate chunks with maple. Just be aware that add-ins may slightly change the baking time and spread.
Is the cinnamon necessary?
Not at all! It’s listed as optional. The cinnamon adds a warm, familiar spice note that complements maple beautifully (think pancake house vibes). But if you prefer a pure, unadulterated maple flavor, simply leave it out. The cookies will still be incredible.
How can I tell if my maple syrup is pure?
Read the ingredient label carefully. The only ingredient should be “maple syrup.” Avoid any product that lists “high fructose corn syrup,” “corn syrup,” “natural flavors,” or “caramel color.” Pure maple syrup is usually more expensive and is sometimes sold in glass bottles. It’s an investment in flavor.
The Final Cookie Crumb
There you have it—my all-time favorite recipe for Maple Cookies with Maple Icing. It’s simple, soul-warming, and filled with the authentic taste of fall. Whether you’re baking for a crowd, a gift, or just a quiet Tuesday treat, these cookies deliver pure joy. So preheat that oven, grab the real maple syrup, and get ready to make your kitchen smell absolutely heavenly. Happy baking!
Equipment
- Plaque à pâtisserie
- Fouet
- Grand bol
- Spatule
- Papier sulfurisé
Ingredients
- 170 g beurre non salé, ramolli
- 220 g sucre brun, tassé
- 60 ml sirop d'érable pur
- 1 œuf
- 10 ml extrait de vanille
- 280 g farine tout usage
- 2 g bicarbonate de soude
- 2 g sel
- 1 g cannelle moulue (facultatif)
- 125 g sucre glace pour le glaçage
- 30 ml sirop d'érable pur pour le glaçage
- 15 ml lait, au besoin
Instructions
- Préchauffez le four à 175°C et tapissez les plaques à pâtisserie de papier sulfurisé.
- Dans un grand bol, crémez le beurre ramolli, le sucre brun et le sirop d'érable pendant 2-3 minutes jusqu'à ce que le mélange soit léger et mousseux.
- Incorporez l'œuf et l'extrait de vanille jusqu'à obtention d'un mélange lisse.
- Dans un autre bol, incorporez la farine, le bicarbonate de soude, le sel et la cannelle.
- Ajoutez progressivement les ingrédients secs au mélange humide jusqu'à ce que le tout soit juste combiné.
- Formez des boules de pâte et déposez-les sur la plaque préparée, en les aplatissant légèrement.
- Faites cuire pendant 10-12 minutes jusqu'à ce que les bords soient dorés et que le centre soit bien gonflé.
- Refroidissez sur la plaque pendant 5 minutes, puis transférez-les sur une grille pour refroidir complètement.
- Pour le glaçage, mélangez le sucre glace et le sirop d'érable, et ajoutez du lait jusqu'à obtenir une consistance lisse.
- Arrosez le glaçage sur les biscuits refroidis et laissez sécher pendant 15-20 minutes avant de servir.
Notes
Nutrition

Hi, I’m Olivia Parker, the founder of BakingSecret.com and a lifelong lover of all things sweet and homemade. I grew up in a small town in Oregon, where the smell of fresh cookies in my family’s kitchen sparked my passion for baking. Over the years, I turned that passion into a mission: to help home bakers feel confident, inspired, and creative.
After studying food science and working in several artisan bakeries across the U.S., I decided to create a space where everyone from beginners to seasoned bakers can find reliable recipes, expert tips, and a warm, welcoming community. BakingSecret.com is my way of sharing the magic of baking with the world. When I’m not testing new recipes, you’ll find me exploring farmers’ markets, collecting vintage cookbooks, or perfecting my sourdough technique.