
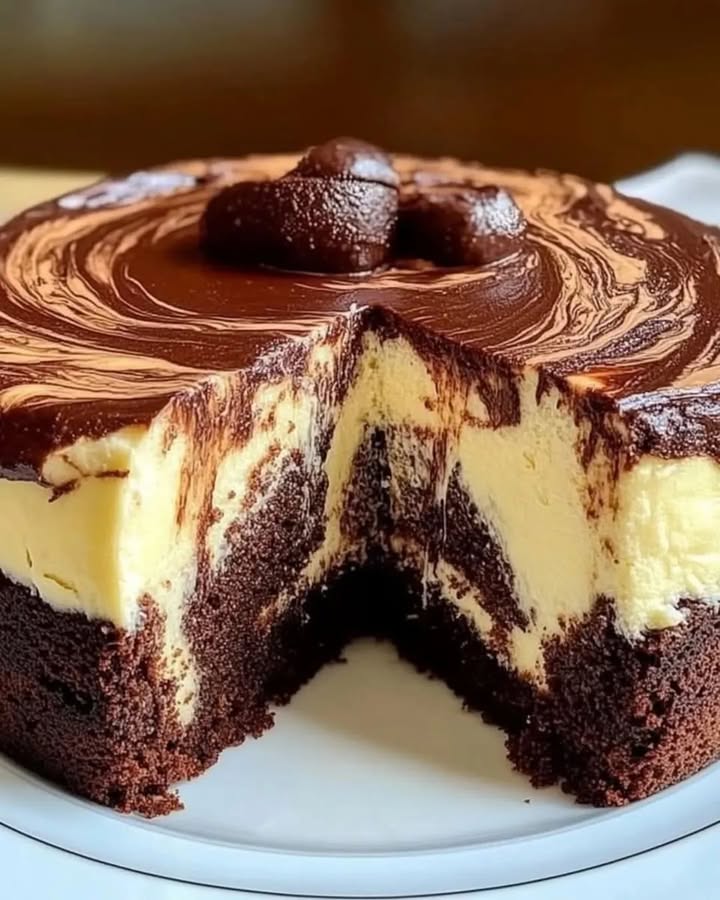
Why This Marble Cake Delight Will Steal Your Heart
There’s something magical about the swirls of chocolate and vanilla in a Marble Cake Delight. The first time I baked this cake, my kitchen smelled like a cozy bakery, and my kids couldn’t wait to dig in. It’s not just a dessert; it’s a memory-maker. Whether you’re baking for family or friends, this recipe is simple enough for beginners but impressive enough for special occasions. Plus, that marbled effect? Pure artistry!
The Sweet History Behind Marble Cake
Marble cakes have been around since the 19th century, originating in Germany. Back then, bakers would use molasses or spices to create the “marbled” look. Over time, chocolate became the star of the show, giving us the version we know and love today. I remember my grandma telling me how she’d make marble cakes for Sunday gatherings. Her secret? A little extra butter and a lot of love. This recipe pays homage to tradition while keeping things modern and easy.
Why You’ll Love This Recipe
This Marble Cake Delight is all about balance. The rich chocolate swirls pair perfectly with the light vanilla base. It’s not overly sweet, so it appeals to both kids and adults. Plus, the prep is straightforward—no fancy tools or techniques required. Whether you’re a seasoned baker or a newbie, this recipe will make you feel like a pro. And let’s not forget the aroma—it’s like a warm hug for your home.
Perfect Occasions to Bake This Beauty
This cake is perfect for birthdays, potlucks, or even a lazy Sunday afternoon. I’ve served it at brunches, paired with a cup of coffee, and everyone raves about it. It’s also a hit at holiday gatherings. Imagine slicing into this beauty during Thanksgiving or Christmas—those swirls are sure to spark joy. And if you’re looking for a thoughtful gift, wrap a slice in parchment paper and tie it with a ribbon. Trust me, people will thank you!
Ingredients for Your Marble Cake Delight
- 250g wheat flour
- 4 eggs
- 100g melted butter
- 1 tablespoon of baking powder
- 200g of sugar
- 1 cup of milk
- 50g of chocolate powder
Substitution Options
If you’re out of wheat flour, almond or oat flour works as a gluten-free alternative. For a dairy-free version, swap the butter with coconut oil and use plant-based milk. If you prefer a darker chocolate flavor, replace the chocolate powder with cocoa powder. Want to cut back on sugar? Try using honey or maple syrup instead. These swaps keep the cake delicious while catering to dietary needs.
Step 1: Preheat and Prep
Start by preheating your oven to 180°C (350°F). Grease your pan with butter to ensure the cake doesn’t stick. I always use a square or round pan—it gives the cake a nice shape. Pro tip: Line the bottom with parchment paper for extra insurance. As the oven heats up, you’ll feel the anticipation building. Baking is as much about the process as it is about the result!
Step 2: Cream the Eggs and Sugar
In a large bowl, beat the eggs with the sugar until the mixture becomes light and creamy. This step is crucial—it adds air to the batter, making the cake fluffy. I love watching the color change from pale yellow to almost white. The sound of the whisk beating is oddly satisfying too. Keep going until the texture is smooth and glossy.
Step 3: Add Wet Ingredients
Now it’s time to add the melted butter and milk. Pour them in slowly while mixing. The butter gives the cake a rich flavor, while the milk keeps it moist. I always use whole milk for that extra creaminess, but any type works. As you mix, the batter will start to look silky and inviting. Can you smell the butter yet? It’s heavenly!
Step 4: Incorporate Dry Ingredients
Sift the wheat flour and baking powder into the wet mixture. Stir gently until everything is combined. Overmixing can make the cake dense, so stop as soon as you see a smooth dough. The texture should be soft and slightly sticky. Pro tip: Sifting the flour prevents lumps and ensures an even rise.
Step 5: Create the Chocolate Swirl
Separate half of the dough into another bowl and mix in the chocolate powder. This is where the magic happens! The contrast between the two batters is stunning. I like to taste a tiny bit of each batter—just to make sure it’s perfect, of course. The chocolate batter should be rich and velvety, while the vanilla remains light and airy.
Step 6: Layer and Swirl
Pour the batters alternately into the greased pan, starting with the vanilla. Use a fork to create gentle swirls. Don’t overdo it—you want those beautiful marbled patterns, not a muddy mess. Chef’s tip: Dip the fork in water before swirling to prevent sticking. The visual effect is what makes this Marble Cake Delight so irresistible.
Step 7: Bake to Perfection
Bake the cake for about 40 minutes. You’ll know it’s done when a toothpick inserted in the center comes out clean. The aroma wafting from the oven is pure bliss. Let the cake cool before slicing—this helps the flavors settle. Patience is key here, though I admit I’ve snuck a piece while it was still warm!
Timing Breakdown
- Preparation time: 15 minutes
- Cooking time: 40 minutes
- Total time: 55 minutes
Chef’s Secret
For an extra touch of decadence, brush the cooled cake with a simple glaze made from powdered sugar and milk. It adds a subtle sweetness and makes the cake look even more tempting. Trust me, this little trick never fails to impress.
Fun Fact About Marble Cake
Did you know that the marbling technique was originally used to save ingredients? Bakers would mix leftover batters to avoid waste, creating the iconic swirl pattern we adore today. Now, it’s a symbol of creativity and balance in baking.
Necessary Equipment
- Mixing bowls
- Whisk or electric mixer
- Baking pan
- Fork for swirling
- Oven
Storage Tips
To keep your Marble Cake Delight fresh, store it in an airtight container at room temperature for up to three days. If you live in a warm climate, refrigerate it to extend its shelf life. Just bring it back to room temperature before serving for the best flavor.
For longer storage, wrap individual slices in plastic wrap and freeze them. They’ll stay good for up to a month. Simply thaw at room temperature when you’re ready to enjoy. Freezing is a great way to have a treat on hand for unexpected guests.
Avoid leaving the cake uncovered, as it can dry out. If the surface feels a bit stale, a quick zap in the microwave can revive it. But honestly, this cake rarely lasts long enough to need reviving!
Tips and Advice
Always measure your ingredients accurately. Too much flour can make the cake dense, while too much sugar can overpower the flavors. Use room-temperature eggs for easier mixing. And don’t skip the sifting step—it really does make a difference. Finally, trust your instincts. Baking is as much about heart as it is about precision.
Presentation Ideas
- Dust with powdered sugar for an elegant touch.
- Add fresh berries on top for a pop of color.
- Serve with a dollop of whipped cream or vanilla ice cream.
- Garnish with mint leaves for a refreshing contrast.
- Place on a decorative cake stand for a wow factor.
- Pair with a cup of coffee or tea for a cozy vibe.
Healthier Alternative Recipes
Here are six ways to make this cake healthier without sacrificing flavor:
- Whole Wheat Version: Replace wheat flour with whole wheat flour for added fiber.
- Low-Sugar Option: Use stevia or monk fruit sweetener instead of sugar.
- Vegan Twist: Substitute eggs with flaxseed meal and use plant-based milk.
- Gluten-Free: Swap wheat flour with almond or oat flour.
- Protein-Packed: Add a scoop of vanilla protein powder to the batter.
- Oil-Free: Use applesauce instead of melted butter for moisture.
Mistake 1: Overmixing the Batter
Overmixing can lead to a dense cake instead of a light and fluffy one. This happens when bakers get too enthusiastic with the whisk. To avoid this, stir gently until the ingredients are just combined. Pro tip: Stop mixing as soon as you see no streaks of flour.
Mistake 2: Skipping the Preheat
Putting the cake in a cold oven can ruin the texture. Always preheat your oven to ensure even baking. I set a timer to remind myself—it’s an easy step to overlook when you’re busy preparing the batter.
Mistake 3: Overbaking
Overbaking dries out the cake. Check for doneness a few minutes before the timer goes off. Insert a toothpick—if it comes out clean, it’s ready. If not, give it another 2-3 minutes. Pro tip: Ovens vary, so rely on the toothpick test rather than time alone.
Mistake 4: Not Greasing the Pan Properly
A poorly greased pan can cause the cake to stick, ruining the presentation. Always grease generously and consider lining the pan with parchment paper. I’ve learned this the hard way—nobody wants to serve a crumbled cake!
Mistake 5: Rushing the Cooling Process
Cutting into the cake too soon can make it fall apart. Let it cool completely before slicing. If you’re short on time, place it in the fridge for 15 minutes to speed up the process. Patience pays off here!
FAQ: Can I Use Cocoa Powder Instead of Chocolate Powder?
Absolutely! Cocoa powder works beautifully in this recipe. Just note that it may give the cake a slightly darker color and richer flavor. I recommend using unsweetened cocoa powder to maintain the balance of sweetness. For best results, sift the cocoa powder with the flour to avoid clumps.
FAQ: How Do I Know When the Cake Is Done?
You’ll know the cake is done when a toothpick inserted in the center comes out clean. The edges should also pull away slightly from the pan, and the top will feel springy to the touch. If you’re unsure, err on the side of caution and bake for an additional 2-3 minutes.
FAQ: Can I Make This Cake Ahead of Time?
Yes, you can bake this cake a day in advance. Store it in an airtight container at room temperature. In fact, letting it sit overnight enhances the flavors. Just add any garnishes or glazes right before serving for a fresh look.
FAQ: What Can I Use Instead of Milk?
You can use any liquid you like—water, almond milk, soy milk, or even orange juice. Each option brings a unique twist to the flavor profile. For a tangy kick, try buttermilk. Experiment to find your favorite variation!
FAQ: Why Is My Cake Dense?
A dense cake often results from overmixing or using too much flour. Measure your ingredients carefully and stir gently. Also, ensure your baking powder is fresh—an expired leavening agent won’t do its job properly.
FAQ: Can I Double the Recipe?
Yes, doubling the recipe is easy. Just multiply each ingredient by two and use two pans or a larger one. Adjust the baking time slightly if needed. This is a great option for feeding a crowd or freezing extras.
FAQ: How Do I Get Perfect Swirls?
To achieve beautiful swirls, alternate spoonfuls of vanilla and chocolate batter in the pan. Use a fork to make gentle circular motions. Avoid over-swirling, as it can muddy the design. Practice makes perfect!
FAQ: Can I Add Nuts or Fruits?
Absolutely! Fold in chopped nuts, chocolate chips, or dried fruits for extra texture. Walnuts and raisins are classic choices, but feel free to get creative. Just sprinkle them evenly to maintain the marbled effect.
FAQ: Why Did My Cake Sink in the Middle?
A sunken cake usually means it wasn’t baked long enough or the oven door was opened too early. Opening the door lets heat escape, which can cause the cake to collapse. Resist the urge to peek until the minimum baking time has passed.
FAQ: Can I Use a Bundt Pan?
Yes, a Bundt pan works wonderfully for this recipe. Just grease it thoroughly and increase the baking time by 5-10 minutes. The intricate design of a Bundt pan adds a fancy touch to your Marble Cake Delight.
FAQ: How Do I Store Leftovers?
Store leftovers in an airtight container at room temperature for up to three days. For longer storage, wrap slices individually and freeze. Thaw at room temperature before enjoying. Proper storage keeps the cake moist and delicious.
This Marble Cake Delight is more than just a dessert—it’s a celebration of flavors, textures, and memories. Whether you’re baking for loved ones or treating yourself, this recipe is sure to become a favorite. So grab your apron, preheat that oven, and let’s create something magical together!
Equipment
- Mixing bowls
- Whisk or electric mixer
- Baking pan
- Fork for swirling
- Oven
Ingredients
- 250 g wheat flour
- 4 eggs
- 100 g melted butter
- 1 tablespoon baking powder
- 200 g sugar
- 1 cup milk
- 50 g chocolate powder
Instructions
- Preheat your oven to 180°C (350°F) and grease the pan with butter.
- Beat the eggs with the sugar until light and creamy.
- Slowly mix in the melted butter and milk until combined.
- Sift the wheat flour and baking powder into the wet mixture and stir gently until smooth.
- Separate half of the batter and mix in the chocolate powder.
- Pour the batters alternately into the greased pan and create gentle swirls with a fork.
- Bake for about 40 minutes, until a toothpick inserted comes out clean. Let cool before slicing.
Notes
Nutrition

Hi, I’m Olivia Parker, the founder of BakingSecret.com and a lifelong lover of all things sweet and homemade. I grew up in a small town in Oregon, where the smell of fresh cookies in my family’s kitchen sparked my passion for baking. Over the years, I turned that passion into a mission: to help home bakers feel confident, inspired, and creative.
After studying food science and working in several artisan bakeries across the U.S., I decided to create a space where everyone from beginners to seasoned bakers can find reliable recipes, expert tips, and a warm, welcoming community. BakingSecret.com is my way of sharing the magic of baking with the world. When I’m not testing new recipes, you’ll find me exploring farmers’ markets, collecting vintage cookbooks, or perfecting my sourdough technique.