
Introduction
You know, Mexican Conchas are one of those sweet breads that just make everything better. They’re soft, sugary, and honestly perfect for breakfast or as a snack anytime. I remember making them for a family brunch once, and let me tell you—they were a total hit. The topping with its shell-like design? That’s what really makes them stand out.
History of Mexican Conchas
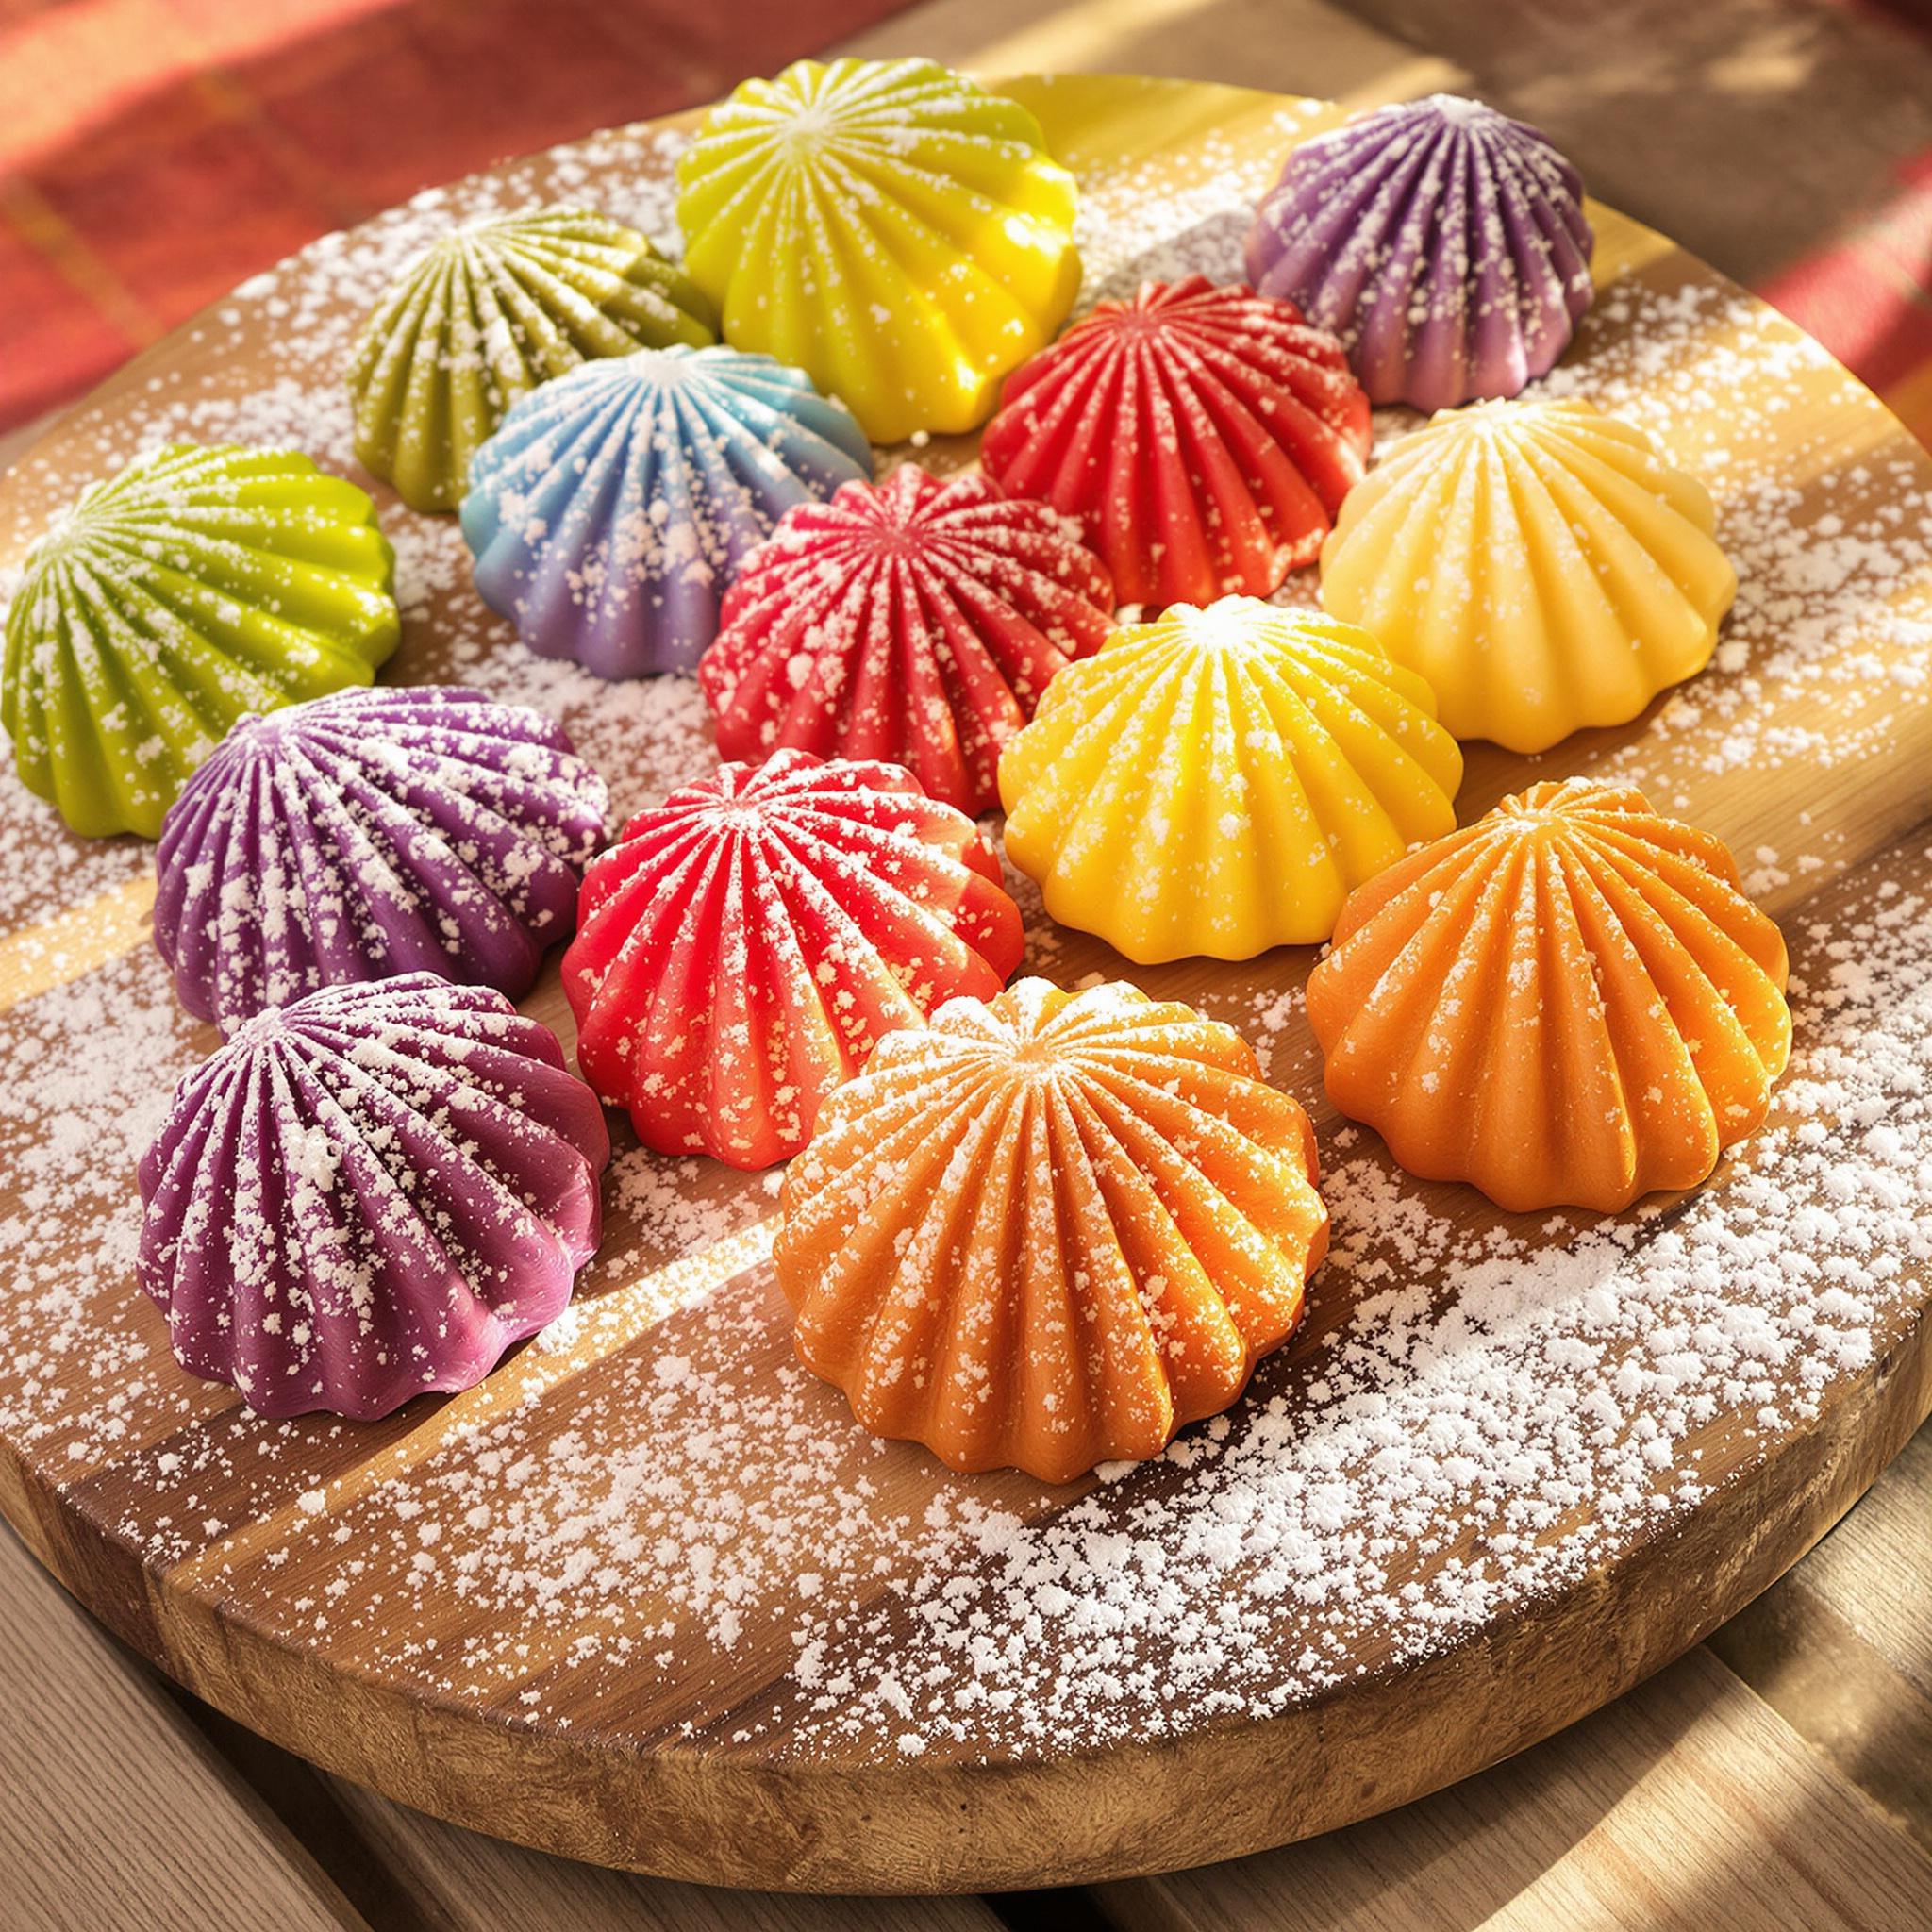
Conchas have been around forever—well, at least since the colonial era in Mexico. Bakers back then took European baking techniques and mixed them up with local flavors. That iconic shell pattern on top? It comes from pressing a stencil into the dough before baking. Nowadays, you’ll find conchas in pretty much every panadería (bakery) across Mexico and even beyond. They’re kind of a big deal.
Why You’ll Love This Recipe
This recipe is super straightforward but oh-so-rewarding. The dough turns out soft and smells amazing while it bakes. And that crunchy-sweet topping? Perfection. Even if you’re new to baking, this is totally doable. Plus, there’s something about the smell of fresh-baked conchas that just feels like home.
Perfect Occasions to Prepare Mexican Conchas
These babies are great for so many things—brunches, birthdays, holidays, you name it. They’re awesome with tea or coffee, or hey, even as a gift for friends. Honestly, they make any occasion feel special. Just put them on the table, and watch people light up.
Ingredients
- 4 cups all-purpose flour
- 1/2 cup granulated sugar
- 1 packet active dry yeast
- 1/2 cup whole milk, warmed
- 3 large eggs
- 1/2 cup unsalted butter, softened
- 1 teaspoon vanilla extract
- 1/2 teaspoon salt
- 1 cup concha topping (flour, sugar, butter, food coloring)
Substitution Options
If you need dairy-free options, swap the whole milk for almond milk. Coconut oil works well instead of butter too. For the topping, you can get creative—try adding cinnamon or cocoa powder for a little twist. (I mean, why not?)
Preparation
Step 1: Make the Dough
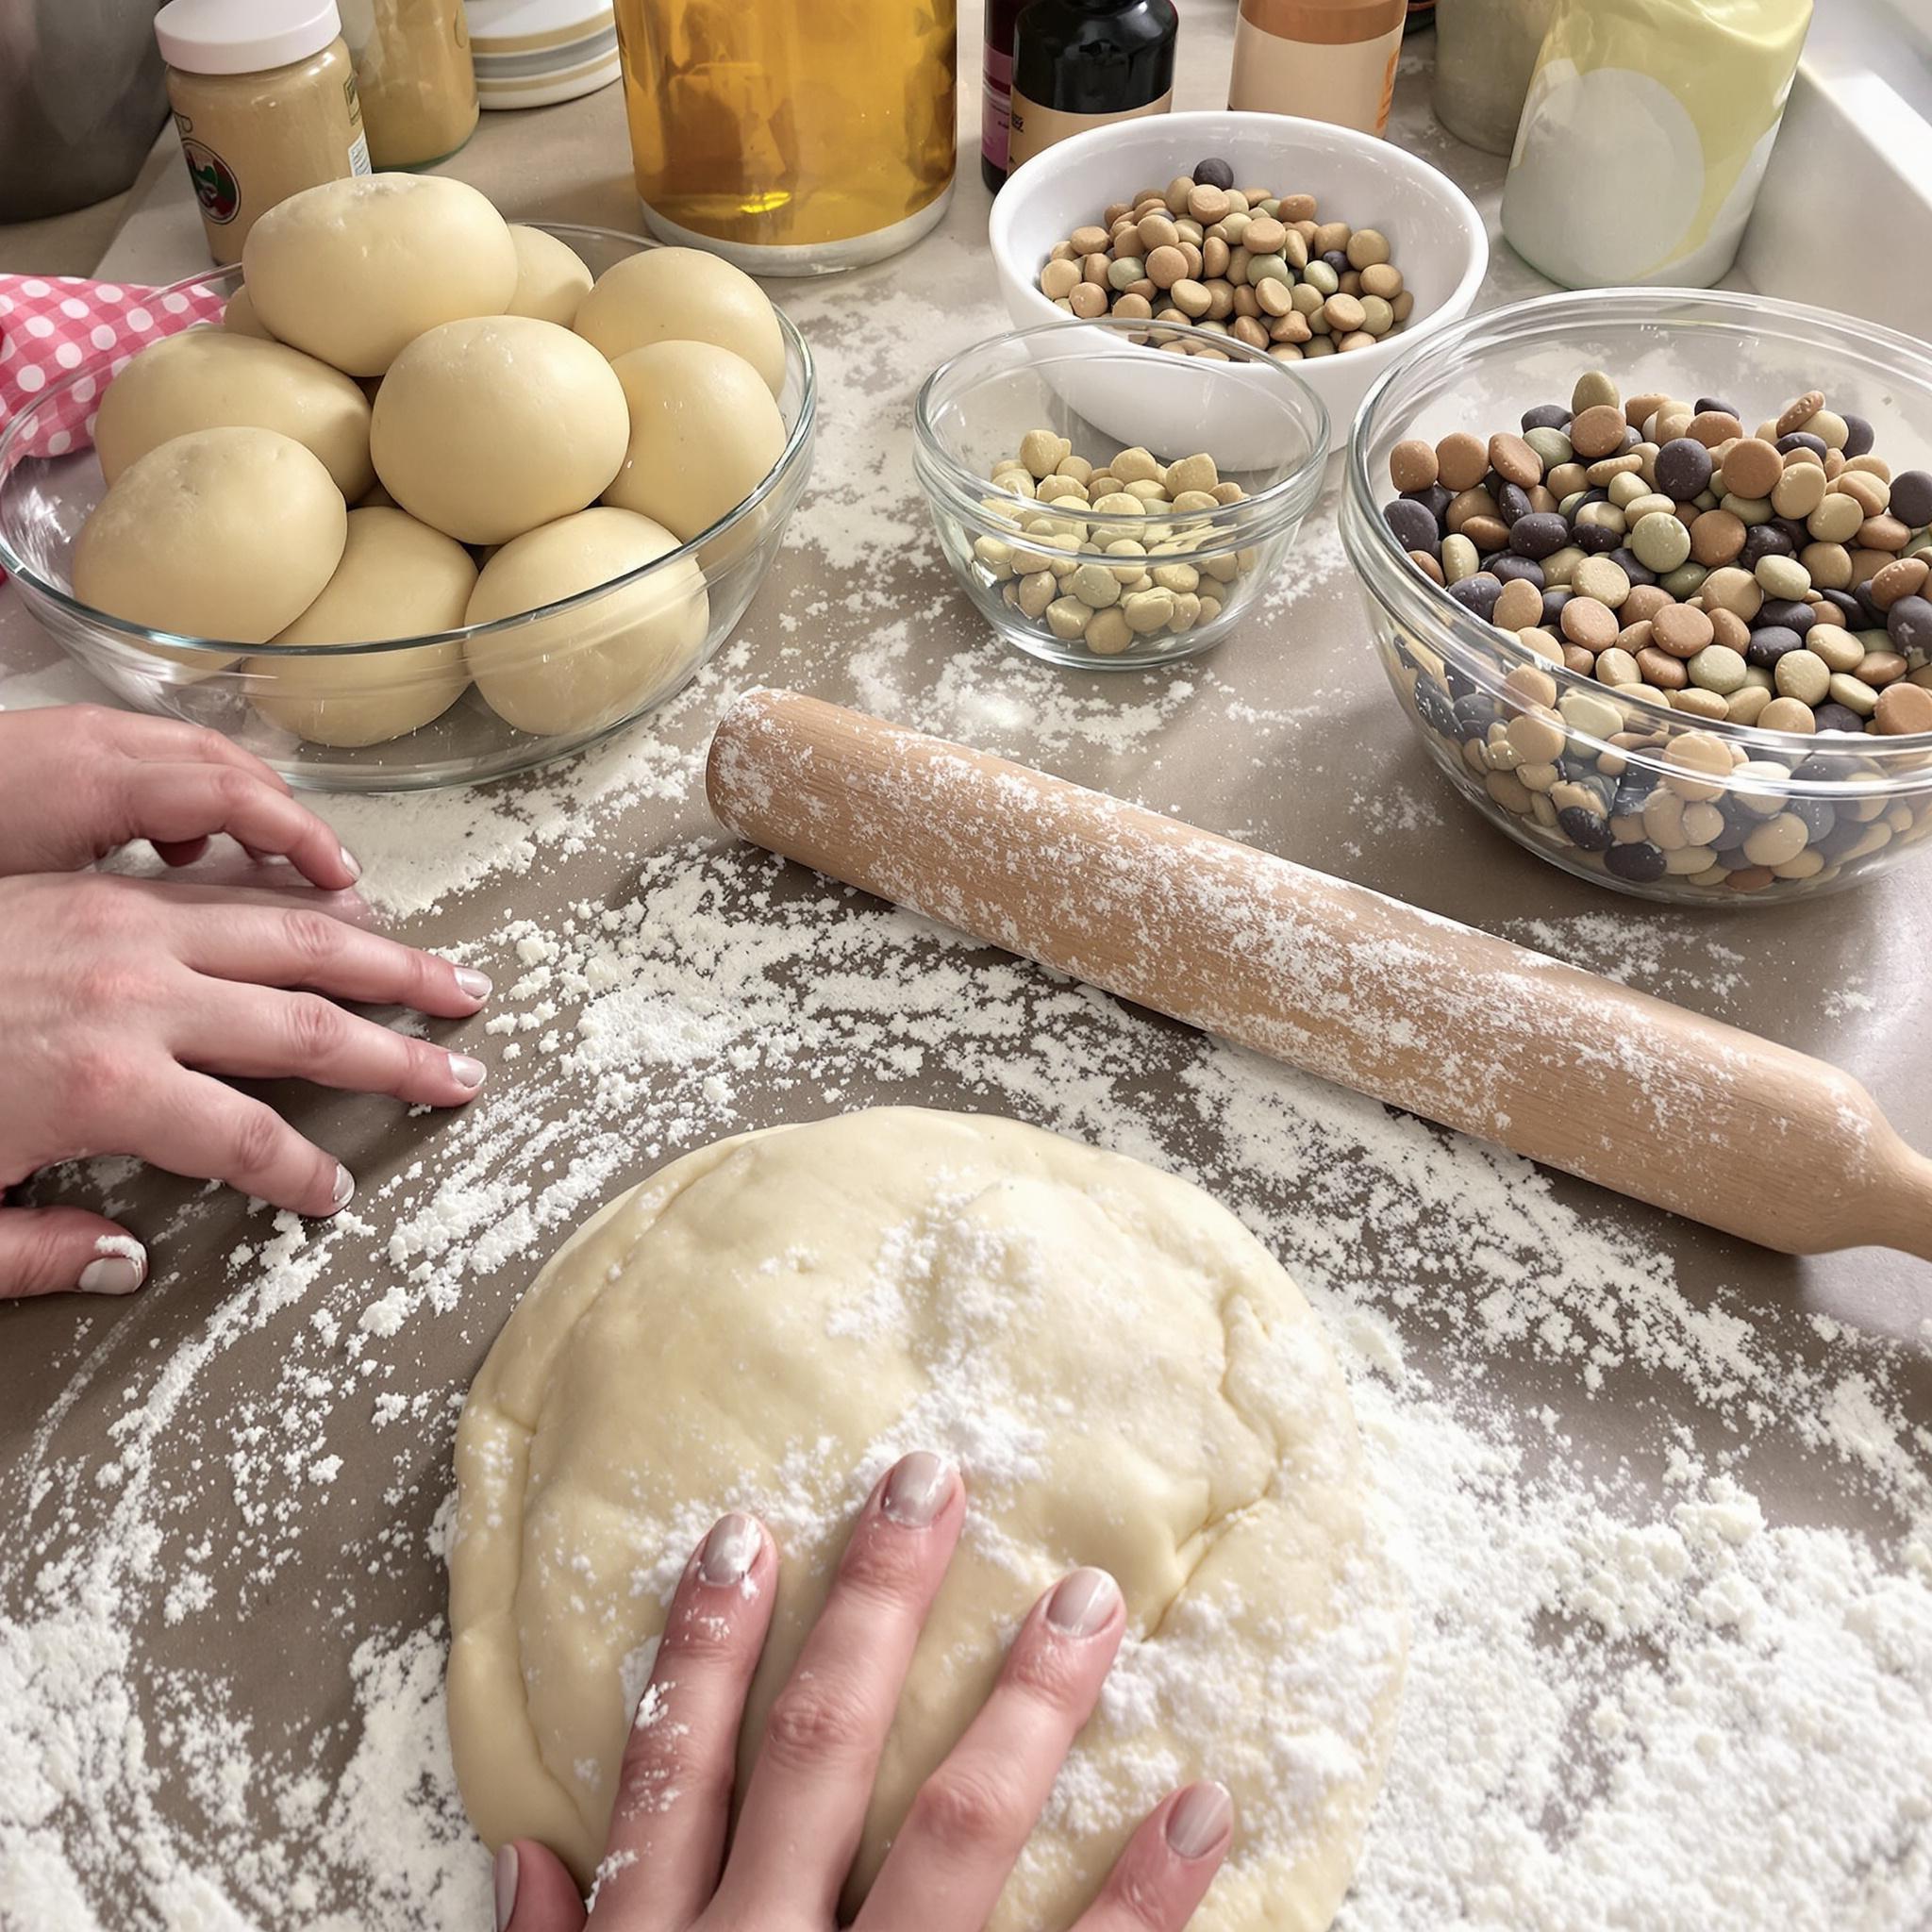
Alright, start by mixing the warm milk and yeast in a bowl. Let it sit for about 5 minutes until it gets bubbly. In another bowl, whisk together the flour, sugar, and salt. Then add the eggs, butter, and vanilla to the yeast mix. Combine everything until smooth. Knead it for about 8-10 minutes—it should feel elastic. Pro tip: If you’ve got a stand mixer, use it. Saves time and your arms won’t hate you later.
Step 2: Let the Dough Rise
Put the dough in a greased bowl, cover it with a towel, and let it hang out for an hour. It should double in size. Keep it somewhere warm—it helps speed things up. You’ll know it’s ready when it looks all soft and pillowy. (Feels kinda satisfying, doesn’t it?)
Step 3: Prepare the Topping
For the topping, mix flour, sugar, and butter. Add some food coloring if you want it colorful. Roll it out thin and cut circles a little smaller than your dough balls. This part gives the conchas their signature crunch. Don’t skip it!
Step 4: Shape and Assemble
Divide the dough into 12 equal pieces and shape each one into a ball. Place them on a baking sheet and gently press a topping circle onto each one. Use a knife to carve the classic shell pattern. Just don’t press too hard—you don’t want to squish the dough. (Trust me, I’ve done that before.)
Step 5: Bake the Conchas
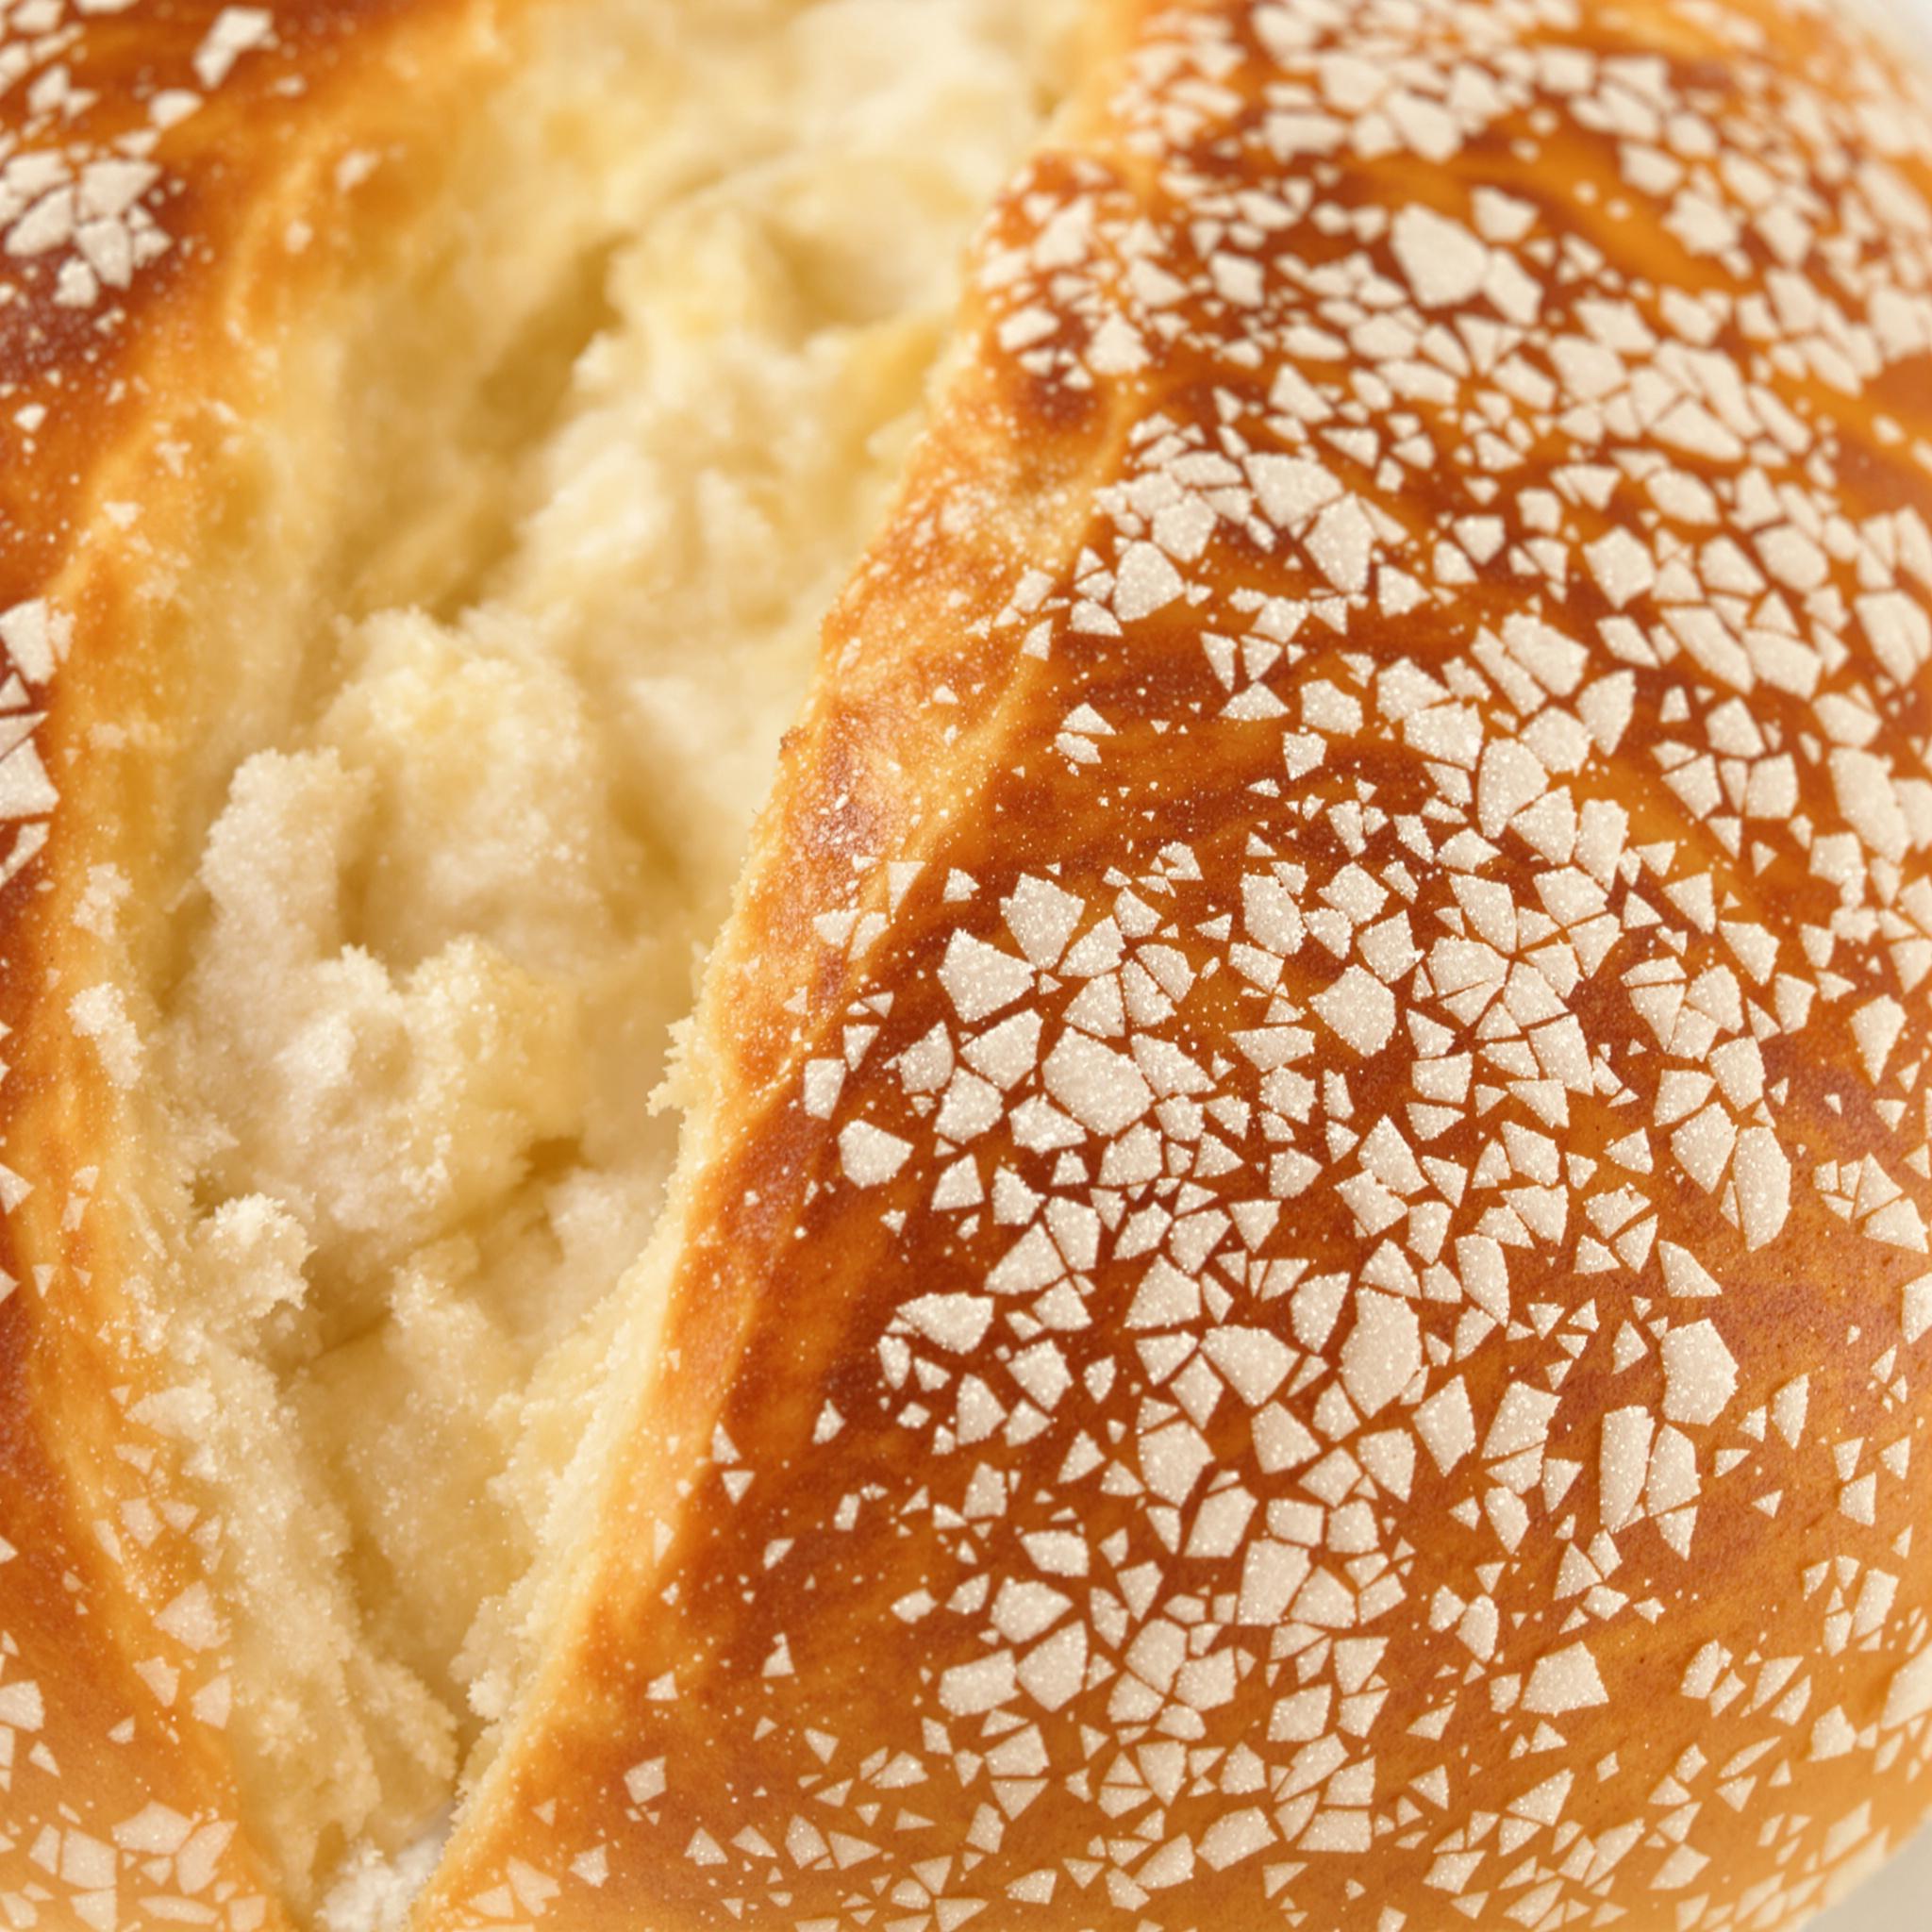
Preheat your oven to 350°F. Let the shaped conchas rest for 15 minutes, then bake for 20-25 minutes until they’re golden brown. Your kitchen will smell incredible while they bake. Once they’re done, cool them on a rack before serving. Patience here pays off.
Chef’s Tip
Here’s a little secret: Brush the baked conchas with melted butter right after they come out of the oven. It adds shine and boosts the flavor. Sounds simple, but it makes a huge difference.
Time
- Prep Time: 30 minutes
- Rising Time: 1 hour
- Baking Time: 25 minutes
- Total Time: 2 hours
Nutritional Information
Each concha has about 250 calories, 8g protein, 35g carbs, and 10g fat. Enjoy them—but maybe don’t eat the whole batch in one go. Moderation is key, right?
Extra Information
Fun fact: “Concha” means “shell” in Spanish, which totally makes sense once you see the design on top. Cool, huh?
Necessary Tools
- Stand mixer or hand mixer
- Rolling pin
- Baking sheet
- Parchment paper
- Knife or stencil for patterns
Storage Instructions
Store these guys in an airtight container at room temp. They’ll stay good for up to 3 days. If you wanna keep them longer, pop them in ziplock bags and freeze them. When you’re ready to eat, thaw them at room temp and reheat briefly in the oven for best results.
Tips and Tricks
- Knead the dough well—it makes a world of difference.
- A stencil really helps with getting clean designs on the topping.
- Don’t rush the second rise. Fluffy conchas = happy people.
Serving Suggestions
Pair conchas with hot chocolate or coffee—it’s such a cozy combo. Serve them with vanilla ice cream for dessert, or just plain with a glass of milk. Works either way.
Healthier Alternatives for Mexican Conchas
If you’re looking to lighten things up, try these swaps:
- Use whole wheat flour instead of all-purpose.
- Swap sugar for honey or maple syrup.
- Go for reduced-fat butter or coconut oil.
- Add chia seeds or flaxseeds for extra fiber.
- Skip the food coloring if you prefer something more natural.
- Try almond extract for a fun twist.
Common Mistakes to Avoid
Mistake 1: Overmixing the Dough
Overmixing makes the dough tough. Mix just until it comes together, and stop kneading once it’s smooth and stretchy. Less is more here.
Mistake 2: Skipping the Second Rise
Skipping the second rise leads to dense conchas, and no one wants that. Be patient—it’s worth it.
Mistake 3: Using Too Much Topping
Too much topping can make them soggy. Go for a thin layer. Trust me, it’s better that way.
Frequently Asked Questions
Can I make conchas ahead of time?
Absolutely. You can prep the dough a day early, stick it in the fridge overnight, and bake fresh the next day. Easy peasy.
How do I store leftover conchas?
Keep them in an airtight container at room temp for up to 3 days. Freeze them if you need to store them longer.
What if my topping cracks during baking?
Cracking happens sometimes because of the sugary crust. If it’s too bad, roll the topping thinner next time.
Can I use instant yeast instead of active dry?
Yep, instant yeast works fine. Just toss it straight into the dry ingredients without proofing first.
Why is my dough sticky?
Sticky dough usually needs a bit more flour. Add a tablespoon at a time until it’s manageable but still soft. Don’t overdo it though.
How do I get the perfect shell pattern?
Practice gentle pressure with a sharp knife or stencil. Take your time, and you’ll get it.
Can I freeze unbaked conchas?
Yes! Freeze them shaped but unbaked. Thaw and let them rise before baking as usual.
What’s the best way to reheat conchas?
Reheat them in the oven at 300°F for 5-10 minutes. They’ll taste fresh again.
Why didn’t my conchas rise?
Check your yeast—if it’s expired, that could be the issue. Also, make sure the milk isn’t too hot; it can kill the yeast.
Can I make mini conchas?
Totally. Just divide the dough into smaller pieces and adjust the baking time accordingly. Perfect for parties or snacks.
Conclusion
Mexican Conchas are seriously delightful—soft dough, crunchy topping, and all-around goodness. Whether you’re a pro baker or just starting out, this recipe is bound to impress. So go ahead, whip up a batch, and share the love with your friends and family. Because homemade treats? Always a win.
Equipment
- Stand mixer
- Rolling pin
- Baking sheet
- Parchment paper
- Stencil or knife
Ingredients
- 4 cups all-purpose flour
- 1/2 cup granulated sugar
- 1 packet active dry yeast
- 1/2 cup whole milk warmed
- 3 large eggs
- 1/2 cup unsalted butter softened
- 1 teaspoon vanilla extract
- 1/2 teaspoon salt
- 1 cup concha topping flour, sugar, butter, food coloring
Instructions
- Mix warm milk and yeast, let sit until bubbly. Whisk flour, sugar, and salt in another bowl. Add eggs, butter, vanilla to yeast mix and combine until smooth. Knead for 8-10 minutes until elastic.
- Place dough in a greased bowl, cover with towel, and let rise for 1 hour until doubled.
- Mix flour, sugar, butter for topping, add food coloring if desired, roll thin, and cut circles.
- Divide dough into 12 balls, press topping on each, carve shell pattern gently.
- Preheat oven to 350°F. Let conchas rest 15 minutes, then bake for 20-25 minutes until golden. Cool on rack.