
Why Mini Cheesecake Brûlées Are a Game-Changer for Dessert Lovers
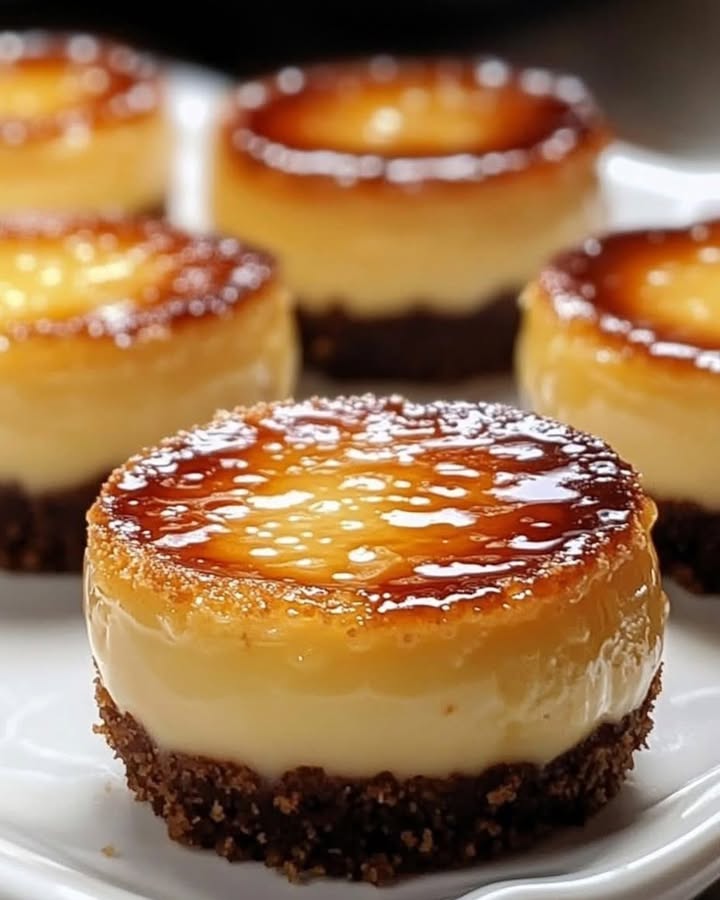
Picture this: a creamy, dreamy cheesecake with a golden caramelized top that cracks under your spoon with a satisfying crunch. Sounds heavenly, right? That’s exactly what you get with these Mini Cheesecake Brûlées! I first made these for a family brunch, and let me tell you, they were gone in minutes. My nephew even asked if he could take the recipe to school for his cooking project. These little wonders are easy to make, fun to serve, and absolutely irresistible.
A Little History Behind the Magic
Cheesecake has been around for centuries, with roots tracing back to ancient Greece. But the brûlée twist? That’s pure modern genius. The caramelized sugar topping is inspired by the classic French dessert Crème Brûlée, giving these mini cheesecakes an elegant and sophisticated edge. When I first tried combining the two, it felt like a match made in dessert heaven. Now, I can’t imagine one without the other!
Why You’ll Love This Recipe
These Mini Cheesecake Brûlées are perfect for anyone who loves rich flavors but doesn’t want to spend hours in the kitchen. The creamy filling paired with the crunchy caramelized sugar is a flavor explosion. Plus, the individual portions make them feel extra special. Whether you’re a seasoned baker or a newbie, this recipe is foolproof and delivers restaurant-quality results every time.
Perfect Occasions to Whip Up These Mini Cheesecake Brûlées
From birthday parties to holiday gatherings, these Mini Cheesecake Brûlées are versatile enough for any occasion. They’re also great for date nights, potlucks, or even as a sweet treat to brighten up a regular Tuesday. Trust me, no matter the event, these little gems will steal the show.
Ingredients You’ll Need
For the crust:
- 1 cup of graham cookie crumbs
- 2 tablespoons of granulated sugar
- 4 tablespoons of melted butter
For the filling:
- 16 oz (450 g) cream cheese, softened
- ½ cup of granulated sugar
- 2 large eggs
- 1 teaspoon of vanilla extract
- ½ cup of sour cream
For the topping:
- ¼ cup of granulated sugar
- Fresh berries (optional)
Substitution Options
If you’re out of graham crackers, try using crushed digestive biscuits or shortbread cookies for the crust. For a dairy-free version, swap the cream cheese with vegan cream cheese and use coconut oil instead of butter. If you don’t have a kitchen torch, broil the sugar topping in the oven—just keep a close eye on it!
Step-by-Step Preparation
Step 1: Preheat and Prep
Start by preheating your oven to 325°F (163°C). Grab a muffin tin and line it with cupcake liners. This step is crucial because it ensures your Mini Cheesecake Brûlées come out perfectly shaped and easy to serve. Pro tip: Use parchment paper liners for a nonstick finish.
Step 2: Make the Crust
In a mixing bowl, combine the graham cracker crumbs, sugar, and melted butter. The mixture should resemble wet sand and smell buttery and sweet. Press a spoonful of this mixture into the bottom of each liner, pressing firmly to create an even layer. This crust is the sturdy base that holds all the creamy goodness together.
Step 3: Prepare the Filling
In a large bowl, beat the softened cream cheese and sugar until smooth and fluffy. Add the eggs one at a time, ensuring each egg is fully incorporated before adding the next. Mix in the vanilla extract and sour cream until the filling is silky and free of lumps. The aroma of vanilla mingling with the tangy cream cheese is simply divine.
Step 4: Assemble the Mini Cheesecakes
Spoon the cheesecake filling evenly over the crusts in the muffin tin. Fill each liner about three-quarters full to leave room for the cakes to rise slightly. This step is where the magic begins—the transformation from simple ingredients to decadent desserts.
Step 5: Bake to Perfection
Bake the Mini Cheesecake Brûlées for 20–25 minutes. They’re done when the centers are set but still have a slight jiggle. Let them cool completely before refrigerating for at least 2 hours. Patience is key here—the chilling process firms up the texture and enhances the flavors.
Step 6: Caramelize the Sugar
Once chilled, sprinkle a thin, even layer of granulated sugar over each cheesecake. Using a kitchen torch, caramelize the sugar until it turns golden brown and crispy. If you’ve never used a torch before, don’t worry—it’s easier than it looks! Just hold the flame a few inches above the sugar and move it in slow, steady circles.
Step 7: Decorate and Serve
For a pop of color and freshness, top each Mini Cheesecake Brûlée with fresh berries like raspberries or blueberries. Arrange them artfully, and voilà—you’ve got a dessert that’s as beautiful as it is delicious. Serve immediately and watch the smiles unfold.
Chef’s Tip
To prevent cracks in your cheesecake filling, avoid overmixing the batter. Gentle folds are the secret to a smooth and creamy texture.
Timing Breakdown
- Prep Time: 15 minutes
- Cooking Time: 25 minutes
- Chilling Time: 2 hours
- Total Time: 2 hours 40 minutes
Extra Info
Did you know that the word “brûlée” means “burnt” in French? It refers to the caramelized sugar topping that gives this dessert its signature crunch. Fun fact: the technique of torching sugar dates back to the 17th century!
Necessary Equipment
- Muffin tin
- Cupcake liners
- Mixing bowls
- Electric mixer
- Kitchen torch (or oven broiler)
Storage Tips
Store your Mini Cheesecake Brûlées in an airtight container in the refrigerator for up to 3 days. Keep them away from strong-smelling foods to prevent the delicate cheesecake flavors from absorbing unwanted odors. If you’ve already caramelized the sugar, cover the tops loosely with plastic wrap to preserve the crispiness.
For longer storage, freeze the cheesecakes without the caramelized topping. Wrap each one individually in plastic wrap and place them in a freezer-safe bag. They’ll stay fresh for up to 2 months. Thaw in the fridge overnight before adding the sugar topping and torching.
Pro tip: Always add the caramelized sugar just before serving to maintain the perfect texture contrast between the creamy filling and the crunchy top.
Tips and Advice
- Use room-temperature ingredients for a smoother batter.
- Don’t skip the chilling step—it’s essential for setting the cheesecake.
- Experiment with different toppings like chocolate shavings or citrus zest.
Presentation Ideas
- Serve on a tiered dessert stand for a fancy touch.
- Garnish with mint leaves for a pop of green.
- Dust with powdered sugar for an extra elegant look.
Healthier Alternatives
Here are six ways to make this recipe healthier without sacrificing flavor:
- Low-Fat Version: Use low-fat cream cheese and sour cream to reduce calorie content.
- Gluten-Free Crust: Swap graham crackers with gluten-free cookies.
- No Added Sugar: Replace granulated sugar with a sugar substitute like stevia or monk fruit.
- Vegan Option: Use plant-based cream cheese and coconut oil for the crust.
- Protein-Packed: Add a scoop of protein powder to the filling for an extra boost.
- Fruit-Infused: Blend fresh fruit puree into the filling for natural sweetness.
Common Mistakes to Avoid
Mistake 1: Overmixing the Batter
Overmixing can incorporate too much air, causing cracks in your Mini Cheesecake Brûlées. To avoid this, mix gently and stop as soon as the ingredients are combined. Pro tip: Use a spatula for the final fold to ensure minimal air bubbles.
Mistake 2: Skipping the Chilling Step
Chilling is essential for achieving the right texture. Without it, your cheesecakes may be too soft and lose their shape. Always allow at least 2 hours in the fridge—or overnight for best results.
Mistake 3: Burning the Sugar Topping
When caramelizing the sugar, it’s easy to burn it if you’re not careful. Keep the torch moving constantly and stop as soon as the sugar turns golden brown. If using the broiler, check every 30 seconds to prevent burning.
FAQs About Mini Cheesecake Brûlées
Can I make these ahead of time?
Absolutely! You can prepare the cheesecakes a day in advance and store them in the fridge. Just wait to add the sugar topping until right before serving to keep it crispy.
Do I need a kitchen torch?
No, you don’t. While a torch gives the best results, you can also caramelize the sugar under the broiler. Watch closely to avoid burning.
Can I use flavored extracts?
Yes! Try almond, lemon, or orange extract for a unique twist. Just stick to 1 teaspoon to avoid overpowering the cheesecake.
What if I don’t have sour cream?
You can substitute Greek yogurt or crème fraîche for a similar tangy flavor.
How do I know when they’re done baking?
The edges should be set, and the centers should have a slight jiggle. Overbaking can dry out the cheesecakes, so err on the side of caution.
Can I freeze these?
Yes, but freeze them before adding the sugar topping. Thaw in the fridge overnight and torch the sugar just before serving.
Are these kid-friendly?
Definitely! Kids love the creamy texture and crunchy topping. Just skip the torch step if they’re helping in the kitchen.
Can I double the recipe?
Of course! Simply double all the ingredients and use two muffin tins if needed.
What berries work best?
Raspberries, blueberries, and strawberries are all excellent choices. Choose whatever is in season for the freshest flavor.
How do I fix a cracked cheesecake?
If cracks appear, don’t panic. Cover them with the caramelized sugar topping or fresh berries for a flawless finish.
Final Thoughts
These Mini Cheesecake Brûlées are more than just a dessert—they’re a celebration of flavors, textures, and creativity. Whether you’re making them for a special occasion or just because, they’re sure to impress. So grab your apron, gather your ingredients, and let’s get baking. Your taste buds will thank you!
Equipment
- Mixing Bowl
- Electric Mixer
- Spatula
- Muffin Tin
- Kitchen Torch
Ingredients
- 150 g Graham Cookie Crumbs
- 2 tbsp Granulated Sugar
- 4 tbsp Melted Butter
- 450 g Cream Cheese Softened
- 100 g Granulated Sugar For filling
- 2 large Eggs
- 1 tsp Vanilla Extract
- 120 g Sour Cream
- 30 g Granulated Sugar For topping
- q.s. Fresh Berries Optional
Instructions
- Preheat your oven to 325°F (163°C) and line a muffin tin with cupcake liners.
- In a mixing bowl, combine graham cracker crumbs, sugar, and melted butter, then press firmly into the bottom of each liner to create the crust.
- In a large bowl, beat softened cream cheese and sugar until smooth; add eggs one at a time, incorporating fully before adding the next.
- Mix in vanilla extract and sour cream until the filling is silky and lump-free.
- Spoon the cheesecake filling evenly over the crusts in the muffin tin, filling each liner about three-quarters full.
- Bake for 20–25 minutes until the centers are set with a slight jiggle; cool completely and refrigerate for at least 2 hours.
- Sprinkle a thin layer of granulated sugar over each cheesecake and caramelize using a kitchen torch or oven broiler until golden brown.
- Top with fresh berries (if desired) and serve immediately.
Notes
Nutrition

Hi, I’m Olivia Parker, the founder of BakingSecret.com and a lifelong lover of all things sweet and homemade. I grew up in a small town in Oregon, where the smell of fresh cookies in my family’s kitchen sparked my passion for baking. Over the years, I turned that passion into a mission: to help home bakers feel confident, inspired, and creative.
After studying food science and working in several artisan bakeries across the U.S., I decided to create a space where everyone from beginners to seasoned bakers can find reliable recipes, expert tips, and a warm, welcoming community. BakingSecret.com is my way of sharing the magic of baking with the world. When I’m not testing new recipes, you’ll find me exploring farmers’ markets, collecting vintage cookbooks, or perfecting my sourdough technique.