
Why These Mini Lemon Cheesecakes Will Make Your Day Brighter
There’s something magical about desserts that combine creamy textures with a zesty kick. Last summer, I decided to whip up these Mini Lemon Cheesecakes for a family brunch, and let me tell you—they were gone in minutes! Everyone kept asking for seconds (and the recipe). These little bites of sunshine are perfect for brightening up any occasion or satisfying your sweet tooth without going overboard.
A Bite-Sized History of Cheesecake
Cheesecake has been around for centuries, with its origins tracing back to ancient Greece. Back then, it was more like a simple honey-and-cheese baked dish. Fast forward to today, and we’ve got endless variations, from rich New York-style cheesecakes to light and tangy lemon versions. My Mini Lemon Cheesecakes are a modern twist—bite-sized, easy to share, and bursting with citrus goodness. Plus, they’re just so cute!
Why You’ll Love This Recipe
These Mini Lemon Cheesecakes are creamy, refreshing, and oh-so-delicious. The buttery cookie base pairs perfectly with the smooth, citrusy filling. Best of all? They’re super simple to make, even if you’re not a pro in the kitchen. No fancy equipment needed—just a muffin tin and some basic ingredients. Trust me; once you try them, they’ll become a staple in your dessert rotation.
Perfect Occasions for Mini Lemon Cheesecakes
Whether you’re hosting a garden party, bringing dessert to a potluck, or simply craving something sweet, these Mini Lemon Cheesecakes are ideal. They’re great for bridal showers, baby showers, or even as a surprise treat for coworkers. Their small size makes them perfect for portion control, but don’t be surprised if people sneak two or three!
Ingredients
- For the Base:
- 150 g of María-type cookies
- 70 g of melted butter
- For the Filling:
- 250 g of cream cheese
- 100 g of sugar
- 1 egg + 1 yolk
- 1 teaspoon vanilla extract
- Zest of 1 lemon
- Juice of 2 lemons
- For Decoration:
- Fine lemon slices
Substitution Options
If you don’t have María cookies, graham crackers or digestive biscuits work just fine. For a dairy-free version, swap the butter for coconut oil and use vegan cream cheese. You can also replace regular sugar with honey or maple syrup for a touch of natural sweetness.
Step 1: Preheat and Prep
Start by preheating your oven to 170°C (340°F). While it heats up, grab a muffin tin and line it with cupcake liners for easy removal later. This step ensures your Mini Lemon Cheesecakes bake evenly and come out picture-perfect. Pro tip: If you don’t have liners, lightly grease the tin instead.
Step 2: Create the Cookie Base
Crush the María cookies into fine crumbs using a food processor or a ziplock bag and rolling pin. Mix the crumbs with melted butter until it resembles wet sand. Press this mixture firmly into the bottom of each muffin cup. Pop them in the oven for 5 minutes, then let them cool while you prepare the filling. The aroma of buttery cookies will already have your mouth watering!
Step 3: Whip Up the Creamy Filling
In a mixing bowl, beat the cream cheese and sugar together until smooth and creamy. Add the egg, yolk, vanilla, lemon zest, and juice, mixing gently to avoid air bubbles. The filling should be silky and fragrant, with a hint of tangy citrus. Pour this luscious mixture over the cooled bases, filling each cup almost to the top.
Step 4: Bake to Perfection
Bake the Mini Lemon Cheesecakes for 15–18 minutes, or until the centers are almost set. They’ll jiggle slightly when you move the pan—that’s okay! Overbaking can make them crack, so keep an eye on them. Once done, let them cool completely before refrigerating for at least 2 hours. Patience is key here; trust me, it’s worth the wait.
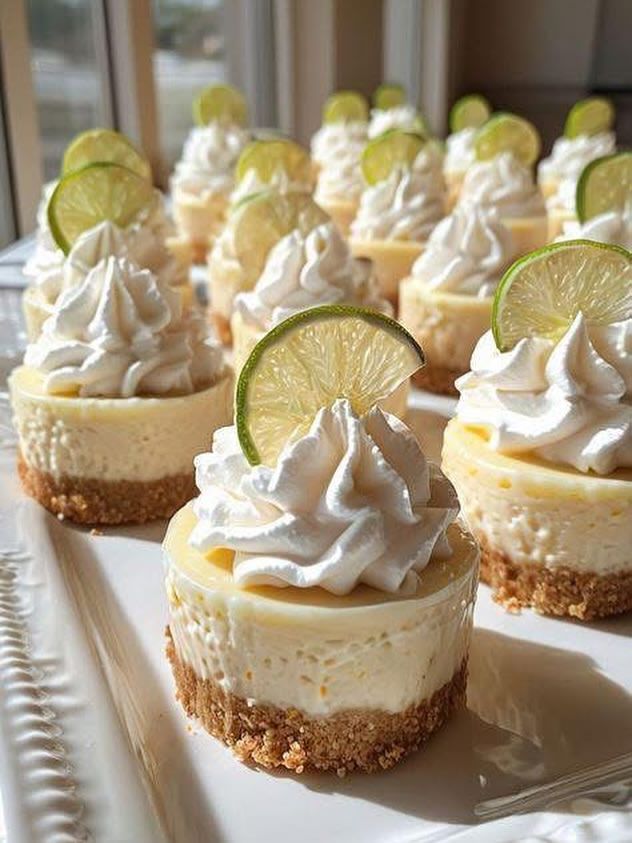
Step 5: Decorate and Serve
Before serving, top each cheesecake with a thin slice of lemon for a pop of color and extra zing. Voilà! Your Mini Lemon Cheesecakes are ready to impress. Arrange them on a platter, and watch them disappear faster than you can say “lemon.”
Timing Breakdown
- Prep Time: 15 minutes
- Cooking Time: 20 minutes
- Resting Time: 2 hours (chilling)
- Total Time: 2 hours 35 minutes
Chef’s Secret
To prevent cracks, let the cheesecakes cool gradually. Turn off the oven after baking, open the door slightly, and leave them inside for 10 minutes. This trick helps them adjust to room temperature without shocking them.
Extra Info
Lemons are packed with vitamin C and antioxidants, making them a healthy addition to desserts. Fun fact: Lemons were once considered a status symbol in Europe because of their rarity and vibrant color!
Necessary Equipment
- Muffin tin
- Mixing bowls
- Food processor or rolling pin
- Electric mixer or whisk
- Spatula
Storage Tips
Store your Mini Lemon Cheesecakes in an airtight container in the fridge for up to 3 days. They stay fresh and delicious, though I doubt they’ll last that long! For longer storage, freeze them for up to a month. Just thaw in the fridge before serving.
If freezing, place them in a single layer on a baking sheet until solid, then transfer to a freezer-safe bag. This prevents them from sticking together.
When reheating isn’t necessary, simply take them out of the fridge 10 minutes before serving to bring out their flavors.
Tips and Advice
Use room-temperature ingredients for the filling—it ensures a smoother texture. Zest your lemons before juicing them to avoid any accidents. And remember, less is more when mixing; overmixing can lead to dense cheesecakes.
Presentation Tips
- Garnish with fresh mint leaves for a pop of green.
- Dust with powdered sugar for an elegant touch.
- Serve on a tiered dessert stand for a wow factor.
Healthier Alternatives
Gluten-Free Option: Use gluten-free cookies for the base.
Vegan Version: Swap cream cheese for cashew-based alternatives.
Low-Sugar Recipe: Replace sugar with stevia or monk fruit.
Coconut Twist: Add shredded coconut to the crust.
Protein-Packed: Mix protein powder into the filling.
No-Bake Style: Skip baking and chill with gelatin for structure.
Mistake 1: Overmixing the Filling
Overmixing introduces too much air, leading to cracks during baking. To avoid this, mix gently until just combined. A smooth batter doesn’t need excessive beating.
Mistake 2: Skipping the Chill Time
Chilling firms up the cheesecakes and enhances their flavor. Rushing this step results in soft, messy slices. Be patient—it’s worth it!
Mistake 3: Using Cold Ingredients
Cold cream cheese won’t blend smoothly, leaving lumps in your filling. Always bring ingredients to room temperature for best results.
Mistake 4: Overbaking
Overbaked cheesecakes dry out and lose their creamy texture. Check for doneness early and remove them while still slightly jiggly in the center.
Mistake 5: Forgetting to Grease the Pan
Without proper greasing or liners, your cheesecakes may stick and break. Save yourself the headache by preparing the pan properly.
FAQs
Can I use other citrus fruits?
Absolutely! Try lime or orange zest for a different twist. Each fruit brings its unique flavor profile, keeping things exciting.
How do I know when they’re done?
The edges should look set, but the centers will still jiggle slightly. They’ll firm up as they cool.
Can I make these ahead?
Yes! These Mini Lemon Cheesecakes can be made a day in advance and stored in the fridge.
What if I don’t have a muffin tin?
You can use a small ramekin or even a mini tart pan. Adjust baking times accordingly.
Are they kid-friendly?
Kids love these bite-sized treats! Just omit the decorative lemon slices if they’re too sour for little ones.
Can I double the recipe?
Of course! Simply double all ingredients and use two muffin tins or larger pans.
Do I need an electric mixer?
Nope! A good old-fashioned whisk works fine, though it might take a bit more elbow grease.
Why is my filling grainy?
This usually happens if the sugar isn’t fully dissolved. Beat the cream cheese and sugar thoroughly before adding other ingredients.
Can I freeze leftovers?
Definitely! Wrap individually and freeze for up to a month. Thaw in the fridge overnight.
What’s the best way to zest a lemon?
Use a microplane grater for fine zest. Avoid the white pith underneath, as it’s bitter.
Final Thoughts
These Mini Lemon Cheesecakes are proof that big flavors can come in small packages. Whether you’re baking for a crowd or treating yourself, they’re sure to delight. So grab those lemons, roll up your sleeves, and get ready to create something truly special. Happy baking!
Equipment
- Mixing bowls
- Electric mixer or whisk
- Spatula
- Muffin tin
- Food processor or rolling pin
Ingredients
- 150 g María-type cookies
- 70 g melted butter
- 250 g cream cheese
- 100 g sugar
- 1 egg
- 1 egg yolk
- 1 tsp vanilla extract
- 1 lemon zest
- 2 lemons juice
Instructions
- Preheat your oven to 170°C (340°F) and line a muffin tin with cupcake liners.
- Crush the María cookies into fine crumbs and mix with melted butter until resembling wet sand; press into the bottom of each muffin cup.
- Bake the cookie bases for 5 minutes, then let them cool.
- In a mixing bowl, beat cream cheese and sugar until smooth, then add egg, yolk, vanilla, lemon zest, and juice; mix gently.
- Pour the filling over the cooled bases, filling each cup almost to the top.
- Bake the cheesecakes for 15–18 minutes, or until the centers jiggle slightly; let cool completely and refrigerate for at least 2 hours.
- Top each cheesecake with a thin slice of lemon before serving.