
Why This No-Bake Berry Cheesecake is a Game-Changer
Let me tell you a little secret. One summer, my oven broke right before a family gathering. I panicked—how could I serve dessert without it? That’s when I stumbled upon this No-Bake Berry Cheesecake. It was love at first bite. Creamy, tangy, and topped with juicy berries, it wowed everyone at the table. What makes this recipe extra special is how easy it is to whip up. No baking means less stress and more time to enjoy with your loved ones.
A Little History of Cheesecake
Cheesecake has been around for centuries, dating back to ancient Greece. Back then, it was made with simple ingredients like cheese, honey, and wheat. Fast forward to today, and we’ve got countless versions of this classic dessert. The no-bake version is perfect for modern cooks who want all the flavor without the fuss. I love making this No-Bake Berry Cheesecake because it feels like a nod to tradition but with a fresh, fruity twist.
Why You’ll Love This Recipe
This cheesecake is a dream come true. First, it’s no-bake, so there’s no need to heat up your kitchen. Second, it’s creamy yet light, thanks to the whipped cream and cream cheese combo. Finally, the berry topping adds a pop of color and a burst of flavor that balances the sweetness perfectly. Whether you’re a seasoned baker or a newbie, this recipe will make you feel like a dessert wizard.
Perfect Occasions for This Dessert
Picture this: a sunny backyard BBQ, a cozy holiday dinner, or even a quiet night in with Netflix. This No-Bake Berry Cheesecake fits every occasion. It’s elegant enough for formal gatherings but simple enough for everyday treats. Plus, it’s a crowd-pleaser that even picky eaters can’t resist.
Ingredients
Here’s what you’ll need to make this magical dessert:
- For the Crumb Base:
- 1 cup cookie crumbs (graham cracker, digestive cookies, or ladyfingers) – 180 g
- ½ cup butter, melted
- For the Cheesecake Filling:
- 8 oz cream cheese (remove from fridge 30 minutes before using)
- ½ cup powdered sugar
- 1 tsp vanilla extract
- 1 cup heavy cream
- 1 tbsp gelatin
- 2 tbsp milk (2% recommended)
- For the Berry Topping:
- ½ cup blueberries
- ½ cup raspberries
- ½ cup + 2 tbsp sugar
- 1 tbsp cornstarch
- Pinch of cinnamon (optional)
- 2 tbsp water
- 1 tbsp lemon juice
Substitution Options
Don’t have all the ingredients? No worries! Here are some swaps:
- Use any type of cookie for the base—ginger snaps work beautifully.
- If you’re out of heavy cream, try whipping coconut cream for a dairy-free option.
- Mixed berries or even sliced strawberries can replace blueberries and raspberries.
- Honey or maple syrup can stand in for sugar if you prefer natural sweeteners.
Step 1: Prepare the Cookie Base
Start by crushing your cookies into fine crumbs. I like using a ziplock bag and rolling pin—it’s oddly satisfying. Mix the crumbs with melted butter until they resemble wet sand. Press this mixture firmly into the bottom of a 7-8 inch springform pan. Pop it in the fridge while you tackle the filling. Pro tip: Use the bottom of a glass to press the crumbs evenly for a smooth base.
Step 2: Make the Cheesecake Filling
In a medium bowl, beat together the softened cream cheese, powdered sugar, and vanilla until silky smooth. In another bowl, whip the heavy cream until stiff peaks form—it should look like fluffy clouds. Now, here’s where the magic happens. Heat the milk and sprinkle gelatin on top. Let it sit for a minute, then gently warm it until dissolved. Fold everything together carefully to keep the airy texture intact.
Step 3: Assemble the Cheesecake
Take your chilled cookie base out of the fridge. Pour the cheesecake filling over it, spreading it evenly with a spatula. Cover the pan with plastic wrap and let it chill in the fridge for 4-5 hours—or better yet, overnight. This resting time lets the flavors meld and the gelatin set properly. Chef’s tip: Place a small plate under the pan to catch any drips during chilling.
Step 4: Prepare the Berry Topping
In a pot, combine blueberries, raspberries, sugar, cornstarch, cinnamon, water, and lemon juice. Bring it to a boil, then simmer until thickened. The aroma of bubbling berries is absolutely divine. Let the topping cool completely before refrigerating it. This step ensures the topping sets nicely and doesn’t make your cheesecake soggy.
Step 5: Serve
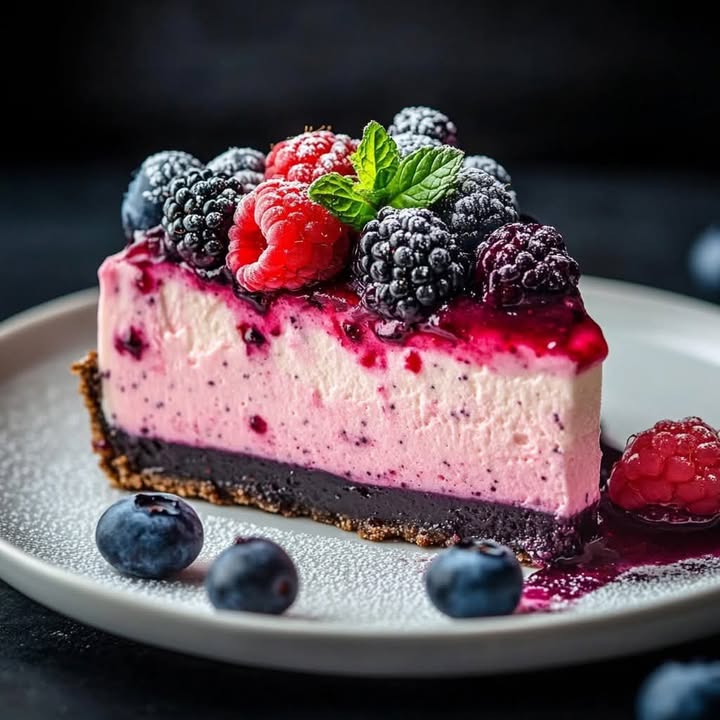
When ready to serve, spoon the berry topping over the cheesecake or drizzle it onto individual slices. You can also serve it alongside a scoop of vanilla ice cream for an extra indulgent treat. Garnish with a sprig of mint for a touch of elegance. Your guests won’t believe how easy this dessert was to make!
Timing
Here’s a quick breakdown of the timing:
- Prep Time: 20 minutes
- Cooking Time: 10 minutes (for the berry topping)
- Resting Time: 4-5 hours (or overnight)
- Total Time: About 5 hours
Chef’s Secret
To enhance the berry topping, add a splash of Grand Marnier or orange liqueur. It gives the sauce a subtle citrus kick that pairs beautifully with the creamy cheesecake.
Extra Info
Did you know that gelatin is derived from collagen? It’s what gives this cheesecake its firm yet melt-in-your-mouth texture. Fun fact: Gelatin has been used in desserts since the 1600s!
Necessary Equipment
You don’t need fancy tools for this recipe. A springform pan, mixing bowls, a whisk, a spatula, and a small pot are all you need. If you have an electric mixer, it’ll save you some arm effort, but hand-whisking works just fine too.
Storage
Store leftovers in an airtight container in the fridge for up to 3 days. The cheesecake stays fresh and delicious, though the crust may soften slightly. For longer storage, freeze slices wrapped in plastic wrap and foil. Thaw them in the fridge overnight before serving.
The berry topping can be stored separately in a jar for up to a week. This way, you can mix and match it with other desserts like pancakes or yogurt.
Never freeze the assembled cheesecake with the topping, as the berries may become watery upon thawing.
Tips and Advice
For best results, bring the cream cheese to room temperature before mixing. Cold cream cheese can create lumps in your filling. Also, fold the whipped cream gently to maintain its airy texture. Lastly, taste as you go—adjust the sugar in the topping based on the sweetness of your berries.
Presentation Tips
- Serve slices on pretty dessert plates with a dusting of powdered sugar.
- Add a dollop of whipped cream and a fresh berry on top for flair.
- Drizzle a bit of berry sauce around the plate for a restaurant-worthy presentation.
Healthier Alternative Recipes
Want to lighten things up? Try these variations:
- Low-Sugar Version: Use monk fruit sweetener instead of sugar.
- Vegan Option: Swap cream cheese for cashew-based cream cheese and use agar-agar instead of gelatin.
- Gluten-Free Base: Use gluten-free cookies for the crust.
- Protein-Packed Cheesecake: Add a scoop of vanilla protein powder to the filling.
- Dairy-Free Delight: Use coconut cream and dairy-free butter.
- Fruit Swap: Experiment with mango or peach toppings for a tropical twist.
Mistake 1: Overmixing the Whipped Cream
Overmixing whipped cream turns it into butter, which ruins the light texture of your cheesecake. To avoid this, stop whipping as soon as stiff peaks form. Pro tip: Chill your mixing bowl and whisk beforehand—it helps stabilize the cream.
Mistake 2: Skipping the Resting Time
Rushing the chilling process leads to a runny cheesecake. Patience is key here. Let it rest for at least 4 hours to allow the gelatin to set fully.
Mistake 3: Using Cold Cream Cheese
Cold cream cheese creates lumpy filling. Always let it sit at room temperature for 30 minutes before using. Smooth filling equals happy tummies.
Mistake 4: Not Straining the Berry Sauce
If you prefer a smoother topping, strain the berry sauce through a fine mesh sieve to remove seeds. This step elevates the texture and appearance.
Mistake 5: Overloading the Topping
Too much berry topping can overwhelm the delicate cheesecake flavors. Aim for a balanced ratio of topping to filling for the perfect bite.
FAQ: Can I use frozen berries?
Absolutely! Just thaw and drain them first to prevent excess liquid in your topping. Frozen berries work great and are often more affordable than fresh ones.
FAQ: How do I fix lumpy filling?
If your filling ends up lumpy, blend it briefly with a hand mixer or immersion blender. Be gentle to avoid deflating the whipped cream.
FAQ: Can I make this ahead?
Yes! This dessert actually benefits from being made a day in advance. The flavors deepen, and the texture improves with time.
FAQ: What size pan should I use?
A 7-8 inch springform pan works best. If you only have a larger pan, double the recipe to ensure the layers are thick enough.
FAQ: Is gelatin necessary?
Yes, gelatin helps the cheesecake set. If you’re vegan, substitute it with agar-agar following package instructions.
FAQ: Can I use store-bought topping?
While homemade is always better, a high-quality store-bought fruit compote can save time in a pinch.
FAQ: Why is my crust soggy?
A soggy crust usually happens if the filling isn’t set properly or if the topping is added too early. Chill thoroughly before assembling.
FAQ: Can I freeze this cheesecake?
Yes, but freeze it without the topping. Wrap slices tightly and thaw in the fridge before serving.
FAQ: What’s the best way to cut clean slices?
Dip your knife in hot water, wipe it dry, then slice. Repeat between cuts for neat, clean edges.
FAQ: Can I add alcohol to the filling?
Of course! A splash of amaretto or Baileys adds a fun twist. Just reduce the milk slightly to compensate for the added liquid.
Final Thoughts
This No-Bake Berry Cheesecake is proof that simplicity and flavor can go hand in hand. Whether you’re a busy mom, a student, or someone who just loves good food, this recipe is for you. So grab your ingredients, roll up your sleeves, and get ready to wow everyone with this scrumptious treat. Trust me, once you try it, it’ll become a staple in your dessert repertoire.
Equipment
- Mixing bowls
- Whisk
- Spatula
- Springform pan
- Small pot
Ingredients
- 180 g cookie crumbs (graham cracker, digestive cookies, or ladyfingers)
- ½ cup butter, melted
- 8 oz cream cheese remove from fridge 30 minutes before using
- ½ cup powdered sugar
- 1 tsp vanilla extract
- 1 cup heavy cream
- 1 tbsp gelatin
- 2 tbsp milk (2% recommended)
- ½ cup blueberries
- ½ cup raspberries
- ½ + 2 tbsp sugar
- 1 tbsp cornstarch
- pinch cinnamon (optional)
- 2 tbsp water
- 1 tbsp lemon juice
Instructions
- Crush cookies into fine crumbs and mix with melted butter.
- Press the mixture into the bottom of a 7-8 inch springform pan and chill.
- Beat cream cheese with powdered sugar and vanilla until smooth.
- Whip heavy cream until stiff peaks form.
- Heat milk and dissolve gelatin, then fold into the cream cheese mixture.
- Pour the cheesecake filling over the chilled cookie base and let it set in the fridge for 4-5 hours or overnight.
- In a pot, combine blueberries, raspberries, sugar, cornstarch, cinnamon, water, and lemon juice, and bring to a boil, then simmer until thickened.
- Cool the berry topping before refrigerating it.
- Serve berry topping over cheesecake or drizzle on individual slices.
Notes
Nutrition

Hi, I’m Olivia Parker, the founder of BakingSecret.com and a lifelong lover of all things sweet and homemade. I grew up in a small town in Oregon, where the smell of fresh cookies in my family’s kitchen sparked my passion for baking. Over the years, I turned that passion into a mission: to help home bakers feel confident, inspired, and creative.
After studying food science and working in several artisan bakeries across the U.S., I decided to create a space where everyone from beginners to seasoned bakers can find reliable recipes, expert tips, and a warm, welcoming community. BakingSecret.com is my way of sharing the magic of baking with the world. When I’m not testing new recipes, you’ll find me exploring farmers’ markets, collecting vintage cookbooks, or perfecting my sourdough technique.