
Why This No-Bake Cheesecake Delight Will Make Your Day
There’s something magical about a cheesecake that doesn’t need an oven. I remember the first time I made this No-Bake Cheesecake Delight—it was for my best friend’s birthday. She loves cheesecake but hates turning on the oven in summer. That’s when I discovered this gem of a recipe, and it has been a hit ever since. Creamy, rich, and oh-so-easy, this dessert proves that you don’t need fancy equipment or hours of baking to create something spectacular.
A Slice of History: The Roots of New York Cheesecake
Cheesecake has been around for centuries, with its origins tracing back to ancient Greece. But the New York version? That’s a modern twist born in the bustling kitchens of Manhattan. Traditional New York cheesecake is known for its dense texture and cream cheese base, but this no-bake version keeps all the flavor without the fuss. It’s perfect for those who love the classic taste but want something quicker and simpler. I’ve served it at family gatherings, potlucks, and even casual movie nights, and it never fails to impress.
Why You’ll Fall in Love with This Recipe
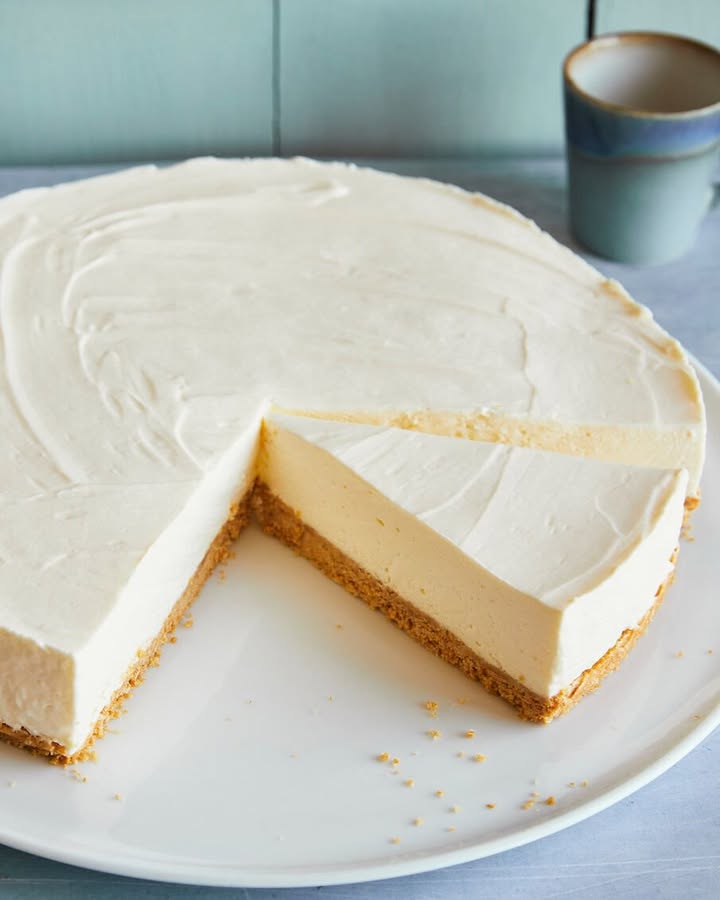
This No-Bake Cheesecake Delight is creamy, dreamy, and surprisingly simple to make. The best part? You don’t need to be a master chef to pull it off. The crust is buttery and crumbly, while the filling is smooth and tangy, with just the right amount of sweetness. Plus, it’s a lifesaver during hot summer days when you don’t want to heat up your kitchen. Whether you’re a seasoned baker or a total beginner, this recipe will feel like a warm hug.
Perfect Occasions for Your No-Bake Cheesecake Delight
From birthdays to holidays, this cheesecake fits any occasion. It’s perfect for summer barbecues, holiday parties, or even as a surprise treat for your loved ones. I once made it for a last-minute dinner party, and my guests couldn’t believe how effortlessly elegant it looked. Trust me, this dessert is a crowd-pleaser every single time.
Ingredients for Your No-Bake Cheesecake Delight
Here’s what you’ll need to whip up this masterpiece:
- For the biscuit floor:
- 200 g butter cookies
- 100 g butter
- For the cheesecake mass:
- 200 g of cream
- 600 g cream cheese
- 200 g of sour cream
- 150 g of sugar
- 1 pack vanilla sugar
- 4 leaves gelatin
- 2 tablespoons of lemon juice
Substitution Options
Not everyone has the same ingredients on hand, so here are some swaps:
- Butter cookies: Use graham crackers or digestive biscuits.
- Cream cheese: Substitute with mascarpone for a richer texture.
- Sour cream: Plain Greek yogurt works just as well.
- Gelatin leaves: Use powdered gelatin according to package instructions.
Step 1: Prepare the Biscuit Floor
Start by grinding the butter cookies into fine crumbs. I use my food processor, but if you don’t have one, a freezer bag and rolling pin work wonders. Melt the butter slowly in a saucepan—don’t rush it, or it might burn. Mix the crumbs and butter until they resemble wet sand. Press the mixture firmly into the bottom of a springform pan lined with baking paper. Pop it in the fridge to chill while you tackle the next steps. Pro tip: Use the back of a spoon to press the crumbs evenly for a smooth finish.
Step 2: Whip Up the Cheesecake Mass
In a large bowl, beat the cream until it forms soft peaks. Set it aside for now. In another bowl, mix the cream cheese, sour cream, sugar, and vanilla sugar until smooth and creamy. The aroma of vanilla mingling with the tangy cream cheese is heavenly. Soak the gelatin leaves in cold water for about 3 minutes—they’ll soften and become pliable. Meanwhile, gently heat the lemon juice in a small saucepan, but don’t let it boil. The citrus scent will make your kitchen smell amazing.
Step 3: Incorporate the Gelatin
Squeeze the excess water from the gelatin leaves and add them to the warm lemon juice. Stir gently until the gelatin dissolves completely. Take a couple of spoonfuls of the cheesecake mixture and stir it into the gelatin to temper it. This prevents lumps from forming later. Slowly pour the gelatin mixture back into the main bowl, stirring constantly. Fold in the whipped cream with a light touch to keep the airy texture intact. Your filling should look glossy and inviting.
Step 4: Assemble and Chill
Pour the cheesecake mass over the chilled biscuit floor. Smooth the top with a spatula for a polished look. Cover the pan with plastic wrap and refrigerate for at least 3 hours—or overnight if you can wait that long. The waiting is the hardest part, but trust me, it’s worth it. When you finally slice into it, the layers will be perfectly set and ready to delight your taste buds.
Timing Breakdown
- Prep Time: 20 minutes
- Chilling Time: 3 hours (minimum)
- Total Time: 3 hours 20 minutes
Chef’s Secret
For an extra burst of flavor, brush the biscuit floor with a thin layer of apricot jam before adding the filling. It adds a subtle sweetness and a beautiful golden hue.
An Interesting Fact About Cheesecake
Did you know that the earliest known cheesecake recipe dates back to 230 AD? Ancient Greeks served it to athletes during the first Olympic Games as an energy booster. While our modern version is more indulgent than energizing, it’s still a winner in my book!
Necessary Equipment
To make this No-Bake Cheesecake Delight, you’ll need:
- A food processor or rolling pin
- A springform pan (Ø 26 cm)
- A small saucepan
- A mixing bowl and spatula
- A whisk or electric mixer
Storage Tips
This cheesecake stores beautifully in the fridge. Keep it covered with plastic wrap or in an airtight container to prevent it from absorbing odors. It stays fresh for up to 3 days, though it rarely lasts that long in my house!
If you want to freeze it, wrap individual slices tightly in plastic wrap and place them in a freezer-safe bag. They’ll keep for up to 2 months. Just thaw them in the fridge overnight before serving.
Always serve it chilled—it’s the secret to achieving that perfect creamy texture.
Tips and Advice
- Use room-temperature cream cheese for easier mixing.
- Don’t skip chilling the crust—it helps it hold together better.
- For a decorative touch, garnish with fresh berries or a drizzle of chocolate sauce.
Presentation Ideas
- Serve each slice with a dollop of whipped cream and a sprinkle of lemon zest.
- Add a side of strawberry or blueberry sauce for a pop of color.
- Dust the top with powdered sugar using a stencil for a professional look.
Healthier Alternatives
If you’re looking to lighten things up, try these variations:
- Low-Sugar Version: Replace sugar with a sugar substitute like stevia or monk fruit.
- Vegan Option: Use coconut cream, vegan cream cheese, and agar-agar instead of gelatin.
- Gluten-Free Crust: Swap butter cookies for gluten-free cookies or almond flour.
- Protein-Packed: Add a scoop of vanilla protein powder to the filling.
- Fruit-Infused: Mix mashed strawberries or mango puree into the cheesecake mass.
- Chocolate Lover’s Dream: Melt dark chocolate and swirl it into the filling before chilling.
Mistake 1: Overmixing the Filling
Overmixing can deflate the whipped cream, leaving your cheesecake flat and dense. To avoid this, fold the cream in gently, using a spatula rather than a whisk. Think of it as coaxing the ingredients together, not beating them into submission.
Mistake 2: Skipping the Gelatin Soak
Gelatin needs time to soften before it dissolves properly. If you skip soaking it, you might end up with lumpy filling. Always soak the leaves in cold water for at least 3 minutes. Patience pays off here!
Mistake 3: Rushing the Chilling Process
Chilling is crucial for setting the cheesecake. If you cut into it too soon, it won’t hold its shape. Plan ahead and give it plenty of time in the fridge. Trust me, good things come to those who wait.
Frequently Asked Questions
Can I use powdered gelatin instead of leaves?
Yes, you can! For every leaf, use about 1 teaspoon of powdered gelatin. Follow the package instructions for proper blooming and dissolving.
What if I don’t have a springform pan?
No problem! A regular round cake pan works too. Just line it with parchment paper for easy removal.
How do I prevent the crust from being too crumbly?
Make sure you press the crust firmly into the pan. Using the back of a spoon or a flat-bottomed glass helps compact it evenly.
Can I make this cheesecake ahead of time?
Absolutely! This No-Bake Cheesecake Delight is perfect for making a day in advance. In fact, letting it sit overnight enhances the flavors.
Is there a dairy-free option?
Yes! Swap the cream cheese and sour cream for plant-based alternatives like cashew cream or coconut yogurt.
Why does my cheesecake taste grainy?
Graininess usually happens when the sugar isn’t fully dissolved. Make sure to mix the filling thoroughly until it’s silky smooth.
Can I freeze this cheesecake?
Yes, freezing is a great way to store leftovers. Just wrap the slices individually and thaw them in the fridge before serving.
What’s the best way to slice it neatly?
Dip a sharp knife in hot water, then wipe it dry before slicing. Repeat between cuts for clean edges.
How can I add more flavor to the crust?
Try adding a pinch of cinnamon or a tablespoon of cocoa powder to the crumb mixture for an extra kick.
What toppings pair well with this cheesecake?
Fresh fruits, caramel sauce, or a dusting of cocoa powder are all fantastic choices. Get creative!
Final Thoughts
This No-Bake Cheesecake Delight is proof that simplicity and elegance can go hand in hand. Whether you’re a seasoned cook or a newbie in the kitchen, this recipe is sure to bring joy to your table. So grab your ingredients, crank up your favorite playlist, and get ready to wow your friends and family with this creamy, dreamy dessert.
Equipment
- Mixing bowl
- Whisk or electric mixer
- Spatula
- Springform pan (Ø 26 cm)
- Small saucepan
Ingredients
- 200 g butter cookies
- 100 g butter
- 200 g cream
- 600 g cream cheese
- 200 g sour cream
- 150 g sugar
- 1 pack vanilla sugar
- 4 leaves gelatin
- 2 tablespoons lemon juice
Instructions
- Grind the butter cookies into fine crumbs and melt the butter slowly in a saucepan.
- Mix the crumbs and melted butter until they resemble wet sand and press into the bottom of a lined springform pan; chill in the fridge.
- In a large bowl, beat the cream until soft peaks form, then set aside.
- In another bowl, mix cream cheese, sour cream, sugar, and vanilla sugar until smooth.
- Soak the gelatin leaves in cold water for 3 minutes and heat the lemon juice gently in a small saucepan.
- Squeeze the gelatin leaves and add them to the warm lemon juice, stirring until dissolved.
- Temper the gelatin mixture with a spoonful of the cheesecake mixture, then add it back into the main bowl and stir.
- Gently fold in the whipped cream until fully incorporated.
- Pour the cheesecake mass over the chilled biscuit crust and smooth the top.
- Cover and refrigerate for at least 3 hours or overnight until set.