
My No-Bake Cheesecake Delight: The Lifesaver for Lazy Sunday Cravings
Ever had one of those days where you’re craving something creamy, dreamy, and indulgent, but the thought of turning on the oven feels like a monumental task? That was me last Sunday. My family was buzzing with “I want dessert!” pleas, and my energy was at an all-time low. That’s when this No-Bake Cheesecake Delight became my kitchen superhero. It’s pure, creamy magic that sets in the fridge while you put your feet up. Trust me, it’s the ultimate crowd-pleaser that looks like you spent hours, when really, you spent most of the time relaxing!
A Slice of History: From Ancient Greece to My Kitchen Counter
Cheesecake has a rich history, dating all the way back to ancient Greece! Of course, their version was a far cry from our creamy, no-bake dream. Traditional cheesecakes were often baked, requiring precision and patience. This no-bake version is a modern miracle, born from our love for instant gratification and cool, refreshing desserts. It takes the classic, elegant concept of cheesecake and makes it utterly accessible for any home cook, any day of the week. In my home, it’s become the “emergency celebration” cake for birthdays, good report cards, or just because it’s Tuesday.
Why You’ll Adore This No-Bake Cheesecake Recipe
You will fall in love with this recipe for so many reasons! First, it’s incredibly forgiving. No worries about cracks, water baths, or over-baking. Second, the texture is unbelievably light and silky. It melts in your mouth with a perfect balance of sweet and tangy. Best of all, it’s a make-ahead marvel. You can prepare it in the morning (or the night before) for a stress-free dessert that’s ready when you are. It’s the perfect blank canvas for all your favorite toppings, from fresh berries to a rich chocolate drizzle.
Perfect Occasions for Your Cheesecake Masterpiece
This cheesecake is your secret weapon for almost any gathering! It’s a star at summer picnics because it’s served chilled and requires no oven on a hot day. Bring it to potlucks where it will stand out on the dessert table. It’s ideal for a girls’ night in, paired with a funny movie. I love making it for weekend family dinners—it feels special without any special effort. Honestly, its perfect occasion is “anytime you deserve a treat.”
Gathering Your Ingredients for No-Bake Success
Let’s talk about what you need. Using simple, quality ingredients is the key to the best flavor. Here’s your shopping list for this easy no-bake cheesecake:
For the Oreo Crust:
- 30 Oreo cookies (cream filling included!) – This gives the crust that deep chocolate flavor and lovely dark color.
- 6 tablespoons unsalted butter, melted – This is the glue that holds our crunchy crust together.
For the Creamy Filling:
- 3 blocks (8 oz each) full-fat cream cheese, at room temperature – This is non-negotiable for a smooth, lump-free filling.
- 3/4 cup powdered sugar – It dissolves instantly for a silky texture.
- 1 cup heavy whipping cream – Chilled straight from the fridge, please!
- 1 teaspoon pure vanilla extract – The flavor enhancer.
- Extra whipped cream for topping (optional) – Because more cream is always a good idea.
Smart Ingredient Swaps & Substitutions
Don’t panic if you’re missing something! This recipe is wonderfully adaptable.
- Oreos: Use regular graham crackers, digestive biscuits, or even vanilla wafers. You’ll need about 2 1/2 cups of crumbs.
- Heavy Cream: For a lighter version, you can use well-chilled coconut cream (the solid part from a can) for a dairy-free twist.
- Powdered Sugar: You can use granulated sugar, but blend it with the cream cheese for much longer to avoid grittiness.
- Add-Ins: Feel free to fold in lemon zest, a swirl of Nutella, or some crushed berries after the filling is made.
Creating Your No-Bake Cheesecake Delight: Step-by-Step
Step 1: Building the Chocolatey Crust
Start by turning those Oreos into fine, dark crumbs. I use my food processor—it’s quick and creates an even texture. Listen to that satisfying crunch! In a bowl, pour the melted butter over the crumbs. Mix it with a fork until every single crumb is moistened and looks like dark, damp sand. Now, press this mixture firmly into the bottom and up the sides of a 9-inch springform pan. Use the bottom of a measuring cup to get it nice and even. Pop this in the fridge to chill and firm up. A solid, cold crust is your foundation for perfect slices later.
Pro tip: Don’t just press down; press the crumbs *up* the sides firmly. This creates a sturdy wall to hold all that luscious filling.
Step 2: Whipping Up the Dreamy Filling
This is where the magic happens! In a large mixing bowl, beat the room-temperature cream cheese with a hand mixer or stand mixer until it’s completely smooth and creamy. No lumps allowed! Scrape down the bowl. Now, sift in the powdered sugar and beat again. Watch it transform into a pale, fluffy cloud. Add the vanilla extract. Now, with the mixer running on medium-high, slowly pour in the cold heavy cream in a steady stream. Keep beating until the mixture thickens dramatically and holds stiff peaks. It should look like the most luxurious whipped cream you’ve ever seen.
Chef’s tip: Everything must be at the right temperature. Cold cream whips better, and room-temp cream cheese blends smoothly. This is the secret to a filling that’s airy, not dense.
Step 3: Assembling and the Big Chill
Pull your chilled crust from the fridge. Spoon the glorious cheesecake filling into the center. Gently spread it out with a spatula, working from the middle out, to push any air bubbles to the edge. Smooth the top into beautiful, soft waves or make it perfectly flat. Now, the hardest part: waiting. Cover the pan and refrigerate your cheesecake for at least 6 hours, or overnight. This rest time is crucial for the flavors to meld and the texture to become perfectly sliceable.
Step 4: The Grand Finale – Serving!
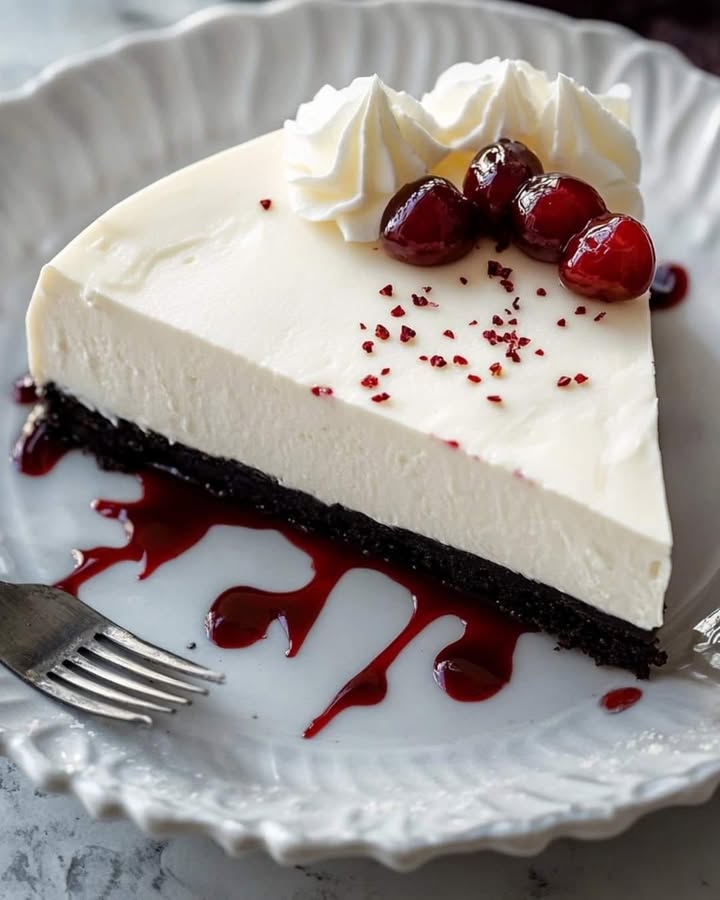
When you’re ready to serve, run a thin knife around the inside edge of the springform pan. Carefully unclasp the ring and lift it away. If you like, pipe or dollop some fresh whipped cream on top. For a gorgeous presentation, add a few fresh berries or a dusting of cocoa powder. Use a sharp knife dipped in hot water (and wiped dry) for impeccably clean slices. Then, just savor the creamy, cool, and utterly divine result of your (not-so-hard) work!
Your Cheesecake Timeline: From Bowl to Belly
- Prep Time: 20 minutes (it’s so quick!)
- Chill Time: 6 hours minimum (overnight is best)
- Total Time: 6 hours 20 minutes (mostly hands-off)
- Servings: 10 happy people
A Baker’s Secret for Supreme Stability
Want an even more foolproof, slice-perfect cheesecake? Add a tiny bit of structure. After whipping your filling to stiff peaks, sprinkle 1 teaspoon of unflavored gelatin powder over 2 tablespoons of cold water in a small dish. Let it bloom for 5 minutes, then microwave for 10-15 seconds until liquid. Stir a spoonful of the cheesecake filling into the gelatin, then fold it all back into the main bowl. This little trick guarantees your cheesecake will hold its shape beautifully, even on a warm day.
A Fun Fact About Your Main Ingredient
Did you know that cream cheese as we know it was invented in New York in 1872? A dairyman named William Lawrence was actually trying to make a French cheese called Neufchâtel but accidentally added too much cream. His “mistake” resulted in a richer, spreadable cheese that eventually became the star of the iconic New York cheesecake—and our beloved no-bake version!
Tools You’ll Need for No-Bake Bliss
- 9-inch springform pan (the MVP for easy removal)
- Food processor or zip-top bag and rolling pin (for the crust)
- Large mixing bowl and electric hand mixer or stand mixer
- Spatula (for scraping and smoothing)
- Measuring cups and spoons
Keeping Your Cheesecake Fresh and Fabulous
In the Refrigerator: Your cheesecake will keep wonderfully in the fridge for up to 5 days. Make sure it’s tightly covered with plastic wrap or stored in an airtight container to prevent it from absorbing other flavors. The crust may soften slightly after a couple of days, but it will still taste amazing.
Can You Freeze It? Absolutely! This no-bake cheesecake freezes like a dream. Wrap the whole cheesecake or individual slices tightly in plastic wrap, then again in foil. Freeze for up to 2 months. Thaw overnight in the refrigerator before serving. This is a fantastic trick for always having a homemade dessert on hand for unexpected guests.
Serving After Storage: Let the cheesecake sit at room temperature for about 15 minutes before slicing and serving after refrigeration. This slight warming makes the texture even creamier. Always use a clean knife for each cut to keep the slices looking neat.
Pro Tips for a Flawless Dessert Every Time
- Patience with the Cream Cheese: Let it sit on the counter for a good 1-2 hours. Room temperature cream cheese blends smoothly and prevents lumps.
- Chill Your Bowl: For even faster whipping, pop your mixing bowl and beaters in the freezer for 15 minutes before whipping the cream and cheese.
- Avoid Overbeating: Once stiff peaks form in the filling, stop mixing! Overbeating can make the filling grainy or cause it to separate.
- Slice with Heat: For picture-perfect slices, dip your knife in a glass of hot water, wipe it dry, then cut. Repeat for each slice.
Presentation Ideas to Wow Your Guests
- Create a berry medley on top with strawberries, blueberries, and raspberries.
- Drizzle with warm caramel or chocolate sauce just before serving.
- For a festive touch, sprinkle with crushed candy canes (winter) or edible flowers (spring).
- Serve with a side of my colorful Layered Summer Fruit Salad for a refreshing contrast.
- Make individual servings in glasses or mason jars for a party.
Mix It Up! 6 Delicious Recipe Variations
Once you’ve mastered the classic, the flavor world is your oyster! Here are six delicious spins on your no-bake cheesecake delight:
- Lemon Berry Bliss: Add 2 tablespoons of lemon zest and 2 tablespoons of lemon juice to the filling. Top with a fresh mixed berry compote.
- Cookies & Cream: Fold 1 cup of crushed Oreo pieces into the filling after whipping. Use an Oreo crust for double the chocolate cookie goodness.
- Salted Caramel Pretzel: Use a crust made from crushed pretzels and brown sugar. Swirl salted caramel sauce into the filling and drizzle more on top.
- Tropical Mango: Fold 1 cup of finely diced ripe mango into the filling. Use a graham cracker crust and top with toasted coconut flakes.
- Chocolate Hazelnut: Swirl a generous 1/2 cup of Nutella into the filling. Top with chopped, toasted hazelnuts for a crunch. For another decadent chocolate option, our Red Velvet Cheesecake is always a showstopper.
- Pumpkin Spice: Perfect for fall! Fold 3/4 cup of pumpkin puree and 2 teaspoons of pumpkin pie spice into the filling.
Common Mistakes to Avoid for No-Bake Perfection
Mistake 1: Using Cold Cream Cheese
This is the number one reason for a lumpy, gritty cheesecake filling. Cold cream cheese will never blend smoothly with the sugar and cream. You’ll end up with little lumps no matter how long you beat it. To avoid this, take the cream cheese out of the fridge at least 1-2 hours before you start. It should feel soft and pliable to the touch. If you’re short on time, you can microwave the unopened blocks on low power for 10-15 seconds, but be very careful not to melt it.
Mistake 2: Not Whipping the Cream to Stiff Peaks
If your cheesecake filling is runny and won’t set, the heavy cream likely wasn’t whipped enough. The whipped cream is what gives the cheesecake its structure and airy texture. You need to beat it until it forms distinct, firm peaks that stand straight up when you lift the beaters. Soft, droopy peaks won’t provide enough support. Make sure your cream and mixing bowl are very cold to help it whip up quickly and firmly.
Mistake 3: Rushing the Chill Time
Impatience is the enemy of no-bake cheesecakes! Pulling it out of the fridge after just an hour or two will result in a delicious but soupy mess. The cheesecake needs ample time for the fat in the cream cheese and cream to firm up. A minimum of 6 hours is essential, but overnight is truly ideal. This long chill ensures every slice will be neat and hold its shape on the plate. Plan ahead—it’s worth the wait.
Mistake 4: A Soggy or Crumbly Crust
A great crust should hold together in slices but still have a slight crunch. A soggy crust often means not enough butter or pressing it in too loosely. A crumbly crust means too much butter or not pressing it firmly enough. The key is to mix until the crumbs look like wet sand, then really pack it into the pan using the bottom of a cup. Chilling it before adding the filling is a non-negotiable step to pre-set it.
Your No-Bake Cheesecake Questions, Answered!
Can I make this cheesecake dairy-free?
Yes, you can! For a dairy-free no-bake cheesecake, use dairy-free cream cheese (available at most grocery stores) and full-fat coconut cream in place of the heavy whipping cream. Make sure to chill the can of coconut cream overnight and scoop out only the solid part that has separated to the top. The flavor will have a slight coconut taste, which works wonderfully with flavors like chocolate or mango. Use a vegan butter substitute for the crust and check that your cookies are vegan-friendly.
Why did my cheesecake turn out too soft?
A soft cheesecake is usually due to one of three things: under-whipped cream, insufficient chill time, or warm ingredients. If the heavy cream was only whipped to soft peaks, it won’t provide enough structure. The most common fix is simply to chill it longer—sometimes a full 12 hours is needed, especially in a humid kitchen. Also, ensure your mixing bowl and beaters were cold before whipping. If it’s still too soft after a full night in the fridge, the fat content in your cream or cream cheese might have been too low.
How can I prevent cracks in a no-bake cheesecake?
Great news! Cracks are almost never a problem with no-bake cheesecakes since there’s no oven heat to cause stress and shrinkage. The only way you might get a crack is if you severely overbeat the filling, causing it to break and separate. Following the instructions to beat just until stiff peaks form will give you a smooth, crack-free surface every single time. This is one of the major joys of no-bake desserts—they are so forgiving.
Can I use granulated sugar instead of powdered sugar?
You can, but it’s not ideal. Powdered sugar (confectioners’ sugar) contains a little cornstarch which helps thicken the filling slightly, and it dissolves instantly for a silky texture. Granulated sugar can leave a faint gritty texture if not blended extremely thoroughly. If you must substitute, blend the room-temperature cream cheese and granulated sugar together for a full 3-4 minutes on high before adding any other ingredients to help the sugar dissolve as much as possible.
What’s the best way to store leftovers?
Leftover cheesecake should always be stored in the refrigerator, covered tightly with plastic wrap or in an airtight container. It will keep well for up to 5 days. You can also freeze individual slices for up to 2 months. Wrap each slice in plastic wrap, then place them in a freezer bag or container. Thaw in the fridge overnight. Remember, practicing good storage is part of preventing foodborne illness and keeping your delicious dessert safe to eat.
Can I double this recipe?
Absolutely! Doubling the recipe works perfectly if you need to feed a larger crowd. You will need to use a larger springform pan, such as a 10-inch or even a 9×13 inch rectangular pan. The preparation steps are exactly the same, but you may need to mix the filling in two batches if your mixer bowl isn’t large enough. The chilling time will remain roughly the same—just ensure the center feels very firm before serving.
My crust stuck to the pan! How do I prevent this?
To ensure easy release, consider lining your springform pan. You can place a round piece of parchment paper on the bottom plate before clamping on the ring. For the sides, a narrow strip of parchment paper around the edge can help, though it’s not always necessary. The most important step is to properly unclasp and carefully lift the ring straight up after running a knife around the edge. If the bottom sticks, you can slide a large, thin spatula or a cake lifter underneath.
What can I use if I don’t have a springform pan?
No springform pan? No problem! You can use a regular 9-inch pie dish. The slices won’t come out as neatly, but it will taste just as wonderful. Another great option is to make cheesecake bars in a 9×9 or 9×13 inch baking pan lined with parchment paper (with overhang on the sides). This makes it super easy to lift the entire cheesecake out and cut it into squares. Individual serving dishes or glasses are also a fun and elegant solution.
Is it necessary to use full-fat cream cheese?
For the best texture and stability, yes, full-fat cream cheese is highly recommended. Low-fat or Neufchâtel cheese has more water and less fat. This can lead to a looser filling that may not set as firmly and can have a slightly different, sometimes tangier, flavor. The fat in full-fat cream cheese is what gives the cheesecake its rich, creamy mouthfeel and helps it hold its shape. Stick with the full-fat blocks for guaranteed success.
How far in advance can I make this?
This cheesecake is an excellent make-ahead dessert. You can prepare it up to two days in advance. In fact, making it the day before is encouraged, as the flavors have more time to develop and the texture becomes perfect. Just keep it covered in the refrigerator until you’re ready to serve. If you want to explore more incredible options, our full collection of delectable cheesecake recipes is waiting for you, from baked classics to other no-bake wonders.
Go Forth and Create Something Creamy!
And there you have it! Your complete guide to a stunning, fuss-free No-Bake Cheesecake Delight. This recipe is all about creating joy without the stress. It’s the dessert that says “I care” without saying “I spent all day in the kitchen.” Whether you stick with the classic or try one of the fun variations, you’re in for a treat. So, grab those Oreos, soften that cream cheese, and get ready for the compliments to roll in. Happy no-baking!
Equipment
- Grand bol
- Fouet électrique
- Spatule
- Moule à charnière 9 pouces
- Rouleau à pâtisserie
Ingredients
- 30 biscuits Oreo
- 6 c. à soupe beurre non salé, fondu
- 3 g fromage à la crème entier, à température ambiante
- 3/4 tasse sucre glace
- 1 tasse crème épaisse, froide
- 1 c. à café extrait de vanille
- q.s. crème fouettée pour la garniture facultatif
Instructions
- Émiettez les biscuits Oreo en fines miettes à l'aide d'un robot culinaire ou d'un sac en plastique et d'un rouleau à pâtisserie.
- Dans un bol, mélangez le beurre fondu avec les miettes de biscuits jusqu'à ce que toutes les miettes soient humidifiées.
- Appuyez fermement sur le mélange au fond et sur les côtés d'un moule à charnière de 9 pouces et réfrigérez pour refroidir.
- Dans un grand bol, battez le fromage à la crème à température ambiante jusqu'à obtenir une texture lisse et crémeuse.
- Tamisez-y le sucre glace et battez jusqu'à ce que le mélange soit léger et aéré.
- Ajoutez l'extrait de vanille et versez la crème épaisse froide tout en mélangeant à vitesse moyenne-élevée, jusqu'à ce que le mélange épaississe et forme des pics fermes.
- Versez la garniture de cheesecake dans la croûte refroidie, en lissant le dessus.
- Couvrez et réfrigérez pendant au moins 6 heures ou toute la nuit pour qu'elle prenne.
- Lorsque vous êtes prêt à servir, passez un couteau autour du bord et libérez délicatement le moule à charnière.
- Garnissez de crème fouettée et de tout autre garniture souhaitée avant de servir.
Notes
Nutrition

Hi, I’m Olivia Parker, the founder of BakingSecret.com and a lifelong lover of all things sweet and homemade. I grew up in a small town in Oregon, where the smell of fresh cookies in my family’s kitchen sparked my passion for baking. Over the years, I turned that passion into a mission: to help home bakers feel confident, inspired, and creative.
After studying food science and working in several artisan bakeries across the U.S., I decided to create a space where everyone from beginners to seasoned bakers can find reliable recipes, expert tips, and a warm, welcoming community. BakingSecret.com is my way of sharing the magic of baking with the world. When I’m not testing new recipes, you’ll find me exploring farmers’ markets, collecting vintage cookbooks, or perfecting my sourdough technique.