
Why This No-Bake Chocolate Cheesecake is a Game Changer
Let me tell you about the time I stumbled upon this **No-Bake Chocolate Cheesecake** recipe. It was one of those days when my oven decided to take an unscheduled vacation, and I was craving something decadent. Lo and behold, this creamy, dreamy dessert saved the day! Not only is it rich in flavor, but it’s also ridiculously easy to make. Whether you’re a seasoned baker or just starting out, this recipe will quickly become your go-to for satisfying chocolate cravings without breaking a sweat.
A Little History of This Decadent Treat
Cheesecakes have been around for centuries—seriously, the ancient Greeks were whipping up versions of this dessert way back when. But this no-bake twist? Pure modern genius. The combination of chocolate and cream cheese creates a silky texture that feels like a warm hug for your taste buds. As for the coffee? That little splash elevates the chocolate flavor, making it taste even more intense. I first made this for a family gathering, and let me tell you, it disappeared faster than I could snap a picture!
Why You’ll Love This Recipe
What’s not to love? This **No-Bake Chocolate Cheesecake** is creamy, cold, and packed with chocolate goodness. Plus, there’s no need to turn on your oven—a win for hot summer days or when you’re just feeling lazy. The best part? It’s surprisingly simple to make. With just a few ingredients and some patience (you’ll need to chill it), you can whip up a dessert that looks like it came from a fancy bakery.
Perfect Occasions to Whip Up This Dessert
This cheesecake is perfect for any occasion—or no occasion at all! Bring it to a potluck, serve it at a dinner party, or enjoy it as a midnight snack (no judgment here). It’s especially great for holidays like Valentine’s Day or birthdays when you want to impress without spending hours in the kitchen. Trust me, your friends and family will be begging for the recipe.
Ingredients You’ll Need
Here’s what you’ll need to create this magical dessert:
For the Base:
- 150 g vanilla cookies (Lincoln type)
- 50 g melted butter
- 1 tablespoon sugar
- 2 tablespoons bitter cocoa powder
For the Filling:
- 400 g semi-sweet chocolate
- 300 g cream cheese (like Philadelphia)
- 45 g sugar
- 2 tablespoons liquid coffee
- 350 g whipping cream
Substitution Options
Not everyone has the exact ingredients on hand, and that’s okay! Here are some swaps you can try:
- Use digestive biscuits instead of vanilla cookies for a slightly less sweet base.
- If you’re out of liquid coffee, instant espresso dissolved in water works just fine.
- Swap semi-sweet chocolate for dark chocolate if you prefer a bolder flavor.
- Coconut oil can replace butter for a dairy-free option.
Step-by-Step Preparation
Step 1: Make the Base
Crush those vanilla cookies into crumbs—not too fine, though; we want a bit of texture. Mix them with cocoa powder, sugar, and melted butter until it resembles wet sand. Press this mixture firmly into the bottom of a 20 cm removable mold. Pop it in the fridge while you work on the filling. Pro tip: Use the bottom of a glass to press the base evenly—it makes a huge difference!
Step 2: Prepare the Filling
Melt the chocolate gently in the microwave or over a double boiler. Meanwhile, beat the cream cheese, sugar, and coffee until smooth and creamy—it should look like a fluffy cloud. Fold in the melted chocolate carefully to avoid lumps. In another bowl, whip the cream until stiff peaks form, then gently fold it into the chocolate mixture. The result? A velvety, chocolatey filling that’s almost too tempting to save for later.
Step 3: Assemble and Chill
Pour the filling onto the chilled base and smooth it out with a spatula. Cover the mold with plastic wrap and let it chill in the fridge for at least 4–6 hours, though overnight is ideal. Patience is key here—the longer it chills, the better it sets. Trust me, it’s worth the wait.
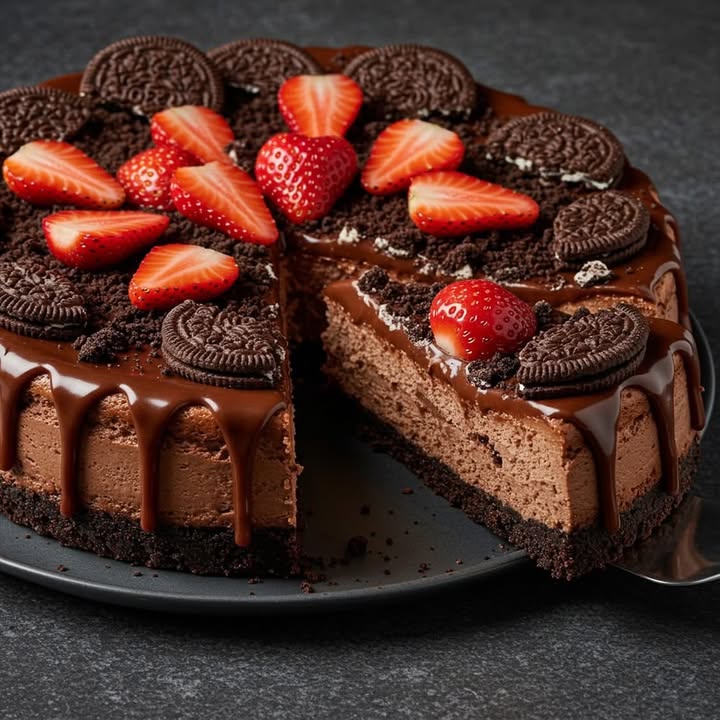
Step 4: Decorate and Serve
Before serving, get creative with toppings. Drizzle ganache, sprinkle chocolate chips, or add fresh berries for a pop of color. Slice it up and watch everyone’s eyes light up as they take their first bite.
Chef’s Secret
Here’s a little secret: Add a pinch of salt to the chocolate filling. It enhances the sweetness and balances the richness, making every bite absolutely irresistible.
Timing Breakdown
- Prep Time: 20 minutes
- Chilling Time: 4–6 hours (or overnight)
- Total Time: About 5 hours
Extra Info
Did you know that chocolate releases endorphins, which make you feel happy? So technically, eating this cheesecake is like giving yourself a mood boost. How’s that for justification?
Necessary Equipment
You don’t need much to make this recipe shine:
- Removable-bottom cake pan (20 cm)
- Mixing bowls
- Electric mixer or whisk
- Spatula
- Plastic wrap
Storage Tips
Once assembled, keep your **No-Bake Chocolate Cheesecake** in the fridge, covered with plastic wrap or in an airtight container. It stays fresh for up to 3–4 days, though it rarely lasts that long in my house! If you need to store it longer, freeze slices individually wrapped in parchment paper and foil. They’ll keep for up to a month.
When serving leftovers, let the cheesecake sit at room temperature for 5–10 minutes to soften slightly. This brings back its creamy texture. And remember, always use a sharp knife dipped in hot water for clean slices—your presentation will thank you.
Tips and Advice
- Make sure your cream cheese is at room temperature before mixing—it blends smoother.
- Don’t skip the chilling step! It’s crucial for setting the filling.
- Experiment with different toppings to match the season or your mood.
Presentation Ideas
Presentation matters, even for a no-fuss dessert like this. Try these ideas:
- Dust powdered sugar over the top for an elegant touch.
- Arrange fresh raspberries or strawberries around the edges.
- Drizzle caramel sauce or melted white chocolate in zigzag patterns.
Healthier Alternatives
If you’re looking to lighten things up, here are six variations:
- Low-Sugar Version: Use sugar substitutes like stevia or erythritol in both the base and filling.
- Vegan Option: Replace cream cheese with cashew cream and use coconut cream instead of whipping cream.
- Gluten-Free Base: Swap vanilla cookies for gluten-free alternatives.
- Protein-Packed: Add a scoop of chocolate protein powder to the filling.
- Fruit-Infused: Mix pureed strawberries or bananas into the filling for a fruity twist.
- Nutty Delight: Stir chopped nuts like almonds or hazelnuts into the base for added crunch.
Common Mistakes to Avoid
Mistake 1: Overmixing the Filling
Overmixing can cause the filling to lose its airy texture. Be gentle when folding in the whipped cream, and stop as soon as everything is combined. Pro tip: Use a spatula instead of a whisk for this step.
Mistake 2: Skipping the Chilling Step
Rushing the chilling process will leave you with a messy, un-set cheesecake. Give it the full 4–6 hours (or overnight) to firm up properly.
Mistake 3: Using Cold Cream Cheese
Cold cream cheese won’t blend smoothly, leaving lumps in your filling. Take it out of the fridge an hour before you start.
FAQs
Can I use milk chocolate instead of semi-sweet?
Absolutely! Milk chocolate will make the cheesecake sweeter, so adjust the sugar accordingly.
How do I prevent the base from being too crumbly?
Make sure you press the base firmly into the mold and chill it before adding the filling. This helps it hold together.
Can I freeze this cheesecake?
Yes! Wrap individual slices tightly and freeze for up to a month. Thaw in the fridge before serving.
What can I use instead of liquid coffee?
Instant espresso dissolved in water works perfectly. Just make sure it’s cooled before adding it to the mix.
Is this recipe kid-friendly?
Definitely! Kids love the rich chocolate flavor, and since there’s no alcohol, it’s safe for all ages.
How do I know when the filling is ready?
The filling should be thick, creamy, and hold its shape when scooped. If it’s too runny, whip the cream a bit longer.
Can I make this in a springform pan?
Yes! A springform pan makes it easier to release the cheesecake once it’s set.
Why does my cheesecake have cracks?
Cracks usually happen if the filling isn’t mixed gently enough. Fold ingredients slowly to maintain airiness.
What’s the best way to cut clean slices?
Dip a sharp knife in hot water, wipe it dry, and slice through the cheesecake. Repeat between cuts for perfection.
Can I add fruit to the filling?
Sure thing! Pureed fruits like raspberries or mangoes add a lovely tang and color contrast.
Final Thoughts
There you have it—a **No-Bake Chocolate Cheesecake** that’s creamy, indulgent, and oh-so-easy to make. Whether you’re a busy parent, a novice baker, or just someone who loves chocolate, this recipe is guaranteed to impress. So grab your ingredients, put on some music, and treat yourself to a slice of heaven. After all, life’s too short not to indulge in a little sweetness!
Equipment
- Mixing bowls
- Electric mixer or whisk
- Spatula
- Removable-bottom cake pan (20 cm)
- Plastic wrap
Ingredients
- 150 g vanilla cookies (Lincoln type)
- 50 g melted butter
- 1 tablespoon sugar
- 2 tablespoons bitter cocoa powder
- 400 g semi-sweet chocolate
- 300 g cream cheese (like Philadelphia)
- 45 g sugar
- 2 tablespoons liquid coffee
- 350 g whipping cream
Instructions
- Crush the vanilla cookies into crumbs and mix with cocoa powder, sugar, and melted butter until it resembles wet sand.
- Press the mixture firmly into the bottom of a 20 cm removable mold and chill in the fridge.
- Melt the chocolate gently using a microwave or double boiler.
- Beat the cream cheese, sugar, and coffee in a mixing bowl until smooth and creamy.
- Fold the melted chocolate into the cream cheese mixture carefully.
- Whip the cream in another bowl until stiff peaks form, then gently fold it into the chocolate mixture.
- Pour the filling onto the chilled base and smooth it out with a spatula.
- Cover with plastic wrap and chill in the fridge for at least 4–6 hours, or overnight if possible.
- Before serving, decorate with toppings like ganache or fresh berries, and then slice and serve.