
Why This Peanut Butter Sheet Cake Is a Game-Changer
Picture this: you walk into your kitchen, and the smell of warm peanut butter and buttery cake fills the air. It’s like a hug in dessert form. That’s exactly what happened when I first baked this Peanut Butter Bliss. Let me tell you, it was love at first bite. My family couldn’t stop raving about how rich, creamy, and downright dreamy this cake is. Whether you’re a peanut butter fanatic or just looking for a crowd-pleasing dessert, this recipe is your golden ticket.
A Little History Behind the Peanut Butter Magic
Peanut butter has been a staple in American kitchens for over a century. It started as a protein-packed food for soldiers and quickly became a household favorite. Sheet cakes, on the other hand, have always been a go-to for potlucks and family gatherings because they’re easy to make and serve. Combining these two classics—peanut butter and sheet cake—is like creating a match made in dessert heaven. I’ve tried countless variations of peanut butter desserts, but this Peanut Butter Sheet Cake stands out because it’s simple yet indulgent.
Why You’ll Fall Head Over Heels for This Recipe
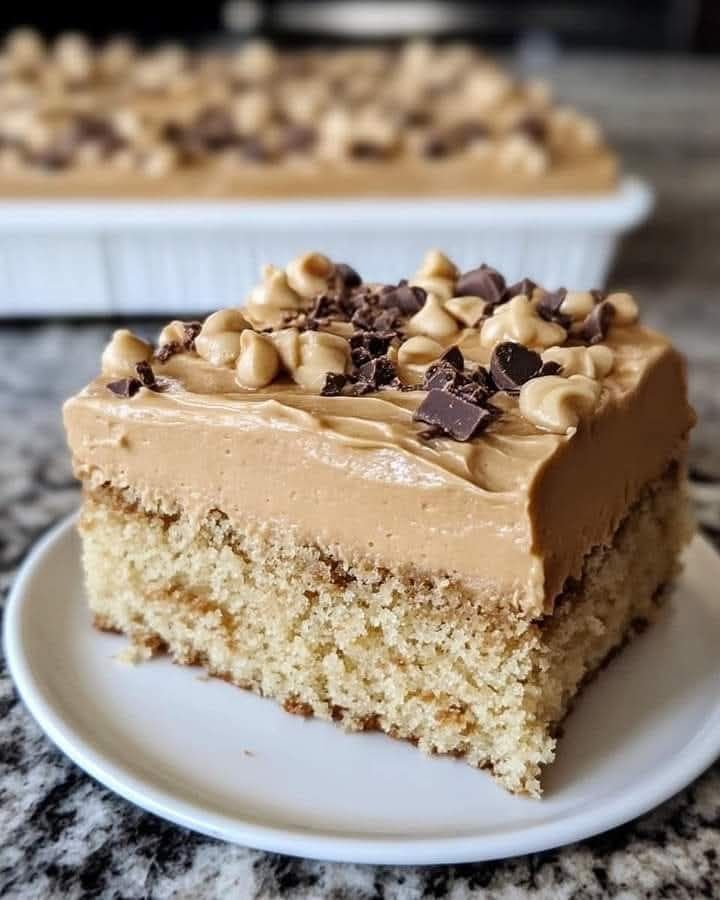
This cake is everything you want in a dessert: soft, moist, and packed with peanut butter flavor. The frosting? Oh, the frosting! It’s creamy, smooth, and melts into the warm cake like a dream. Plus, the recipe is beginner-friendly. No fancy techniques or hard-to-find ingredients here. Just a few bowls, a saucepan, and your trusty baking pan. It’s perfect for busy days when you need a quick treat or for special occasions when you want to impress.
Perfect Occasions to Whip Up This Peanut Butter Bliss
Whether it’s a birthday party, a holiday gathering, or just a random Tuesday night, this cake fits the bill. I once made it for a summer barbecue, and it disappeared faster than the potato salad. It’s also great for bake sales, office parties, or even as a sweet surprise for your family after dinner. Honestly, there’s no bad time to enjoy this Peanut Butter Bliss.
Ingredients You’ll Need
- 1 cup unsalted butter
- 2 large eggs
- 1/2 cup buttermilk
- 1/4 cup creamy peanut butter
- 1 teaspoon baking soda
- 3 cups powdered sugar
- 1 teaspoon vanilla extract
- 2 cups granulated sugar
- 2 cups all-purpose flour
- 1/2 teaspoon salt
- 1 cup water
- 1/2 cup whole milk
Substitution Options
If you’re out of buttermilk, mix 1/2 cup of regular milk with 1/2 tablespoon of lemon juice or vinegar. For a dairy-free version, swap the butter with vegan margarine and use almond or oat milk instead of whole milk. If you’re not a fan of creamy peanut butter, chunky works too, though the texture will be slightly different. And hey, if you’re cutting back on sugar, try using a sugar substitute like monk fruit or stevia.
Step 1: Preheat and Prep
Start by preheating your oven to 350°F (175°C). Grab a 15x10x1-inch baking pan and give it a good greasing. Trust me; this step ensures your cake slides out effortlessly later. I like to use parchment paper too—it’s a little extra effort that pays off big time.
Step 2: Mix Your Dry Ingredients
In a spacious mixing bowl, whisk together 2 cups of all-purpose flour, 2 cups of granulated sugar, 1 teaspoon of baking soda, and 1/2 teaspoon of salt. This dry mix is the backbone of your cake, so make sure everything is evenly distributed. Pro tip: Sifting the flour and sugar beforehand gives your cake an extra light texture.
Step 3: Melt the Butter and Peanut Butter
In a medium saucepan, combine 1 cup of water, 1 cup of unsalted butter, and 1/4 cup of creamy peanut butter. Heat it over medium-high heat, stirring constantly until the mixture comes to a gentle boil. The aroma of melting butter and peanut butter is absolutely intoxicating. Once it’s ready, pour it into your dry ingredients and stir until smooth.
Step 4: Add Wet Ingredients
Now, crack in 2 large eggs, pour in 1/2 cup of buttermilk, and add 1 teaspoon of vanilla extract. Mix everything until the batter is smooth and well-blended. You’ll notice the batter is thick but pourable, with a gorgeous pale beige color. Pour it into your prepared pan and spread it evenly. Chef’s tip: Use an offset spatula for a perfectly smooth surface.
Step 5: Bake to Perfection
Pop your pan into the preheated oven and bake for 18-22 minutes. Keep an eye on it—when a toothpick inserted into the center comes out clean, it’s done. The cake will have a golden-brown edge and a soft, springy center. While it bakes, let’s move on to the frosting!
Step 6: Make the Peanut Butter Frosting
In a small saucepan, melt 1/2 cup of unsalted butter with 1/4 cup of creamy peanut butter. Stir in 1/2 cup of whole milk and 1 teaspoon of vanilla extract. Gradually whisk in 3 cups of powdered sugar until the frosting is smooth and creamy. The warm frosting will be glossy and pourable, making it easy to spread over the hot cake.
Step 7: Frost and Serve
As soon as the cake comes out of the oven, pour the warm frosting over the top. Spread it gently with a spatula, letting it drip down the sides. Allow the cake to cool for a few moments before slicing into squares. The frosting will set slightly, creating a luscious, sticky layer that’s pure Peanut Butter Bliss.
Timing Breakdown
Preparation Time: 15 minutes
Cooking Time: 20 minutes
Total Time: About 35 minutes
Chef’s Secret
For an extra-rich flavor, toast your flour lightly in a dry skillet before mixing it into the batter. This simple trick enhances the nuttiness of the cake and adds a subtle depth to the overall taste.
An Interesting Tidbit
Did you know that peanut butter was once considered a luxury item? Back in the early 1900s, it was sold in fancy department stores and cost more than steak! Thankfully, today we can enjoy it in all its creamy glory without breaking the bank.
Necessary Equipment
- 15x10x1-inch baking pan
- Medium saucepan
- Spacious mixing bowl
- Whisk or electric mixer
- Offset spatula
Storage Tips
To keep your Peanut Butter Bliss fresh, store it in an airtight container at room temperature for up to 2 days. If you live in a warm climate, pop it in the fridge to prevent the frosting from getting too soft. For longer storage, wrap individual slices in plastic wrap and freeze them for up to 3 months. When you’re ready to enjoy, let the slices thaw at room temperature.
Proper storage ensures the cake stays moist and flavorful. Avoid leaving it uncovered, as it can dry out quickly. If you do refrigerate it, bring it back to room temperature before serving for the best texture.
One last tip: If you’re storing leftovers, place a piece of parchment paper between layers to prevent sticking. This way, every slice comes out perfect.
Tips and Advice
- Use room-temperature eggs for easier blending.
- Don’t overmix the batter—just stir until combined.
- Test the cake for doneness a minute or two before the timer goes off to avoid overbaking.
Presentation Ideas
Serve your Peanut Butter Sheet Cake on a rustic wooden board for a cozy vibe. Garnish with chopped peanuts or a drizzle of melted chocolate for extra flair. For themed parties, cut the cake into fun shapes using cookie cutters. A dusting of powdered sugar or a sprinkle of sea salt on top can elevate the look instantly.
Healthier Alternatives
Here are six ways to make this cake a bit lighter:
- Whole Wheat Flour: Swap half of the all-purpose flour with whole wheat flour for added fiber.
- Less Sugar: Reduce the granulated sugar by 1/4 cup without compromising the sweetness.
- Coconut Oil: Replace butter with coconut oil for a dairy-free option.
- Egg Substitute: Use flax eggs (1 tablespoon ground flaxseed + 2.5 tablespoons water per egg).
- Natural Sweeteners: Try honey or maple syrup instead of granulated sugar.
- Low-Fat Milk: Use skim or almond milk instead of whole milk.
Mistake 1: Overbaking the Cake
Overbaking is a common issue that leads to a dry cake. To avoid this, start checking for doneness a couple of minutes before the recommended time. Insert a toothpick—if it comes out clean or with a few crumbs, it’s ready. Pro tip: Ovens vary, so rely on visual cues and texture rather than just the timer.
Mistake 2: Skipping the Grease
Not greasing your pan properly can result in a stuck cake. Always grease generously and consider lining the pan with parchment paper for insurance. Trust me, it saves a lot of heartache later.
Mistake 3: Rushing the Frosting
Some folks rush the frosting process, spreading it unevenly. Take your time to ensure it’s smooth and covers the entire surface. Warm frosting spreads like a dream, so don’t let it cool too much before applying.
Frequently Asked Questions
Can I use crunchy peanut butter?
Absolutely! Crunchy peanut butter adds a delightful texture to both the cake and frosting. Just be aware that it might slightly alter the smoothness of the final product.
How do I make this gluten-free?
Substitute the all-purpose flour with a gluten-free flour blend. Ensure the blend contains xanthan gum for the right texture. Otherwise, add 1 teaspoon of xanthan gum to the dry ingredients.
Can I double the recipe?
Yes, doubling the recipe works perfectly. Just use a larger pan or divide the batter between two pans. Adjust the baking time accordingly, adding a few extra minutes if needed.
What’s the best way to reheat leftovers?
For reheating, microwave individual slices for 10-15 seconds. Cover with a damp paper towel to keep the cake moist during reheating.
Is this cake kid-friendly?
Definitely! Kids love the rich peanut butter flavor and soft texture. Just ensure there are no peanut allergies before serving.
Can I freeze the frosted cake?
Yes, wrap the frosted cake tightly in plastic wrap and foil. Freeze for up to 3 months. Thaw overnight in the fridge before serving.
Why did my frosting turn grainy?
Grainy frosting usually happens if the powdered sugar isn’t fully incorporated. Whisk vigorously and ensure all lumps are smoothed out before spreading.
What can I use instead of buttermilk?
Mix regular milk with a splash of lemon juice or vinegar. Let it sit for 5 minutes to thicken before using.
Can I make this cake ahead of time?
Yes, bake the cake a day in advance and store it unfrosted. Add the frosting just before serving to keep it fresh and gooey.
Does this cake need to be refrigerated?
It depends. In cooler climates, you can leave it at room temperature. In warmer environments, refrigerate to keep the frosting stable.
Final Thoughts
This Peanut Butter Sheet Cake is more than just a dessert—it’s a celebration of flavors, textures, and simplicity. Whether you’re baking for a crowd or treating yourself, this recipe delivers every time. So grab your ingredients, preheat that oven, and get ready to create some sweet memories. Happy baking!
Equipment
- Spacious mixing bowl
- Whisk or electric mixer
- Offset spatula
- 15x10x1-inch baking pan
- Medium saucepan
Ingredients
- 1 cup unsalted butter
- 2 large eggs
- 1/2 cup buttermilk
- 1/4 cup creamy peanut butter
- 1 teaspoon baking soda
- 3 cups powdered sugar
- 1 teaspoon vanilla extract
- 2 cups granulated sugar
- 2 cups all-purpose flour
- 1/2 teaspoon salt
- 1 cup water
- 1/2 cup whole milk
Instructions
- Preheat your oven to 350°F (175°C) and grease a 15x10x1-inch baking pan.
- In a mixing bowl, whisk together flour, granulated sugar, baking soda, and salt.
- In a medium saucepan, combine water, butter, and peanut butter; heat until boiling.
- Pour the hot mixture into the dry ingredients and stir until smooth.
- Add eggs, buttermilk, and vanilla extract; mix until well-blended.
- Pour the batter into the prepared baking pan and spread evenly.
- Bake for 18-22 minutes until a toothpick comes out clean.
- For frosting, melt butter and peanut butter; stir in whole milk and vanilla.
- Gradually whisk in powdered sugar until smooth.
- Pour the warm frosting over the cake immediately after baking and spread.
Notes
Nutrition

Hi, I’m Olivia Parker, the founder of BakingSecret.com and a lifelong lover of all things sweet and homemade. I grew up in a small town in Oregon, where the smell of fresh cookies in my family’s kitchen sparked my passion for baking. Over the years, I turned that passion into a mission: to help home bakers feel confident, inspired, and creative.
After studying food science and working in several artisan bakeries across the U.S., I decided to create a space where everyone from beginners to seasoned bakers can find reliable recipes, expert tips, and a warm, welcoming community. BakingSecret.com is my way of sharing the magic of baking with the world. When I’m not testing new recipes, you’ll find me exploring farmers’ markets, collecting vintage cookbooks, or perfecting my sourdough technique.