
A Slice of Heaven: Why You’ll Fall in Love with Peanut Butter Delight
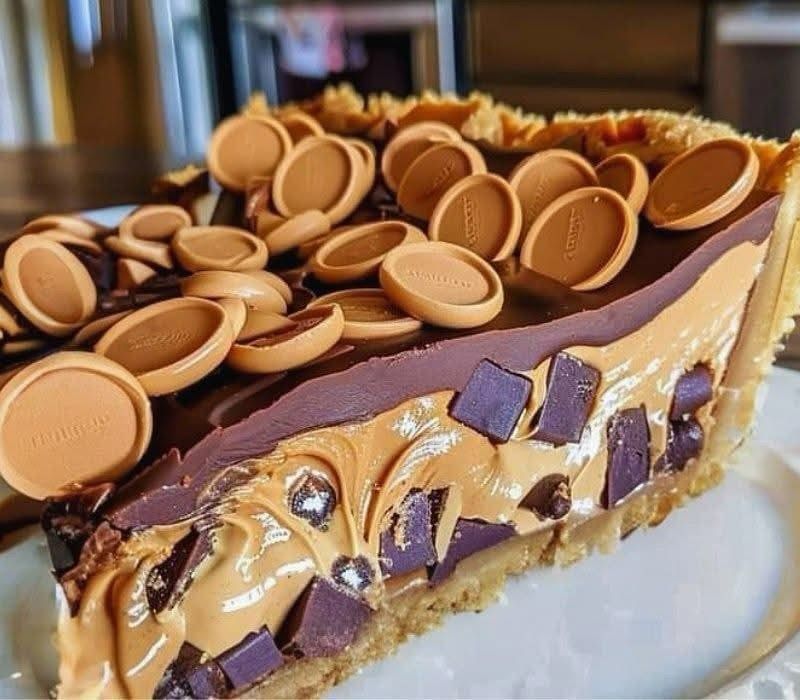
Let me tell you a little story. Last summer, during one of those sweltering afternoons where the air conditioning was my best friend, I decided to whip up something sweet and indulgent for my family. Enter the Peanut Butter Delight, a creamy, crispy peanut butter cake that became an instant hit. Imagine layers of rich peanut butter filling, velvety chocolate ganache, and crunchy peanuts all coming together in perfect harmony. It’s like Reese’s candy had a baby with a cheesecake, and trust me—it’s pure bliss.
This dessert is more than just a treat; it’s a celebration of textures and flavors. Whether you’re a fan of peanut butter or just looking for a show-stopping dessert, this recipe will not disappoint. Plus, it’s surprisingly easy to make, even if you’re a beginner in the kitchen!
The Sweet History Behind This Peanut Butter Wonder
Peanut butter desserts have been around for ages, but the Peanut Butter Delight feels like a modern twist on classic favorites. The combination of graham cracker crust, creamy peanut butter filling, and chocolate ganache reminds me of childhood birthday parties where we’d devour peanut butter cups by the handful. Over time, creative bakers took these beloved flavors and turned them into layered cakes like this one.
I first tried making this cake for my niece’s birthday. She adores anything peanut butter, so I knew I had to nail it. After a few tweaks (and some sneaky taste tests), I perfected the balance between sweetness and saltiness. Now, it’s become a family tradition whenever we want to impress our guests—or just indulge ourselves!
Why You’ll Love This Recipe
Here’s the thing about this Peanut Butter Delight: it checks all the boxes. It’s creamy yet crunchy, sweet yet salty, and oh-so-satisfying. Plus, it doesn’t require any fancy baking skills—just a mixing bowl, a whisk, and a bit of patience while it chills in the fridge. The result? A dessert that looks impressive enough for special occasions but tastes comforting enough for everyday enjoyment.
Another bonus? You can customize it however you like. Add extra chocolate drizzle, swap out toppings, or go wild with decorations. It’s your masterpiece, after all!
Perfect Occasions to Whip Up This Treat
This Peanut Butter Delight shines at potlucks, birthday parties, holiday gatherings, or even lazy Sunday afternoons. Picture this: you bring it to a barbecue, and suddenly everyone forgets about the burgers because they’re too busy raving about your cake. Or imagine serving it as the grand finale at Thanksgiving dinner—trust me, no one will complain about having “one more slice.”
Ingredients You’ll Need
- 1 1/2 cups of graham cracker crumbs
- 1/3 cup of granulated sugar
- 1/2 cup of melted butter
- 1 cup of peanut butter
- 8 oz of cream cheese
- 1 cup of powdered sugar
- 1 teaspoon of vanilla extract
- 1 1/2 cups of whipping cream (divided)
- 1 cup of chocolate chips
- 1/2 cup of chopped peanuts
- 1/2 cup of peanut butter chips (optional)
Substitution Options
If you’re missing an ingredient or want to experiment, here are some swaps:
- Graham cracker crumbs can be replaced with crushed digestive biscuits.
- Use almond butter or cashew butter instead of peanut butter for a nutty twist.
- For a dairy-free version, substitute whipped coconut cream for regular whipping cream.
- Vegan chocolate chips work great if you need a plant-based option.
Step-by-Step Preparation Guide
Step 1: Create the Graham Cracker Crust
Start by mixing the graham cracker crumbs, granulated sugar, and melted butter in a bowl until it resembles wet sand. Press this mixture firmly into the bottom of a 9-inch springform pan. Make sure it’s evenly spread—you want every bite to have that satisfying crunch. Pop it into the fridge while you tackle the next steps. Pro tip: Use the back of a spoon to press down firmly for a smooth base.
Step 2: Whip Up the Peanut Butter Filling
In another bowl, beat the peanut butter, cream cheese, powdered sugar, and vanilla extract until smooth and creamy. In a separate bowl, whip 1 cup of whipping cream until stiff peaks form. Gently fold the whipped cream into the peanut butter mixture. This step is crucial for achieving that light, airy texture. Chef’s tip: Chill your mixing bowls before whipping the cream—it helps stabilize it better.
Step 3: Assemble the Layers
Pour the peanut butter filling over the chilled crust and spread it evenly with a spatula. Take your time here; a smooth surface makes the final product look professional. Place the cake back in the fridge while you prepare the chocolate topping.
Step 4: Make the Chocolate Ganache
Melt the chocolate chips with 1/2 cup of whipping cream in the microwave, stirring every 30 seconds until glossy and smooth. Pour this decadent ganache over the peanut butter layer, spreading it gently to cover the entire surface. Sprinkle chopped peanuts and peanut butter chips on top for added crunch and visual appeal.
Step 5: Let It Set
Cover the cake and refrigerate it for at least 4 hours, though overnight is ideal. This resting period allows the flavors to meld together and the layers to set perfectly. Patience pays off—you’ll thank yourself later!
Timing Breakdown
Prep Time: 20 minutes
Chilling Time: 4 hours minimum
Total Time: Approximately 4 hours and 20 minutes
Chef’s Secret
To elevate your Peanut Butter Delight, toast the chopped peanuts before sprinkling them on top. Toasting enhances their nutty flavor and adds an irresistible aroma to the cake. Simply toss them in a dry skillet over medium heat for 2-3 minutes, shaking the pan frequently.
Extra Info
Did you know that peanut butter was invented in the late 1800s as a protein-rich food for people who couldn’t chew meat? Fast forward to today, and it’s become a staple in desserts worldwide. This fun fact always reminds me how versatile and beloved peanut butter truly is!
Necessary Equipment
- 9-inch springform pan
- Mixing bowls
- Electric mixer or whisk
- Spatula
- Measuring cups and spoons
- Microwave-safe bowl
Storage Tips
Once your Peanut Butter Delight is ready, store it in the refrigerator covered with plastic wrap or in an airtight container. This keeps it fresh and prevents any unwanted odors from seeping in. If you live in a warm climate, keep it chilled right up until serving time.
For longer storage, freeze individual slices wrapped tightly in plastic wrap and aluminum foil. They’ll stay good for up to 2 months. Just thaw them in the fridge overnight when you’re ready to enjoy again.
Avoid leaving the cake at room temperature for more than 2 hours, especially during summer. Dairy-based desserts spoil quickly, and nobody wants a soggy cake!
Tips and Advice
- Use high-quality peanut butter for the best flavor.
- Don’t skip the chilling step—it ensures the layers hold together beautifully.
- If you prefer a darker chocolate ganache, use semi-sweet or dark chocolate chips.
Presentation Ideas
- Garnish with additional chocolate shavings or drizzles.
- Serve slices with a dollop of whipped cream on the side.
- Add a sprinkle of sea salt flakes for a gourmet touch.
Healthier Alternative Recipes
If you’re looking to lighten things up, try these variations:
- Low-Sugar Version: Replace granulated sugar with stevia or monk fruit sweetener.
- Gluten-Free Option: Use gluten-free graham crackers for the crust.
- Dairy-Free Delight: Swap cream cheese for vegan alternatives and use coconut cream for whipping.
- Protein-Packed Cake: Add a scoop of vanilla protein powder to the peanut butter filling.
- Fruit Twist: Layer sliced bananas between the peanut butter filling and ganache.
- Mini Cakes: Portion the mixture into cupcake liners for adorable mini cakes.
Common Mistakes to Avoid
Mistake 1: Skipping the Chilling Time
Rushing the process is tempting, but skipping the chilling time results in a messy, unstructured cake. Without proper setting, the layers may slide apart when sliced. Pro tip: Plan ahead and make the cake the night before serving.
Mistake 2: Overmixing the Whipped Cream
Overmixing whipped cream turns it grainy and deflated. To avoid this, stop beating as soon as stiff peaks form. Keep an eye on it—it only takes a minute or two!
Mistake 3: Using Old or Stale Ingredients
Old peanut butter or expired cream cheese affects the overall taste and texture. Always check expiration dates and opt for fresh ingredients for the best results.
FAQ
Can I make this cake ahead of time?
Absolutely! In fact, making it a day in advance gives the flavors time to meld together. Store it in the fridge until ready to serve.
Is this cake freezer-friendly?
Yes, it freezes well. Wrap individual slices tightly and store them for up to 2 months. Thaw in the fridge before serving.
Can I use crunchy peanut butter instead of smooth?
Definitely! Crunchy peanut butter adds extra texture, which pairs wonderfully with the other layers.
What if I don’t have a springform pan?
No worries! Use a regular pie dish or square baking pan lined with parchment paper for easy removal.
How do I prevent the ganache from cracking?
Make sure the ganache cools slightly before pouring it onto the cake. Also, avoid refrigerating it immediately after adding the ganache.
Can I omit the nuts for allergies?
Of course! Leave out the peanuts and peanut butter chips for a nut-free version. Consider adding pretzel pieces for crunch.
Why does my crust taste bland?
You might need more butter or sugar. Adjust the ratio to enhance the flavor and ensure it holds together properly.
Can I double the recipe?
Yes, simply double all ingredients and use a larger pan or divide the mixture between two pans.
What’s the best way to cut clean slices?
Dip your knife in hot water, wipe it dry, then slice through the cake. Repeat for each cut to maintain neat edges.
Can I add alcohol to the ganache?
Sure thing! A splash of bourbon or rum complements the chocolate beautifully. Just stir it in before pouring.
Final Thoughts
This Peanut Butter Delight is more than just a dessert—it’s a labor of love that brings joy to anyone lucky enough to taste it. From its rich peanut butter filling to its glossy chocolate topping, every element works together to create a symphony of flavors. So grab your apron, gather your ingredients, and get ready to wow your friends and family with this unforgettable treat. Trust me, once you make it, there’s no going back!
Equipment
- Mixing bowls
- Electric mixer or whisk
- Spatula
- 9-inch springform pan
- Microwave-safe bowl
Ingredients
- 1 1/2 cups graham cracker crumbs
- 1/3 cup granulated sugar
- 1/2 cup melted butter
- 1 cup peanut butter
- 8 oz cream cheese
- 1 cup powdered sugar
- 1 teaspoon vanilla extract
- 1 1/2 cups whipping cream divided
- 1 cup chocolate chips
- 1/2 cup chopped peanuts
- 1/2 cup peanut butter chips optional
Instructions
- Mix graham cracker crumbs, granulated sugar, and melted butter until it resembles wet sand and press into the bottom of a 9-inch springform pan.
- Chill the crust while preparing the peanut butter filling.
- Beat peanut butter, cream cheese, powdered sugar, and vanilla extract until smooth.
- Whip 1 cup of whipping cream until stiff peaks form, then gently fold into the peanut butter mixture.
- Pour the peanut butter filling over the chilled crust and smooth it out.
- Melt chocolate chips with 1/2 cup of whipping cream in the microwave until smooth and pour over the peanut butter layer.
- Sprinkle chopped peanuts and peanut butter chips on top.
- Cover and refrigerate for at least 4 hours, ideally overnight.