
Why This Pineapple Delight Cake is a Must-Try
Picture this: a slice of cake so moist, it practically melts in your mouth. The aroma of fresh pineapple mingles with the sweetness of vanilla, creating a tropical escape right in your kitchen. I first made this Pineapple Delight Cake for a summer potluck, and let me tell you—it was gone before the sun set. What makes this cake special? It’s simple, foolproof, and utterly delicious. No fancy techniques or hard-to-find ingredients—just pure baking joy.
A Little History Behind the Pineapple Delight Cake
The origins of pineapple desserts can be traced back to tropical regions where this golden fruit reigns supreme. Pineapples have long been symbols of hospitality and warmth, making them perfect for cakes that bring people together. Over time, bakers added their own twists, but this version stays true to its roots—easy, flavorful, and comforting. I love how this cake bridges tradition and modernity. It’s a nod to classic recipes while still feeling fresh and exciting.
Why You’ll Fall in Love with This Recipe
This Pineapple Delight Cake is all about simplicity without sacrificing flavor. The juicy pineapple juice keeps the cake tender, while the glaze adds a glossy finish that’s downright irresistible. Plus, it’s versatile! Whether you’re a seasoned baker or just starting out, this recipe will make you feel like a pro. And trust me, once you see how quickly it disappears at gatherings, you’ll want to keep it in your recipe rotation.
Perfect Occasions to Bake This Cake
Need a dessert for a birthday party, a holiday brunch, or even a casual weekend treat? This cake fits the bill every time. Its tropical vibe makes it perfect for summer celebrations, but honestly, it’s delightful year-round. I’ve served it at family dinners, baby showers, and even as a sweet “thank you” gift for neighbors. Everyone loves it!
Ingredients You’ll Need
Let’s gather everything before we dive in:
- For the cake:
- 250g (2 cups) all-purpose flour
- 300g (1 cup) granulated sugar
- 1 teaspoon sodium bicarbonate (baking soda)
- 2 large eggs
- 225ml (1 cup) sugar-free pineapple juice
- 1 teaspoon vanilla extract
- 120ml (½ cup) vegetable oil
- For the glaze:
- 200g (1 cup) powdered sugar
- 60ml (¼ cup) pineapple juice
- 2 tablespoons unsalted butter, melted
- 1 teaspoon vanilla extract
- To decorate:
- 1 cup fresh pineapple wedges
- (Optional) coconut flakes, whipped cream
Substitution Options
Don’t stress if you’re missing an ingredient! Here are some swaps:
- Use regular pineapple juice instead of sugar-free.
- Swap vegetable oil for melted coconut oil for a hint of tropical flavor.
- If you don’t have powdered sugar for the glaze, blend granulated sugar until fine.
Step 1: Preheat and Prep
Preheat your oven to 175°C (350°F). Grease and flour two round 8-inch molds—or one 9-inch pan if you prefer a taller cake. I always recommend lining the bottom with parchment paper for easy release. This step ensures your cake doesn’t stick and comes out picture-perfect every time.
Pro tip: Use a pastry brush to spread the oil evenly on the pan. It makes cleanup a breeze!
Step 2: Mix Dry Ingredients
In a large bowl, whisk together the flour, sugar, and baking soda. This dry mixture forms the base of your cake. Watch how the powdery texture comes alive when combined—it’s almost magical! Whisking ensures there are no lumps, which means a smoother batter later.
Step 3: Combine Wet Ingredients
In another bowl, beat the eggs lightly, then add the pineapple juice, vanilla extract, and vegetable oil. Stir until smooth. The golden hue of the pineapple juice adds a sunny touch, and the scent of vanilla fills your kitchen with warmth. Slowly pour this wet mix into the dry ingredients, stirring gently until fully incorporated.
Step 4: Bake to Perfection
Pour the batter into your prepared pans and bake for 30–35 minutes. To check if it’s done, insert a toothpick into the center—it should come out clean. As the cake bakes, your home will smell like a tropical paradise. Isn’t that amazing?
Chef’s tip: Rotate the pans halfway through baking for even cooking.
Step 5: Add the Glaze
While the cake is still warm, poke holes across the surface with a fork. Slowly drizzle the glaze over the top, letting it seep into the cake. The combination of melted butter, pineapple juice, and powdered sugar creates a sticky-sweet coating that’s simply divine.
Step 6: Decorate and Serve
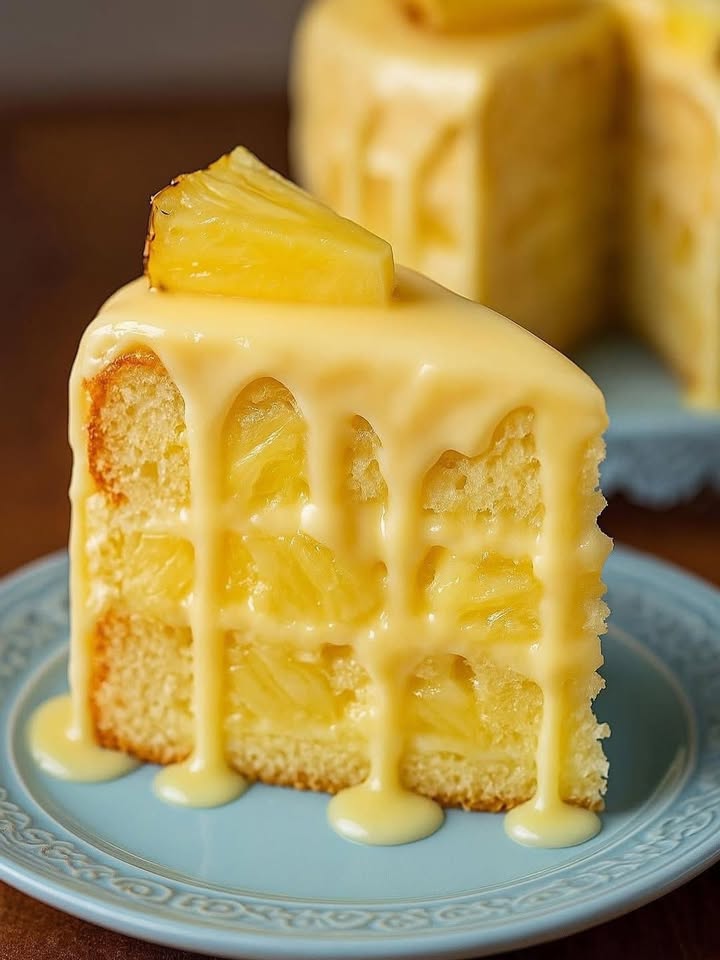
Let the cake cool completely before decorating. Arrange fresh pineapple wedges on top for a pop of color, and sprinkle coconut flakes if you’re feeling fancy. A dollop of whipped cream takes it to the next level. Presentation matters, folks!
Timing Breakdown
Here’s how long each part takes:
- Prep time: 15 minutes
- Cooking time: 35 minutes
- Resting time: 20 minutes (cooling)
- Total time: About 1 hour 10 minutes
Chef’s Secret
For extra moistness, brush the cooled cake layers with a little extra pineapple juice before adding the glaze. It’s a trick I learned from my grandma, and it works wonders!
Extra Info
Did you know pineapples were once considered luxury items? In the 18th century, they were so rare that people rented them for parties just to show off. Thankfully, today we can enjoy them anytime—and turn them into scrumptious cakes!
Necessary Equipment
You’ll need:
- Mixing bowls
- Whisk or electric mixer
- Measuring cups and spoons
- Baking pans
- Parchment paper
- Toothpick or skewer
Storage Tips
Store leftovers in an airtight container at room temperature for up to 2 days. For longer storage, refrigerate for up to a week. Just remember to bring it back to room temp before serving—it tastes better that way.
If freezing, wrap individual slices in plastic wrap and place them in a freezer-safe bag. They’ll stay good for up to 3 months. Simply thaw overnight in the fridge before enjoying.
Avoid leaving the cake uncovered, as it can dry out. Keep it snug and happy!
Tips and Advice
Want to elevate this recipe? Try using freshly squeezed pineapple juice instead of store-bought. It adds a brighter flavor. Also, don’t overmix the batter—a few lumps are okay. Overmixing can lead to dense cake layers.
Presentation Ideas
Serve slices on vintage plates for a retro vibe, or layer the cake with whipped cream for a towering effect. Garnish with edible flowers or toasted coconut for a chic touch.
Healthier Alternatives
Looking to lighten things up? Here are six variations:
- Whole wheat version: Replace all-purpose flour with whole wheat flour for added fiber.
- Low-sugar option: Use a sugar substitute like stevia or monk fruit.
- Vegan delight: Swap eggs for flax eggs and use plant-based butter.
- Gluten-free goodness: Use almond flour or a gluten-free flour blend.
- Protein-packed: Add a scoop of vanilla protein powder to the batter.
- Dairy-free dream: Skip the butter in the glaze and use coconut cream.
Mistake 1: Overmixing the Batter
Overmixing leads to tough, rubbery cake layers. Mix just until the ingredients come together. Think light and airy—not heavy lifting!
Mistake 2: Skipping the Cooling Step
Pouring glaze onto a hot cake might seem tempting, but it can cause uneven absorption. Let the cake cool slightly for best results.
Mistake 3: Not Greasing the Pan Properly
A poorly greased pan equals a stuck cake. Always grease and flour your pans thoroughly—or use nonstick spray.
FAQs
Can I use canned pineapple juice?
Absolutely! Just ensure it’s unsweetened to balance the flavors.
How do I know when the cake is done?
Insert a toothpick into the center. If it comes out clean, it’s ready.
Can I freeze this cake?
Yes! Wrap slices tightly and freeze for up to 3 months.
What if I don’t have pineapple juice?
Orange or apple juice works as a substitute, though the flavor will differ slightly.
Is this cake kid-friendly?
Definitely! Kids love its fruity sweetness and soft texture.
Can I make cupcakes instead?
Of course! Fill cupcake liners halfway and bake for 18–20 minutes.
How long does the glaze last?
Store leftover glaze in the fridge for up to 3 days. Reheat gently before using.
Do I need a mixer?
Nope! A whisk and some elbow grease work just fine.
Can I skip the glaze?
Sure! Dust with powdered sugar for a simpler finish.
What tools help with decorating?
A small offset spatula helps spread the glaze smoothly.
Final Thoughts
This Pineapple Delight Cake is more than just a dessert—it’s a celebration of flavor and fun. With its easy steps, delightful taste, and endless possibilities, it’s a recipe worth keeping close. So grab those ingredients, fire up the oven, and let’s bake something beautiful together. Happy baking!
Equipment
- Mixing bowls
- Whisk or electric mixer
- Measuring cups and spoons
- Baking pans
- Parchment paper
- Toothpick or skewer
Ingredients
- 250 g all-purpose flour
- 300 g granulated sugar
- 1 tsp sodium bicarbonate (baking soda)
- 2 large eggs
- 225 ml sugar-free pineapple juice
- 1 tsp vanilla extract
- 120 ml vegetable oil
Instructions
- Preheat your oven to 175°C (350°F) and grease and flour two round 8-inch molds or one 9-inch pan.
- In a large bowl, whisk together the flour, granulated sugar, and baking soda until well combined.
- In another bowl, lightly beat the eggs and add the pineapple juice, vanilla extract, and vegetable oil, stirring until smooth.
- Slowly pour the wet mixture into the dry ingredients, stirring gently until fully incorporated.
- Pour the batter into prepared pans and bake for 30–35 minutes or until a toothpick comes out clean.
- While the cake is still warm, poke holes across the surface and drizzle the glaze over the top, allowing it to seep in.
- Let the cake cool completely before decorating with fresh pineapple wedges and optional coconut flakes or whipped cream.