
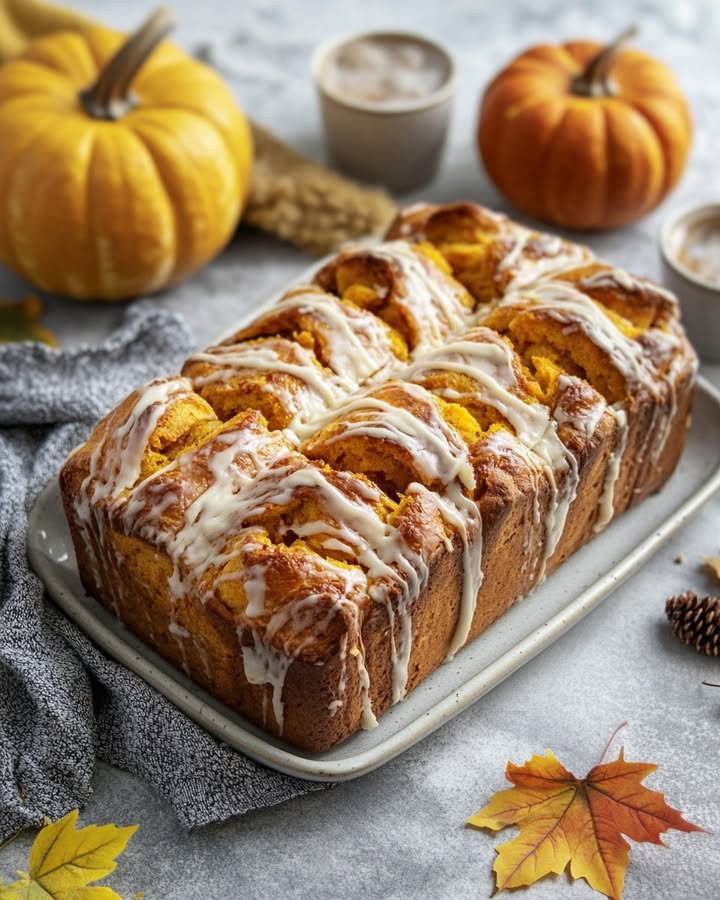
Get Ready for a Pumpkin Pie Bliss with This Irresistible Pull-Apart Bread
There’s something magical about the aroma of pumpkin and spices wafting through the kitchen. Every time I bake this Pumpkin Pie Bliss pull-apart bread, it feels like a warm hug from the inside out. It’s not just a recipe; it’s a slice of autumnal heaven that brings my family together.
A Taste of Tradition: The History of Pumpkin Pie Bliss
For as long as I can remember, fall has been synonymous with pumpkin treats. My grandmother used to make a classic pumpkin pie, and I’ve taken that inspiration to create a modern twist. This Pumpkin Pie Bliss pull-apart bread is a delightful blend of tradition and innovation, perfect for today’s busy yet cozy kitchens.
Why You’ll Love This Recipe
Imagine a bread that’s both soft and gooey, bursting with the flavors of pumpkin pie. It’s incredibly easy to make, and the combination of pumpkin puree, spices, and melted butter makes each bite a little piece of heaven. Plus, it’s a crowd-pleaser at any gathering!
Perfect Occasions to Prepare This Recipe
This Pumpkin Pie Bliss is a hit at family gatherings, holiday parties, or even as a special treat for a lazy Sunday brunch. It’s one of those recipes that you can whip up in no time, and it always turns out deliciously.
Ingredients
- 1 can (8-count) refrigerated biscuits
- 1 cup canned pumpkin puree
- 1/2 cup granulated sugar
- 1/4 cup brown sugar
- 1 teaspoon pumpkin pie spice
- 1/2 cup unsalted butter, melted
- 1 teaspoon vanilla extract
Substitution Options
- Biscuits: You can use homemade biscuit dough if you prefer.
- Pumpkin Puree: If you can’t find pumpkin puree, butternut squash puree works well too.
- Butter: Use coconut oil or margarine for a dairy-free option.
Preparation Section
Step 1: Preheat the Oven
Preheat your oven to 350°F (175°C). Grease a loaf pan or line it with parchment paper for easy removal. This step is crucial to ensure your bread bakes evenly and comes out of the pan without sticking.
Step 2: Mix the Pumpkin Filling
In a medium bowl, combine the pumpkin puree, granulated sugar, brown sugar, pumpkin pie spice, and vanilla extract. Mix until everything is well combined and smooth. The mixture should be a vibrant orange color, and you’ll already start to smell those amazing fall spices.
Step 3: Prepare the Biscuits
Separate the biscuits and cut each one into quarters. Roll each piece into a ball. This step is where the fun begins! As you roll the dough, imagine those little balls turning into a delicious, gooey bread.
Step 4: Layer the Bread
Dip each biscuit ball into the melted butter, then coat it in the pumpkin mixture. Layer the coated biscuit pieces in the prepared loaf pan. Pour any remaining butter and pumpkin mixture over the top. This step is all about creating layers of flavor, so take your time and enjoy the process.
Chef’s Tip: For an extra touch, sprinkle some cinnamon sugar on top before baking.
Step 5: Bake the Bread
Place the loaf pan in the oven and bake for 30-35 minutes, or until the bread is golden brown and cooked through. Check doneness by inserting a toothpick into the center; it should come out clean. The aroma will fill your kitchen, making it hard to wait for the bread to cool!
Step 6: Cool and Serve
Allow the bread to cool in the pan for about 10 minutes. Carefully remove it from the pan and transfer it to a serving plate. Enjoy this warm, gooey, and delicious Pumpkin Pie Bliss treat!
Timing
Preparation Time: 15 minutes
Cooking Time: 35 minutes
Servings: 8
Calories: 350 per serving
Extra Info
Did you know that pumpkin is not just delicious but also packed with dietary antioxidants? This means you’re not just enjoying a tasty treat but also giving your body a boost of goodness. Now, that’s what I call a win-win!
Necessary Equipment
- Loaf pan
- Mixing bowls
- Measuring cups and spoons
- Toothpick
- Parchment paper (optional)
Storage
Store the Pumpkin Pie Bliss bread in an airtight container at room temperature for up to 3 days. If you want to keep it longer, refrigerate it for up to a week. To reheat, simply pop a slice in the microwave for a few seconds or in the oven at 250°F (120°C) for about 5-10 minutes. The bread will stay moist and delicious, ready to be enjoyed again.
Tips and Advice
- Don’t skimp on the butter—it adds richness and helps the bread stay moist.
- Feel free to add a bit more pumpkin pie spice if you love a stronger flavor.
- For a decadent touch, drizzle some cream cheese icing over the warm bread.
Presentation Tips
For a stunning presentation, serve the Pumpkin Pie Bliss on a large platter with a side of whipped cream or a sprinkle of powdered sugar. You can also add a few fresh cranberries for a pop of color. It’s a showstopper at any table!
Healthier Alternative Recipes
If you’re looking for a healthier twist, here are six variations you can try:
- Whole Wheat Version: Use whole wheat biscuits for a nuttier flavor and added fiber. Follow the same steps for an equally delicious result.
- No Sugar Added: Replace the granulated and brown sugars with a natural sweetener like stevia or a sugar substitute. The pumpkin and spices will still shine through.
- Vegan Option: Substitute the butter with coconut oil and use a vegan egg replacer. The bread will still be moist and flavorful.
- Gluten-Free: Use gluten-free biscuit dough and follow the same steps. The texture might be slightly different, but the taste will be just as amazing.
- Lactose-Free: Use lactose-free butter and a dairy-free milk alternative. The bread will still be rich and creamy.
- Keto-Friendly: Replace the biscuits with a low-carb almond flour dough and use a sugar substitute. The bread will be a keto-friendly delight.
If you love this recipe, you might also enjoy these other fall favorites like Cream Cheese Cranberry Bread, Pumpkin Cream Cheese Muffins, Sweet Potato Waffles, and Cherry Almond Muffins. Each one is a delicious way to celebrate the season.
Common Mistakes to Avoid
Mistake 1: Overmixing the Pumpkin Filling
Overmixing the pumpkin filling can lead to a tough, dense bread. Mix the ingredients until they are just combined. The key is to get a smooth mixture without overworking it. Pro tip: Use a spatula to fold the ingredients gently.
Mistake 2: Not Greasing the Pan Properly
Not greasing the pan properly can result in the bread sticking and falling apart when you try to remove it. Make sure to grease the pan thoroughly or use parchment paper. This small step makes a big difference in the final presentation.
Mistake 3: Skipping the Coating Step
Skipping the step of coating the biscuit balls in the pumpkin mixture can lead to a bland, unflavored bread. Make sure each ball is well-coated to ensure every bite is full of that pumpkin pie flavor. Pro tip: Use a spoon to help coat the dough evenly.
FAQ
Can I use fresh pumpkin instead of canned pumpkin puree?
Yes, you can use fresh pumpkin puree, but it may have a slightly different texture and water content. Make sure to drain any excess liquid from the fresh pumpkin puree to achieve the right consistency.
Can I make this recipe ahead of time?
Absolutely! You can prepare the Pumpkin Pie Bliss pull-apart bread a day in advance. Store it in an airtight container, and reheat it in the oven before serving to keep it warm and gooey.
What can I use instead of pumpkin pie spice?
If you don’t have pumpkin pie spice, you can mix your own by combining 1/2 teaspoon of ground cinnamon, 1/4 teaspoon of ground ginger, 1/8 teaspoon of ground nutmeg, and 1/8 teaspoon of ground cloves. This mix will give you the same warm, spicy flavor.
Can I use a different type of pan?
While a loaf pan is ideal, you can use a round cake pan or a Bundt pan. Just make sure to adjust the baking time accordingly. The bread will still be delicious, but the shape will be different.
Is this recipe suitable for a beginner baker?
Absolutely! This Pumpkin Pie Bliss recipe is very forgiving and easy to follow. Even if you’re new to baking, you can make this bread with great results. Just follow the steps carefully, and you’ll have a wonderful treat.
Can I add nuts or raisins to the bread?
Yes, you can add chopped nuts like walnuts or pecans, or raisins to the pumpkin mixture for extra texture and flavor. Just sprinkle them in as you layer the bread. It’s a great way to customize the recipe to your liking.
How do I store leftover bread?
Store the leftover Pumpkin Pie Bliss in an airtight container at room temperature for up to 3 days. For longer storage, refrigerate the bread for up to a week. Reheat slices in the microwave or oven to restore that warm, gooey texture.
Can I make this recipe gluten-free?
Yes, you can make this recipe gluten-free by using gluten-free biscuit dough. Follow the same steps, and the bread will be just as delicious. Just be sure to check the labels of all your ingredients to ensure they are gluten-free.
Conclusion
Whether you’re hosting a fall-themed party, enjoying a cozy weekend, or just craving a delicious treat, this Pumpkin Pie Bliss pull-apart bread is sure to delight. It’s a simple, scrumptious, and satisfying recipe that brings a touch of autumnal magic to any occasion. So, preheat your ovens, gather your ingredients, and get ready to savor a slice of pure bliss. Happy baking! And don’t forget to explore more delicious recipes in our main category.
Equipment
- Loaf pan
- Mixing bowls
- Measuring cups and spoons
- Toothpick
- Parchment paper (optional)
Ingredients
- 1 can (8-count) refrigerated biscuits
- 1 cup canned pumpkin puree
- 1/2 cup granulated sugar
- 1/4 cup brown sugar
- 1 tsp pumpkin pie spice
- 1/2 cup unsalted butter, melted
- 1 tsp vanilla extract
Instructions
- Preheat your oven to 350°F (175°C) and grease a loaf pan or line it with parchment paper.
- In a medium bowl, combine the pumpkin puree, granulated sugar, brown sugar, pumpkin pie spice, and vanilla extract. Mix until smooth.
- Separate the biscuits and cut each one into quarters, rolling each piece into a ball.
- Dip each biscuit ball in melted butter, then coat it in the pumpkin mixture. Layer them in the prepared loaf pan, pouring any remaining butter and pumpkin mixture over the top.
- Bake for 30-35 minutes or until golden brown and cooked through, checking doneness with a toothpick.
- Allow the bread to cool in the pan for about 10 minutes before transferring to a serving plate.
Notes
Nutrition

Hi, I’m Olivia Parker, the founder of BakingSecret.com and a lifelong lover of all things sweet and homemade. I grew up in a small town in Oregon, where the smell of fresh cookies in my family’s kitchen sparked my passion for baking. Over the years, I turned that passion into a mission: to help home bakers feel confident, inspired, and creative.
After studying food science and working in several artisan bakeries across the U.S., I decided to create a space where everyone from beginners to seasoned bakers can find reliable recipes, expert tips, and a warm, welcoming community. BakingSecret.com is my way of sharing the magic of baking with the world. When I’m not testing new recipes, you’ll find me exploring farmers’ markets, collecting vintage cookbooks, or perfecting my sourdough technique.