
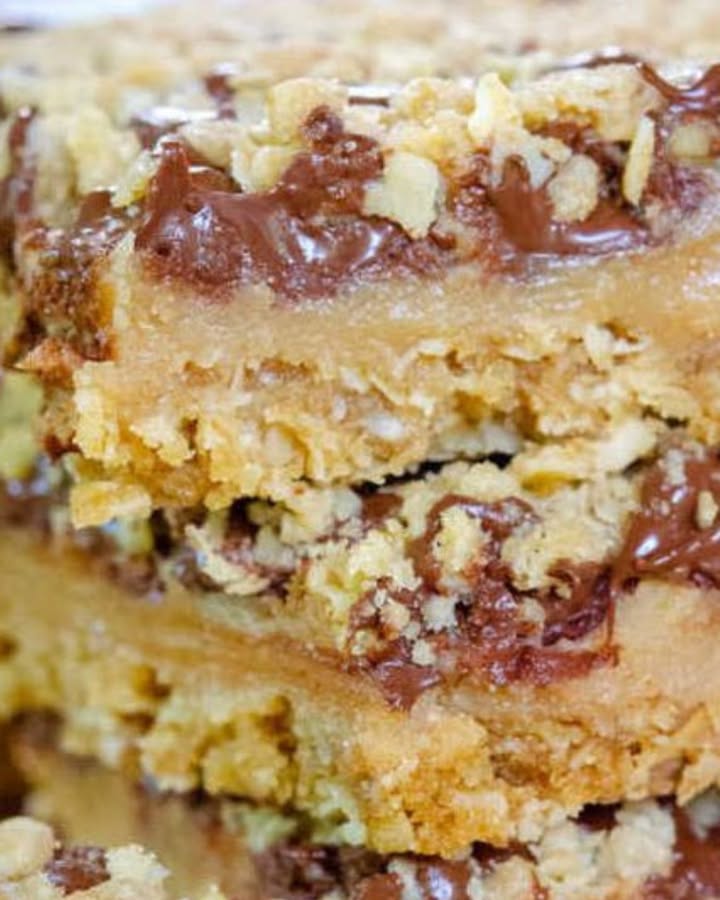
Whip Up a Quick Treat: Peanut Butter Chocolate Oat Bars!
Let me tell you a little story. Last Sunday, I was craving something sweet after lunch—nothing fancy, just a cozy treat to pair with my coffee. My pantry wasn’t exactly bursting with options, but I found oats, peanut butter, and chocolate chips. That’s when these Quick Peanut Butter Bars were born! Trust me; they’re gooey, rich, and oh-so-satisfying. Whether you’re baking for family or friends, this recipe will become your go-to favorite in no time.
The Sweet History Behind This Recipe
Oat bars have been around for ages, often seen as a wholesome snack. The combo of peanut butter and chocolate? Pure magic! In the 1950s, home bakers started experimenting with sweetened condensed milk to create fudgy layers without heavy cream. Modern versions like this one are designed to be quick and easy while still delivering big on flavor. Plus, who doesn’t love bars that require zero frosting skills?
Why You’ll Love These Quick Peanut Butter Bars
These bars are perfect if you love bold flavors without spending hours in the kitchen. Imagine biting into creamy peanut butter, melty chocolate, and crunchy oats all at once. They’re simple enough for beginner bakers but tasty enough to impress even the picky eaters in your life. And guess what? No mixer needed! Just grab a bowl and enjoy some hands-on fun.
Perfect Occasions to Make These Bars
Need a dessert for game nights, potlucks, or weekend brunches? These bars are ideal. They’re portable, so you can wrap them up for school lunches or road trips too. I’ve even served them during book club meetings, and everyone raved about how good they smelled baking in the oven.
Lets Get Into the Ingredients
- 1 cup all-purpose flour
- 2 cups old-fashioned oats
- 1 cup brown sugar
- 1/2 teaspoon salt
- 1/2 teaspoon baking soda
- 3/4 cup butter, cubed, at room temperature
- 3/4 cup peanut butter
- 1 14 oz can sweetened condensed milk
- 2 teaspoons vanilla extract
- 1 cup semi-sweet chocolate chips
Swap Ideas for Your Pantry Staples
- Use gluten-free flour instead of regular flour if needed.
- Substitute almond butter or sunflower seed butter for peanut butter.
- Try dark chocolate chips or white chocolate chips for variety.
Step-by-Step Guide: Easy Peasy!
Step 1: Prep Your Baking Space
Start by preheating your oven to 350°F (175°C). Grab a 9×13-inch baking dish—you’ll need it greased well so nothing sticks. A bit of spray goes a long way here! Now, let’s move onto making the oat base. It smells heavenly as you work through this step.
Step 2: Mix the Oat Base
In a large bowl, combine the flour, oats, brown sugar, salt, and baking soda. Add the butter cubes right in there and use your hands to squish everything together until you get a crumbly texture. Think of it like playing in sand—but tastier! Set aside 1 1/2 cups of the mixture for later.
Step 3: Create the Perfect Foundation
Press the rest of the oat mix firmly into the bottom of your prepared pan. You want a nice, even layer because this is what holds everything together. Pro tip: Use the back of a spoon or a spatula to smooth it out perfectly.
Step 4: Pour Over the Creamy Filling
In another bowl, stir the peanut butter, sweetened condensed milk, and vanilla until it’s silky smooth. Now pour this luscious filling over the oat base and spread it gently toward the edges. It’s already looking like dessert heaven, isn’t it?
Step 5: Top With Joy
Time for the fun part! Sprinkle those chocolate chips evenly across the surface like confetti. Then, sprinkle the reserved oat mixture over the top, pressing lightly. This creates a beautiful crumble finish that bakes to golden perfection.
Cooking Times Breakdown
- Prep Time: 15 minutes
- Cook Time: 30 minutes
- Total Time: 45 minutes
Chef’s Secret Weapon
For an extra touch, toast your oats before mixing them in. It adds a nutty aroma that takes these bars from great to extraordinary. Try it—you won’t regret it!
An Interesting Tidbit About Ingredients
Did you know peanut butter has been part of American diets since the late 1800s? It’s versatile, affordable, and packed with protein—a true kitchen MVP. Learn more about its history here!
Essential Tools for Success
- Measuring cups and spoons
- Mixing bowls
- Baking pan (9×13 inches)
- Spatula or wooden spoon
Storing Leftovers Like a Pro
To keep your bars fresh, let them cool completely before slicing. Store slices in an airtight container at room temperature for up to three days. For longer storage, refrigerate them—they’ll taste just as amazing cold.
If you’re freezing, wrap individual pieces tightly in plastic wrap or foil before placing them in a freezer bag. They’ll last up to two months. Perfect for surprise cravings!
P.S.: Keep a batch ready at all times—it’s practically guaranteed happiness.
Tips and Tricks for Best Results
- Don’t skip greasing the pan—it makes cleanup easier.
- Overmixing the oat base isn’t necessary. Aim for a crumbly consistency.
- Press down gently but firmly when layering.
Dazzling Presentation Ideas
- Serve on a pretty plate with powdered sugar dusted lightly on top.
- Add edible flowers for a fancy flair.
- Pair with fresh berries or whipped cream for contrast.
Diet-Friendly Variations
- Vegan Version: Swap butter for coconut oil and choose vegan chocolate chips.
- Low-Sugar Option: Reduce the brown sugar and use sugar-free condense milk.
- Nut-Free: Replace peanut butter with tahini or soy nut butter.
- Gluten-Free: Use certified gluten-free oats and flour.
- Protein Boost: Stir in a scoop of protein powder into the oat base.
- Elevated Taste: Drizzle melted chocolate on top post-bake.
Explore More Sweet Recipes
If you loved these bars, check out our decadent brownie batter ice cream for a chilled twist. Craving plant-based sweets? Our vegan brownie mix might be calling your name. Feeling adventurous? Combine cream cheese with box mix brownies for a show-stopping treat found here. And don’t miss cottage cheese brownies—we promise you won’t regret trying this unique spin linked right here.
Mistake 1: Overbaking the Edges
Burning the edges happens easily because this recipe requires careful timing. Bake for only 30 minutes, checking regularly. If the middle seems underdone but the sides are browning too fast, cover loosely with foil.
Mistake 2: Not Cooling Before Cutting
Rushing to cut warm bars can lead to crumbling disasters. Let them sit untouched for at least 30 minutes to set properly. Patience pays off, trust me.
Mistake 3: Skipping the Salt
Never forget the pinch of salt—it balances the sweetness and enhances the other flavors. Without it, your bars may taste bland.
A Little Food Waste Wisdom
Always double-check your ingredients before tossing them out. Did you know avoiding food waste not only saves money but also helps the planet? Visit this USDA resource for tips on reducing waste effectively.
More Desserts Worth Trying
If you enjoyed this recipe, explore all the other desserts we offer in our dessert collection. There’s always something new waiting to inspire you!
Frequently Asked Questions
Can I make these bars ahead of time?
Absolutely! These bars store beautifully, making them perfect for meal prep or busy weeks. Just bake, cool, slice, and refrigerate or freeze until needed. Reheat briefly in the microwave for a gooey treat.
How do I prevent the chocolate from sinking?
Gently press the chocolate chips into the wet layer instead of sprinkling heavily. This keeps them suspended nicely while baking.
Do I need to toast the oats?
Nope, though toasting gives them extra crunch and flavor. If you’re short on time, skip it—it’s optional but recommended.
What type of peanut butter works best?
Smooth, creamy peanut butter blends better than chunky styles. Natural brands with oil separation should be stirred thoroughly prior to use.
Can I halve the recipe?
Yes, simply adjust ingredient amounts accordingly and bake in a smaller pan. Note cooking times may vary slightly.
How many servings does this make?
This recipe yields about 16 generous squares, depending on how you slice them. Great for sharing!
Is it okay to add nuts?
Definitely! Chopped peanuts or almonds pair wonderfully with this combo. Sprinkle them on top before baking.
Why did my bars turn out dry?
Dry bars usually result from overmixing the batter or adding too much flour. Stick closely to measurements and handle carefully.
Are they kid-friendly?
Kids adore these treats thanks to their chewy texture and rich flavors. Bonus: They’re fun to help assemble too!
Can I skip the condensed milk?
Condensed milk is key to the bar’s softness and richness. Substituting isn’t recommended unless using a similar sweet binding agent.
The Final Word
There you have it, friends—the ultimate guide to creating Quick Peanut Butter Bars that dazzle both eyes and taste buds. So gather your ingredients, heat up that oven, and whip up these delightful treats today. Happy baking, and remember: Life is always sweeter with homemade goodies!
Equipment
- Measuring cups and spoons
- Mixing bowls
- Baking pan (9x13 inches)
- Spatula or wooden spoon
- Grease spray
Ingredients
- 1 cup all-purpose flour
- 2 cups old-fashioned oats
- 1 cup brown sugar
- 1/2 teaspoon salt
- 1/2 teaspoon baking soda
- 3/4 cup butter, cubed, at room temperature
- 3/4 cup peanut butter
- 1 14 oz can sweetened condensed milk
- 2 teaspoons vanilla extract
- 1 cup semi-sweet chocolate chips
Instructions
- Preheat oven to 350°F (175°C) and grease a 9x13-inch baking dish.
- In a large bowl, mix flour, oats, brown sugar, salt, and baking soda; add butter and mix until crumbly.
- Reserve 1 1/2 cups of the mixture and press the rest into the bottom of the prepared pan.
- In another bowl, mix peanut butter, sweetened condensed milk, and vanilla until smooth; pour over the oat base.
- Sprinkle chocolate chips and reserved oat mixture on top and press lightly before baking.
Notes
Nutrition

Hi, I’m Olivia Parker, the founder of BakingSecret.com and a lifelong lover of all things sweet and homemade. I grew up in a small town in Oregon, where the smell of fresh cookies in my family’s kitchen sparked my passion for baking. Over the years, I turned that passion into a mission: to help home bakers feel confident, inspired, and creative.
After studying food science and working in several artisan bakeries across the U.S., I decided to create a space where everyone from beginners to seasoned bakers can find reliable recipes, expert tips, and a warm, welcoming community. BakingSecret.com is my way of sharing the magic of baking with the world. When I’m not testing new recipes, you’ll find me exploring farmers’ markets, collecting vintage cookbooks, or perfecting my sourdough technique.