
Why This Reese’s Peanut Butter Cheesecake Is a Must-Try
Picture this: it’s Saturday night, and I’m in the kitchen whipping up something sweet for my family. My kids are hovering around like little sugar detectives, trying to guess what’s baking. The smell of peanut butter and chocolate fills the air, and suddenly, everyone is quiet. That silence? It’s the magic of this Reese’s Peanut Butter Cheesecake. Creamy, rich, and downright irresistible, this dessert has become a staple at our house. Whether it’s for a holiday or just because, this cheesecake never fails to impress.
The Sweet History Behind Reese’s Peanut Butter Cheesecake
I didn’t invent this masterpiece, but I sure did perfect it! Reese’s Peanut Butter Cups have been a favorite candy since their creation in 1928 by H.B. Reese. Over the years, people have found countless ways to incorporate them into desserts. Cheesecake, with its velvety texture, seemed like the perfect match. I first tried making this recipe after seeing a friend post about it online. One bite, and I was hooked. Since then, I’ve tweaked it to make it foolproof for home bakers like you!
Why You’ll Love This Recipe
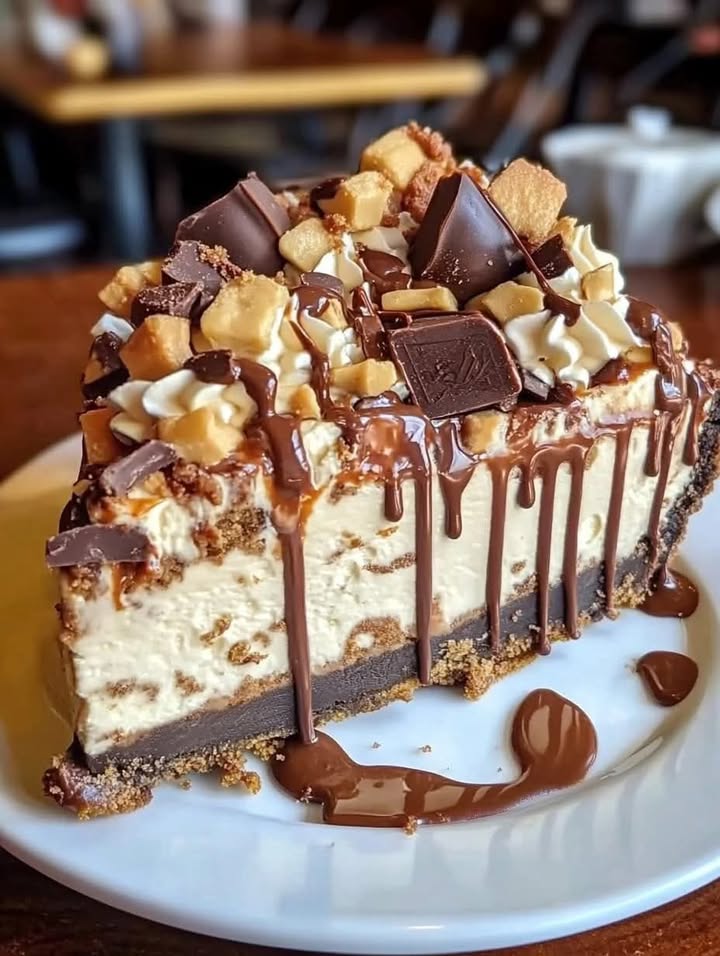
This Reese’s Peanut Butter Cheesecake is a dream come true for chocolate and peanut butter lovers. The graham cracker crust adds a crunchy contrast to the creamy filling, while the chopped peanut butter cups inside create delightful bursts of flavor. What’s more, the recipe is surprisingly simple. Even if you’re new to baking, you can pull this off without breaking a sweat. Plus, it’s a crowd-pleaser—trust me, no one leaves your table without asking for seconds!
Perfect Occasions to Make This Cheesecake
This cheesecake is perfect for any occasion—or no occasion at all! Bring it to a potluck, and watch it disappear faster than you can say “peanut butter.” It’s also a hit at birthday parties, holiday gatherings, or even as a special treat for date night. Honestly, I’ve made it just because I had some leftover cream cheese and wanted to spoil my family. Life’s too short not to indulge sometimes, right?
Ingredients You’ll Need
- For the crust:
- 2 cups graham cracker crumbs
- 1/4 cup unsalted butter, melted
- 1/4 cup granulated sugar
- 1/4 teaspoon salt
- For the filling:
- 24 oz (680g) cream cheese, softened
- 1 cup granulated sugar
- 1 cup creamy peanut butter
- 1 cup sour cream
- 1 teaspoon vanilla extract
- 3 large eggs
- 1 cup chopped Reese’s Peanut Butter Cups
- For the topping:
- 1/2 cup chocolate chips
- 1/4 cup heavy cream
- Mini Reese’s Peanut Butter Cups for decoration
Substitution Options
If you’re out of an ingredient or want to switch things up, here are some ideas:
- Swap graham cracker crumbs for crushed Oreos for a chocolatey twist.
- Use almond butter instead of peanut butter if you’re avoiding peanuts.
- Replace sour cream with Greek yogurt for a tangier flavor.
- Gluten-free? Use gluten-free graham crackers for the crust.
Step 1: Preparing the Crust
Start by preheating your oven to 325°F (163°C). Grab a 9-inch springform pan and give it a good greasing. In a mixing bowl, combine the graham cracker crumbs, melted butter, sugar, and salt. The mixture should resemble wet sand—it’s almost therapeutic to squish it between your fingers! Press it firmly into the bottom of the pan to form an even layer. Pop it in the oven for 10 minutes, then let it cool while you tackle the filling. Pro tip: Use the bottom of a glass to press the crust down for a smooth finish.
Step 2: Making the Filling
In a large bowl, beat the softened cream cheese until it’s silky smooth. Add the sugar and peanut butter, and mix until the color turns a beautiful golden brown. Stir in the sour cream and vanilla extract for extra creaminess. Now, crack in the eggs one at a time, beating gently after each addition—overmixing can cause cracks later. Fold in the chopped Reese’s Peanut Butter Cups last; they’ll sink slightly during baking but add pockets of gooey goodness. Pour this luscious filling over the cooled crust and spread it evenly. Chef’s tip: Tap the pan lightly on the counter to release any air bubbles.
Step 3: Baking the Cheesecake
Bake the cheesecake for 60-70 minutes. You’ll know it’s done when the edges are set but the center still has a slight jiggle—it will firm up as it cools. Turn off the oven and leave the door slightly ajar for an hour. This gradual cooling prevents cracks. Afterward, transfer the cheesecake to the fridge to chill for at least 4 hours or overnight. Patience pays off here; trust me, the wait is worth it!
Step 4: Adding the Topping
Once the cheesecake is chilled, it’s time for the finishing touch. Heat the chocolate chips and heavy cream in a microwave-safe bowl in 30-second intervals, stirring until smooth. Drizzle this glossy ganache over the cheesecake and spread it evenly. Decorate with mini Reese’s Peanut Butter Cups for that wow factor. Slice carefully with a warm knife for clean cuts, wiping the blade between slices.
Timing Breakdown
Here’s how long each step takes:
- Prep Time: 30 minutes
- Baking Time: 60-70 minutes
- Cooling Time: 1 hour
- Chilling Time: 4+ hours
- Total Time: Approximately 5 hours
Chef’s Secret
To prevent cracks, don’t skip the water bath method! Wrap the outside of your springform pan in foil and place it in a larger pan filled with hot water. This keeps the cheesecake moist and crack-free. It’s a game-changer, I promise!
Extra Info
Did you know that Reese’s Peanut Butter Cups were originally called “Penny Cups” because they cost just one cent? While prices have gone up, their popularity hasn’t waned. Pairing them with cheesecake feels like giving them the royal treatment they deserve!
Necessary Equipment
You’ll need a few tools to make this recipe shine:
- 9-inch springform pan
- Mixing bowls
- Electric mixer
- Spatula
- Measuring cups and spoons
Storage Tips
Store leftovers in the fridge, covered tightly with plastic wrap or aluminum foil. It stays fresh for up to 5 days. For longer storage, freeze individual slices wrapped in parchment paper and placed in a freezer-safe bag. Thaw in the fridge overnight before serving.
If you’re freezing the whole cheesecake, wrap it well and store it for up to 2 months. Let it thaw in the fridge for a day before slicing.
Avoid leaving the cheesecake at room temperature for more than 2 hours to prevent spoilage. Keep it chilled until ready to serve.
Tips and Advice
Here are a few tricks to elevate your cheesecake:
- Use room-temperature ingredients for a smoother batter.
- Don’t overmix the eggs—they can make the cheesecake dense.
- Let the cheesecake chill overnight for the best texture.
Presentation Ideas
Make your cheesecake stand out with these tips:
- Serve slices on colorful plates for a pop of contrast.
- Garnish with a sprinkle of sea salt for a salty-sweet twist.
- Add fresh berries around the plate for a fruity touch.
Healthier Alternatives
Want to lighten things up? Try these variations:
- Low-Sugar Version: Use a sugar substitute like stevia in the crust and filling.
- Vegan Option: Swap cream cheese for cashew-based cream cheese and use dairy-free chocolate.
- Gluten-Free: Use gluten-free graham crackers for the crust.
- Protein-Packed: Add a scoop of protein powder to the filling.
- Fruit Twist: Top with sliced bananas or strawberries instead of chocolate.
- Mini Cheesecakes: Use a muffin tin for portion-controlled servings.
Common Mistakes to Avoid
Mistake 1: Overmixing the Batter
Overmixing incorporates too much air, leading to cracks during baking. Mix just until combined, especially after adding the eggs. Pro tip: Use a spatula for the final fold to avoid overworking the batter.
Mistake 2: Skipping the Water Bath
Skipping the water bath can result in a dry cheesecake. The steam from the water keeps the cake moist and prevents cracks. If you’re worried about leaks, double-wrap the pan in foil.
Mistake 3: Cutting Too Soon
Cutting into the cheesecake before it’s fully chilled makes a mess. Always chill it for at least 4 hours to allow the flavors to meld and the texture to set.
FAQs
Can I make this cheesecake ahead of time?
Absolutely! This cheesecake tastes even better the next day. Make it up to 2 days in advance and store it in the fridge until ready to serve.
How do I fix a cracked cheesecake?
No worries—a little ganache or whipped cream hides cracks beautifully. Just spread it evenly across the top for a polished look.
Can I use natural peanut butter?
Yes, but stir it well first. Natural peanut butter separates, which can affect the texture of your filling.
What if I don’t have a springform pan?
You can use a regular cake pan, but line it with parchment paper for easy removal. Be gentle when lifting it out!
Why does my cheesecake taste eggy?
This happens if the eggs aren’t fully incorporated or if the cheesecake isn’t baked long enough. Beat the eggs gently and ensure the center is set before removing it from the oven.
Can I freeze this cheesecake?
Yes! Wrap it tightly and freeze for up to 2 months. Thaw in the fridge overnight before serving.
What’s the best way to slice cheesecake?
Dip your knife in hot water, then wipe it clean between slices for neat cuts. A sharp knife is key!
Can I use other candies besides Reese’s?
Of course! Try Snickers, Milky Way, or Rolos for a different twist.
Why is my crust soggy?
A soggy crust happens if the butter ratio is off or if the crust wasn’t baked long enough. Bake it for the full 10 minutes to crisp it up.
How do I know when the cheesecake is done?
The edges should be set, and the center should have a slight jiggle. It will continue to firm up as it cools.
Final Thoughts
This Reese’s Peanut Butter Cheesecake is more than just a dessert—it’s a celebration of flavors that brings joy to anyone lucky enough to try it. Whether you’re baking for loved ones or treating yourself, this recipe promises happiness in every bite. So grab your apron, gather your ingredients, and get ready to create something truly unforgettable. Happy baking!
Equipment
- Mixing Bowls
- Electric Mixer
- Spatula
- 9-inch Springform Pan
- Measuring Cups and Spoons
Ingredients
- 2 cups graham cracker crumbs
- 1/4 cup unsalted butter, melted
- 1/4 cup granulated sugar
- 1/4 teaspoon salt
- 24 oz cream cheese, softened
- 1 cup granulated sugar
- 1 cup creamy peanut butter
- 1 cup sour cream
- 1 teaspoon vanilla extract
- 3 large eggs
- 1 cup chopped Reese’s Peanut Butter Cups
- 1/2 cup chocolate chips
- 1/4 cup heavy cream
- q.s. Mini Reese’s Peanut Butter Cups for decoration
Instructions
- Preheat your oven to 325°F (163°C) and grease a 9-inch springform pan.
- Combine graham cracker crumbs, melted butter, sugar, and salt in a bowl until it resembles wet sand.
- Press the mixture firmly into the bottom of the pan and bake for 10 minutes; let cool.
- Beat cream cheese in a large bowl until silky, then add sugar and peanut butter until golden brown.
- Stir in sour cream and vanilla extract, then add eggs one at a time, mixing gently after each.
- Fold in chopped Reese’s Peanut Butter Cups, pour filling over the cooled crust, and spread evenly.
- Bake for 60-70 minutes until the edges are set and the center has a slight jiggle.
- Turn off the oven and leave the door slightly ajar for 1 hour; then chill in the fridge for at least 4 hours.
- Heat chocolate chips and heavy cream in a microwave-safe bowl until smooth and drizzle over chilled cheesecake.
- Decorate with mini Reese’s Peanut Butter Cups and slice with a warm knife.
Notes
Nutrition

Hi, I’m Olivia Parker, the founder of BakingSecret.com and a lifelong lover of all things sweet and homemade. I grew up in a small town in Oregon, where the smell of fresh cookies in my family’s kitchen sparked my passion for baking. Over the years, I turned that passion into a mission: to help home bakers feel confident, inspired, and creative.
After studying food science and working in several artisan bakeries across the U.S., I decided to create a space where everyone from beginners to seasoned bakers can find reliable recipes, expert tips, and a warm, welcoming community. BakingSecret.com is my way of sharing the magic of baking with the world. When I’m not testing new recipes, you’ll find me exploring farmers’ markets, collecting vintage cookbooks, or perfecting my sourdough technique.