
Why Rosette Cakes Are a Must-Try for Bakers
I still remember the first time I saw a rosette cake. It was at a friend’s birthday party, and the cake sat in the center of the table like a masterpiece. The swirls of frosting looked almost too perfect to eat. But when I finally took a bite, I realized it wasn’t just about how it looked—this cake tasted as good as it seemed. That’s the magic of a rosette cake. These cakes are more than desserts; they’re works of art that bring joy to both bakers and those who get to enjoy them.
Rosette cakes have become incredibly popular in the USA because they strike the perfect balance between elegance and fun. They’re not overly complicated, but their intricate patterns make them stand out. Whether you’re new to cake decorating or a seasoned baker, mastering the art of the rosette cake can elevate your creations. For me, baking has always been a passion, and rosette cakes hold a special place in my heart. They’re simple enough for beginners yet versatile enough for advanced decorators to experiment with colors and designs.
What Makes a Rosette Cake So Special?
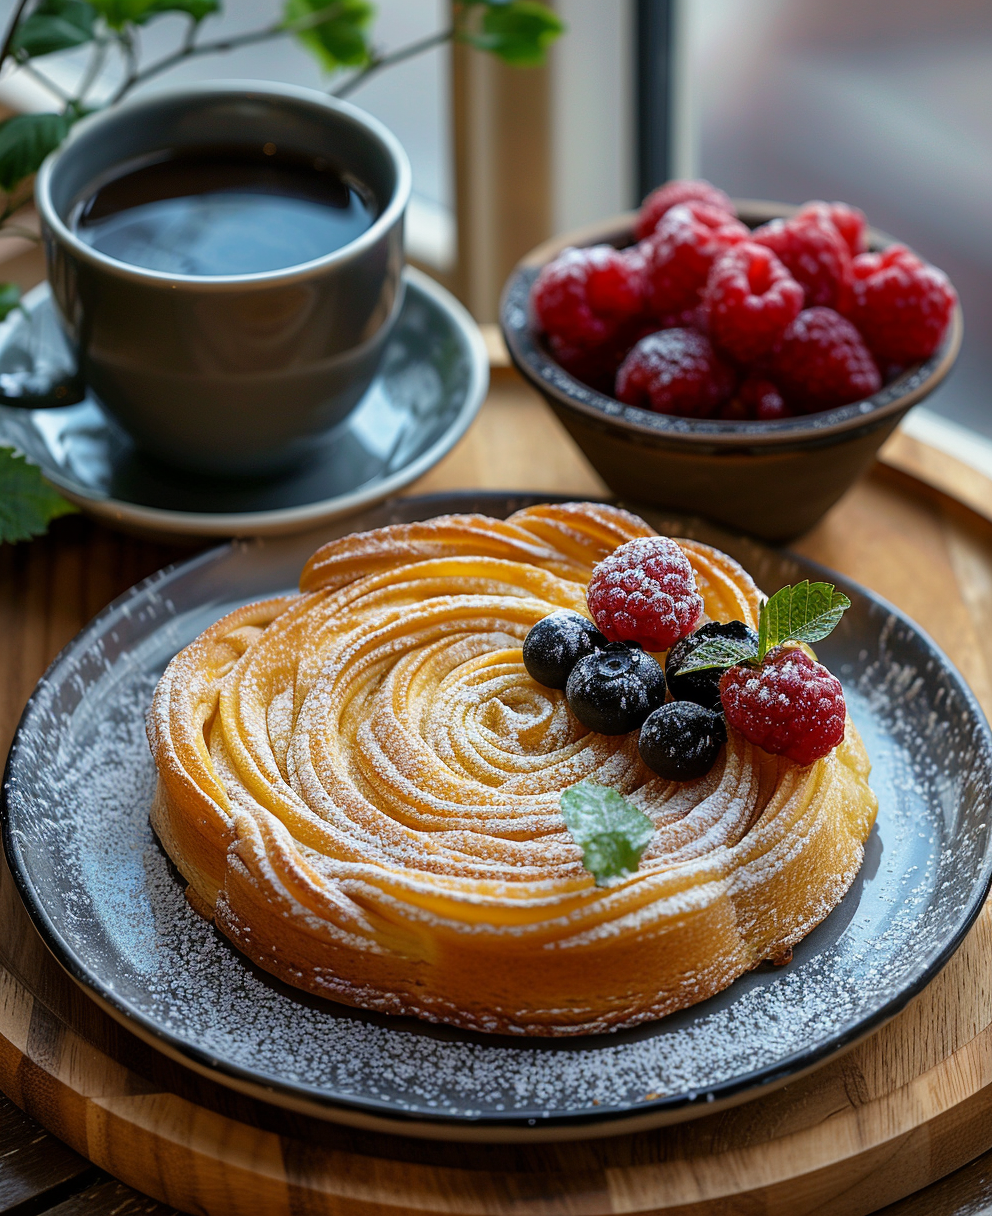
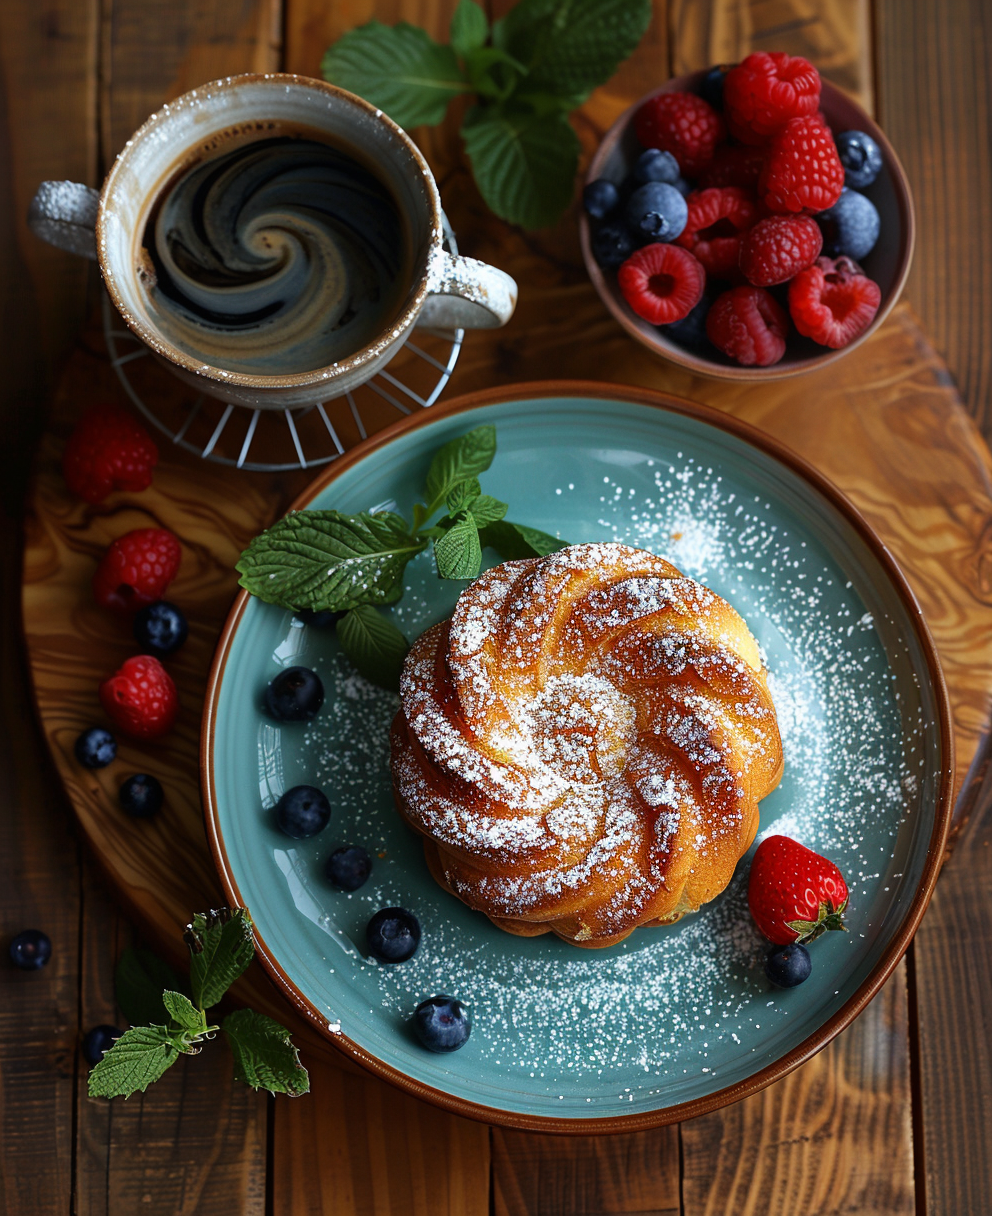
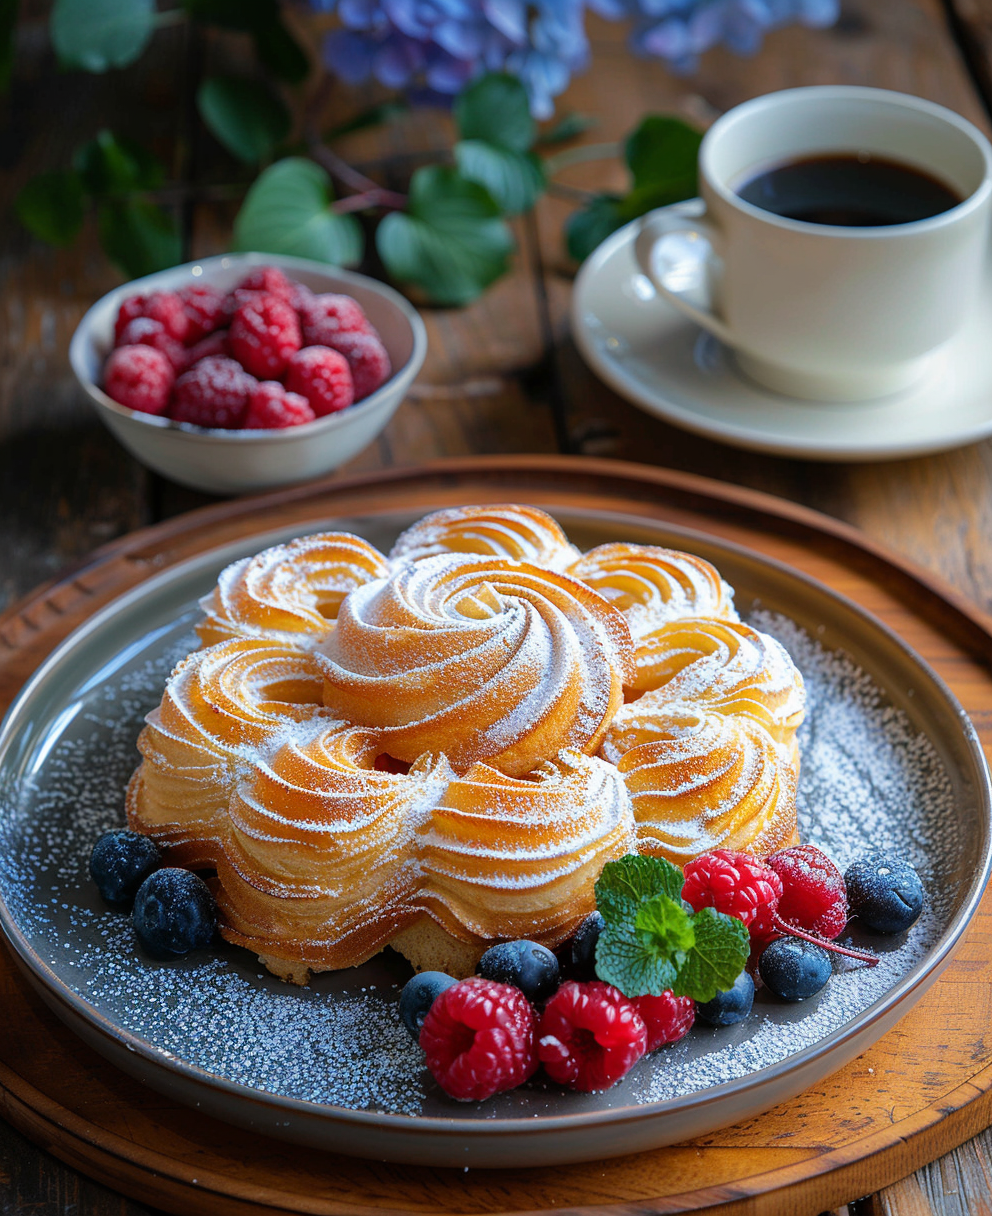
A rosette cake is a cake decorated with rows of small, flower-like swirls made using a piping technique. These swirls create texture and dimension, giving the cake a polished, professional look. Unlike flat frosted cakes, rosette patterns add depth and visual interest. This makes them perfect for celebrations like weddings, birthdays, or even casual get-togethers.
One of the reasons I love rosette cakes is their versatility. You can customize them in so many ways. Want a bold statement? Try a blue ombre rosette cake. Looking for something romantic? A red rosette cake might be your pick. I’ve even made a purple rosette cake for a friend who loves lavender hues. The possibilities are endless, and that’s what makes these cakes so appealing.
So, what sets a rosette cake apart from other decorated cakes? The answer lies in the technique. While smooth buttercream finishes or fondant-covered cakes rely on precision, rosette cakes focus on creating movement and flow. Each swirl overlaps slightly, forming a cohesive pattern that feels organic yet intentional. Plus, the rosette cake tip makes it easier to achieve consistent results, even if you’re just starting out.
The Tools You Need to Create Stunning Rosette Cakes
If you’re ready to try your hand at making a rosette cake, you’ll need a few essential tools. Don’t worry—these tools are beginner-friendly and won’t break the bank. Here’s what I recommend:
- Piping bags: Disposable ones are great for hassle-free cleanup.
- Rosette cake tips: These are the star of the show. Look for specific numbers like #104 or #127, which work beautifully for creating rosettes.
- Cake turntable: This helps you rotate the cake while piping, ensuring even coverage.
- Offset spatula: Perfect for smoothing the base layer of frosting before adding rosettes.
For beginners, I always suggest starting with a rosette cake tip number like #104. It’s easy to handle and produces lovely, medium-sized rosettes. Once you get comfortable, you can experiment with different sizes and shapes. For example, a smaller tip like #81 creates delicate swirls, while a larger one adds drama to a 2-tier rosette cake.
Here’s a quick tip: practice on parchment paper before moving to the actual cake. This helps build confidence and ensures your rosettes look consistent. Trust me—I’ve had my fair share of wobbly swirls during my early attempts!
Finding Inspiration for Your Rosette Cake Designs
Once you have the tools, the next step is deciding on a design. One of my favorite combinations is a rose swirl cake with shades of pink and white. It’s classic yet timeless. If you want to try something trendy, consider a blue ombre rosette cake. Start with light blue at the top and gradually transition to a deeper shade toward the bottom. This effect looks stunning and isn’t as hard as it seems.
Color aside, think about the occasion. A red rosette cake is perfect for Valentine’s Day or anniversaries, while a purple rosette cake can add a regal touch to a bridal shower. I once made a blue rosette cake for a baby shower, and the guests couldn’t stop raving about how beautiful it looked.
Don’t forget about flavor either. While the outside matters, the inside should taste just as amazing. Pair your rosette design with a rich chocolate cake, a tangy lemon sponge, or a moist vanilla bean base. My go-to rosette cake recipe includes layers of almond-flavored sponge with raspberry filling—it’s a crowd-pleaser every time.
How Much Does a Rosette Cake Cost?
If you’re wondering whether it’s worth making a rosette cake yourself, let’s talk about cost. Professionally made rosette cakes can range significantly in price depending on size, design complexity, and location. On average, a rosette cake price for a single-tier cake starts at $50 and can go up to $200 or more for elaborate designs like a 2-tier rosette cake.
Making your own saves money and gives you creative control. With basic tools costing around $20-$30 and ingredients ranging from $10-$20 per cake, you can create a bakery-worthy dessert for under $50. Plus, there’s nothing quite like the satisfaction of saying, “I made this myself!”
In the end, whether you’re crafting a blue ombre rosette cake or experimenting with new color combinations, the process is just as rewarding as the final product. And who knows? You might discover a hidden talent for cake decorating along the way.
Step-by-Step Rosette Cake Recipe
You know what’s awesome about baking? It’s like a little science experiment that ends with something delicious. And when it comes to making a rosette cake, the process is just as fun as the result. Trust me, once you break it down into steps, it feels totally doable—even if you’re not a pro baker. Let’s dive in!
First things first: we need to bake the cake layers. For this recipe, I usually go with a classic vanilla or chocolate sponge because they pair well with any frosting. If you’re feeling adventurous, try out flavors like almond or lemon—just imagine how amazing your kitchen will smell while it bakes! Once your cakes are cool (and yes, patience is key here), it’s time to prepare the frosting.
Frosting is where the magic happens. My go-to is a simple buttercream made with unsalted butter, powdered sugar, and a splash of milk or cream. Here’s a tip: whip it longer than you think you should—it makes all the difference in getting that light, fluffy texture. Want to switch it up? Add flavor extracts like vanilla or almond. Oh, and don’t forget food coloring! This is where you can start dreaming about a blue ombre rosette cake or even a bold red rosette cake.
Now, onto the star of the show: piping those gorgeous rosettes. Grab your rosette cake tip (I swear by the #104 for beginners) and load it into a piping bag filled with frosting. Hold the bag at a slight angle, apply gentle pressure, and rotate your turntable to create each swirl. Easy, right? Well, almost. The trick is keeping your hand steady—I’ve definitely had moments where my rosettes looked more like blobs, but hey, practice makes perfect.
Here’s a variation idea: if you want to make a purple rosette cake, divide your frosting into separate bowls and tint them different shades of purple. Start with the lightest hue at the top and gradually work your way down to darker tones. It gives such a professional look without much extra effort. By the way, I love using a two-tier design for special occasions—it’s easier than it looks! Just stack one layer on top of another after securing it with a bit of frosting. People always think it’s super fancy.
Speaking of designs, ever wondered how to achieve the perfect rosette swirl? The secret lies in consistency. Make sure your frosting isn’t too stiff or runny; you want it firm enough to hold its shape but soft enough to pipe smoothly. Also, keep your movements slow and deliberate. Practice on parchment paper first if you’re nervous. Funny enough, my dog once tried to “help” by eating my practice swirls off the counter. Lesson learned: keep an eye on curious pets!
Creative Rosette Cake Designs
Okay, let’s talk creativity. Decorating a rosette cake is kind of like painting—it’s all about expressing yourself. Some people stick to monochromatic schemes, while others go wild with colors. Personally, I’m obsessed with sunflower-inspired designs. Imagine bright yellows and oranges popping against a rustic brown background. So cheerful!
If you’re aiming for elegance, consider a rose swirl cake. Use pastel pinks and whites for a romantic vibe. Or maybe you’re planning something modern? A sleek rosette cake blue with metallic accents could be just the thing. Multicolored options are also fantastic—they remind me of those rainbow sprinkle cakes everyone went crazy for a few years back.
Themed cakes are another great way to get creative. For example, a wedding rosette cake might feature soft ivories and gold highlights, while a birthday cake could incorporate bold hues and playful patterns. Speaking of birthdays, have you seen the trend of birthday cakes for men? They often use darker colors like navy or black paired with geometric shapes. Super stylish.
Ombre effects are still huge right now, especially for events like baby showers or bridal parties. Picture a gradient transitioning from pale lavender to deep plum—it’s mesmerizing. Here’s the thing: achieving this effect doesn’t require advanced skills. Simply mix varying amounts of food coloring into your frosting and layer them strategically. Trust me, guests will think you spent hours on it.
Can I customize a rosette cake for any theme? Absolutely. Whether it’s a girly unicorn party or a sports-themed bash, the versatility of these cakes makes them ideal for customization. Pro tip: match the colors to the event decor, and you’ll instantly impress everyone. I once made a cake inspired by a client’s favorite soccer team, complete with tiny edible jerseys. Talk about taking personalization to the next level!
Budget-Friendly Tips for Making Rosette Cakes
Let’s face it: buying a professionally decorated cake can get pricey. That’s why learning to make your own rosette cake is such a game-changer. Sure, there’s an initial investment in tools, but over time, you’ll save so much money. And honestly, you don’t need expensive equipment to create something beautiful.
For starters, skip the fancy fondant unless it’s absolutely necessary. Buttercream works wonders and costs way less. Plus, it tastes better (no shade to fondant lovers). When shopping for ingredients, buy in bulk—things like flour, sugar, and cocoa powder tend to be cheaper that way. Another cost-saving hack? Use store-brand products instead of name brands. They taste just as good, promise.
Tools-wise, focus on essentials like piping bags, a couple of good-quality tips, and a reliable turntable. You’d be surprised how far these basics can take you. Funny story: I accidentally bought a cheap turntable once, and it wobbled so much my cake almost slid right off. Not ideal. So yeah, invest in a decent one if you can.
By the way, have you checked out recipes for other trendy desserts? Like number cakes? They’re insanely popular for milestone birthdays and anniversaries. Or how about a milhojas cake? Layers of crispy pastry and creamy filling—it’s divine. These ideas might inspire you to branch out beyond rosettes someday.
One last piece of advice: don’t stress too much about perfection. Homemade cakes have charm that store-bought ones lack. Even if your rosettes aren’t picture-perfect, people will appreciate the love and effort you put into it. After all, baking is supposed to be fun, not stressful. Right?
Common Mistakes to Avoid When Decorating a Rosette Cake
Let’s face it—decorating a rosette cake can feel a bit intimidating at first. Even with the right tools and ingredients, things don’t always go as planned. I’ve had my fair share of baking mishaps, trust me. One time, I spent hours piping what I thought were perfect rosettes, only to realize they looked more like sad little blobs once the cake was done. It happens to everyone, but the good news is, you can avoid most mistakes with a little know-how.
One of the biggest pitfalls? Uneven frosting consistency. If your buttercream is too stiff, your rosettes will look flat instead of full. On the flip side, if it’s too runny, the swirls will collapse into each other. The fix? Make sure your frosting has the right texture. You want it firm enough to hold its shape but soft enough to pipe smoothly. A quick test: scoop a bit onto a spoon and let it sit for a minute. If it holds its form without drooping, you’re golden.
Another common issue is improper piping pressure. This one took me ages to master. Hold the piping bag too tightly, and you’ll end up with overly large rosettes. Too lightly, and they’ll look sparse and uneven. My advice? Practice on parchment paper first. Find a grip that feels comfortable and experiment with different pressures until you get consistent results. Oh, and keep your wrist steady—trembling hands are no fun when you’re aiming for perfection.
Here’s a question I hear a lot: “Why do my rosettes look flat instead of full?” Chances are, you’re not overlapping the swirls enough. Each rosette should slightly cover the base of the previous one to create a fuller, layered effect. Think of it like shingles on a roof—they need to overlap just right to look cohesive. Also, don’t forget to rotate your turntable as you pipe. It makes the process so much easier and helps keep your lines even.
Funny enough, I once ruined an entire blue ombre rosette cake because I skipped this step. I thought I could eyeball it, but the result was a mess of uneven rows. Lesson learned: take your time, and don’t cut corners. Baking’s all about patience, after all.
Bonus Tips to Elevate Your Rosette Cake Game
Now that we’ve covered the big mistakes, let’s talk about some extra tips to make your creations stand out. For instance, have you ever tried using a rosette cake tip number like #127? It’s slightly larger than the #104 and creates bigger, more dramatic swirls. Perfect for a 2-tier rosette cake where you want the design to really pop.
By the way, lighting matters more than you’d think. If you’re working in a dimly lit kitchen, it’s easy to miss tiny imperfections in your piping. I invested in a small LED lamp for my workspace, and it made such a difference. Plus, it doubles as mood lighting when I’m baking late at night (don’t judge).
Temperature is another factor people often overlook. If your cake or frosting is too warm, the rosettes might slide around or lose their shape. Keep your workspace cool, and chill the cake briefly between layers of decoration if needed. Funny story: I accidentally left a red rosette cake in the fridge overnight once, and the next morning, it looked flawless. Sometimes happy accidents happen!
Speaking of designs, why not mix things up with textures? Instead of sticking to just rosettes, try alternating them with dots, stars, or even ruffles. I recently made a purple rosette cake with silver sugar pearls scattered between the swirls—it added a touch of sparkle that wowed everyone at the party.
FAQs About Rosette Cakes
If you’re still curious about rosette cakes, here are answers to some common questions. Whether you’re wondering about flavors, timing, or dietary options, I’ve got you covered.
- What flavors pair well with a rosette cake design?
Honestly, almost anything works. Classic vanilla and chocolate are always crowd-pleasers, but don’t shy away from experimenting. Lemon pairs beautifully with blue ombre designs, while almond complements purple hues. For something bold, try a rich espresso-flavored sponge with a rose swirl cake design. - How far in advance can I decorate a rosette cake?
You can frost and decorate your cake up to 2 days ahead if stored properly. Keep it in the fridge, covered loosely with plastic wrap to prevent it from drying out. Just bring it to room temperature before serving for the best flavor and texture. - Are there vegan or gluten-free rosette cake recipes available?
Absolutely! Swap regular butter for plant-based margarine in your frosting, and use a gluten-free flour blend for the cake layers. There are tons of amazing recipes online—I even found one for a vegan red rosette cake that turned out surprisingly moist and delicious. - Can I use store-bought frosting for a rosette cake?
Sure, but it might not hold its shape as well as homemade buttercream. If you go this route, consider chilling the frosting slightly before piping to firm it up. Homemade is usually better, though, especially if you’re aiming for intricate designs. - What’s the best way to transport a decorated rosette cake?
Invest in a sturdy cake carrier. Place non-slip mats underneath the cake to prevent sliding, and drive carefully to avoid jostling. Pro tip: chill the cake before transporting to help everything stay in place. - How do I fix a mistake while piping rosettes?
No worries—just scrape off the offending swirl with a small offset spatula and start again. Buttercream is forgiving, so fixing errors is usually pretty easy. Practice makes perfect, after all. - Can I freeze a rosette cake?
Yes, but only if it’s unfrosted. Wrap the cake layers tightly in plastic wrap and freeze for up to 3 months. Once thawed, let them come to room temperature before frosting. - What’s the easiest color scheme for beginners?
Stick to monochromatic shades like white and ivory or soft pastels. They look elegant without requiring advanced techniques. A blue rosette cake with varying tones of the same hue is a great starting point. - How do I clean my piping tips quickly?
Soak them in warm, soapy water right after use. Use a small brush to remove any stubborn bits of frosting. Rinse thoroughly and dry completely before storing. - Where can I find inspiration for unique rosette cake designs?
Check out social media platforms like Pinterest or Instagram. There are endless ideas out there, from themed cakes to creative color combinations. And hey, browsing through cake recipes and tutorials never hurts either!
Final Thoughts
You know, every time I bake a rosette cake, I’m reminded of how therapeutic it can be. Watching those tiny swirls come together into something beautiful feels almost meditative. And honestly, there’s nothing quite like seeing someone’s face light up when they see—or taste—your creation.
So, let me know in the comments which design you’re excited to try first! Whether it’s a romantic rose swirl cake or a bold blue ombre rosette cake, I’d love to hear about it. Don’t forget to share your creations with me—I’d love to see them!
Equipment
- Piping bags
- Rosette cake tips e.g., #104, #127
- Cake turntable
- Offset spatula
Ingredients
- 200 g cake layers (classic vanilla or chocolate sponge)
- 200 g unsalted butter for frosting
- 400 g powdered sugar for frosting
- 2 tablespoons milk or cream for frosting
- as needed food coloring for decorating
Instructions
- Bake the cake layers, allowing them to cool completely.
- Prepare the frosting by beating unsalted butter with powdered sugar and a splash of milk or cream until light and fluffy.
- If desired, add flavor extracts and food coloring to the frosting.
- Load a piping bag with frosting using a rosette cake tip (preferably #104).
- Pipe the rosettes onto the cooled cake, rotating the turntable for even coverage.
- Optionally, create color gradients by using different shades of frosting.
- Chill the cake briefly between layers of decoration if necessary.
- Serve and enjoy!
Notes
Nutrition

Hi, I’m Olivia Parker, the founder of BakingSecret.com and a lifelong lover of all things sweet and homemade. I grew up in a small town in Oregon, where the smell of fresh cookies in my family’s kitchen sparked my passion for baking. Over the years, I turned that passion into a mission: to help home bakers feel confident, inspired, and creative.
After studying food science and working in several artisan bakeries across the U.S., I decided to create a space where everyone from beginners to seasoned bakers can find reliable recipes, expert tips, and a warm, welcoming community. BakingSecret.com is my way of sharing the magic of baking with the world. When I’m not testing new recipes, you’ll find me exploring farmers’ markets, collecting vintage cookbooks, or perfecting my sourdough technique.