
My Go-To Gourmet Treat: Salted Caramel Truffles
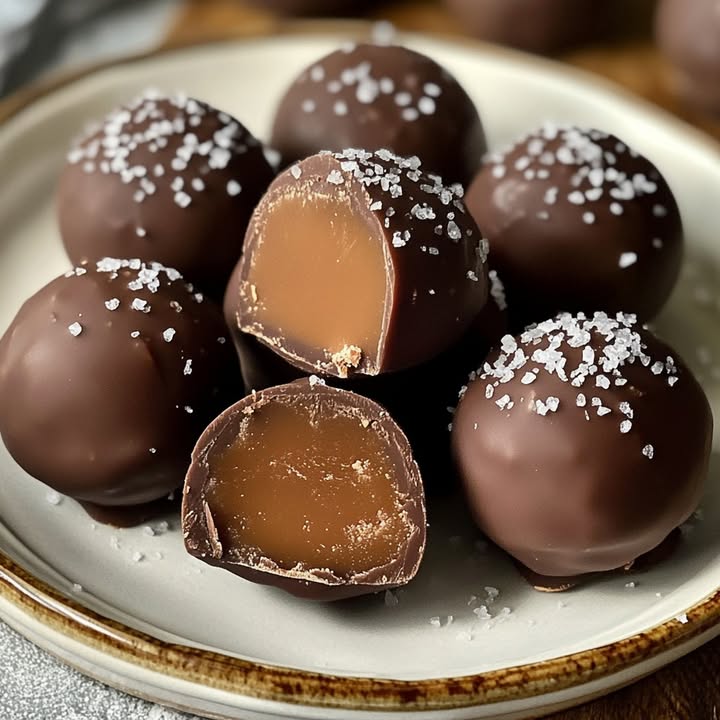
Have you ever had that moment where a single bite of something just stops you in your tracks? For me, it was a little chocolate orb filled with liquid caramel and a whisper of salt. I swear, my eyes rolled back a little. That’s the magic of homemade salted caramel truffles. They look fancy, but honestly, they’re just pure, delicious fun. Forget store-bought boxes. Once you taste these, you’ll be the resident chocolate hero for every party, gift exchange, or “I need a treat” moment.
The Sweet and Salty Story Behind Truffles
The word “truffle” in chocolate comes from their resemblance to the rare, earthy fungus. But the taste is anything but earthy! The classic French chocolate truffle is just ganache—chocolate and cream—rolled into a ball. Adding salted caramel is my modern twist. It’s a perfect marriage of two beloved trends: deep, rich caramel and the gourmet “sweet & salty” combo. It’s like taking a luxurious chocolate truffle and giving it a deliciously naughty little heart. I love making them because they feel both classic and totally new.
Why You’ll Absolutely Love This Recipe
First, these salted caramel truffles are shockingly simple. No fancy tempering or chocolate molds needed. Second, they’re incredibly forgiving. If your caramel is a shade lighter or darker, it’s still delicious. Third, the flavor payoff is huge. You get a crisp chocolate shell, a creamy caramel center, and that tiny salty finish that makes you want another…immediately. They’re little bites of joy that you can make ahead and have ready for any occasion.
Perfect Occasions for Salted Caramel Truffles
These truffles are the ultimate versatile treat. I make a big batch for holiday gift boxes—they always impress more than a store-bought card. They’re stunning on a dessert table at a dinner party. A small plate of them turns a casual coffee chat into something special. Honestly, any day that calls for a little celebration is a good day for these homemade salted caramel truffles.
Gathering Your Ingredients
You don’t need a pantry full of strange items. Here’s the simple list:
- 1/2 cup granulated sugar
- 2 tablespoons water
- 3 tablespoons unsalted butter
- 1/4 cup heavy cream
- 1/4 teaspoon sea salt (plus more for sprinkling)
- 1/2 teaspoon vanilla extract
- 8 ounces semisweet or dark chocolate, chopped
- 1 teaspoon coconut oil or shortening (optional, for smoother coating)
Smart Substitutions If You Need Them
Don’t stress if you’re missing something! For the chocolate, a good-quality bar you chop yourself works best, but chocolate chips can be used (they might need the coconut oil to help thin them). If you don’t have heavy cream, you can use full-fat whipping cream. For the sea salt, any flaky salt like Maldon is perfect for sprinkling, but regular fine sea salt works in the caramel itself. The vanilla is key for aroma, but you could skip it if you must.
Crafting Your Salted Caramel Truffles: Step-by-Step
Step 1: Making the Caramel
In a medium saucepan, combine the sugar and water. Place it over medium heat. Now, the most important rule: do not stir. Just let it bubble and boil. You’ll watch it go from clear to a light golden, then finally to a deep amber color. This takes about 5-7 minutes. It smells like toasty sugar and looks like liquid gold. When it’s that deep amber, immediately remove it from the heat. Pro tip: Have your butter, cream, and salt ready right next to the stove. Timing is key here.
Step 2: Finishing the Caramel Sauce
Carefully whisk in the butter. It will foam up dramatically—that’s normal! Then slowly pour in the heavy cream and whisk again. Finally, add the sea salt and vanilla. Keep whisking until you have a smooth, glossy, and beautifully homogeneous sauce. It will be thin and pourable. Pour this into a bowl and let it cool to room temperature before moving it to the fridge to firm up. This chilling takes about an hour.
Step 3: Forming the Caramel Centers
Once your caramel is firm (like a soft, scoopable dough), use a small spoon or a melon baller to scoop out portions. Roll them quickly into balls between your palms. They might be sticky! If they get too soft, pop them back in the fridge for 10 minutes. Once rolled, place all the balls on a plate and freeze them for 15-20 minutes. This quick freeze is crucial—it makes the solid caramel centers easier to dip in chocolate without melting.
Step 4: Melting the Chocolate Coating
While the balls are freezing, melt your chopped chocolate. You can do this in a double boiler or a microwave in short bursts. If using, add the teaspoon of coconut oil or shortening. This little trick makes the melted chocolate more fluid and gives a smoother, shinier final shell on your salted caramel truffles. Stir until it’s completely smooth and velvety.
Step 5: Dipping and Decorating
Take your frozen caramel balls out. Using a fork or a dipping tool, dip each ball fully into the melted chocolate. Lift it out, let excess chocolate drip off, and place it on a parchment-lined sheet. Immediately, while the chocolate is still wet, sprinkle a tiny pinch of flaky sea salt right on top. That salt not only looks pretty but gives that perfect salty burst. Let them set at room temperature or in the fridge until the shell is hard. Chef’s tip: If your chocolate starts to thicken as you dip, just re-warm it gently for a few seconds.
Understanding the Timing
This isn’t a rushed recipe. The prep is quick (20 mins), and cooking the caramel is fast (10 mins). But the magic happens during the resting times. Chilling the caramel (1 hour) and freezing the balls (20 mins) are essential for success. The final setting of the chocolate takes another 30 minutes. So total time from start to delicious finish is about 1 hour 30 minutes. Perfect for a relaxed afternoon baking project.
My Chef’s Secret for Perfection
The secret is in the caramel color. Don’t under-cook it—a light caramel won’t have that deep, complex flavor. But don’t let it go too dark and smoky either. Aim for a color like a rich, amber honey. When you see that, you’ve hit the sweet spot. Trust your eyes more than a timer.
A Little Extra Sweet Info
Caramel is simply sugar, transformed by heat. That transformation is called caramelization. It’s a beautiful chemical process that creates hundreds of new flavor compounds. Adding butter and cream stops the process and creates the sauce we love. It’s science that tastes amazing!
Necessary Equipment
You don’t need special tools. A medium saucepan, a whisk, a bowl for chilling, a small scoop or spoon for forming balls, and a fork for dipping. Parchment paper is a must for easy cleanup and no-stick setting. A microwave-safe bowl or double boiler for melting chocolate rounds out the list.
How to Store Your Salted Caramel Truffles
These truffles store beautifully. At room temperature in a cool, dry place, they’ll keep for about 3-4 days in an airtight container. The chocolate shell protects the caramel inside perfectly.
For longer storage, the refrigerator is your friend. They’ll keep for up to two weeks chilled. Let them come to room temperature for about 10 minutes before serving for the best texture and flavor.
You can even freeze them for a month or more! Wrap them well in an airtight container or freezer bag. Thaw in the fridge overnight before serving. This makes them a fantastic make-ahead treat for busy times.
Tips and Advice for Success
Use a light-colored saucepan to make the caramel. It helps you see the color change clearly. When adding the cream to the hot caramel, do it slowly—it will bubble violently. Be ready. When rolling the caramel balls, if they are too sticky, dampen your hands slightly with water. Don’t skip the sea salt sprinkle on top—it’s the signature finish!
Presentation Ideas to Impress
Place them in a pretty mini cupcake liner on a platter. Stack them in a clear glass jar as a gift. Arrange them on a board with other desserts like a bright Lemon Sour Cream Pound Cake for a contrast of flavors. For holidays, sprinkle them with colored sugar instead of salt. For a dinner party, serve them with a small glass of port or coffee.
Healthier & Fun Variations to Try
You can easily tweak this salted caramel truffle recipe for different tastes or diets.
- Dairy-Free Truffles: Use vegan butter and coconut cream instead of dairy. Choose a dairy-free dark chocolate.
- Lower-Sugar Option: Reduce the sugar in the caramel by a quarter and use a higher percentage dark chocolate (85%+). The flavor will be more intense and less sweet.
- Nutty Delight: Add a tiny piece of pecan or almond inside the caramel ball before freezing and dipping.
- Spiced Caramel: Infuse the caramel with a pinch of cinnamon or cardamom for a warm, cozy twist.
- Espresso Shot: Dissolve a teaspoon of instant espresso powder into the cream before adding it for a mocha caramel truffle.
- Pink Sea Salt: Use pink Himalayan salt for sprinkling for a gorgeous color and mild mineral flavor.
Common Mistakes to Avoid
Mistake 1: Stirring the Sugar While It Melts
This is the most common error. Stirring the sugar and water while it heats causes the sugar to crystallize back into grains. You’ll end up with a gritty, cloudy caramel instead of a smooth, clear one. Just trust the process. Let it boil untouched until it reaches the right color. Swirl the pan only if you see it coloring unevenly.
Mistake 2: Taking the Caramel Off Heat Too Early or Too Late
Caramel color equals flavor. A light gold caramel will taste mild and sweet. A deep amber gives that rich, complex, almost toffee-like depth we want. But if you let it go too dark (dark brown), it can taste bitter and burnt. Watch carefully. Aim for a color similar to a dark maple syrup. Pro tip: Have all your next ingredients measured and right by the stove so you can add them immediately when the color is perfect.
Mistake 3: Skipping the Freezing Step for the Caramel Balls
It seems like a small step, but those 15-20 minutes in the freezer are vital. A firm, cold caramel center won’t melt when dipped into the warm chocolate. If you dip a room-temperature caramel ball, it can soften, leak, or even cause the chocolate shell to crack. Patience here ensures a perfect, sealed truffle.
Mistake 4: Using Cold Ingredients for the Caramel Finish
When you whisk the butter and cream into the hot sugar, they should be at room temperature or warmed slightly. Adding very cold cream to extremely hot sugar can cause the caramel to seize or harden into lumps. Let your cream sit out for a few minutes, and use room-temperature butter for a smooth, seamless blend.
Frequently Asked Questions
Can I use store-bought caramel instead?
You can, but the flavor and texture won’t be the same. Store-bought caramel sauces are often softer and don’t set firm enough to be rolled into a center. Making your own caramel is simpler than you think and gives you control over the salt level and depth of flavor. It’s the heart of the recipe, so I really recommend trying it!
Why do I need to add water to the sugar at the start?
The water helps dissolve the sugar evenly and allows it to heat more uniformly. It prevents the sugar from burning in spots before it’s fully melted. As it heats, the water evaporates, leaving you with pure liquid sugar that then caramelizes. Starting with dry sugar in a pan is much harder to control and often leads to burning.
My caramel became grainy. What happened?
This usually means either the sugar was stirred during heating, or a cold ingredient was added too quickly and caused crystallization. Also, ensure your sugar is completely dissolved at the start. Next time, remember: no stirring during boiling, and use room-temperature butter and cream. Grainy caramel can still be used—it will taste good but have a sandy texture.
Can I make these truffles with milk chocolate?
Absolutely! Milk chocolate will give a sweeter, milder shell. Since the caramel center is already sweet, I personally prefer the contrast of dark or semisweet chocolate. But if you love milk chocolate, go for it. Just note that milk chocolate is softer, so your truffles might need to be stored in the fridge to keep the shell firm.
How do I get a really smooth, professional-looking chocolate coating?
The secret is in the chocolate’s temperature and fluidity. Adding a small amount of coconut oil or shortening (as listed in the recipe) thins the chocolate, making it easier to dip and giving a smoother finish. Also, make sure your melted chocolate is not too hot when you dip the cold caramel balls. A moderate temperature helps it set in a even layer.
What’s the best way to gift these truffles?
Place them in a small cardboard or metal gift box, separated by layers of parchment paper. You can decorate the box with a ribbon. Include a small note with storage advice (cool place). They are a fantastic homemade gift that feels much more personal than anything from a store. Pair them with other homemade treats like easy Crockpot Easter Candy Clusters for a festive candy assortment.
Can I add flavorings to the caramel?
Yes, but do it carefully. Add extracts (like orange or almond) or liquors (like a teaspoon of bourbon) after you’ve added the cream and the caramel has cooled slightly. Adding them to the pure hot sugar can cause flavor loss or splattering. Start with small amounts so you don’t overpower the main caramel taste.
Why is sea salt better than regular salt for sprinkling?
Flaky sea salt, like Maldon, has a light, crisp texture and a clean, briny taste. It doesn’t dissolve immediately on the chocolate. This gives you a delightful little crunch and a burst of saltiness that complements the sweet. Regular table salt is finer, dissolves faster, and can just make the chocolate taste salty without that textural pop.
How can I tell if the caramel centers are firm enough to roll?
After chilling in the fridge, the caramel should feel like a firm, but still pliable, dough. If it’s too hard to scoop, let it sit at room temperature for 5 minutes. If it’s too soft and sticky, chill it a bit longer. The ideal texture is like a soft cookie dough that holds its shape when rolled.
Are these truffles safe for people with nut allergies?
This base recipe contains no nuts. However, always check your chocolate labels, as some brands may be processed in facilities with nuts. To keep them allergy-friendly, use a brand you trust and avoid any nut-based substitutions. For other festive desserts, you could also offer a nut-free option like a stunning Easter Bunny Poke Cake.
Making your own candy is a wonderful way to ensure quality and food freshness. You control the ingredients and the process, which often leads to a tastier and more satisfying result.
I love how these salted caramel truffles fit into so many moments. They’re perfect for everything from a casual treat to a big holiday spread. If you’re looking for more special occasion baking ideas, you can find a wonderful collection in our holiday and special occasion bakes category. From truffles to cheesecakes like this gorgeous Strawberry Swirl Cheesecake, there’s always something new to try.
Your Turn to Be the Chocolate Wizard
So, there you have it. My favorite recipe for little bites of magic. These salted caramel truffles are your ticket to homemade gourmet status. They’re fun to make, even more fun to eat, and universally loved. Don’t be intimidated by the caramel—just watch the color and go with it. Once you roll that first perfect truffle and taste it, you’ll be hooked. Now, go grab your saucepan and make someone’s day sweeter (and a little saltier). Happy cooking!
Equipment
- Casserole moyenne
- Fouet
- Grand bol
- Cuillère à mesurer
- Papier sulfurisé
Ingredients
- 100 g sucre granuleux
- 30 ml eau
- 45 g beurre non salé
- 60 ml crème épaisse
- 1 g sel de mer plus pour saupoudrer
- 2 ml extrait de vanille
- 225 g chocolat noir ou au lait haché
- 5 g huile de coco ou shortening optionnel, pour un enrobage plus lisse
Instructions
- Dans une casserole moyenne, combinez le sucre et l'eau à feu moyen sans remuer jusqu'à obtenir une couleur ambrée profonde (5-7 minutes).
- Ajoutez soigneusement le beurre; ça va mousser.
- Versez lentement la crème épaisse tout en fouettant jusqu'à ce que le mélange soit lisse, puis ajoutez le sel de mer et la vanille.
- Versez le caramel dans un bol et laissez refroidir à température ambiante, puis réfrigérez jusqu'à ce qu'il soit ferme (environ 1 heure).
- Une fois que le caramel est ferme, prélevez des portions et roulez-les en boules; mettez au congélateur pendant 15-20 minutes.
- Faites fondre le chocolat haché au bain-marie ou au micro-ondes et, si désiré, ajoutez l'huile de coco pour un fini plus lisse.
- Trempez chaque boule de caramel congelée dans le chocolat fondu et placez-les sur une plaque recouverte de papier sulfurisé; saupoudrez de flocons de sel de mer.
- Laissez le chocolat prendre à température ambiante ou au réfrigérateur jusqu'à ce qu'il soit ferme (environ 30 minutes).
Notes
Nutrition

Hi, I’m Olivia Parker, the founder of BakingSecret.com and a lifelong lover of all things sweet and homemade. I grew up in a small town in Oregon, where the smell of fresh cookies in my family’s kitchen sparked my passion for baking. Over the years, I turned that passion into a mission: to help home bakers feel confident, inspired, and creative.
After studying food science and working in several artisan bakeries across the U.S., I decided to create a space where everyone from beginners to seasoned bakers can find reliable recipes, expert tips, and a warm, welcoming community. BakingSecret.com is my way of sharing the magic of baking with the world. When I’m not testing new recipes, you’ll find me exploring farmers’ markets, collecting vintage cookbooks, or perfecting my sourdough technique.