
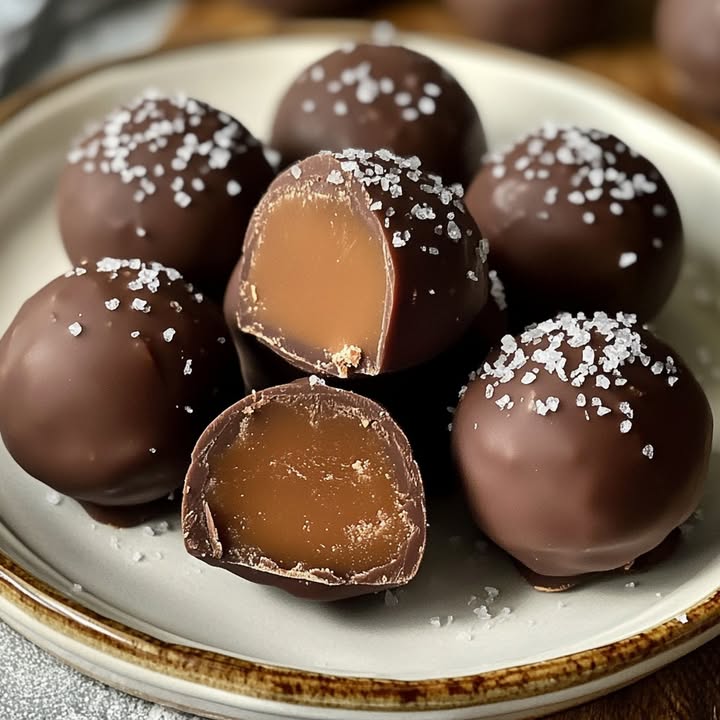
There’s a special kind of magic that happens when you combine chocolate, caramel, and a pinch of salt. For me, it’s the taste of pure joy wrapped up in a tiny, two-bite package. I first made these salted caramel truffles for a friend’s birthday, trying to impress her with something homemade. The look on her face when she tasted that creamy, sweet, and slightly salty center was priceless. It wasn’t just a treat; it was a moment. That’s why I love sharing this recipe so much. It proves that gourmet, gift-ready goodness can be born right in your own kitchen, with just a little patience and a lot of love.
A Sweet Story: Humble Caramel’s Luxurious Upgrade
Caramel, in its simplest form, is just sugar and heat. It’s a staple that goes back centuries. But the genius of adding a touch of sea salt? That’s a more modern twist. It turns a simple sweet into a complex, sophisticated flavor dance. My version of salted caramel truffles borrows from classic French chocolate work but keeps everything achievable for home cooks. You don’t need fancy molds or tempering machines. You just need a good saucepan, a whisk, and a willingness to watch sugar transform into liquid gold. Think of it as giving a timeless candy a deliciously modern, salty hug.
Why You’ll Fall in Love With These Salted Caramel Truffles
If you need reasons beyond “they’re incredible,” here are a few:
- Flavor Bomb: The contrast of deep, bitter chocolate, rich caramel, and sharp salt is unforgettable.
- Surprisingly Simple: While they look like boutique candy, the process is straightforward. The hardest part is waiting for them to chill!
- The Ultimate Gift: Homemade candy shows thoughtfulness. Package these in a little box, and you’ve got a present anyone would adore.
- Crowd-Pleasing: They suit almost every occasion. From holiday parties to casual movie nights, they’re always a hit.
Perfect Occasions for Homemade Salted Caramel Truffles
These aren’t just for December! They shine year-round. Think of them for:
- Holiday Gift Boxes: Make a big batch and share the love during Christmas, Valentine’s Day, or Easter.
- Dinner Party Finale: Place a few on a petite dish beside coffee for a stunning, elegant finish.
- Personal “Chocolate Fix”: Keep a secret stash in the fridge for when a luxurious treat is needed.
- Bake Sale Star: They sell faster than anything because they look and taste professional.
Ingredients for Your Gourmet Chocolate Truffles
Gathering these simple ingredients is the first step to candy-making success:
- 1/2 cup granulated sugar
- 2 tablespoons water
- 3 tablespoons unsalted butter
- 1/4 cup heavy cream
- 1/4 teaspoon sea salt plus more for sprinkling
- 1/2 teaspoon vanilla extract
- 8 ounces semisweet or dark chocolate, chopped
- 1 teaspoon coconut oil or shortening (optional, for smoother coating)
Ingredient Substitutions: Making It Work With What You Have
Don’t stress if your pantry isn’t perfectly stocked. Here are some easy swaps:
- Chocolate: Use high-quality chocolate chips if chopping a bar feels fussy. Dark chocolate (around 60-70%) gives a lovely balance against the sweet caramel.
- Heavy Cream: Full-fat coconut cream can be used for a dairy-free version. The flavor will be slightly different but still delicious.
- Coconut Oil: This helps the melted chocolate coat smoothly. If you don’t have it, just use the chocolate alone; it will still work.
- Sea Salt: A fine flaky sea salt is perfect for sprinkling. If you only have coarse salt, grind it a bit between your fingers before using.
Crafting Your Salted Caramel Truffles: A Step-by-Step Journey
Follow these steps and you’ll be a truffle-making pro!
Step 1: Creating the Liquid Gold Caramel
Place your saucepan over medium heat and combine the sugar and water. Now, here’s the key: resist stirring! Just let the mixture bubble and simmer. Watch as it goes from clear to a light golden hue, then finally to a deep, amber color. This is the moment. You’ll smell a rich, almost nutty aroma. Pro tip: Swirl the pan gently if you see the color changing unevenly, but don’t introduce a spoon. Removing it from heat, carefully whisk in the butter. It will foam up gloriously. Then add the cream, sea salt, and vanilla. Stir until you have a smooth, glorious salted caramel sauce. Let this cool before moving on.
Step 2: Chilling and Forming the Caramel Centers
Transfer your warm caramel to a bowl and let it come to room temperature. Then, pop it into the refrigerator. This step is about patience. You need the caramel to become firm enough to handle, about an hour. Once it’s chilled, use a small spoon or a melon baller to scoop out portions. Roll them quickly between your palms into little balls. The caramel might be sticky; that’s okay. Place the balls on a plate and freeze them for 15-20 minutes. This firming-up step makes the next part—the chocolate dip—much, much easier.
Step 3: Mastering the Chocolate Coating
While the caramel balls are firming up, melt your chopped chocolate. You can do this gently in a microwave with short bursts of heat or in a double boiler. If using, add the teaspoon of coconut oil. This gives the chocolate a lovely fluidity and a beautiful shine once set. Stir until it’s completely smooth and velvety. Now, take your frozen caramel balls. Using a fork or a dipping tool, dunk each ball into the melted chocolate. Lift it out, let excess chocolate drip off, and place it on a parchment-lined sheet. Immediately sprinkle with a tiny, artistic touch of sea salt. Chef’s tip: Work in small batches so the caramel centers don’t warm up and melt in the chocolate.
Step 4: The Final Set and Shine
Let your dipped truffles rest. They will set at room temperature if your kitchen isn’t too warm, but chilling them in the fridge speeds things up. As they set, the chocolate shell hardens into a perfect, snap-worthy coating protecting the soft, gooey caramel inside. This is the moment of transformation where your kitchen project becomes a real confection.
Understanding Your Timeline: Patience Makes Perfect
Good candy-making isn’t rushed. Here’s how the time breaks down:
- Prep Time (20 minutes): Measuring, mixing the caramel, and rolling the balls.
- Cooking Time (10 minutes): The active time making the caramel on the stove.
- Resting & Chilling Time (1 hour): This is crucial! The caramel needs to chill firm, the balls need a freeze, and the finished truffles need to set.
- Total Time (1 hour 30 minutes): Most of this is hands-off waiting. Perfect for doing other things while your treats become perfect.
Chef’s Secret for Perfect Salted Caramel Truffles
My secret weapon is quality sea salt. Don’t just use standard table salt. A flaky, marine sea salt (like Maldon) has a cleaner, brighter salty taste and a delicate texture. That final sprinkle isn’t just for looks. It pops on your tongue as you bite through the chocolate, awakening all the other flavors. It’s the tiny detail that makes these taste professional.
A Little Extra Sweet Info
Did you know the word “truffle” for candy comes from the resemblance to the rare, earthy fungus? Because traditional chocolate truffles are often irregular, dusted balls. Our version is more polished, but the name sticks because it implies something precious, rare, and utterly delicious. You’re making edible treasures!
Necessary Equipment for Homemade Candy
You won’t need specialist tools. Gather these:
- Medium Saucepan (for the caramel)
- Whisk
- Bowls for cooling and melting
- Parchment Paper (for setting the truffles)
- Fork or Dipping Tool (for coating)
- Measuring Cups and Spoons
Storing Your Gourmet Chocolate Truffles
To keep your salted caramel truffles tasting fresh, store them in an airtight container. A single layer is best to prevent them from sticking together. You can separate layers with parchment paper if you need to stack them.
They are happiest in the refrigerator. The cool environment keeps the caramel firm and the chocolate shiny. They will last beautifully for up to two weeks stored this way. For longer storage, you can freeze them for up to a month. Thaw in the fridge before serving.
If you’re gifting them, let them come to room temperature for about 15 minutes before eating. This allows the caramel center to soften slightly into that perfect, creamy texture that makes these homemade truffles so special.
Tips and Advice for Truffle Success
- Caramel Color: Don’t let the sugar get too dark. Deep amber is perfect; dark brown means it’s burnt and will taste bitter.
- Chill Importance: Never skip chilling the caramel or freezing the balls. Warm caramel will melt and ruin your chocolate coating.
- Chocolate Temperature: Your melted chocolate should be warm, not hot. If it’s too hot, it will melt the frozen caramel ball from the inside.
- Salt Sprinkle: Do it immediately after dipping while the chocolate is still wet. The salt will stick perfectly.
Presentation Tips: Make Them Look Stunning
Presentation turns homemade candy into a gift. Try these ideas:
- Place them in mini paper candy cups for a classic look.
- Stack them in a clear glass jar with a ribbon for a rustic present.
- Arrange them on a white platter with gold dust for a festive party tray.
- Package them in a small decorative box lined with tissue paper.
Healthier & Creative Salted Caramel Truffle Variations
Love the idea but want to tweak it? Here are six fun variations:
- Dairy-Free Delights: Use vegan butter and full-fat coconut cream in the caramel. Choose a vegan dark chocolate for coating.
- Nutty Indulgence: Roll the chilled caramel centers around a single whole almond or pecan before dipping in chocolate.
- Spiced Sensation: Add a pinch of cinnamon or a tiny bit of chili powder to the caramel for a warm, surprising kick.
- Orange Zest Twist: Add a teaspoon of orange zest to the caramel for a citrusy note that pairs wonderfully with dark chocolate.
- Coconut Coat: Instead of a chocolate dip, roll the firm caramel balls in toasted, finely shredded coconut.
- Espresso Boost: Dissolve a teaspoon of instant espresso powder into the heavy cream for a mocha-inspired caramel center.
Common Mistakes to Avoid When Making Truffles
Mistake 1: Burning the Caramel Sugar
This is the most common stumble. Sugar goes from perfect amber to burnt and bitter very quickly. It happens because we get distracted or the heat is too high. Stay focused! Keep the heat at a steady medium and watch the color change. Once it’s a uniform deep amber—like the color of a penny—remove it from the heat immediately. Pro tip: Have your butter and cream measured and ready next to the stove so you can add them right away, which also stops the cooking.
Mistake 2: Skipping the Chilling Steps
Impatience leads to messy truffles. If you try to roll soft, warm caramel, it will stick to everything. If you try to dip soft caramel balls, they’ll melt into the chocolate pool. Respect the chill time! Let the caramel firm up in the fridge. Then freeze the rolled balls. These cold centers are the foundation for a smooth, clean chocolate coating.
Mistake 3: Using Hot Chocolate for Dipping
If your melted chocolate is too hot, it will shock your frozen caramel center. The outside might set, but the inside caramel can become a runny mess. Let the melted chocolate cool slightly after melting. It should be fluid but not steaming. Test by dipping one ball first—if the chocolate shell sets quickly and the center stays firm, your temperature is perfect.
Mistake 4: Over-Salting the Finish
We love the salty contrast, but too much can overpower. The sprinkle is meant to be a highlight, not a coating. Use a pinch of flaky salt between your fingers and gently scatter just a few crystals on top of each freshly dipped truffle. Think “artistic accent,” not “covered in salt.”
Frequently Asked Questions About Salted Caramel Truffles
Can I make the caramel without using a thermometer?
Absolutely! This recipe is designed for visual cues, not thermometer readings. You watch the color. Start with clear sugar water. It will turn to a light gold, then eventually a deep, uniform amber. That’s your sign to remove it from heat. If you see dark brown streaks, it’s going too far. Trust your eyes and nose—the smell will be rich and nutty, not acrid or burnt.
My caramel sauce split or looks grainy. What did I do wrong?
This usually happens if the cream was too cold when added, or if you stirred too vigorously. To fix it, return the saucepan to very low heat and whisk constantly until it comes back together smoothly. Next time, ensure your cream is at room temperature, and when adding it to the hot sugar, whisk gently but confidently to bring it all together.
Can I use milk chocolate instead of dark or semisweet?
You can, but the flavor balance will change. Milk chocolate is much sweeter. With the sweet caramel inside, the overall treat might be overly sweet for some tastes. Dark chocolate (50-70% cocoa) provides a beautiful bitter contrast that makes the caramel and salt pop. If you love milk chocolate, try it! But know it creates a different, much sweeter experience.
How do I get a really smooth, professional-looking chocolate coat?
The coconut oil or shortening is your friend here. It thins the melted chocolate slightly, making it more fluid for dipping. It also helps the chocolate set with a glossy finish. Also, ensure your caramel balls are very cold and your melted chocolate is at a good dipping temperature (not too hot, not too thick). A final trick: after placing the dipped truffle on parchment, give it a little wiggle with your fork to settle the chocolate neatly.
Can I make these truffles ahead for a holiday party?
They are perfect for making ahead! In fact, I recommend it. They keep wonderfully in the fridge for up to two weeks. Make them a few days before your event. Store them in an airtight container. This way, you can focus on other party prep, and your stunning homemade candy is ready to impress.
What’s the best way to package these as a gift?
Small, rigid boxes are ideal. Line the box with tissue paper or a pretty napkin. Place the truffles in mini candy papers (available at craft stores) so they don’t stick. You can stack them gently. Close the box and tie with a ribbon. A handmade label adds a lovely touch. They travel well and are a gift that truly shows you cared.
Why is sea salt specified instead of regular table salt?
Sea salt, especially flaky varieties, has a cleaner, brighter salty flavor. Table salt can taste more metallic and harsh. Also, the texture of sea salt flakes creates a delightful little crunch on top of the smooth chocolate. That texture contrast is part of the gourmet experience. If you must use table salt, use half the amount for sprinkling.
My chocolate coating cracked after setting. Why?
Cracking can happen if the caramel centers were too cold (almost frozen solid) and the chocolate coating was too warm. The extreme temperature difference causes contraction and cracking. Avoid this by letting your frozen caramel balls sit out for just 2-3 minutes before dipping, so they’re cold but not rock-hard. Also, don’t refrigerate the dipped truffles too aggressively; let them set at cool room temperature first.
Can I add flavorings like bourbon or coffee to the caramel?
Yes, for adult-friendly treats! Add a tablespoon of bourbon, rum, or strong espresso to the caramel after you’ve added the cream. Be aware this adds liquid, so you might need to cook the sauce a tiny bit longer to thicken it back up. Chill it thoroughly so the centers firm up properly. These boozy or coffee-infused truffles are fantastic for sophisticated gatherings.
Are these salted caramel truffles suitable for people with dietary restrictions?
With substitutions, they can be adapted. For dairy-free, use vegan butter and coconut cream, and choose vegan chocolate. For gluten-free, they are naturally gluten-free as none of the core ingredients contain gluten. Always check your specific chocolate labels to ensure no gluten-containing additives. For nut-free, they are safe as the recipe contains no nuts unless you add them as a variation.
To ensure you’re using ingredients at their best, it’s good practice to check general guidelines on food freshness and safety from trusted sources. This helps you store things like cream and chocolate properly before using them in your creations.
These salted caramel truffles are more than a recipe. They’re a little project that brings huge satisfaction. From the moment you see that sugar turn to amber to the final satisfying sprinkle of salt, you’re crafting something truly special. They fit beautifully into any collection of special occasion bakes, standing right alongside a show-stopping Lemon Sour Cream Pound Cake or a festive Easter Bunny Poke Cake. They also make a wonderful, no-bake alternative to oven treats like easy Crockpot Easter Candy Clusters or a rich Strawberry Swirl Cheesecake. So, gather your ingredients, embrace the chill time, and get ready to make tiny bites of sweet-and-salty heaven. Your friends and family will thank you—and you’ll feel like a certified candy genius.
Equipment
- Moyenne casserole
- Fouet
- Bols pour refroidissement et fusion
- Papier sulfurisé
- Outil de trempage
Ingredients
- 1/2 tasse sucre granulé
- 2 cuillères à soupe eau
- 3 cuillères à soupe beurre non salé
- 1/4 tasse crème épaisse
- 1/4 cuillère à café sel marin plus pour saupoudrer
- 1/2 cuillère à café extrait de vanille
- 8 onces chocolat mi-sucré ou noir, haché
- 1 cuillère à café huile de coco ou shortening optionnel, pour un enrobage plus lisse
Instructions
- Combinez le sucre et l'eau dans une casserole moyenne à feu moyen et laissez bouillir sans remuer jusqu'à ce qu'il devienne d'une couleur ambre profonde.
- Retirez du feu et incorporez le beurre, puis ajoutez la crème épaisse, le sel marin et la vanille, en remuant jusqu'à ce que le mélange soit homogène.
- Laissez le caramel refroidir à température ambiante, puis réfrigérez jusqu'à ce qu'il soit ferme, environ 1 heure.
- Une fois ferme, prélevez des portions de caramel et roulez-les en boules, puis congelez pendant 15-20 minutes.
- Faites fondre le chocolat haché au micro-ondes ou au bain-marie, en ajoutant de l'huile de coco si utilisée, jusqu'à consistance lisse.
- Plongez chaque boule de caramel dans le chocolat fondu, en laissant l'excédent s'égoutter, puis placez-les sur du papier sulfurisé.
- Saupoudrez de sel marin pendant que le chocolat est encore humide et laissez durcir à température ambiante ou au réfrigérateur jusqu'à ce qu'ils soient complètement durs.
Notes
Nutrition

Hi, I’m Olivia Parker, the founder of BakingSecret.com and a lifelong lover of all things sweet and homemade. I grew up in a small town in Oregon, where the smell of fresh cookies in my family’s kitchen sparked my passion for baking. Over the years, I turned that passion into a mission: to help home bakers feel confident, inspired, and creative.
After studying food science and working in several artisan bakeries across the U.S., I decided to create a space where everyone from beginners to seasoned bakers can find reliable recipes, expert tips, and a warm, welcoming community. BakingSecret.com is my way of sharing the magic of baking with the world. When I’m not testing new recipes, you’ll find me exploring farmers’ markets, collecting vintage cookbooks, or perfecting my sourdough technique.