
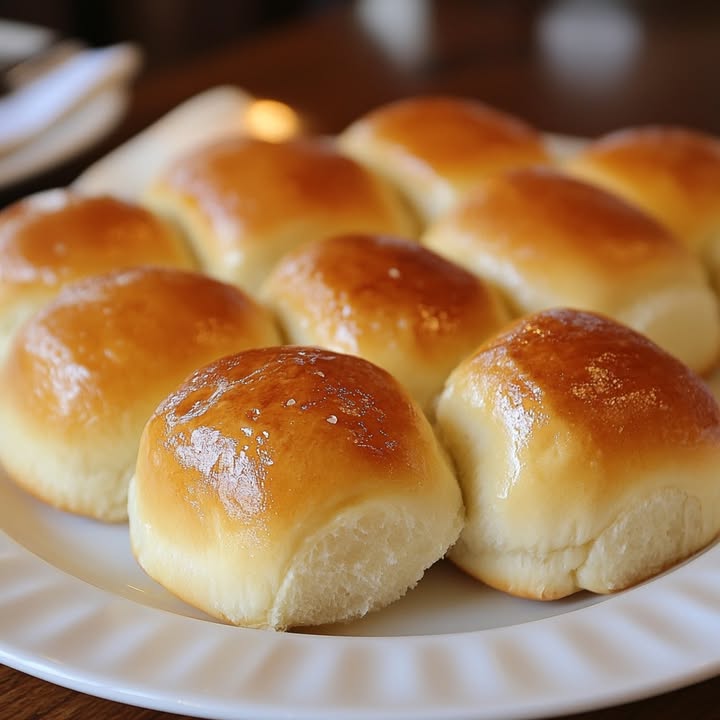
The Irresistible Allure of Texas Roadhouse Rolls
Okay, let’s be honest. Has anyone ever gone to Texas Roadhouse just for the steak? I certainly haven’t! For years, my family’s visits were secretly, and sometimes not so secretly, orchestrated around the arrival of that heavenly basket of warm, fluffy rolls and that legendary honey cinnamon butter. The moment they hit the table, all conversation stops. It’s pure, buttery, sweet magic. After one too many “to-go” bag requests just for the rolls, I decided enough was enough—I had to bring that magic into my own kitchen. After countless batches (my friends and family were very willing taste-testers!), I perfected a copycat recipe that captures every soft, pillowy, dreamy bite. Let me show you how to make Texas Roadhouse-style rolls that will have everyone forgetting the main course!
A Slice of Americana: The Story Behind the Rolls
The iconic Texas Roadhouse restaurant chain, founded in 1993, built its reputation not just on steaks, but on an unforgettable dining experience. A huge part of that experience is the free, endless baskets of fresh-baked rolls served with sweet honey butter. These rolls aren’t just bread; they’re a gesture of Southern hospitality, a warm welcome meant to be shared. While the exact recipe is a closely guarded secret, the spirit of it is all about comfort, generosity, and that made-from-scratch feel. Our homemade version honors that tradition, turning your kitchen into the heart of your own cozy roadhouse.
Why You’ll Fall in Love With This Recipe
This recipe is a winner for so many reasons! First, the texture is absolutely divine—cloud-like soft on the inside with a slight, buttery golden sheen on the outside. Second, the process is wonderfully therapeutic. There’s something special about working with yeast dough and watching it rise. Finally, the smell that will fill your house is better than any candle. It’s the smell of happiness, anticipation, and home. Whether you’re a seasoned baker or a nervous newbie, this recipe holds your hand all the way to roll heaven.
Perfect Occasions for These Fluffy Dinner Rolls
These rolls aren’t just for Tuesday dinner. They are the star of any gathering! Imagine them at your holiday table, stealing the spotlight from the turkey. Picture them at a summer BBQ, sopping up every last bit of sauce. They are perfect for potlucks (you’ll be the most popular person there), Sunday family suppers, or just as a special treat to make an ordinary Wednesday feel extraordinary. Anytime you want to spread a little extra love, these rolls are your answer.
What You’ll Need: Texas Roadhouse Roll Ingredients
Gathering simple, quality ingredients is the first step to success. Here’s your shopping list:
- 1 packet (2¼ teaspoons) active dry yeast
- 1 cup warm milk (110°F)
- ¼ cup granulated sugar
- 1 large egg
- ¼ cup unsalted butter, melted, plus extra for brushing
- 3 cups all-purpose flour (plus more for dusting)
- 1 teaspoon salt
For the Honey Cinnamon Butter (Optional, but Highly Recommended):
- ½ cup unsalted butter, softened
- ¼ cup powdered sugar
- ¼ cup honey
- 1 teaspoon ground cinnamon
Smart Swaps: Handy Substitution Options
No worries if you’re missing something! Here are some easy swaps:
- Milk: Whole milk gives the richest flavor, but 2% or even a warm, unsweetened almond milk will work.
- Butter: Salted butter can be used. Just omit the extra salt in the dough.
- All-Purpose Flour: For a slightly heartier texture, you can substitute up to 1 cup with bread flour.
- Honey Butter: Use maple syrup instead of honey for a different cozy flavor profile.
How to Make Your Own Texas Roadhouse Rolls
Follow these steps for soft, fluffy rolls every single time. Get ready to get your hands a little dusty with flour—it’s the best part!
Step 1: Wake Up the Yeast
This is where the magic begins! In a small bowl, combine the warm milk (it should feel like comfortable bath water, not hot), a pinch of the sugar, and the yeast. Give it a gentle stir and let it sit for 5-10 minutes. You’re looking for a creamy, frothy foam to form on top. This “proofing” step tells you your yeast is alive and ready to make your dough rise beautifully. If it doesn’t foam, your milk may have been too hot or the yeast is old. Pro tip: Use a kitchen thermometer to nail the 110°F temperature for perfect proofing every time.
Step 2: Create the Dough Base
In a large mixing bowl, pour in that wonderful foamy yeast mixture. Add the rest of the sugar, the egg, the ¼ cup of melted butter, and the salt. Whisk it all together until it’s a smooth, pale yellow, slightly bubbly liquid. The smell is already incredible—sweet and yeasty. This wet mixture is the foundation for your soft dinner rolls.
Step 3: Knead to Perfection
Now, gradually add the flour, about one cup at a time, stirring with a wooden spoon or a dough hook on low speed. Once the dough starts to come together and pulls away from the sides of the bowl, it’s time to knead. Turn it out onto a lightly floured surface and knead for 8-10 minutes. You’ll feel it transform from a shaggy mess into a smooth, elastic, and slightly tacky ball. This kneading develops the gluten, which is the secret to those tall, fluffy rolls. Chef’s tip: The dough is ready when you can gently stretch a small piece thin enough to see light through it without it tearing (the “windowpane test”).
Step 4: The First Rise
Place your beautiful smooth dough ball into a large, lightly greased bowl. Turn it once to coat it lightly in oil, which prevents a skin from forming. Cover the bowl with a clean kitchen towel or plastic wrap. Let it rest in a warm, draft-free spot. In about 1 to 1.5 hours, it will double in size! This quiet transformation is my favorite part of baking with yeast—it’s like a little science experiment on your counter.
Step 5: Shape and Second Rise
Gently punch down the risen dough to release the air. On a floured surface, roll it out to about ½-inch thickness. Using a sharp knife or a pizza cutter, cut the dough into roughly 2-inch squares or rectangles. Don’t worry about perfection—rustic is charming! Place them on a greased baking sheet, leaving a little space between each. Cover them again and let them rise for 30-45 minutes. They will become beautifully puffy and almost touch each other.
Step 6: Bake to Golden Glory
While the rolls are doing their final rise, preheat your oven to 350°F (175°C). Once puffy, bake them for 12-15 minutes. Watch for that perfect golden-brown color on top. The second they come out of the oven, brush the tops generously with melted butter. This gives them that iconic glossy finish and adds an extra layer of flavor. The sound of the butter sizzling on the hot rolls is pure music.
Step 7: Whip Up the Honey Butter
While the rolls bake, make the magic dip! In a medium bowl, beat the softened butter, powdered sugar, honey, and cinnamon together until it’s light, fluffy, and completely combined. Scrape it into a pretty serving bowl. I promise, making this honey cinnamon butter is almost as satisfying as eating it.
Timing Your Baking Success
Good baking is about patience. Here’s your timeline:
- Prep Time: 20 minutes (hands-on mixing and shaping)
- Rising Time: 1.5 hours total (1 hour first rise + 45 minutes second rise)
- Cooking Time: 15 minutes
- Total Time: About 2 hours and 5 minutes
- Servings: Makes about 12 delicious rolls
My Secret Weapon
For the absolute fluffiest texture, use a technique called “tangzhong.” Before you start the main recipe, take 3 tablespoons of the recipe’s flour and ½ cup of the recipe’s milk. Whisk them together in a saucepan over medium heat until a thick, paste-like roux forms. Let it cool to room temperature, then add it to the wet ingredients in Step 2. This Japanese-inspired method locks in moisture, giving you rolls that stay soft for days!
A Fun Fact About Yeast
Those little granules of yeast are actually living microorganisms! When you feed them warm milk and sugar, they “wake up” and start producing carbon dioxide gas. This gas gets trapped in the stretchy dough network, creating millions of tiny air pockets. That’s what causes the dough to rise and gives your finished rolls that wonderful, airy, light-as-a-cloud texture. You’re not just baking; you’re hosting a tiny, delicious party for microbes!
Gather Your Tools
You don’t need fancy equipment! Here’s what will make the job easier:
- Large mixing bowls (at least two)
- Wooden spoon or stand mixer with dough hook
- Measuring cups and spoons
- Rolling pin
- Sharp knife or pizza cutter
- Baking sheet
- Pastry brush (for that essential butter wash)
- Kitchen towel or plastic wrap
Keeping Your Rolls Fresh
These homemade rolls are best enjoyed the day they are made, while they are still warm and impossibly soft. If you have leftovers (a big if!), let them cool completely first. Never store them while they are still warm, as this creates condensation that leads to sogginess.
Place the completely cooled rolls in an airtight container or a resealable plastic bag. They will stay fresh at room temperature for up to 2 days. For longer storage, you can freeze them. Wrap each roll individually in plastic wrap, then place them all in a freezer bag. They’ll keep for up to 2 months.
To reheat, thaw at room temperature if frozen, then wrap in aluminum foil and warm in a 300°F oven for 5-10 minutes. For a single roll, 15-20 seconds in the microwave works in a pinch, though the oven method restores the exterior texture better. Always re-butter after warming!
Pro Tips for Roll Perfection
- Flour Power: When measuring flour, spoon it into the measuring cup and level it off with a knife. Scooping directly from the bag packs in too much flour, leading to dense rolls.
- Warm Rising Spot: If your kitchen is cool, create a warm spot for rising. Place the covered bowl in an oven with just the light on, or on top of a preheating dryer.
- Uniform Sizing: For even baking, try to cut your rolls as close to the same size as possible. A bench scraper is a great tool for this.
- Butter is Best: Don’t skip brushing with melted butter right after baking. It’s the signature finishing touch!
Make Them Shine: Presentation Ideas
- Serve the warm rolls in a lined basket or on a wooden board, nestled in a clean kitchen towel to keep them warm.
- Present the honey cinnamon butter in a small mason jar or a ramekin with a little honey dipper on the side.
- For a party, make mini slider rolls and set up a build-your-own slider station.
- Dust the rolls with a tiny bit of flaky sea salt right after buttering for a sweet-salty twist.
Mix It Up: Healthier & Fun Variations
Once you’ve mastered the classic, try these tasty twists!
- Whole Wheat Texas Rolls: Substitute half of the all-purpose flour with whole wheat flour for added fiber and a nutty flavor. You may need a touch more milk.
- Garlic Herb Butter Rolls: Skip the honey butter. After baking, brush with melted butter mixed with minced garlic, parsley, and a pinch of salt.
- Cheesy Pull-Apart Rolls: After cutting the dough, dip each piece in melted butter, then roll in grated Parmesan and cheddar cheese before placing in a baking dish. Let rise and bake as directed.
- Everything Bagel Rolls: Before the second rise, brush the shaped rolls with an egg wash and sprinkle generously with everything bagel seasoning.
- Sweet Cinnamon Sugar Rolls: Roll the dough out, brush with butter, and sprinkle with cinnamon sugar before cutting and shaping. Bake and finish with a simple vanilla glaze instead of savory butter.
- Dairy-Free/Vegan Rolls: Use a plant-based milk (like oat or soy), a flax egg, and vegan butter. The result will still be wonderfully soft!
A Word From Our Other Recipes
If you love the soft, comforting texture of these rolls, you’ll absolutely adore our other from-scratch treats. For the ultimate sweet showdown, you must try our decadent Peanut Butter Caramel Toffee Chocolate Chip Cookie Bars—they’re chewy, gooey, and packed with flavor. And for a classic that never fails, my go-to Homemade Chocolate Chip Cookies recipe is a family heirloom. Looking for something uniquely rich? Our Chocolate Chip Cheesecake Cookies combine two beloved desserts in one bite. Finally, for a dose of pure nostalgia, bake up a batch of the famous Lunchroom Ladies Brownies with their iconic fudgy frosting.
Common Mistakes to Avoid
Mistake 1: Using Too Hot or Too Cold Liquid
This is the number one reason recipes fail. If your milk is too hot (above 130°F), it will kill the yeast, and your dough won’t rise. If it’s too cold, the yeast won’t activate. Aim for 105-110°F, which feels warm but not hot on your wrist. A quick-read thermometer is a small investment that guarantees success. It takes the guesswork out and ensures your yeast gets off to a perfect, foamy start.
Mistake 2: Adding Too Much Flour
In the quest to handle a sticky dough, it’s tempting to keep adding flour. Resist! Adding too much flour is the fastest way to end up with dry, dense, hockey-puck rolls instead of soft, fluffy ones. The dough should be soft and slightly tacky, not dry. Remember, the flour amounts in recipes can vary based on humidity. Mix in the flour gradually, and stop when the dough pulls away from the bowl and forms a soft ball. A little stickiness is okay.
Mistake 3: Skipping the Second Rise
You’ve waited an hour for the first rise, shaped your rolls, and you’re eager to get them in the oven. Don’t skip the second rise! This final 30-45 minute rest allows the gluten to relax and the individual rolls to puff up. Baking them immediately after shaping will result in smaller, tighter rolls that aren’t as light. Patience here is directly rewarded with height and fluffiness.
Mistake 4: Overbaking the Rolls
These rolls bake quickly. Leaving them in the oven for just a few minutes too long can dry them out. They should be a light golden brown on top, not dark brown. Start checking at the 12-minute mark. The internal temperature should be around 190°F if you want to be precise. As soon as they come out, get that melted butter on them to lock in moisture.
A Note on Food Safety
Since these rolls contain dairy and eggs, proper handling is key. Always allow baked goods to cool completely before sealing them in an airtight container to prevent mold. For comprehensive guidelines on keeping all your homemade foods safe and fresh, the FDA offers excellent resources on proper food storage practices that are great for any home cook to know.
Your Next Baking Adventure Awaits
I hope this recipe brings as much joy to your kitchen as it has to mine. Honestly, there’s no better feeling than pulling a tray of these golden, buttery rolls out of the oven. If you find yourself falling in love with baking bread at home, you can explore so many more wonderful ideas in our complete collection of homemade bread and muffin recipes.
Your Texas Roadhouse Rolls Questions, Answered
Can I make these rolls ahead of time?
Absolutely! You have two great options. First, you can prepare the dough through the first rise, then punch it down, wrap it tightly in plastic, and refrigerate it for up to 24 hours. When ready, let it sit at room temp for 30 minutes, then shape, do the second rise, and bake. Second, you can bake the rolls completely, let them cool, and freeze them for up to 2 months. Reheat from frozen in a foil-covered dish in the oven. The make-ahead flexibility makes these perfect for holiday planning!
Why didn’t my dough rise?
If your dough didn’t rise, the most common culprit is old or dead yeast. Always check the expiration date on your yeast packet. The second reason is liquid temperature. If the milk was too hot, it killed the yeast; if it was too cold, the yeast never activated. Your rising environment might also be too cold. Yeast loves a warm, draft-free spot. Try placing the covered bowl in an oven with just the light on for gentle, consistent warmth.
Can I use instant yeast instead of active dry?
Yes, you can! Instant yeast doesn’t require proofing in liquid first. You can mix it directly with your dry ingredients (flour). Use the same amount (2 ¼ teaspoons). Your first rise time might be slightly shorter. The result will be just as good, so it’s a great time-saver if you have instant yeast on hand.
How do I get my rolls super soft and fluffy?
The key to super soft rolls is not over-flouring the dough and not over-baking. A slightly tacky dough creates a more tender crumb. Also, brushing the hot rolls with melted butter immediately after baking creates a soft crust and adds moisture. For next-level softness that lasts for days, try the “tangzhong” method mentioned in the Chef’s Secret section—it’s a total game-changer for texture.
My rolls are dense. What went wrong?
Dense rolls usually mean too much flour was added or the dough didn’t rise properly. Measure your flour carefully using the spoon-and-level method. Also, ensure you gave the dough enough time for both rises in a warm enough spot. Kneading the dough adequately develops the gluten structure needed for a light, airy texture, so don’t skimp on that step either.
Can I make these without a stand mixer?
Of course! I make them by hand most of the time. Simply use a large bowl and a sturdy wooden spoon to mix the ingredients. When it becomes too stiff to stir, turn it out onto a floured surface and knead by hand for the full 8-10 minutes. Kneading by hand is wonderfully therapeutic and gives you a perfect feel for the dough’s texture.
What’s the best way to reheat leftover rolls?
The oven is best for restoring texture. Wrap the rolls in aluminum foil and warm in a 300°F oven for 5-10 minutes until heated through. You can also use the microwave for speed: wrap a single roll in a slightly damp paper towel and heat for 15-20 seconds. The microwave can make them a bit chewy, so the oven method is preferred if you have the time.
Can I use this dough to make different shapes?
Definitely! While the classic square is easy, this versatile dough can be shaped into knots, classic round dinner rolls, or even braids. For round rolls, divide the dough into equal portions, shape into smooth balls, and place them on the baking sheet. The baking time remains the same. Get creative—it’s your kitchen!
Is the honey butter necessary?
While the rolls are delicious on their own, the honey cinnamon butter is what makes the true Texas Roadhouse experience. It’s simple to make and transforms the rolls into an unforgettable sweet and savory treat. I highly recommend not skipping it! If you’re out of honey, try maple syrup or even a fruit jam mixed into softened butter for a different dip.
Can I double this recipe?
Yes, you can easily double all the ingredients to make a larger batch for a crowd. You may need to mix the dough in two batches if your bowl isn’t large enough, or use a very large stockpot. The rising times should remain about the same. Just make sure you have enough baking sheets! A double batch is perfect for a big family gathering or potluck.
Ready, Set, Bake!
So there you have it—your ticket to recreating a beloved restaurant favorite right at home. This recipe for Texas Roadhouse-style rolls is more than just instructions; it’s an invitation to create warm memories around your own table. The process is fun, the results are incredibly rewarding, and the smiles you’ll get are the best reward. Don your apron, dust your counter with flour, and get ready to bake a batch of pure, buttery joy. Happy baking!
Equipment
- Grand bol
- Fouet
- Spatule
- Plaque à pâtisserie
- Papier sulfurisé
Ingredients
- 1 paquet levure sèche active
- 240 ml lait tiède à 43°C
- 50 g sucre granulé
- 1 oeuf
- 60 g beurre sans sel, fondu
- 360 g farine tout usage plus encore pour le farinage
- 5 g sel
- 120 g beurre sans sel, ramolli pour le beurre au miel et à la cannelle (optionnel)
- 30 g sucre glace pour le beurre au miel et à la cannelle (optionnel)
- 60 ml miel pour le beurre au miel et à la cannelle (optionnel)
- 5 g cannelle en poudre pour le beurre au miel et à la cannelle (optionnel)
Instructions
- Combinez le lait tiède, une pincée de sucre et la levure dans un petit bol ; laissez reposer pendant 5-10 minutes jusqu'à ce qu'elle devienne mousseuse.
- Dans un grand bol de mélange, combinez le mélange de levure, le reste du sucre, l'œuf, le beurre fondu et le sel ; fouettez jusqu'à ce que le mélange soit lisse.
- Ajoutez progressivement la farine, une tasse à la fois, en remuant avec une cuillère en bois ou un crochet à pâte jusqu'à ce que la pâte se détache des bords.
- Sortez la pâte sur une surface farinée ; pétrissez pendant 8-10 minutes jusqu'à ce qu'elle soit lisse et élastique.
- Placez la pâte dans un bol graissé, couvrez et laissez lever dans un endroit chaud pendant 1 à 1,5 heures jusqu'à ce qu'elle double de volume.
- Frappez la pâte levée, étalez-la à une épaisseur de 1,25 cm et découpez-la en carrés de 5 cm ; placez-les sur une plaque à pâtisserie graissée.
- Couvrez et laissez les rouleaux lever à nouveau pendant 30-45 minutes.
- Préchauffez le four à 175°C et faites cuire les rouleaux pendant 12-15 minutes jusqu'à ce qu'ils soient dorés.
- Brossez les rouleaux chauds avec du beurre fondu immédiatement après la cuisson.
- Préparez le beurre au miel et à la cannelle en battant ensemble le beurre ramolli, le sucre glace, le miel et la cannelle jusqu'à ce qu'il soit mousseux.
Notes
Nutrition

Hi, I’m Olivia Parker, the founder of BakingSecret.com and a lifelong lover of all things sweet and homemade. I grew up in a small town in Oregon, where the smell of fresh cookies in my family’s kitchen sparked my passion for baking. Over the years, I turned that passion into a mission: to help home bakers feel confident, inspired, and creative.
After studying food science and working in several artisan bakeries across the U.S., I decided to create a space where everyone from beginners to seasoned bakers can find reliable recipes, expert tips, and a warm, welcoming community. BakingSecret.com is my way of sharing the magic of baking with the world. When I’m not testing new recipes, you’ll find me exploring farmers’ markets, collecting vintage cookbooks, or perfecting my sourdough technique.