
Why This 3 Tier Cake Will Be Your New Favorite Dessert
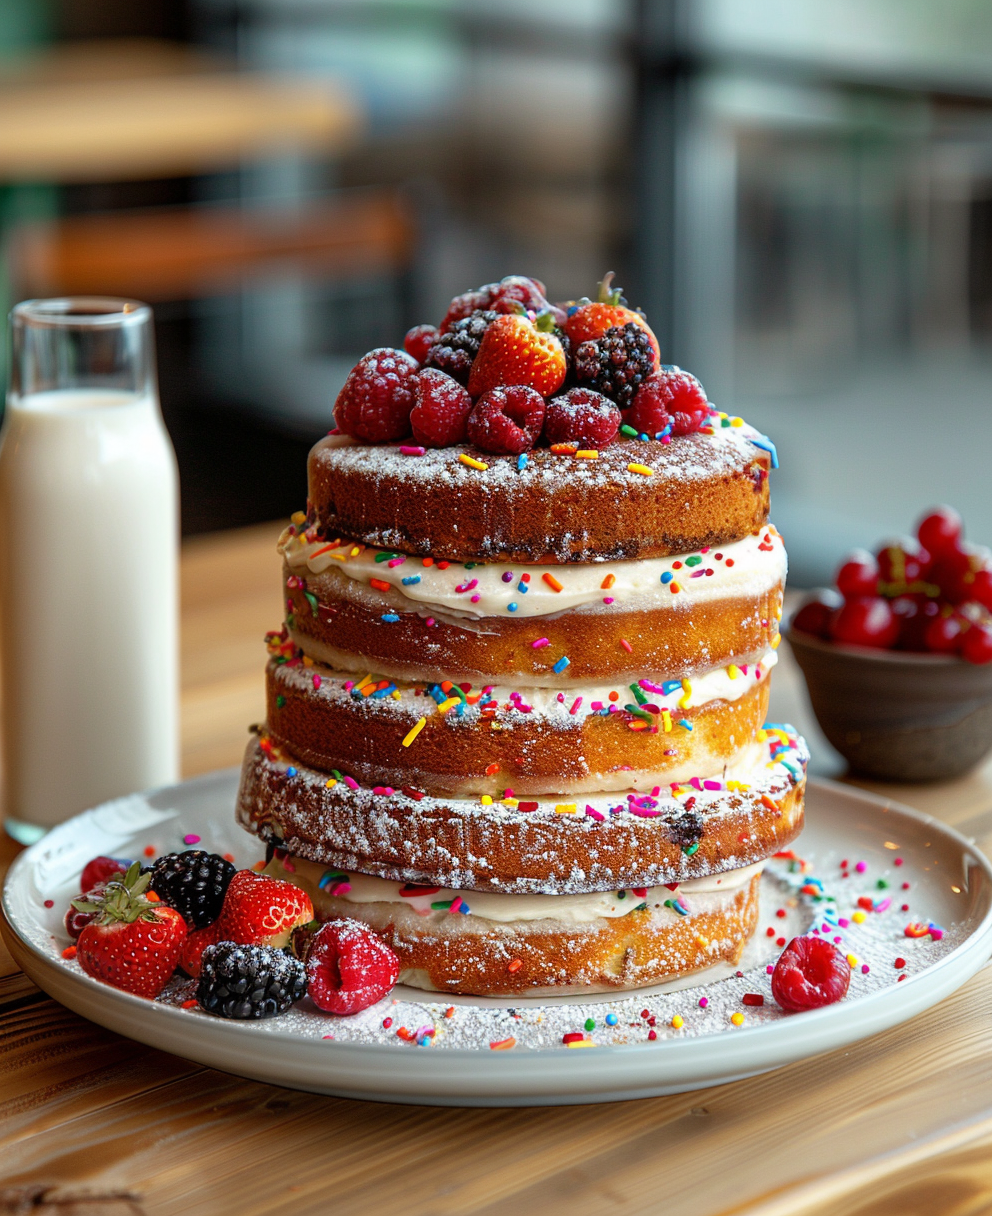
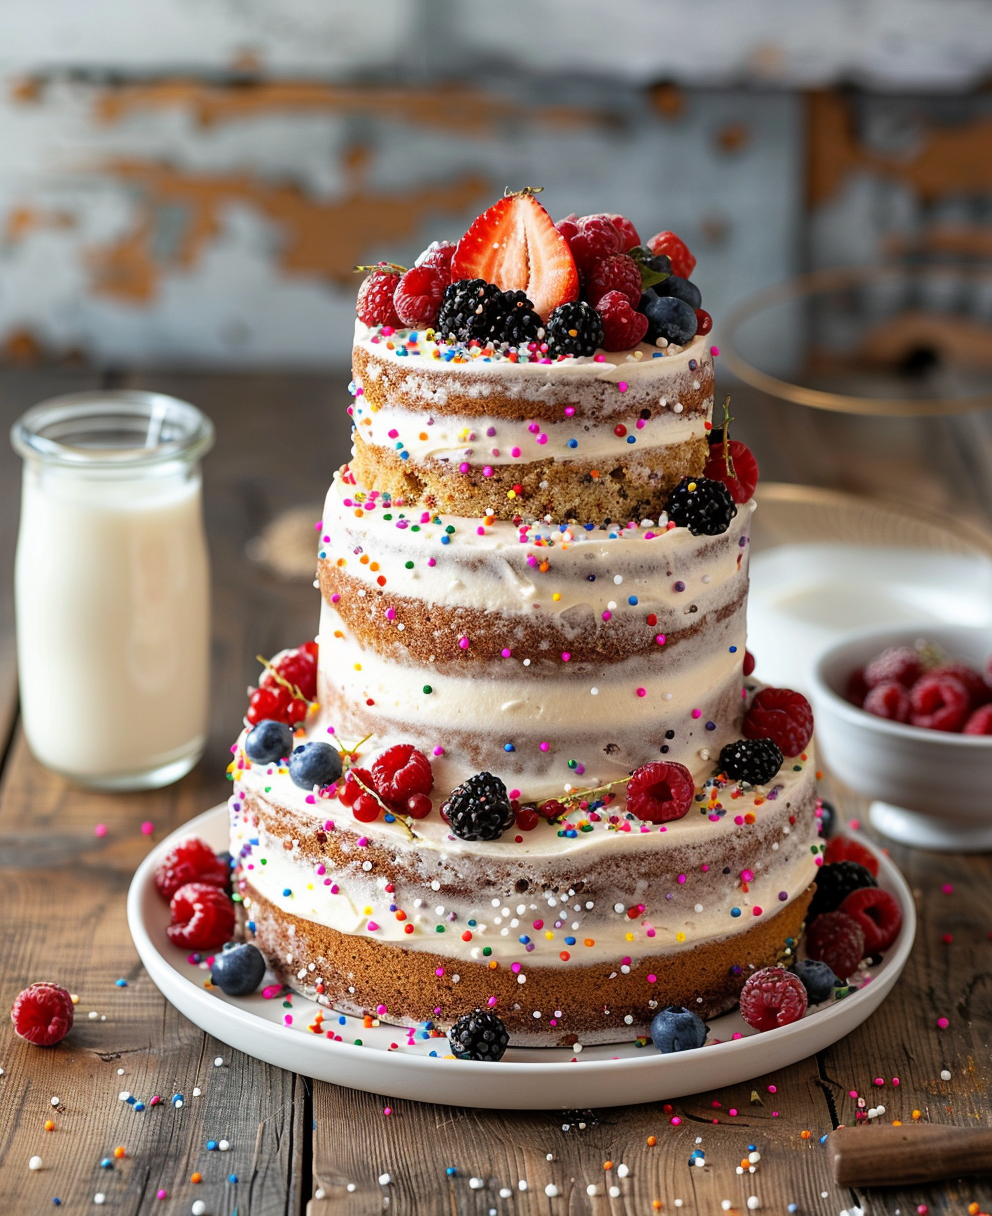
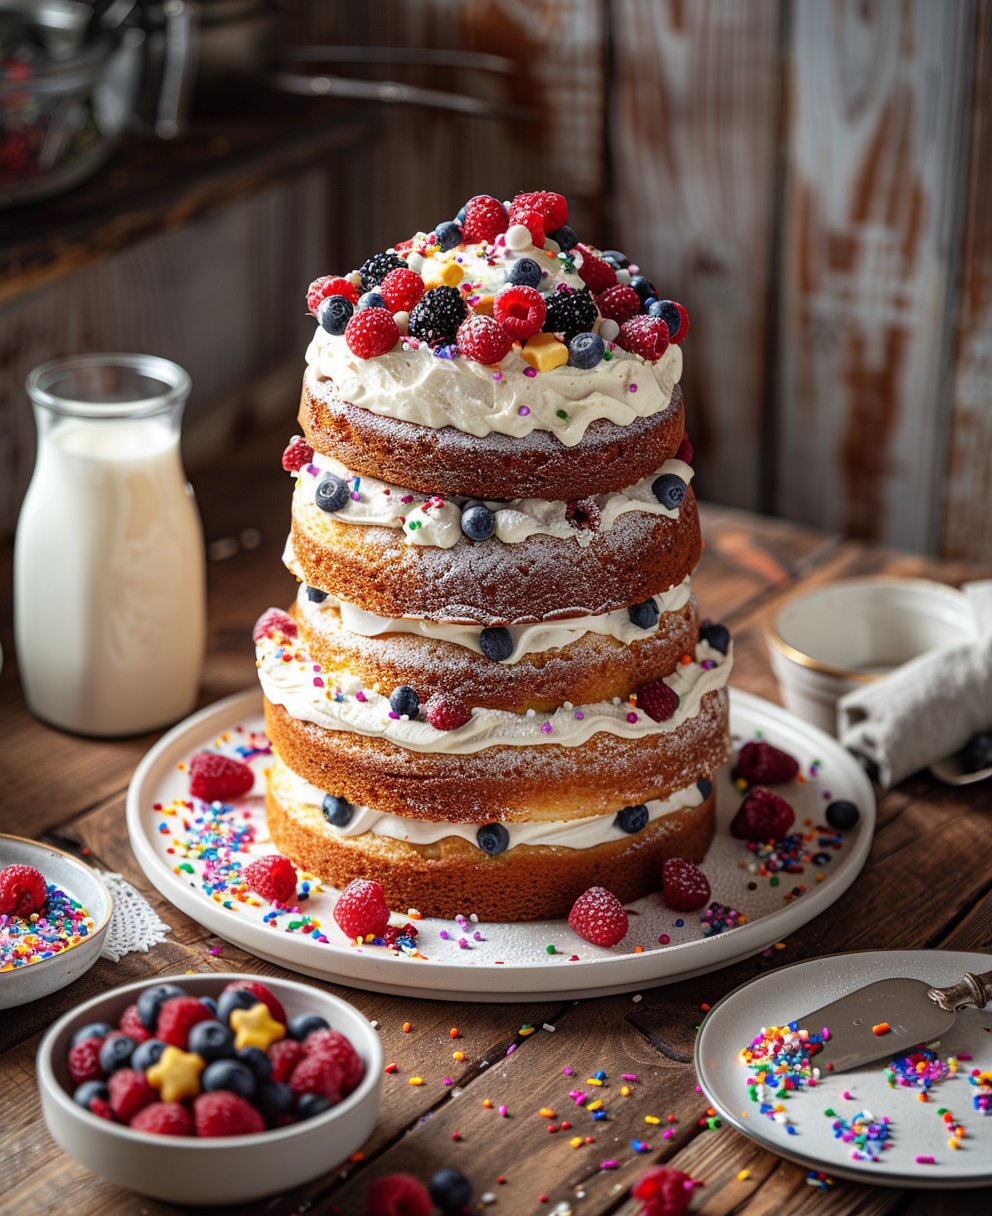
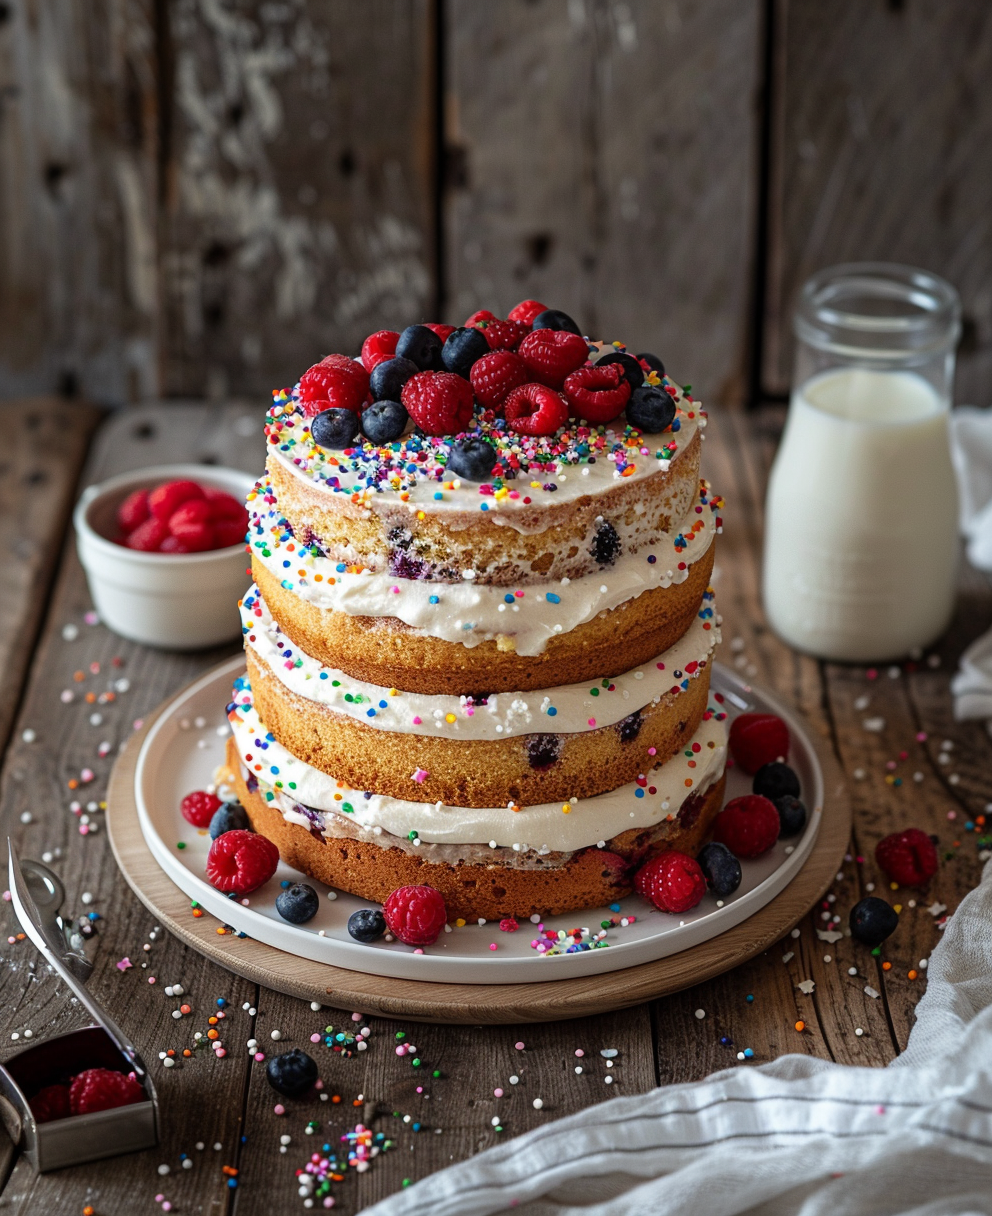
Let me tell you a little story. Last summer, my niece turned five, and she requested a “princess castle cake.” I thought, no big deal, right? Wrong. The moment I started researching 3 tier cake designs for birthdays, I realized I was in over my head. But guess what? After some trial and error (and a few late-night frosting sessions), I created a show-stopping 3 tier cake with fondant that had everyone snapping pictures. And now, I’m sharing my foolproof 3 tier cake recipe with you. Whether it’s for a birthday, wedding, or just because, this cake will make your event unforgettable.
A Little History of the Majestic 3 Tier Cake
Cakes have been around for centuries, but the 3 tier cake as we know it today has its roots in weddings. Back in the day, only royalty could afford such elaborate desserts. Today, they’ve become a symbol of celebration, from elegant 3 tier wedding cakes to playful birthday creations. When I first tried making one, I felt like a modern-day cake architect. It’s not just about stacking layers; it’s about creating something beautiful that brings joy to everyone who sees it.
Why You’ll Love This Recipe
This 3 tier cake recipe is designed for home bakers who want to impress without stressing. It’s moist, flavorful, and versatile enough to suit any occasion. Plus, I’ll teach you how to stack a 3 tier cake with dowels, so it stays sturdy and picture-perfect. Trust me, once you see how easy it is, you’ll be whipping these up for every family gathering.
Perfect Occasions for a 3 Tier Cake
A 3 tier cake isn’t just for weddings. Birthdays, anniversaries, baby showers—you name it, this cake fits the bill. I’ve used this recipe for everything from 3 tier cake designs for birthdays to holiday celebrations. It’s also a great centerpiece for dessert tables at large gatherings. Imagine slicing into a beautifully decorated cake while your guests cheer—it’s pure magic!
Ingredients
- For the cake layers: 6 cups all-purpose flour, 4 cups sugar, 2 cups unsalted butter, 1 cup milk, 8 large eggs, 2 teaspoons baking powder, 1 teaspoon salt, 2 teaspoons vanilla extract.
- For the frosting: 4 cups unsalted butter, 8 cups powdered sugar, 2 teaspoons vanilla extract, 1/2 cup heavy cream.
- Optional: Fondant, food coloring, edible decorations.
Substitution Options
- Swap all-purpose flour with gluten-free flour if needed.
- Use almond or coconut milk instead of regular milk for a dairy-free option.
- Replace buttercream with cream cheese frosting for a tangy twist.
Step 1: Preparing the Cake Layers
Start by preheating your oven to 350°F. Grease three round cake pans (one 6-inch, one 8-inch, and one 10-inch) and line them with parchment paper. In a large bowl, cream the butter and sugar until light and fluffy. Add the eggs one at a time, mixing well after each addition. Slowly incorporate the dry ingredients, alternating with the milk and vanilla. Divide the batter evenly among the pans and smooth the tops with a spatula. Bake for 25-30 minutes or until a toothpick comes out clean. Let the cakes cool completely before assembling.
Pro tip: Level your cakes with a serrated knife to ensure even stacking.
Step 2: Making the Frosting
In a stand mixer, beat the butter until creamy. Gradually add the powdered sugar, one cup at a time, mixing on low speed to avoid a sugar cloud. Once combined, pour in the vanilla and heavy cream. Increase the speed and whip until the frosting is light and airy. If you’re using fondant, set aside a small portion of the frosting for crumb coating.
Pro tip: Chill the frosting for 15 minutes if it feels too soft.
Step 3: Stacking the Cake
Place the largest layer on a 3 tier cake stand. Spread a generous amount of frosting on top, then stack the medium layer. Repeat with the smallest layer. To stabilize the cake, insert wooden dowels into the bottom two tiers, cutting them to size with a sharp knife. This technique ensures your 3 tier cake won’t topple over.
Chef’s tip: Use a turntable for smooth frosting application.
Timing
- Prep time: 1 hour
- Baking time: 30 minutes
- Resting time: 1 hour (cooling)
- Total time: 2 hours 30 minutes
Chef’s Secret
Always chill your cake layers before frosting. Cold cakes are easier to handle and less likely to crumble.
Extra Info
Did you know that a 3 tier cake can feed anywhere from 50 to 100 people, depending on the slice size? That’s why it’s perfect for big events. Plus, Costco and Walmart offer tiered cakes, but nothing beats the personal touch of a homemade creation.
Necessary Equipment
- Stand mixer
- Round cake pans (6-inch, 8-inch, 10-inch)
- Serrated knife
- Wooden dowels
- Turntable
Storage
To store your 3 tier cake, keep it in a cool, dry place. If frosted with buttercream, it can sit at room temperature for up to two days. For longer storage, refrigerate the cake but bring it back to room temperature before serving. Fondant-covered cakes should always be stored in a box to prevent drying out.
If you need to store leftovers, wrap individual slices in plastic wrap and freeze them. They’ll stay fresh for up to three months.
Avoid placing the cake near direct sunlight or heat sources, as this can melt the frosting and ruin the design.
Tips and Advice
- Practice piping techniques before decorating the final cake.
- Use a bench scraper for smooth edges.
- Plan your design ahead of time to save time during assembly.
Presentation Tips
- Add fresh flowers or edible gold accents for elegance.
- Use themed toppers for birthdays or holidays.
- Display the cake on a mirrored base for a professional look.
Healthier Alternative Recipes
Here are six variations to make your 3 tier cake healthier:
- Gluten-Free: Substitute all-purpose flour with almond or oat flour.
- Vegan: Replace eggs with flaxseed meal and butter with coconut oil.
- Low-Sugar: Use monk fruit sweetener instead of sugar.
- Fruit-Based: Add mashed bananas or applesauce to the batter.
- Protein-Packed: Mix in protein powder for an extra boost.
- Dairy-Free: Opt for plant-based milk and margarine.
Mistake 1: Skipping the Crumb Coat
One common mistake is skipping the crumb coat when frosting a 3 tier cake. Without it, crumbs can get stuck in the final layer, ruining the smooth finish. Always apply a thin layer of frosting first, then chill the cake before adding the final coat.
Tip: Use a bench scraper to remove excess frosting during the crumb coat stage.
Mistake 2: Overloading the Top Tier
Adding too much weight to the top tier can cause the cake to sink. Avoid heavy decorations or overly thick frosting layers. Balance is key!
Tip: Use lightweight fondant or minimal toppings for stability.
Mistake 3: Not Using Dowels
Skipping dowels when stacking a 3 tier cake is a recipe for disaster. The layers can collapse under their own weight. Always measure and cut dowels to fit snugly inside each tier.
Tip: Mark the height of the bottom layer on the dowel for precision.
FAQ
How many will a 3-tier cake feed?
A typical 3 tier cake serves 50 to 100 people, depending on slice size. For weddings, smaller portions are standard, while birthday parties may require larger slices.
Can Costco do tiered cakes?
Yes, Costco offers tiered cakes, including 3 tier cake prices that range from $50 to $200. However, customization options are limited compared to homemade versions.
How much does a typical 3-tier wedding cake cost?
Custom 3 tier wedding cake prices vary widely, starting at $300 and going up to $1,000 or more. Factors include design complexity, flavors, and location.
Does Walmart do three-tier wedding cakes?
Walmart provides affordable 3 tier wedding cake options, typically ranging from $150 to $300. While convenient, they lack the personalization of homemade cakes.
What are some popular 3 tier cake designs for birthdays?
Popular designs include unicorn themes, floral patterns, and ombre effects. Check out 3 layer cake images online for inspiration.
Can beginners make a 3 tier cake?
Absolutely! With clear instructions and patience, anyone can master a 3 tier cake recipe. Start simple and build confidence over time.
How do I transport a 3 tier cake safely?
Use a sturdy 3 tier cake stand and secure the cake in a box. Drive carefully to avoid jostling.
Is fondant necessary for a 3 tier cake?
No, fondant isn’t mandatory. Buttercream works just fine for most designs.
What tools do I need to decorate a 3 tier cake?
You’ll need piping bags, tips, a turntable, and possibly stencils for intricate designs.
Where can I find inspiration for 3 tier cake designs?
Look at Pinterest, Instagram, or cake blogs for endless ideas and tutorials.
Final Thoughts
Baking a 3 tier cake might seem daunting at first, but with practice, it becomes second nature. Whether you’re celebrating a milestone or simply indulging your sweet tooth, this recipe is sure to impress. So grab your apron, gather your ingredients, and let’s create something magical together. Happy baking!
Equipment
- Stand mixer
- Round cake pans (6-inch, 8-inch, 10-inch)
- Serrated knife
- Wooden dowels
- Turntable
Ingredients
- 6 cups all-purpose flour
- 4 cups sugar
- 2 cups unsalted butter
- 1 cup milk
- 8 large eggs
- 2 teaspoons baking powder
- 1 teaspoon salt
- 2 teaspoons vanilla extract
- 4 cups unsalted butter for frosting
- 8 cups powdered sugar
- 2 teaspoons vanilla extract for frosting
- 1/2 cup heavy cream for frosting
Instructions
- Preheat your oven to 350°F.
- Grease three round cake pans (6-inch, 8-inch, and 10-inch) and line them with parchment paper.
- In a large bowl, cream the butter and sugar until light and fluffy.
- Add the eggs one at a time, mixing well after each addition.
- Slowly incorporate the dry ingredients, alternating with the milk and vanilla.
- Divide the batter evenly among the pans and smooth the tops with a spatula.
- Bake for 25-30 minutes or until a toothpick comes out clean.
- Let the cakes cool completely before assembling.
- In a stand mixer, beat the butter until creamy for the frosting.
- Gradually add the powdered sugar, mixing on low speed to avoid a sugar cloud.
- Once combined, pour in the vanilla and heavy cream, then whip until light and airy.
- Place the largest cake layer on a cake stand and spread frosting on top.
- Stack the medium layer on top, then the smallest layer.
- Insert wooden dowels into the bottom two tiers for stability.
Notes
Nutrition

Hi, I’m Olivia Parker, the founder of BakingSecret.com and a lifelong lover of all things sweet and homemade. I grew up in a small town in Oregon, where the smell of fresh cookies in my family’s kitchen sparked my passion for baking. Over the years, I turned that passion into a mission: to help home bakers feel confident, inspired, and creative.
After studying food science and working in several artisan bakeries across the U.S., I decided to create a space where everyone from beginners to seasoned bakers can find reliable recipes, expert tips, and a warm, welcoming community. BakingSecret.com is my way of sharing the magic of baking with the world. When I’m not testing new recipes, you’ll find me exploring farmers’ markets, collecting vintage cookbooks, or perfecting my sourdough technique.