
Why I Love Baking and Why You’ll Love This Cake
I still remember the first time I baked a cake. It was lopsided, slightly burnt, and far from perfect. But it made me happy. That’s how my love for baking started. Over the years, I’ve tried countless recipes and designs, but nothing compares to the magic of a 3 tier wedding cake. There’s something about its elegance and charm that makes it the star of any celebration.
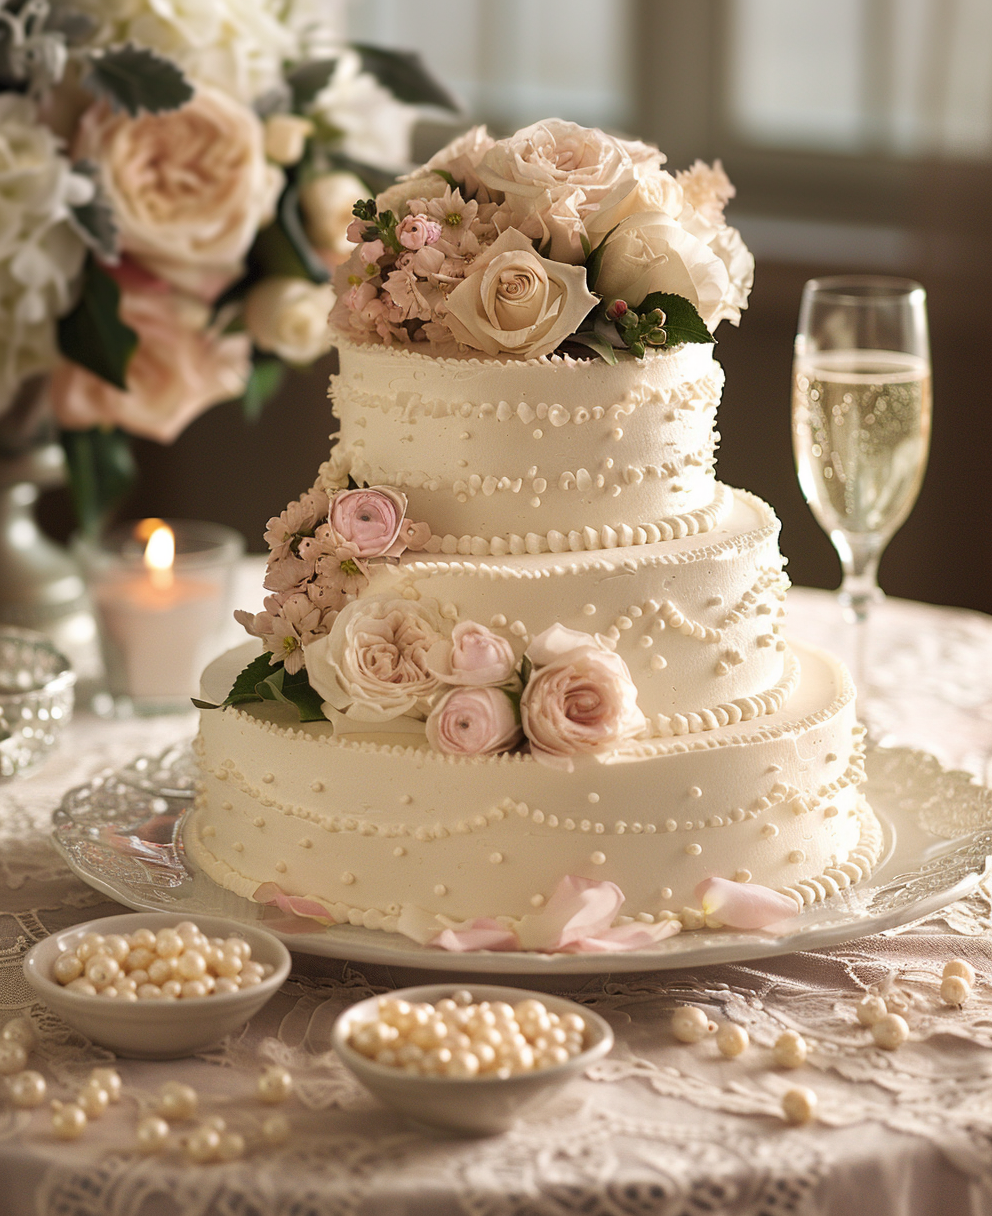
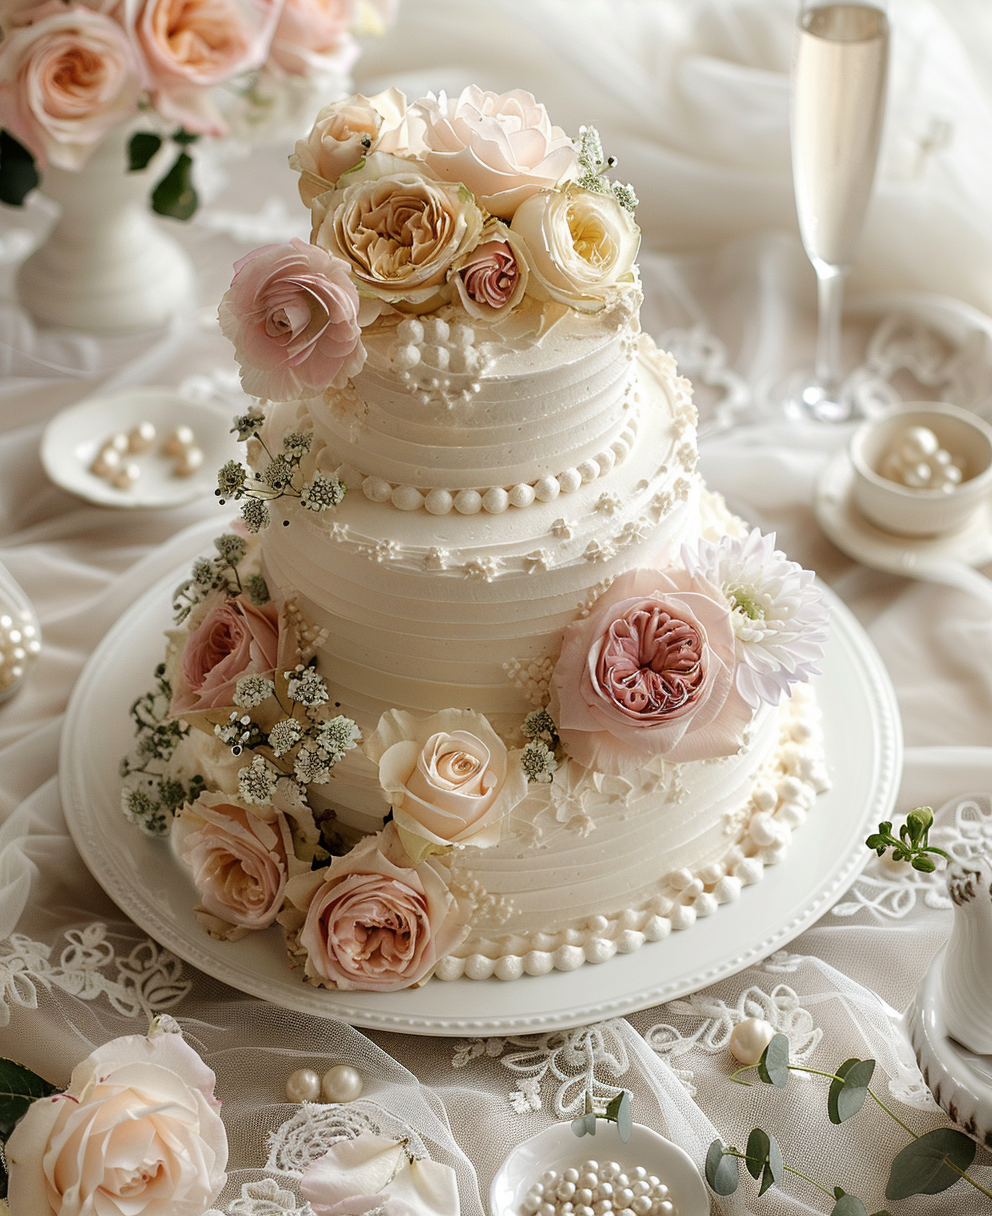
A 3 tier wedding cake isn’t just dessert—it’s a centerpiece. It’s the moment everyone waits for at weddings, birthdays, and other big events. Whether you’re planning your own or simply dreaming of one, this guide will help. You’ll discover elegant 3 tier wedding cake designs, easy-to-follow recipes, pricing tips, and answers to common questions like: How many people does a 3 tier wedding cake serve? What does a 3 tier wedding cake represent? Let’s get started.
Why Choose an Elegant 3 Tier Wedding Cake?
There’s a reason why 3 tier wedding cakes are iconic. They’re timeless, versatile, and carry deep meaning. For me, they symbolize tradition and togetherness. Each tier represents a step in life’s journey—past, present, and future. It’s not just a cake; it’s a story.
Another reason I adore them is their practicality. A 3 tier wedding cake can serve anywhere from 50 to 150 guests, depending on the size of each tier and the serving style. Here’s a quick breakdown:
- Smallest tier: Serves about 10-20 people.
- Middle tier: Serves around 20-40 people.
- Largest tier: Feeds up to 80-100 people.
This makes it perfect for medium to large gatherings. Plus, it’s a great way to ensure everyone gets a slice without needing multiple desserts.
Popular 3 Tier Cake Designs for Weddings and Beyond
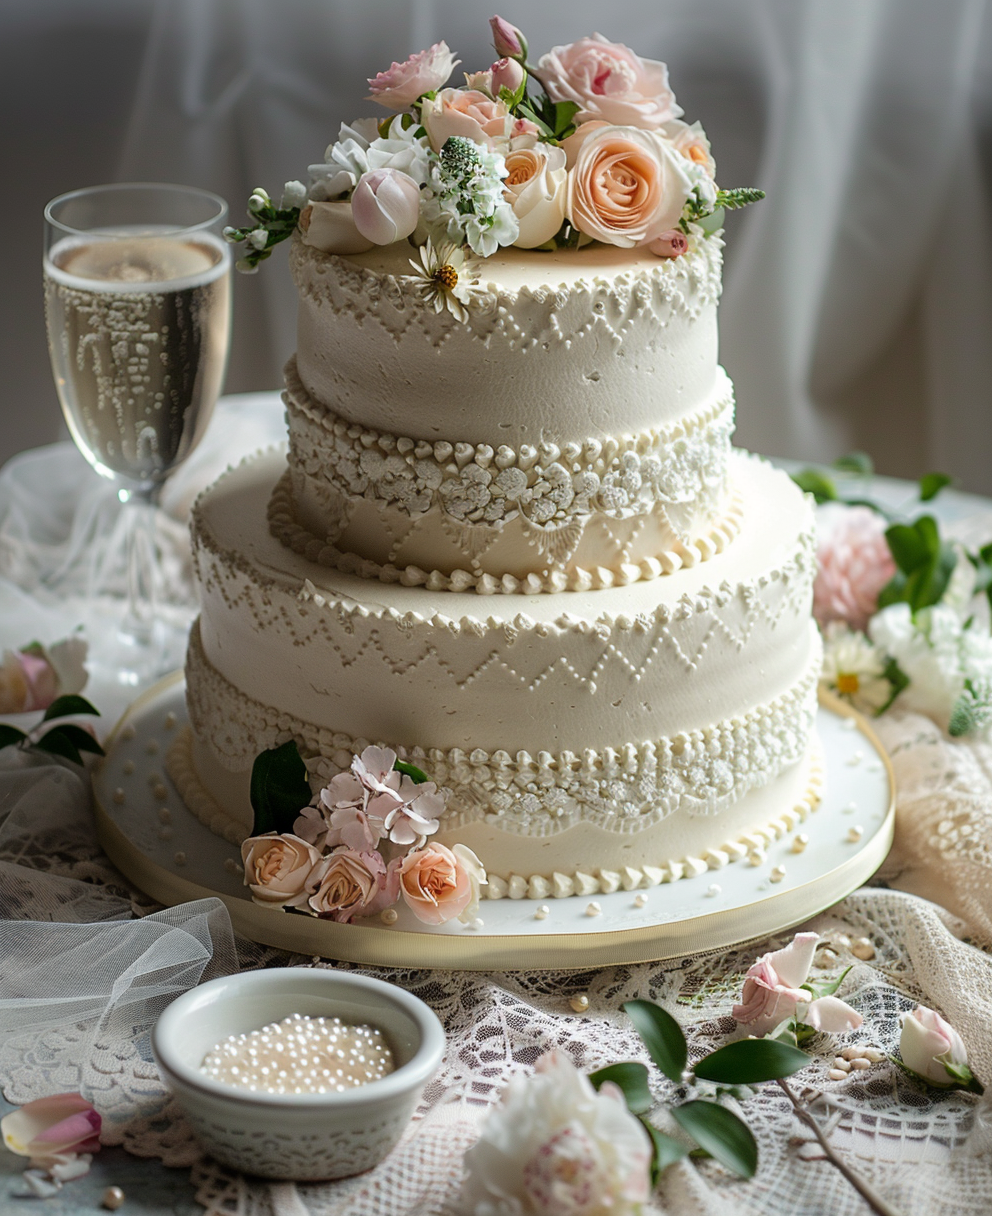
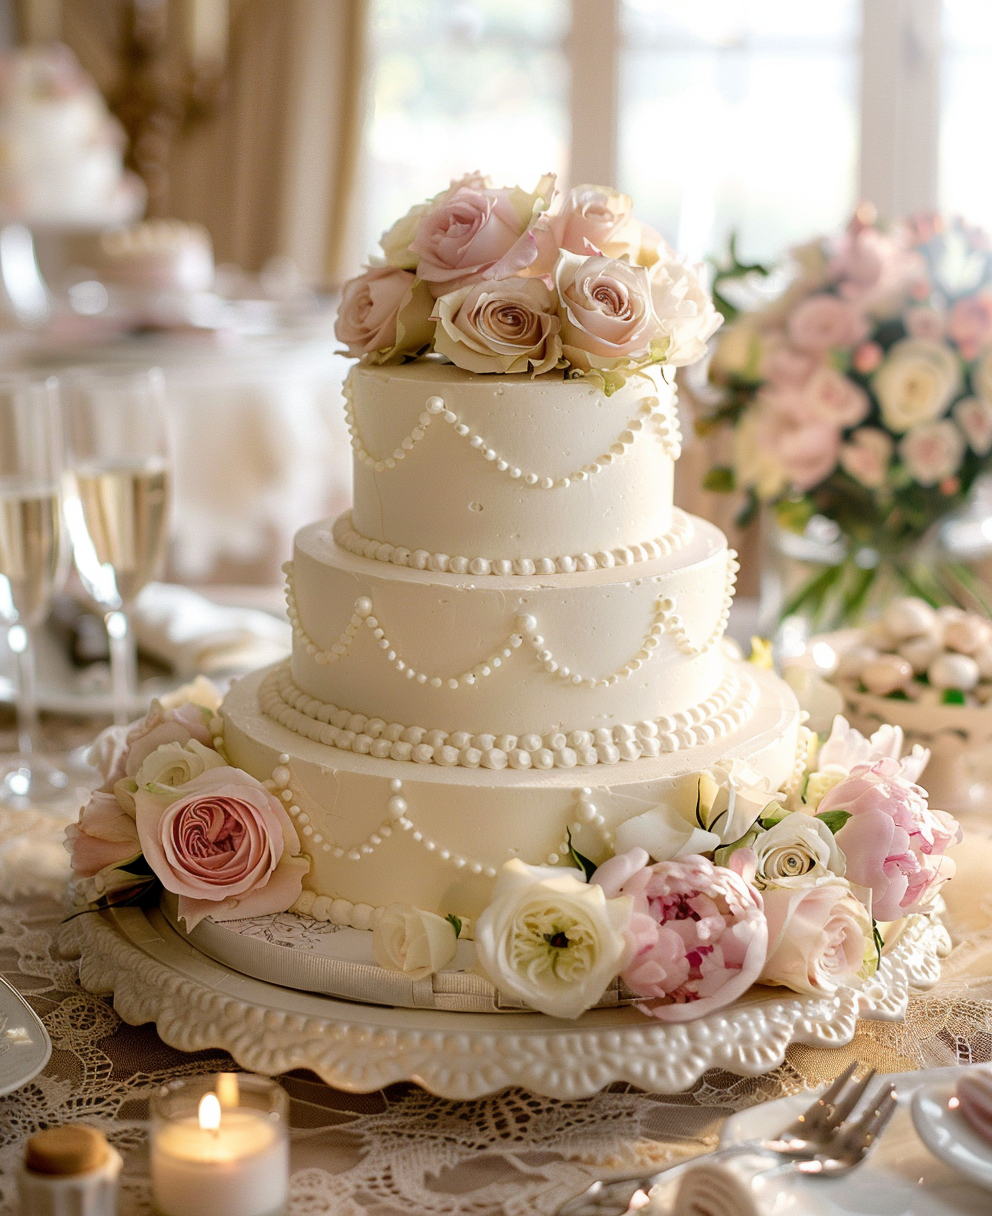
When it comes to 3 tier cake designs, the options are endless. From classic white fondant to bold buttercream textures, there’s something for every theme and taste. Let me share a few ideas that have always inspired me.
For weddings, elegant 3 tier wedding cakes often feature intricate details. Think lace patterns, floral accents, or metallic touches. Fondant works wonders here because it’s smooth and easy to shape. If you’re wondering how to make a 3 tier wedding cake with fondant, it starts with a sturdy base and precise layering. Practice helps, but even beginners can achieve beautiful results.
Not just for weddings, these cakes shine at birthday parties too. Imagine a funfetti 3 tier cake recipe with colorful sprinkles or a whimsical design topped with figurines. Birthdays call for creativity, so don’t be afraid to experiment. Buttercream frosting offers more flexibility than fondant, making it ideal for playful themes.
If you’re looking to customize, consider these tips:
- Add height: Use a 3 tier wedding cake stand to elevate your creation visually.
- Play with colors: Match the cake to your event’s color scheme.
- Personalize: Add monograms, edible flowers, or themed decorations.
One of my favorite projects was a rustic-themed 3 tier wedding cake covered in textured buttercream and adorned with fresh berries. It felt warm and inviting, just like the couple hosting the event. Another time, I created a sleek black-and-gold design for a milestone birthday. Both were hits because they reflected the personalities behind the celebrations.
Can stores like Costco or Walmart do tiered cakes? Yes, they can. But if you want something truly unique, making your own 3 tier cake is worth the effort. Not only do you control the flavor and design, but you also create memories along the way.
Whether you’re a seasoned baker or a beginner, this guide will walk you through everything—from choosing the right recipe to understanding costs and answering FAQs. Stick around, and let’s bring your vision to life!
How to Make Your Own 3 Tier Wedding Cake
Alright, let’s dive into the nitty-gritty of making your very own 3 tier wedding cake. Trust me, it’s not as intimidating as it sounds. With a little patience and some practice, you’ll be stacking tiers like a pro in no time. Plus, there’s nothing quite like the satisfaction of slicing into a cake you made yourself. So grab your apron, and let’s get started.
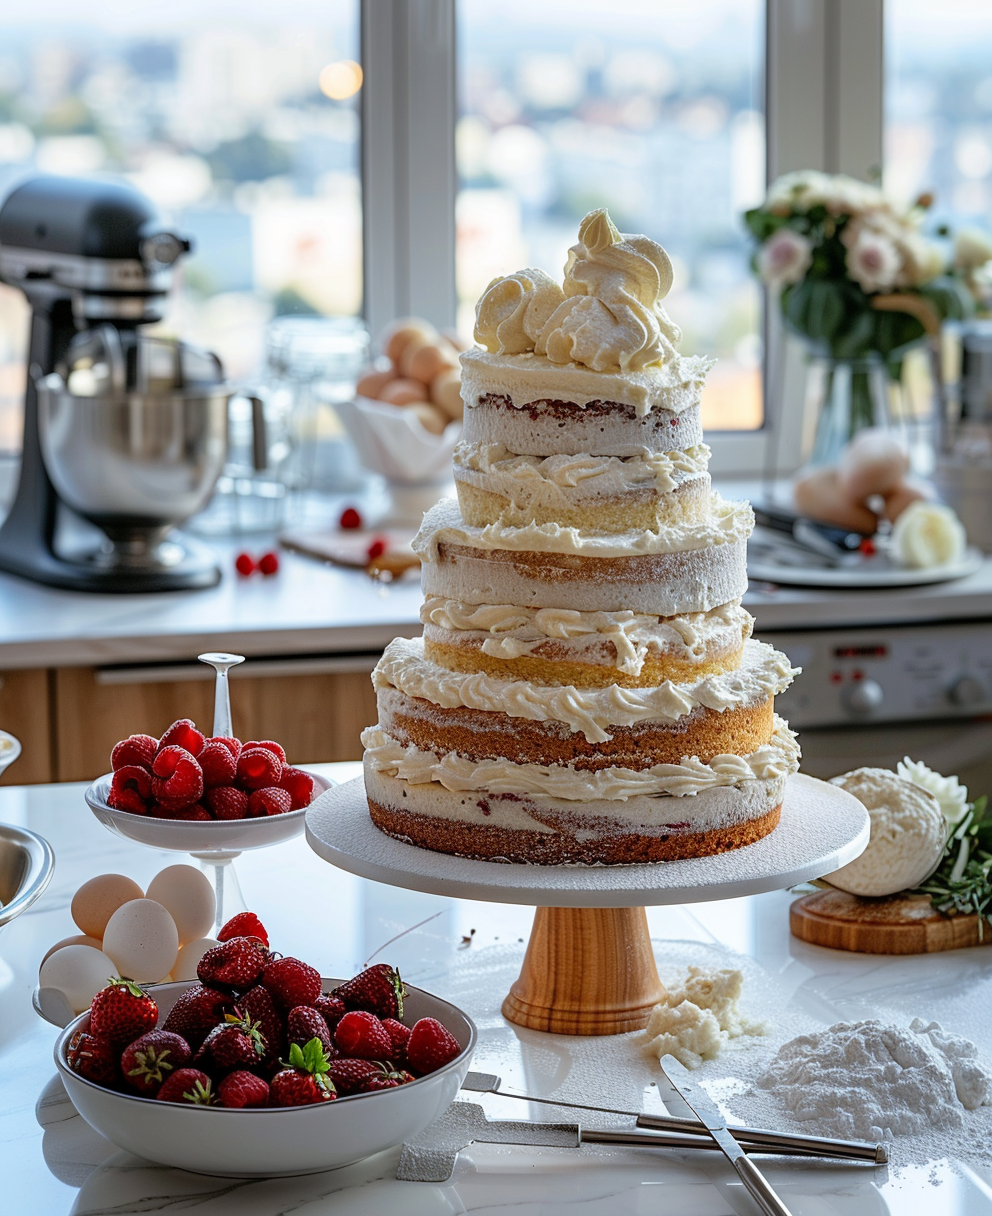
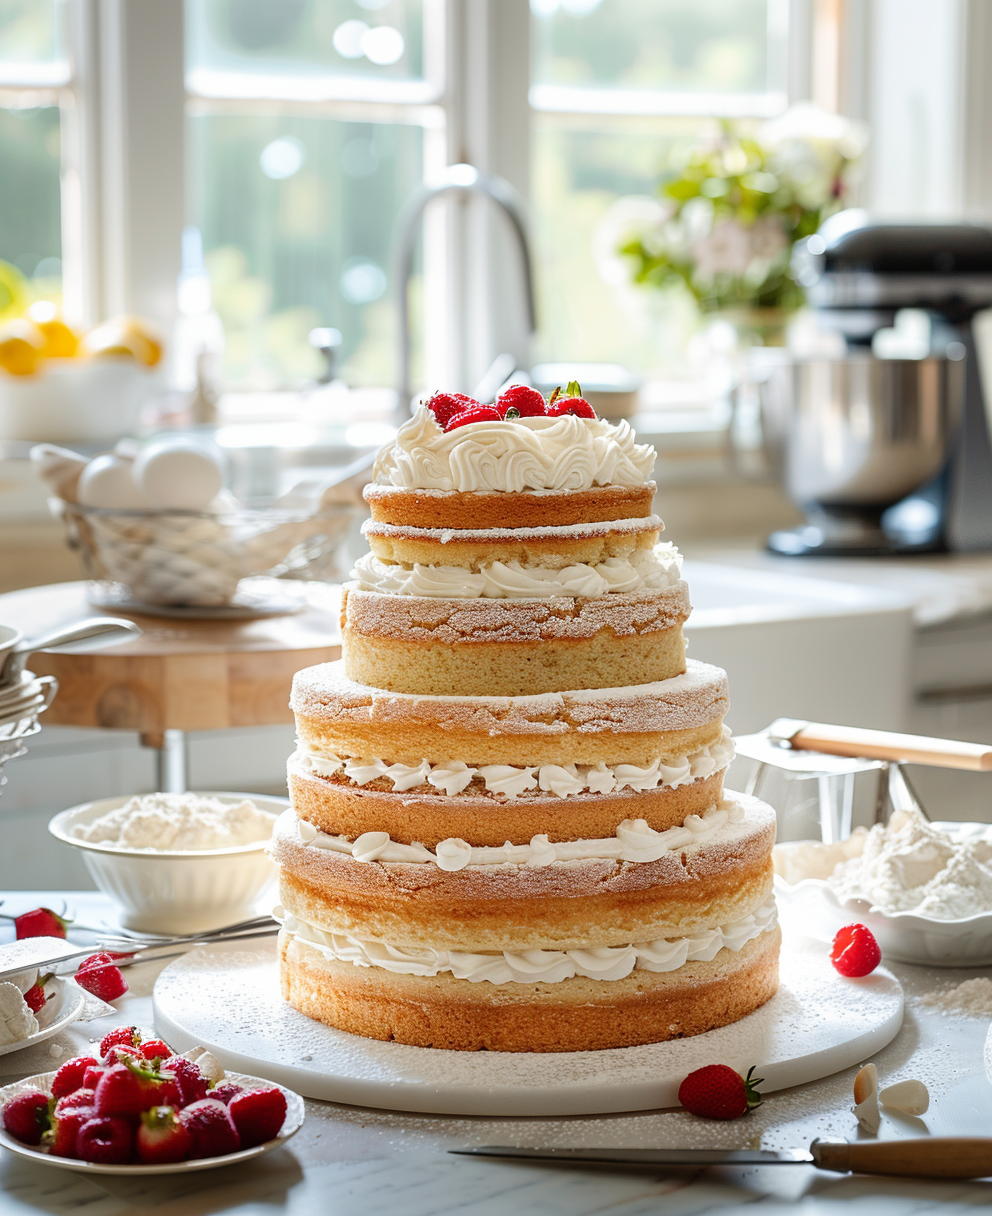
First things first—baking the cakes themselves. I always recommend starting with solid recipes that you’ve tested before. If you’re unsure where to begin, check out this delicious 8-inch round cake recipe. It’s versatile enough to serve as the base for each tier. For larger gatherings, you can scale up or double the recipe depending on how many guests you’re serving.
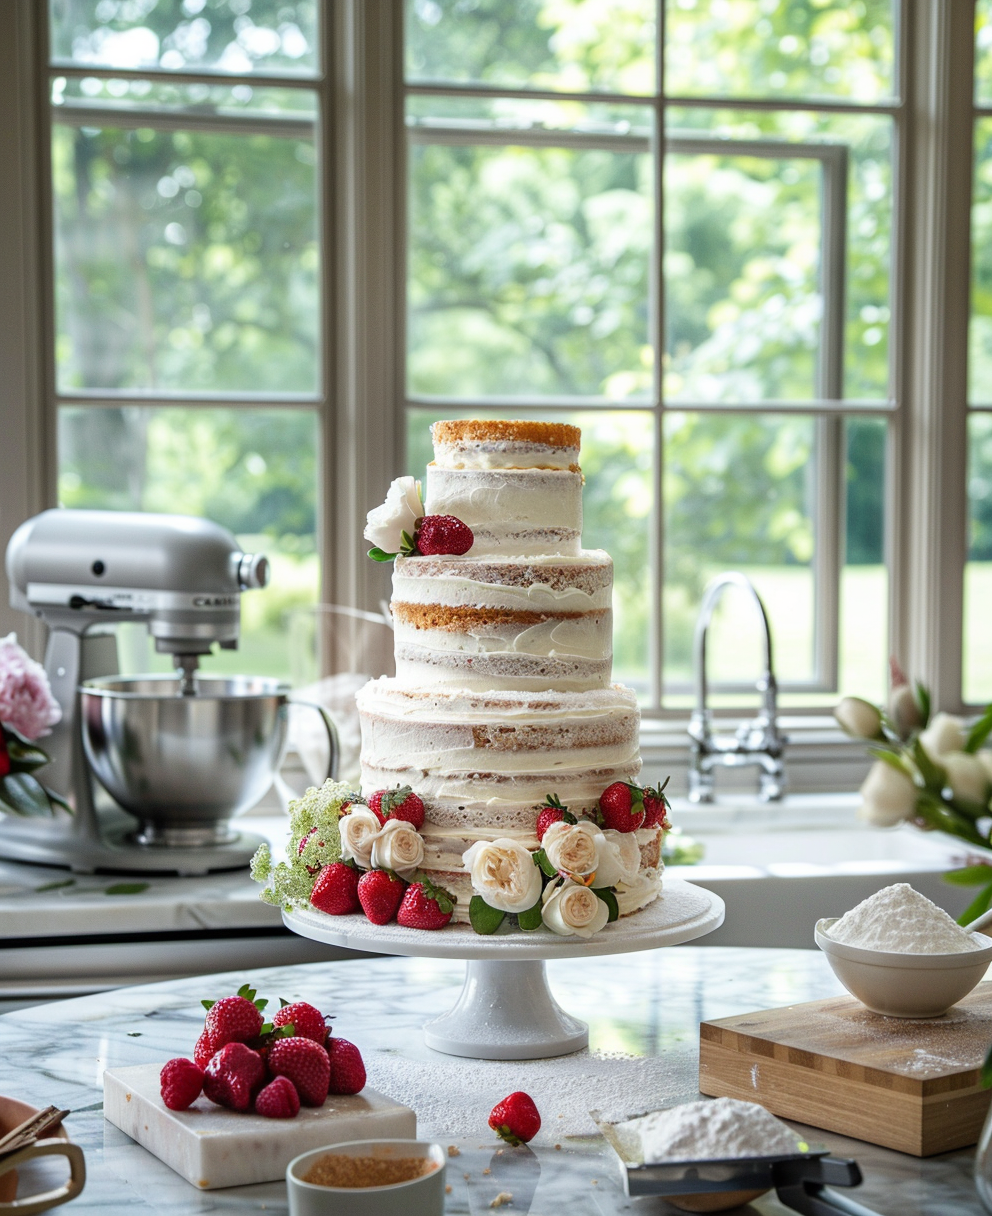
Once your cakes are baked and cooled (and trust me, don’t skip the cooling part—it’s crucial), it’s time to level them. Use a serrated knife or a cake leveler to trim off any domed tops so each layer is flat and even. This step is key for stability when stacking later. Then, frost each tier lightly with a crumb coat—a thin layer of frosting that traps crumbs—and chill the cakes in the fridge for about 20 minutes. By the way, if you’re going for a buttercream finish, this naked wedding cake tutorial has some great tips for achieving smooth edges.
Now comes the fun part: covering your tiers with fondant. How to make a 3 tier wedding cake with fondant? Start by rolling out your fondant on a clean, powdered surface. Make sure it’s large enough to drape over the entire tier without tearing. Gently lift the fondant using a rolling pin and drape it over the chilled cake. Smooth it out carefully with your hands or a fondant smoother, working from the top down to avoid air bubbles. Trim off any excess around the bottom edge. Repeat this process for all three tiers.
Here’s the thing about stacking: safety matters just as much as aesthetics. You’ll need a sturdy 3 tier wedding cake stand or dowels to support the weight of the upper tiers. Insert bubble tea straws or wooden dowels into the middle and largest tiers to act as pillars. These will prevent the tiers from collapsing under pressure. Funny enough, I once tried skipping the dowels because I thought my frosting would hold everything together. Spoiler alert: it didn’t. Lesson learned!
When assembling, place the largest tier at the bottom, followed by the medium, and finally the smallest on top. Secure each tier with a bit of frosting or royal icing between layers to keep them steady. If you’re transporting the cake, use non-slip mats inside your vehicle to avoid disaster. Trust me, nobody wants to deal with a toppled cake five minutes before the event starts.
Delicious Recipes for Your 3 Tier Cake
Let’s talk flavors because, honestly, what’s the point of a beautiful cake if it doesn’t taste amazing? One of my all-time favorites is this limoncello mascarpone cake. The zesty lemon flavor paired with creamy mascarpone filling adds a refreshing twist that works perfectly for weddings or summer birthdays. Pair it with a light buttercream frosting, and you’ve got a showstopper.
If tropical vibes are more your style, try incorporating mango mousse between layers. This mango mousse cake recipe is a crowd-pleaser, especially for outdoor events. The bright citrus notes balance beautifully with rich vanilla sponge layers. Pro tip: alternate fruity fillings with plain sponge layers to keep the flavors balanced.
For those who prefer simplicity, a classic vanilla sponge paired with chocolate ganache never disappoints. Or, if you’re feeling adventurous, mix and match flavors across tiers. For example, go with a raspberry-filled bottom tier, a lemon curd middle tier, and a coconut cream top tier. Just be mindful of combining complementary flavors; too many bold tastes can overwhelm the palate.
Speaking of finishes, don’t underestimate the power of texture. A 3 tier wedding cake buttercream design can look stunning with rustic swirls or sharp edges. If you’re aiming for elegance, consider adding edible flowers or gold leaf accents. They elevate the overall presentation without being overly complicated.
Budgeting for Your Dream Cake
Now, let’s address the elephant in the room: cost. How much do 3 tier wedding cakes prices actually run? Well, it depends on several factors. Size, design complexity, and location all play a role. On average, expect to pay anywhere from $300 to $1,000 for a professionally made cake. Custom designs with intricate details like hand-painted elements or sugar flowers will naturally cost more.
But here’s the good news—you can save money by making it yourself. DIY-ing your 3 tier cake cuts labor costs significantly. Plus, you have full control over ingredients and portion sizes. For instance, instead of buying expensive fondant, you could opt for a simpler buttercream finish. Every little choice adds up.
What about big stores? Can Costco do tiered cakes? Absolutely! Costco offers affordable options for tiered cakes, though customization might be limited. Similarly, Walmart can handle basic designs, but don’t expect anything overly fancy. Their cakes are decent for casual events, but if you’re envisioning something truly unique, these retailers probably won’t cut it.
To strike a balance between quality and affordability, consider semi-homemade solutions. For example, bake the cakes yourself but hire someone to decorate them. Alternatively, focus on one standout element, like a fondant topper or custom piping, while keeping the rest minimalistic. Small touches can make a big impact without breaking the bank.
Lastly, think about leftovers. A well-planned 3 tier cake ensures everyone gets a slice while minimizing waste. Remember earlier when we discussed serving sizes? Keep that in mind when deciding how much cake to make. After all, nobody likes throwing away delicious dessert—or paying for slices that won’t get eaten.
So whether you’re crafting an elegant 3 tier wedding cake or experimenting with playful 3 tier cake designs for birthdays, remember that preparation is key. Take your time, enjoy the process, and most importantly, have fun with it. Because at the end of the day, baking isn’t just about feeding people—it’s about creating memories.
Tips for Decorating Like a Pro
Let’s be honest—decorating a 3 tier wedding cake can feel like trying to paint the Mona Lisa with a butter knife. But don’t stress! You don’t need to be a professional to achieve jaw-dropping results. All it takes is some planning, practice, and a few insider tricks I’ve picked up along the way.
First things first: plan your design before you even bake. Grab a sketchpad or open Pinterest (yes, it’s okay to admit you’re addicted) and jot down ideas. Are you going for an elegant fondant look or something more rustic with textured buttercream? Sketching it out helps you visualize the final product and saves time when you’re elbows-deep in frosting. Plus, it’s oddly satisfying to see your vision come to life step by step.
By the way, if you’re new to working with fondant, start small. Fondant has a reputation for being tricky, but honestly, it’s all about confidence. Practice rolling it out on parchment paper until you get that smooth, wrinkle-free finish. And here’s a little secret: cornstarch is your best friend. Dust your surface lightly to keep the fondant from sticking. If you mess up, no biggie—just ball it up and roll it again. Trust me, I’ve done this more times than I care to admit.
When it comes to buttercream, texture is everything. For an elegant 3 tier wedding cake, sharp edges scream sophistication. Use a bench scraper to smooth the sides as much as possible. It might take a couple of tries, but hey, practice makes perfect. On the flip side, if you’re aiming for a more relaxed vibe, go for those swoopy, organic swirls. They add charm without needing perfection.
One of my favorite tips? Pre-make your decorations. Whether it’s sugar flowers, fondant ribbons, or edible pearls, having these ready ahead of time takes so much pressure off. Funny enough, I once spent hours piping tiny roses onto a cake only to smudge them at the last second. Lesson learned: prep early and store delicate pieces in a cool, dry place until assembly time.
Oh, and let’s talk tools. Investing in a turntable isn’t just fancy—it’s practical. Spinning your cake while smoothing the frosting saves you from awkward angles and uneven finishes. Same goes for a good offset spatula. These tools might seem pricey upfront, but they’re worth every penny. Think of them as your baking BFFs.
Lastly, don’t forget lighting. Seriously, nothing ruins a cake faster than realizing halfway through decorating that the room is too dim to see what you’re doing. Natural light is ideal, but if that’s not an option, set up a bright lamp nearby. Your Instagram photos will thank you later.
Frequently Asked Questions About 3 Tier Wedding Cakes
You’ve got questions; I’ve got answers. Here are some common queries people ask about 3 tier wedding cakes and how to tackle them:
- How many people does a 3 tier wedding cake serve?
This depends on how generous your slices are. Typically, a 3 tier cake recipe serves between 50 and 150 guests. Smaller tiers feed fewer people, while larger ones stretch further. Just remember, bigger slices mean fewer servings! - What does a 3 tier wedding cake represent?
Traditionally, each tier symbolizes a stage in life: past, present, and future. It’s a beautiful metaphor for growth and shared journeys. Plus, it’s just plain gorgeous. - Can Costco do tiered cakes?
Yep, Costco offers affordable options for tiered cakes, though customization is limited. Their cakes are solid for casual events, but if you want intricate designs, you might need to DIY or hire a pro. - Can Walmart do a 3 tier cake?
Yes, Walmart can handle basic tiered cakes. However, their designs tend to lean toward simplicity rather than elegance. Perfect for low-key celebrations but maybe not for formal weddings. - How much should I budget for a 3 tier wedding cake?
Prices vary widely based on size, design, and location. Expect anywhere from $300 to $1,000+ for custom work. Making it yourself? Costs drop significantly, especially if you skip premium ingredients. - Do I really need a 3 tier wedding cake stand?
While not strictly necessary, a stand adds height and visual impact. Plus, it makes transportation easier. If you’re stacking directly, ensure dowels or supports are in place for stability. - What flavors pair well together in a 3 tier cake?
Balance is key. Mix bold flavors like lemon or raspberry with neutral layers such as vanilla or almond. Avoid overwhelming combinations—simplicity often shines brightest. - Is fondant better than buttercream for a 3 tier cake?
Both have pros and cons. Fondant creates a sleek, polished look, while buttercream feels softer and more approachable. Choose based on your theme and taste preferences. - Can I freeze parts of a 3 tier cake beforehand?
Absolutely! Bake and freeze individual tiers ahead of time. Just thaw completely before assembling and decorating. It’s a lifesaver for busy schedules. - How far in advance can I decorate my cake?
Fondant-covered cakes can sit for a day or two if stored properly. Buttercream cakes are best decorated the day before serving. Always refrigerate perishable fillings.
If you’re hungry for more inspiration, check out our collection of cakes and cupcakes recipes. There’s something magical about finding the perfect recipe to match your vision.
In the end, whether you decide to bake your own 3 tier wedding cake or order one from a talented baker, remember that it’s all about celebrating love—and who doesn’t love cake? So take a deep breath, trust yourself, and dive into the sweet adventure.
A Final Thought
Baking is more than mixing flour and sugar—it’s storytelling, creativity, and connection wrapped in frosting. Don’t let fear hold you back. Even if your first attempt isn’t flawless, it’ll still taste amazing. After all, the best memories are made around shared desserts. Now go make some magic happen!
Equipment
- Mixing bowls
- Electric mixer
- Serrated knife
- Cake pans
- Offset spatula
Ingredients
- 3 cups cake flour
- 2 cups granulated sugar
- 1 cup unsalted butter softened
- 5 pcs eggs
- 1 cup milk
- 1 tbsp baking powder
- 1 tsp baking soda
- 1 tbsp vanilla extract
- Fondant for covering the cake
- Buttercream for frosting
- Optional fillings (fruit preserves, mousse, etc.)
- Edible decorations for decoration (flowers, gold leaf)
Instructions
- Preheat your oven and prepare cake pans.
- In a mixing bowl, cream together the butter and sugar until light and fluffy.
- Add eggs, one at a time, mixing well after each addition.
- In a separate bowl, whisk together dry ingredients (cake flour, baking powder, and baking soda).
- Gradually add the dry ingredients to the butter mixture, alternating with milk, and mix until smooth.
- Pour the batter into the prepped cake pans and bake according to the recipe's specified time.
- Once baked, allow the cakes to cool completely.
- Level the cakes using a serrated knife to ensure flat surfaces.
- Apply a crumb coat by spreading a thin layer of frosting over each cake tier.
- Chill the cakes for about 20 minutes in the fridge.
- Roll out the fondant and drape over each cooled and chilled cake tier smoothly.
- Stack the tiers using appropriate dowels for support.
- Decorate as desired, adding edible decorations.
Notes
Nutrition

Hi, I’m Olivia Parker, the founder of BakingSecret.com and a lifelong lover of all things sweet and homemade. I grew up in a small town in Oregon, where the smell of fresh cookies in my family’s kitchen sparked my passion for baking. Over the years, I turned that passion into a mission: to help home bakers feel confident, inspired, and creative.
After studying food science and working in several artisan bakeries across the U.S., I decided to create a space where everyone from beginners to seasoned bakers can find reliable recipes, expert tips, and a warm, welcoming community. BakingSecret.com is my way of sharing the magic of baking with the world. When I’m not testing new recipes, you’ll find me exploring farmers’ markets, collecting vintage cookbooks, or perfecting my sourdough technique.