
Introduction
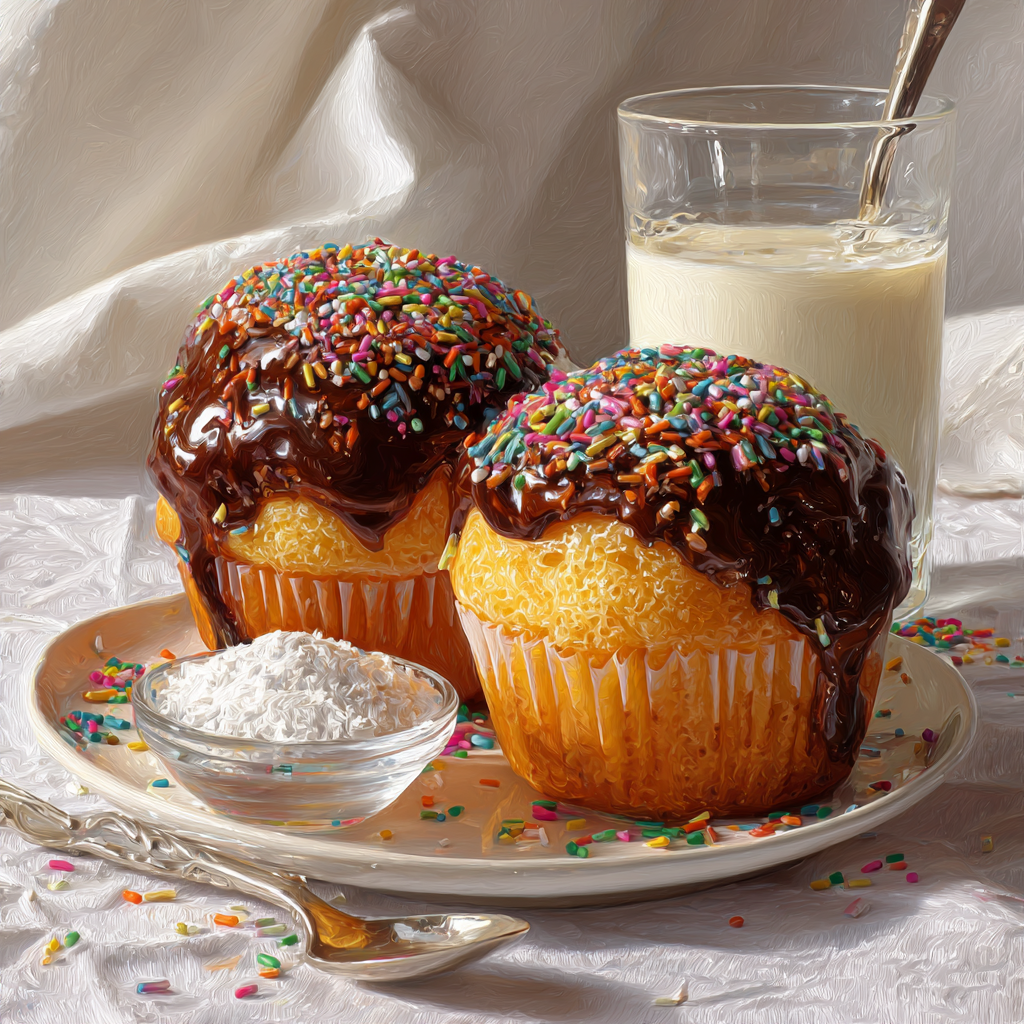
I still remember the first time I tasted a Boston cream cupcake. It was at a small bakery tucked away in my hometown, and the combination of rich chocolate, creamy filling, and soft cake left me speechless. Since then, these cupcakes have become one of my all-time favorites. If you’ve been searching for the best recipe for Boston cream cupcakes, you’re in the right place.
What makes this dessert so special? For starters, it’s a classic that appeals to just about everyone. Whether you’re new to baking or a seasoned pro, this recipe is simple enough to follow while offering plenty of room to get creative. Plus, there’s something magical about biting into a perfectly balanced cupcake where every layer complements the others. Let’s dive into what makes Boston cream cupcakes so irresistible.
What Makes Boston Cream Cupcakes Special?
Boston cream cupcakes trace their roots back to the famous Boston cream pie, which dates back to the 19th century. The original pie was created by Armenian-French chef M. Sanzian at Boston’s Parker House Hotel. Over time, bakers began transforming the layered pie into individual cupcakes, making them easier to share and enjoy.
So, what sets these cupcakes apart from other desserts? It’s the perfect mix of textures and flavors. The soft, buttery cake pairs beautifully with the smooth custard filling and glossy chocolate glaze. Unlike many overly sweet treats, Boston cream cupcakes strike a balance that keeps you coming back for more.
A common question people ask is: What is Boston cream filling made of? The answer lies in its simplicity. A traditional Boston cream filling is a homemade custard made with milk, sugar, eggs, cornstarch, and vanilla extract. Cornstarch thickens the mixture, giving it a luscious, pudding-like consistency. Vanilla adds warmth and depth, tying everything together. While some recipes suggest using store-bought alternatives like vanilla pudding, keep in mind that it may alter the flavor slightly.
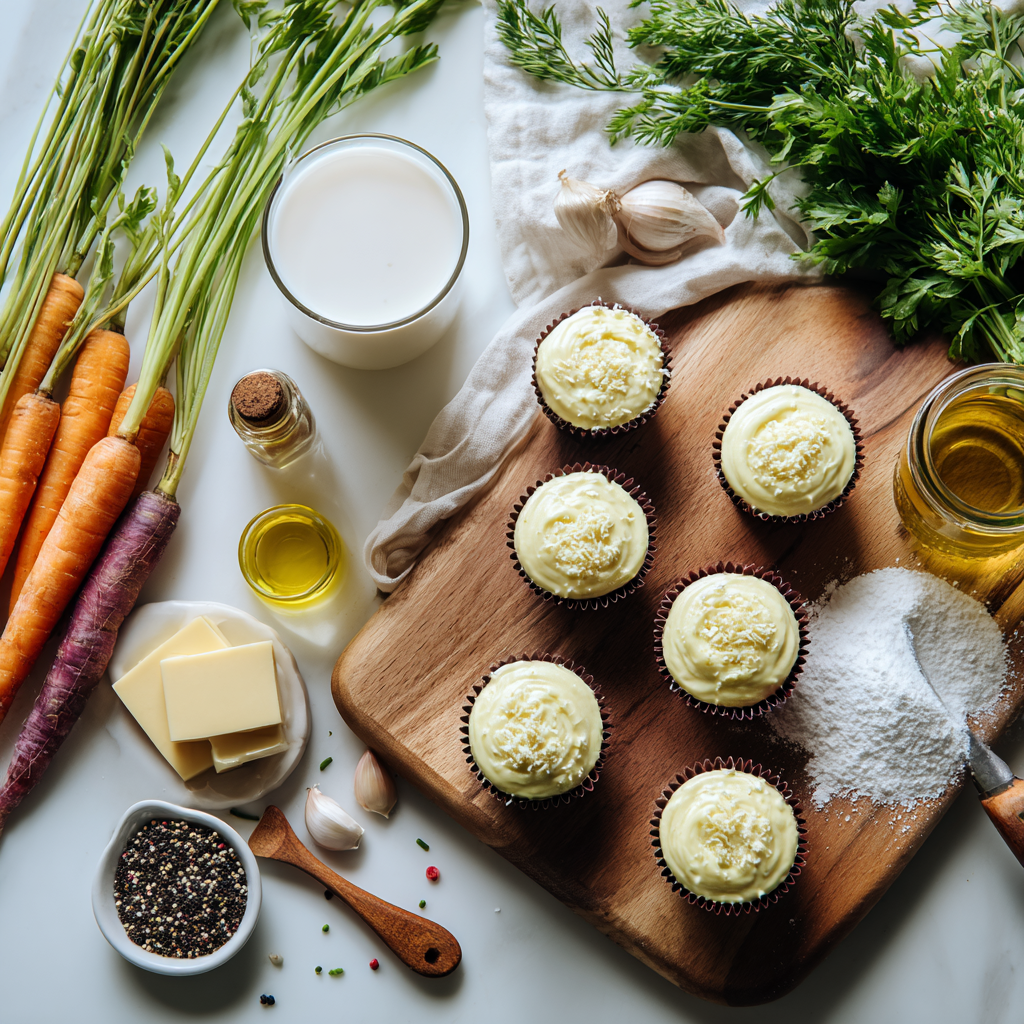
Ingredients You’ll Need
To make these delightful cupcakes, you’ll need three main components: the cupcake batter, the creamy filling, and the chocolate glaze. Each part plays a key role in creating the final masterpiece.
- Cupcake Batter: Start with a basic yellow or vanilla cupcake recipe. For extra moistness, consider adding an extra egg yolk or substituting buttermilk for regular milk. These small tweaks can make a big difference.
- Creamy Filling: As mentioned earlier, the filling is a custard made from scratch. However, if you’re short on time, a high-quality instant vanilla pudding can work as a substitute. Just be aware it might not have the same depth of flavor.
- Chocolate Glaze: A simple ganache made with semi-sweet chocolate and heavy cream is the way to go. This creates a shiny, decadent topping that hardens slightly as it cools, making your cupcakes look professional.
For those wondering, Can you use vanilla pudding for Boston cream pie? Yes, you absolutely can. It’s a convenient option, especially for beginners. However, don’t expect the exact same taste. Homemade custard has a richer, more authentic flavor compared to boxed pudding mixes. If you decide to use pudding, opt for brands known for quality, like Jell-O or Cook’s Essentials.
Another tip: To ensure your cupcakes turn out super moist, avoid overmixing the batter. Mix until the ingredients are just combined. Overmixing develops gluten, which can lead to dense or dry results. Also, let the cupcakes cool completely before filling them. Otherwise, the custard might melt and lose its structure.
Lastly, here’s a fun fact: Many people confuse Boston cream with Bavarian cream. While both are creamy fillings, they differ in texture and preparation. Bavarian cream often includes gelatin and whipped cream, giving it a lighter, fluffier consistency. Boston cream, on the other hand, is denser and more pudding-like. Understanding this distinction helps you choose the right filling for your cupcakes.
Step 1: Baking the Perfect Cupcakes
Alright, let’s get into the fun part—baking those dreamy cupcake bases. Trust me, this step is where the magic begins. The goal here is to create a light and fluffy cake that serves as the perfect canvas for your creamy filling and chocolate glaze. I’ve had my fair share of baking disasters (like the time I accidentally added salt instead of sugar), so I’ll share some hard-earned tips to help you nail it on your first try.
First things first, gather your ingredients. You’ll need the usual suspects: flour, sugar, eggs, butter, and milk. But here’s a little secret: if you want your cupcakes to be extra moist, swap regular milk for buttermilk. It adds a subtle tang and keeps the texture soft. And while we’re on the topic of moisture, this oversized cupcake recipe has a trick I swear by—brushing the cooled cupcakes with a simple syrup. It’s like giving them a little hydration boost!
Now, about mixing. I know it’s tempting to go all out with the electric mixer, but hold back! Overmixing is the enemy of fluffy cupcakes. Once the dry ingredients are incorporated, stop. That’s it. Walk away if you have to. Overworking the batter leads to dense, tough results, and nobody wants that. By the way, have you ever tried baking with room-temperature eggs? They blend more evenly, which makes a huge difference in texture. Just saying.
Here’s another pro tip: don’t overfill your cupcake liners. Aim for about two-thirds full. This gives them enough space to rise without spilling over. Funny enough, I learned this the hard way when I ended up with a tray of mini muffin volcanoes. Not cute.
Oh, and before I forget—what is the secret to super moist cupcakes? Besides using buttermilk or brushing with syrup, it’s all about timing. Don’t overbake them. A toothpick inserted into the center should come out clean, but not bone-dry. If you’re unsure, err on the side of underbaking slightly; they’ll continue to cook a bit from residual heat as they cool.
Step 2: Preparing the Cream Filling
Okay, now onto the star of the show—the Boston cream filling. If you thought the cupcakes were exciting, wait till you taste this custard. It’s rich, smooth, and oh-so-satisfying. I remember the first time I made it from scratch—it felt like I unlocked a hidden level in baking. Let me walk you through both the traditional method and a shortcut, just in case life gets in the way.
Traditionally, Boston cream filling is made by cooking milk, sugar, cornstarch, egg yolks, and vanilla over low heat until it thickens. Sounds fancy, right? It’s actually pretty straightforward. The key is to whisk constantly to prevent lumps. Pro tip: strain the mixture through a fine-mesh sieve once it’s done. This ensures an ultra-smooth consistency. Plus, it feels very chef-like, which is always a bonus.
But hey, life happens. Maybe you’re short on time or just don’t feel like standing over a hot stove. In that case, instant pudding mix can save the day. Just make sure to choose a high-quality brand. While it won’t have the same depth as homemade custard, it’ll still deliver that creamy goodness. For instance, this biscoff cupcakes recipe uses a similar hack, and readers rave about how tasty it turns out.
One question I often see is, “What’s the difference between Bavarian cream and Boston crème?” Great question. Bavarian cream tends to be lighter because it includes whipped cream and gelatin, giving it a mousse-like texture. Boston cream, on the other hand, is denser and more pudding-like. Think of it as the difference between a cloud and a pillow. Both are amazing, but they serve different purposes.
Here’s the thing: even though shortcuts exist, I highly recommend trying the homemade version at least once. There’s something incredibly rewarding about making custard from scratch. It’s like a warm hug in dessert form. Plus, it pairs beautifully with the chocolate glaze we’ll talk about later.
Step 3: Assembling Your Cupcakes
Finally, the moment you’ve been waiting for—assembly time! This is where everything comes together, quite literally. Don’t worry; it’s easier than it sounds. With the right tools and a bit of patience, you’ll have bakery-worthy cupcakes in no time.
Start by coring the cupcakes. You can use an apple corer or a small paring knife to remove the center, leaving a little border around the edges. Be careful not to dig too deep—you don’t want to puncture the bottom. Alternatively, invest in a cupcake corer tool. It’s inexpensive and makes the process a breeze. I got mine during a random kitchen gadget spree, and it’s one of those things I didn’t know I needed until I tried it.
Next, prepare your piping bag. Fill it with the cream filling and snip off the tip. Insert the nozzle into the hole you created and gently squeeze until the filling starts to peek out. Easy peasy. If you don’t have a piping bag, a zip-top bag with the corner snipped works too. No judgment here—I’ve used both methods depending on my mood.
Now, here’s a fun detail: don’t overfill the cupcakes. A little goes a long way. Too much filling can make them soggy, and we worked too hard on the batter to let that happen. Oh, and if you’re wondering how to keep things neat, practice makes perfect. My first attempts were messy, but eventually, I got the hang of it. You will too!
Before moving on to the glaze, let’s take a quick detour. Have you ever experimented with other fillings? For example, this pumpkin cheesecake cupcake recipe swaps the custard for spiced cheesecake filling. It’s a game-changer if you’re looking to switch things up while keeping the Boston cream vibe alive.
Lastly, don’t forget to chill your filled cupcakes for about 10–15 minutes before adding the glaze. This helps the filling set and prevents any melty mishaps. Trust me, it’s worth the wait.
And there you have it—the blueprint for creating irresistible Boston cream cupcakes. Whether you stick to tradition or experiment with shortcuts, these treats are guaranteed to impress. So grab your apron, crank up some music, and let’s bake something unforgettable. Happy baking!
Step 4: Adding the Chocolate Glaze
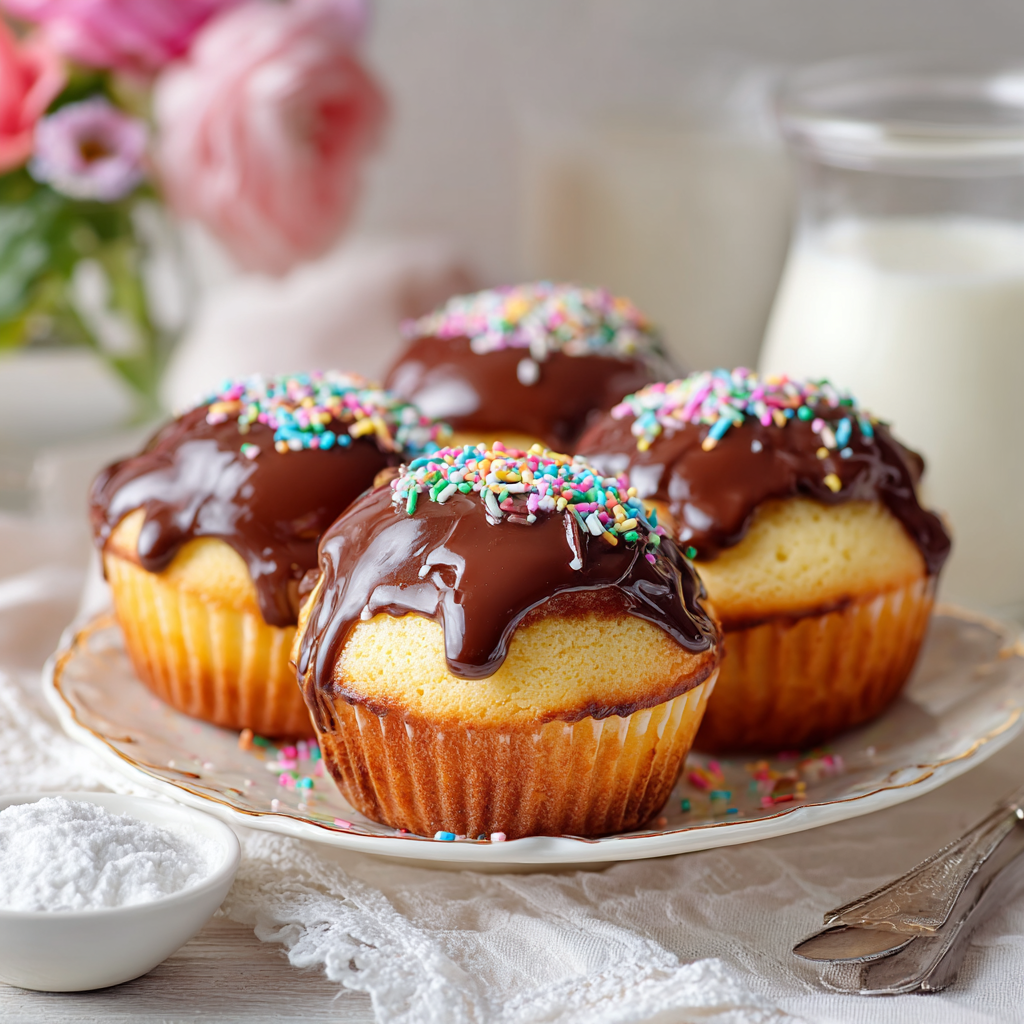
Alright, let’s talk about the pièce de résistance—the chocolate glaze. If you’ve ever wondered what makes Boston cream cupcakes look so irresistible, this glossy topping is your answer. It’s not just about aesthetics, though. The glaze adds a rich, slightly bitter contrast to the sweet custard filling and tender cake. Honestly, I could eat it with a spoon (and sometimes I do).
To make the perfect glaze, you’ll need semi-sweet chocolate and heavy cream. Why semi-sweet? Because it strikes that ideal balance between sweetness and depth. If you go too dark, it might overpower the other flavors; too sweet, and it feels one-dimensional. Heat the cream until it’s warm but not boiling, then pour it over finely chopped chocolate. Let it sit for a minute or two before whisking it into silky perfection. Trust me, watching the chocolate melt into the cream is oddly therapeutic.
Here’s a tip: strain the glaze through a sieve if you notice any lumps. Yes, even with melted chocolate, little bits can sneak in. Straining ensures a smooth, professional finish. By the way, if you’re feeling fancy, add a pinch of salt or a splash of vanilla extract to enhance the flavor. Salted chocolate is having a moment, and for good reason—it’s divine.
Now, let’s chat about storage. One thing I’ve learned the hard way is that chocolate glaze can crack if it dries out too quickly. To avoid this, cover your cupcakes loosely with plastic wrap after the glaze has set. Don’t seal them tightly, though—condensation can ruin the shine. If you’re planning to serve them later, store them in the fridge but bring them back to room temperature before serving. Cold cupcakes are fine, but they’re magical at room temp.
Tips for Serving and Storing
So, when should you whip up these beauties? Honestly, they’re perfect for just about any occasion. Birthdays? Check. Holidays? Absolutely. Even a random Tuesday night when you need a pick-me-up? You bet. Funny enough, I once made them for a coworker’s farewell party, and they were such a hit that she requested the recipe. That’s the power of Boston cream cupcakes—they bring people together.
If you’re hosting a gathering, you can prep these ahead of time. Fill and glaze the cupcakes a day in advance, then store them in the fridge. Just remember to take them out about 30 minutes before serving to let them come to room temperature. This step really makes a difference in flavor and texture. Oh, and here’s a pro move: keep them in an airtight container to prevent the glaze from dulling. Nobody wants lackluster chocolate.
What if you want to freeze them? Totally doable! Wrap each cupcake individually in plastic wrap, then place them in a freezer-safe bag. They’ll keep for up to three months. When you’re ready to enjoy, thaw them overnight in the fridge and let them sit at room temperature for a bit. The glaze might lose some shine, but a quick reheat with a hairdryer (yes, seriously) can bring it back. Try it—it’s a game-changer.
By the way, if you’re looking for more cupcake inspiration, check out this collection of cakes and cupcakes. There’s something for every mood, from fruity to decadent.
FAQ Section
Let’s tackle some lingering questions you might have about making these dreamy cupcakes:
- What is Boston cream filling made of? At its core, it’s a simple custard made with milk, sugar, eggs, cornstarch, and vanilla. The cornstarch thickens the mixture, giving it that signature pudding-like texture. Vanilla adds warmth and ties all the flavors together.
- What is the secret to super moist cupcakes? A few tricks: use buttermilk instead of regular milk, don’t overmix the batter, and brush the cooled cupcakes with a simple syrup. Also, avoid overbaking—err on the side of slightly underdone since they’ll continue to cook as they cool.
- What’s the difference between Bavarian cream and Boston crème? Bavarian cream is lighter and fluffier, thanks to whipped cream and gelatin. Boston cream, on the other hand, is denser and more pudding-like. Think of it as the difference between a cloud and a pillow—both cozy, but different vibes.
- Can you use vanilla pudding for Boston cream pie? Absolutely! It’s a convenient shortcut, especially if you’re short on time. However, keep in mind that homemade custard has a richer, deeper flavor compared to boxed mixes. If you go the pudding route, choose a high-quality brand for the best results.
- How do I stop my chocolate glaze from cracking? Cracking usually happens when the glaze dries out too quickly. Cover your cupcakes loosely with plastic wrap after the glaze sets. Avoid sealing them tightly, as condensation can dull the shine.
- Can I make the custard ahead of time? Yes, you can! Store it in an airtight container in the fridge for up to three days. Give it a good stir before using, as it might thicken in the fridge. You can also freeze it for longer storage—just thaw it in the fridge overnight.
- Why does my cupcake batter taste eggy? This usually happens if the eggs aren’t fully incorporated or if the batter isn’t baked long enough. Be sure to mix thoroughly and bake until a toothpick comes out clean.
- What can I use instead of heavy cream in the glaze? If you’re out of heavy cream, try using half-and-half or whole milk. Keep in mind the glaze won’t be as thick or glossy, but it’ll still taste delicious.
- How do I know when the custard is done? The custard is ready when it thickens enough to coat the back of a spoon. Run your finger through the coating—if it leaves a clear line, it’s good to go.
- Can I use a different type of chocolate for the glaze? Sure! While semi-sweet is classic, dark or milk chocolate works too. Just adjust your expectations for sweetness and bitterness accordingly.
Final Thoughts
Baking Boston cream cupcakes is like creating edible art. Each layer tells a story, from the soft, buttery cake to the creamy filling and glossy glaze. Whether you follow the traditional method or opt for shortcuts, these cupcakes are bound to impress. So, why not give it a try? Dust off your apron, crank up your favorite playlist, and dive into this delightful recipe for Boston cream cupcakes.
And hey, I’d love to hear how it goes! Share your results or ask questions in the comments below. Happy baking!
Equipment
- Mixing bowl
- Electric mixer (optional)
- Cupcake pan
- Cupcake liners
- Piping bag (or zip-top bag)
Notes
Nutrition

Hi, I’m Olivia Parker, the founder of BakingSecret.com and a lifelong lover of all things sweet and homemade. I grew up in a small town in Oregon, where the smell of fresh cookies in my family’s kitchen sparked my passion for baking. Over the years, I turned that passion into a mission: to help home bakers feel confident, inspired, and creative.
After studying food science and working in several artisan bakeries across the U.S., I decided to create a space where everyone from beginners to seasoned bakers can find reliable recipes, expert tips, and a warm, welcoming community. BakingSecret.com is my way of sharing the magic of baking with the world. When I’m not testing new recipes, you’ll find me exploring farmers’ markets, collecting vintage cookbooks, or perfecting my sourdough technique.