

Introduction
I still remember the first gender reveal party I attended. The room buzzed with excitement as everyone waited for that magical moment. Then it happened—a cloud of pink smoke filled the air, and cheers erupted. At the center of it all? A gender reveal cake. That cake wasn’t just dessert; it was the heart of the celebration. These days, gender reveal parties are more popular than ever, and the cake remains a centerpiece that brings joy and anticipation to every event.
If you’re planning your own celebration, you’ve come to the right place. This article will guide you through everything you need to know about creating or choosing the perfect gender reveal cake. From simple designs to jaw-dropping tutorials, we’ll cover ideas like the best gender reveal cake ideas, tips for making your own, and even options for store-bought cakes. By the end, you’ll feel confident about picking the right cake for your big day.
Why a Gender Reveal Cake is Special
A gender reveal cake isn’t just another dessert—it’s a symbol of new beginnings. When you cut into that cake, you’re not just revealing pink or blue frosting; you’re sharing a life-changing moment with family and friends. For many, this cake becomes a cherished memory, something they’ll talk about for years to come.
What makes a gender reveal cake truly memorable? It’s all about the details. Some people love bold, colorful designs, while others prefer a simple gender reveal cake with a classic twist. Think about what fits your style. Do you want a chocolate gender reveal cake with rich flavors, or would you rather go for something light and airy? Maybe you’d like to add unique gender reveal cake toppers to make it stand out. There’s no wrong choice—just the one that feels right for you.
Here are some ideas to spark your creativity:
- A two-tone cake with layers that surprise when sliced.
- A fondant-covered design with hidden colors inside.
- A themed cake, like baby animals or nursery rhymes, tied to your baby shower.
And if you’re worried about execution, don’t stress. Whether you’re a seasoned baker or a beginner, there are plenty of resources to help you succeed. Look up a gender reveal cake tutorial online for step-by-step guidance, or browse examples of gender reveal cakes gone wrong for a good laugh—and to learn what to avoid!
Choosing Between Store-Bought and Homemade
When it comes to your gender reveal cake, you have two main options: buy one or bake it yourself. Both choices have their perks, so let’s break them down.
Store-Bought Cakes: If time is tight or baking isn’t your thing, buying a cake might be the way to go. Many grocery stores offer ready-to-order gender reveal cakes. For example, gender reveal cakes at Walmart are budget-friendly and convenient. Publix also has beautiful custom options if you’re looking for something fancier. In Singapore, local bakeries specialize in stunning gender reveal cake Singapore designs tailored to your preferences.
Homemade Cakes: On the other hand, making your own cake adds a personal touch. You control every detail, from flavor to decoration. Plus, it can be a fun project if you enjoy baking. Just keep it simple unless you’re confident in your skills. A simple gender reveal cake with basic ingredients can still wow your guests if done thoughtfully.
To decide, ask yourself these questions:
- How much time do I have?
- Am I comfortable baking, or would I rather leave it to the pros?
- What’s my budget?
No matter which route you choose, remember that the cake is just one part of the experience. What matters most is the joy it brings to your special day.
Creative Gender Reveal Cake Ideas
Alright, let me paint a picture for you. Imagine slicing into a cake that’s not just delicious but also an absolute showstopper. That’s the magic of a well-thought-out gender reveal cake. If you’re looking for design inspiration, buckle up because I’ve got some killer ideas to share. These aren’t your run-of-the-mill cakes—I’m talking about designs that’ll have your guests snapping photos left and right.
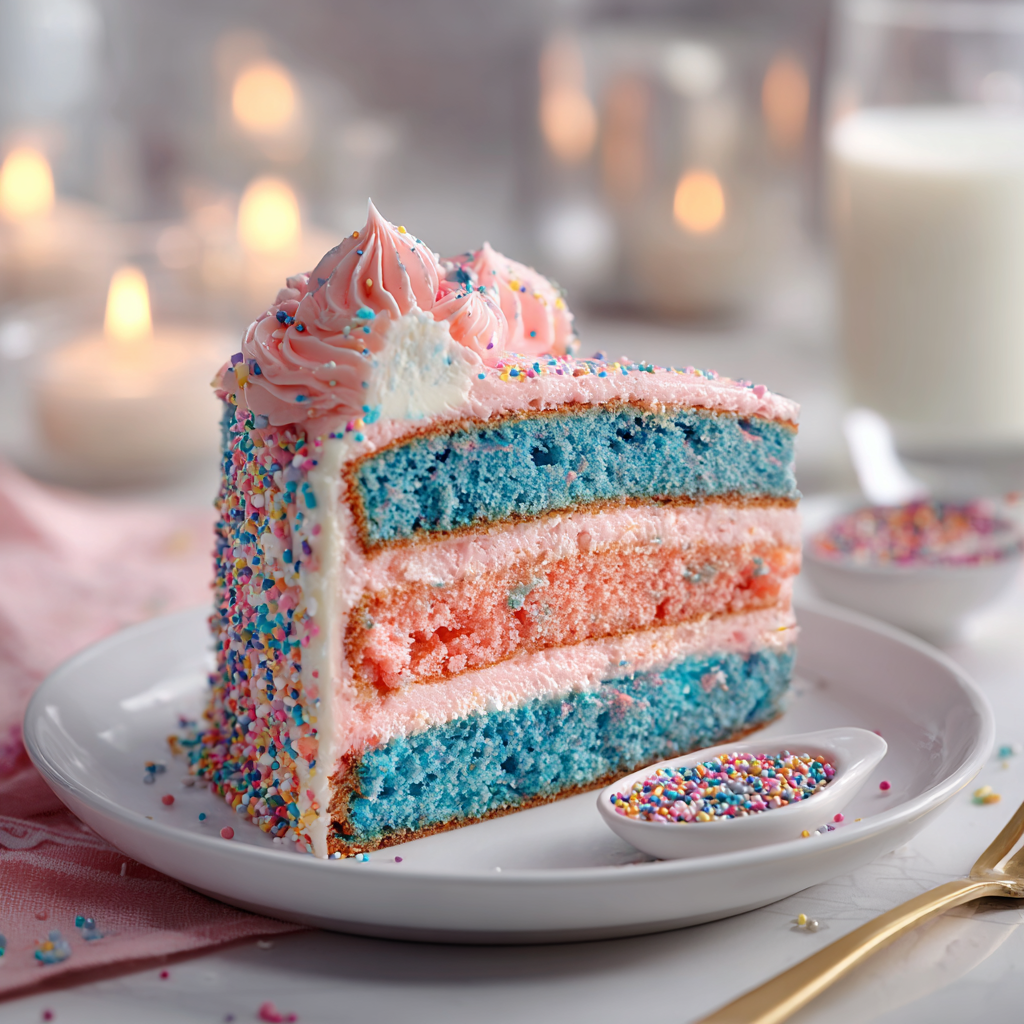
First up, ombre cakes. These beauties are all about smooth color transitions. Picture this: a soft pink or blue gradient that spills out when you cut into the cake. It’s subtle yet stunning. For those who want something more playful, themed decorations are where it’s at. How about a woodland-themed cake with fondant animals? Or maybe a nursery rhyme-inspired design featuring cute little sheep jumping over fences? Trust me, these themes add a personal touch that ties everything together.
Now, here’s a fun twist—unique fillings. While the outside might look simple, the inside tells the real story. Think layers of raspberry jam paired with white chocolate ganache for a chocolate gender reveal cake, or even a citrusy lemon curd that contrasts beautifully with the hidden colored batter. Speaking of hidden surprises, if you’re curious about how to pull off the ultimate reveal, check out this guide on making a heart shape cake for extra flair.
Oh, and don’t forget gender reveal cake toppers! They’re like the cherry on top—literally. Whether you go for a glittery “Boy or Girl?” sign or a custom acrylic piece with your baby’s name (or initials), these finishing touches can elevate any cake. Funny enough, I once saw a cake topped with tiny fondant booties in alternating colors—it was adorable!
So, what are some trending designs right now? People seem to love cakes inspired by rainbows, like this rainbow cake rainbow idea. The vibrant hues pair perfectly with the surprise element of a gender reveal. Others are opting for minimalist styles with clean lines and elegant fonts, proving that less really can be more.
Step-by-Step Tutorial for Making Your Own Cake
Okay, so you’re feeling inspired, but maybe you’re wondering, “Can I actually pull this off?” Absolutely. Even if you’re not a baking wizard, following a solid gender reveal cake tutorial will have you whipping up something amazing in no time. Let me walk you through it step by step.
Step one: Baking the base. Start with your favorite recipe. Need suggestions? Try using an angel food cake mix for a light and airy texture, or stick to a classic vanilla sponge. Divide your batter into two bowls—one stays plain, while the other gets tinted with food coloring. Pro tip: Gel-based colors give brighter results than liquid ones.
Next, we move on to filling. This is where the magic happens. Layer your colored batter carefully into the pan, alternating between colors. You could also pour them side by side for a striped effect. By the way, if you’re nervous about messing up the layers, try freezing each layer before stacking. It makes assembly way easier.
Step three: Frosting. Once your cake has cooled, frost it with buttercream or cream cheese icing. Keep it smooth and even—you want the reveal to be the star, not lumpy frosting. And hey, if you mess up, grab a bench scraper or spatula to smooth things out. No judgment here; we’ve all been there.
Finally, the big moment—the reveal. Cut into the cake, and watch as everyone gasps in delight. Here’s the thing: it doesn’t have to be perfect. What matters most is the excitement and joy it brings. Oh, and if you’re looking for a boozy twist, why not serve some pineapple upside down cake shots alongside your masterpiece?
Tools-wise, you’ll need basics like mixing bowls, a whisk, and a good-quality cake pan. A turntable comes in handy for frosting, but if you don’t have one, a lazy Susan works just fine. Ingredients matter too—use high-quality butter, eggs, and flavorings to ensure your cake tastes as good as it looks.
Avoiding Common Pitfalls
Let’s talk about the elephant in the room: gender reveal cakes gone wrong. We’ve all seen those viral videos where cakes collapse, colors bleed, or someone accidentally reveals the gender before the big moment. Yeah, it happens—but it doesn’t have to happen to you.
One common mistake is overmixing the batter. Doing this can make your cake dense instead of fluffy. Another issue? Using too much food coloring. Sure, you want bold colors, but adding too much can alter the taste. Stick to gel-based dyes, and use sparingly. Also, avoid rushing the cooling process. Patience is key—if you frost a warm cake, the frosting will melt, and trust me, that’s never pretty.
Presentation mishaps are another area to watch out for. Ever seen a cake topple over during transport? Yikes. To prevent this, secure your cake on a sturdy board and cover it tightly with plastic wrap or a cake carrier. If you’re taking it somewhere far, chill it slightly beforehand to help stabilize the layers.
And here’s a pro tip: always do a test run. Practice baking and assembling your design ahead of time. That way, you’ll catch any potential issues before the main event. Plus, you get to eat cake twice—who wouldn’t love that?
Lastly, remember that perfection isn’t the goal. Even the most experienced bakers encounter hiccups now and then. My first attempt at a layered cake ended up looking like a toddler’s art project, but guess what? Everyone still loved it because it came from the heart. So relax, enjoy the process, and focus on creating memories rather than stressing over every detail.
Budget-Friendly Options for Every Parent
Let’s face it—planning a gender reveal party can get pricey. Between decorations, food, and, of course, the cake, costs can add up faster than you’d expect. But here’s the good news: you don’t need to break the bank to have a show-stopping gender reveal cake. Whether you’re buying one or baking your own, there are plenty of ways to keep things affordable without sacrificing style.
First off, let’s talk about store-bought options. You might be surprised by how many budget-friendly choices are out there. For instance, gender reveal cakes at Walmart are a lifesaver if you’re looking for something simple yet effective. They offer pre-designed cakes that you can customize with a pink or blue filling. And honestly? Sometimes simple is better. A basic vanilla or chocolate cake with a colorful interior can still pack an emotional punch when you cut into it. Plus, you’ll save time and stress by letting the pros handle the baking.
If you’re in the mood to DIY but want to save money, here’s a little trick I swear by: start with a box mix. Yep, you heard me right. Grab a simple gender reveal cake mix from the grocery store and jazz it up with a few homemade touches. Add a layer of homemade buttercream frosting, toss on some sprinkles, and voilà—you’ve got a semi-homemade masterpiece. By the way, this hack works wonders if you’re short on time but still want that personal touch.
Another cost-saving idea? Skip the elaborate fondant designs unless you’re really confident in your skills. Fondant looks gorgeous, sure, but it can also be pricey and tricky to work with. Instead, focus on bold colors and clean lines. A two-tone ombre effect, for example, is super easy to pull off and looks way fancier than it actually is. Funny enough, I once made a cake like this for a friend’s party, and everyone thought I’d spent hours on it. Spoiler alert: I didn’t.
And hey, if you’re wondering whether you can create a beautiful gender reveal cake on a budget, the answer is absolutely yes. It’s all about being smart with your resources. Use what you already have at home—like leftover sprinkles, piping bags, or even cookie cutters for shaping fondant decorations. If you’re feeling extra crafty, try making your own gender reveal cake toppers using cardstock or glitter foam. Pinterest is full of free templates you can print and assemble in no time.
Here’s another tip: think small. You don’t need a massive cake to make a big impact. A mini cake or even cupcakes can work just as well, especially for intimate gatherings. Plus, they’re easier to transport and serve. I once attended a party where the hosts used a single-tier cake surrounded by themed cupcakes—it was adorable and totally Instagram-worthy.
Oh, and don’t forget about local bakeries. While places like Publix or specialty shops in gender reveal cake Singapore might seem expensive, sometimes they offer smaller packages or deals if you ask nicely. It never hurts to inquire!
Speaking of alternatives, if you’re worried about spending too much on the cake itself, consider pairing it with other fun elements. For example, serve a classic cupcake tower alongside your main cake. This way, you stretch your dessert budget while still offering variety. Trust me, guests won’t mind having options.
Frequently Asked Questions (FAQ)
What should I look for when buying a pre-made gender reveal cake?
When shopping for a pre-made gender reveal cake, prioritize freshness and flavor. Check if the bakery uses high-quality ingredients and offers customization options like color choices for the filling. Also, read reviews or ask friends for recommendations to ensure reliability. Finally, confirm the size of the cake to make sure it fits your guest list.
Where can I find quality gender reveal cake toppers?
Quality gender reveal cake toppers can be found online on platforms like Etsy or Amazon, where sellers often offer customizable designs. Local craft stores may also carry acrylic or wooden tooffers. Alternatively, you can DIY them using materials like cardstock, glitter paper, or even printed photos.
Are there alternatives to cutting the cake for revealing the baby’s gender?
Absolutely! If you’re not keen on a traditional cake-cutting moment, consider other creative methods. Balloon pops, confetti cannons, or even a piñata filled with colored treats are fantastic alternatives. Some parents opt for a “smash cake” session with their toddler, which adds a playful twist to the reveal.
How do I prevent my gender reveal cake from falling apart?
To avoid structural issues, chill your cake layers before assembling. Use a sturdy cake board as a base and secure each layer with a dab of frosting. Avoid overloading the top with heavy decorations, and always transport the cake in a stable carrier to minimize movement.
Can I freeze a gender reveal cake ahead of time?
Yes, freezing can be a great way to prep in advance. Wrap the unfrosted cake layers tightly in plastic wrap and aluminum foil, then thaw them in the fridge overnight before decorating. Just remember to frost the cake after it’s fully defrosted to prevent condensation from ruining the design.
What flavors pair best with a gender reveal theme?
Classic flavors like vanilla, chocolate, and red velvet are crowd-pleasers that complement any gender reveal cake theme. For a unique twist, try fruity fillings like raspberry or lemon curd. These flavors balance well with rich buttercream frostings and add a refreshing element to the dessert table.
Is it okay to use boxed cake mixes for a gender reveal cake?
Definitely! Boxed mixes are a convenient and cost-effective option, especially if you’re new to baking. To elevate the taste, add extras like vanilla extract, sour cream, or pudding mix to the batter. With a bit of effort, no one will guess it came from a box.
How far in advance can I decorate a gender reveal cake?
For best results, decorate your cake within 24 hours of serving. Fondant-covered cakes can last slightly longer if stored properly, but buttercream-decorated cakes should ideally be kept refrigerated until the event. Always bring the cake to room temperature before presenting it.
What tools do I need to make a gender reveal cake?
Basic tools include mixing bowls, a whisk, spatula, and a good-quality cake pan. A turntable helps with frosting, but a lazy Susan works fine too. Invest in gel-based food coloring for vibrant hues, and consider a bench scraper for smoothing edges.
Can I incorporate non-food items into my gender reveal cake?
While it’s generally safer to stick to edible decorations, some people use small props like LED lights or pull-string mechanisms inside the cake for added drama. Just ensure these items are food-safe and won’t pose choking hazards during the reveal.
Final Thoughts
At the end of the day, a gender reveal cake isn’t about perfection—it’s about creating a moment that brings people together. So whether you go all-out with a custom design or keep it sweet and simple, know that your effort will shine through. Take a deep breath, trust the process, and remember that the biggest reactions come from the heart, not the price tag.
As you plan your big day, I hope you feel inspired to try one of the ideas or tutorials shared in this article. Whatever route you choose, may your celebration be filled with laughter, love, and unforgettable memories. Cheers to this exciting new chapter in your life—you’ve got this!
Equipment
- Mixing bowls
- Whisk
- Spatula or bench scraper
- Cake pan
- Turntable or lazy Susan (optional)
Ingredients
- 1 box cake mix (vanilla or chocolate)
- optional Raspberry jam, lemon curd, or other fillings for extra flavor
Instructions
- Start by preparing the cake mix according to package instructions.
- Divide the batter into two bowls, leaving one plain and tinting the other with food coloring.
- Alternate pouring the colored and plain batters into your cake pan to create layers.
- Bake according to mix instructions and let the cake cool completely.
- Frost the cooled cake with buttercream or cream cheese icing, ensuring a smooth finish.
- Decorate the cake with toppers or other decorations as desired.
- When ready, slice the cake to reveal the colored interior.
Notes
Nutrition

Hi, I’m Olivia Parker, the founder of BakingSecret.com and a lifelong lover of all things sweet and homemade. I grew up in a small town in Oregon, where the smell of fresh cookies in my family’s kitchen sparked my passion for baking. Over the years, I turned that passion into a mission: to help home bakers feel confident, inspired, and creative.
After studying food science and working in several artisan bakeries across the U.S., I decided to create a space where everyone from beginners to seasoned bakers can find reliable recipes, expert tips, and a warm, welcoming community. BakingSecret.com is my way of sharing the magic of baking with the world. When I’m not testing new recipes, you’ll find me exploring farmers’ markets, collecting vintage cookbooks, or perfecting my sourdough technique.