
Introduction to the Creamy Delight: Peanut Butter Silk Pie
There’s something magical about a dessert that feels like a warm hug in every bite. That’s exactly what this Peanut Butter Silk Pie is—decadent, creamy, and utterly irresistible. I stumbled upon this recipe while experimenting with ways to use up a jar of peanut butter sitting in my pantry. It quickly became a family favorite, especially during cozy evenings when everyone craves something sweet but comforting. Whether you call it peanut butter pie, peanut silk dessert, or just “that amazing pie,” this recipe is sure to win hearts.
The Sweet History of Peanut Butter Silk Pie
Peanut butter desserts have been around for decades, with their roots tracing back to the early 20th century when peanut butter became a household staple. This particular peanut butter silk pie variation gained popularity in the Midwest, where rich, no-bake desserts are cherished for their simplicity and indulgence. The “silk” in its name refers to the velvety texture achieved by whipping cream and folding it into the peanut butter mixture. I remember my grandmother making a similar pie during holidays—it was always the star of the dessert table. Today, modern bakers have added twists like chocolate drizzles or crunchy toppings, but the classic version remains timeless.
Why You’ll Love This Peanut Butter Dessert Recipe
What makes this peanut butter silk pie stand out? For starters, it’s incredibly easy to make, even for beginner bakers. There’s no need to fuss over ovens or precise measurements; it’s all about mixing and chilling. Plus, the combination of creamy peanut butter filling and a buttery crust creates a flavor profile that’s both familiar and exciting. If you’re a fan of peanut butter cups or peanut butter cookies, this pie will feel like their sophisticated cousin.
Perfect Occasions to Serve This Peanut Butter Silk Dessert
This peanut butter pie is perfect for any occasion, from casual weeknight treats to special celebrations. Bring it to potlucks, serve it at birthday parties, or enjoy it as a comforting dessert after a hearty meal. I’ve even made mini versions for holiday gift-giving, and they were a hit! Its versatility makes it ideal for summer barbecues (no oven required!) or winter gatherings when people crave something rich and satisfying.
Ingredients for Your Peanut Butter Silk Pie
- 1 cup creamy peanut butter
- 1 cup heavy whipping cream
- 1/2 cup powdered sugar
- 1 teaspoon vanilla extract
- 1 pre-made pie crust (or homemade, if you’re feeling adventurous)
- 1/4 cup chopped peanuts (optional, for garnish)
- Chocolate syrup or cocoa powder (optional, for decoration)
Substitution Options for Flexibility
Not everyone has the exact ingredients on hand, and that’s okay! Here are some swaps you can try:
- Use almond butter or cashew butter instead of peanut butter for a nutty twist.
- Swap powdered sugar with honey or maple syrup for a natural sweetener option.
- If dairy-free, use coconut cream instead of heavy whipping cream.
- For a gluten-free version, opt for a gluten-free pie crust or a crushed cookie base.
Preparation Steps for Your Peanut Butter Silk Pie
Step 1: Prepare the Crust
Start by prepping your pie crust. If you’re using a store-bought crust, simply place it in a pie dish and press it gently into shape. For a homemade crust, mix flour, butter, and a pinch of salt, then bake until golden brown. Pro tip: To prevent cracks, let the crust cool completely before adding the filling. A perfectly baked crust provides a sturdy base for the silky layers above.
Step 2: Whip the Cream
In a large mixing bowl, whip the heavy cream until stiff peaks form. This step is crucial for achieving that dreamy, airy texture. Add the powdered sugar gradually while whipping—this ensures the sugar dissolves evenly and doesn’t leave gritty spots. Imagine clouds forming in your bowl as the cream transforms into fluffy peaks!
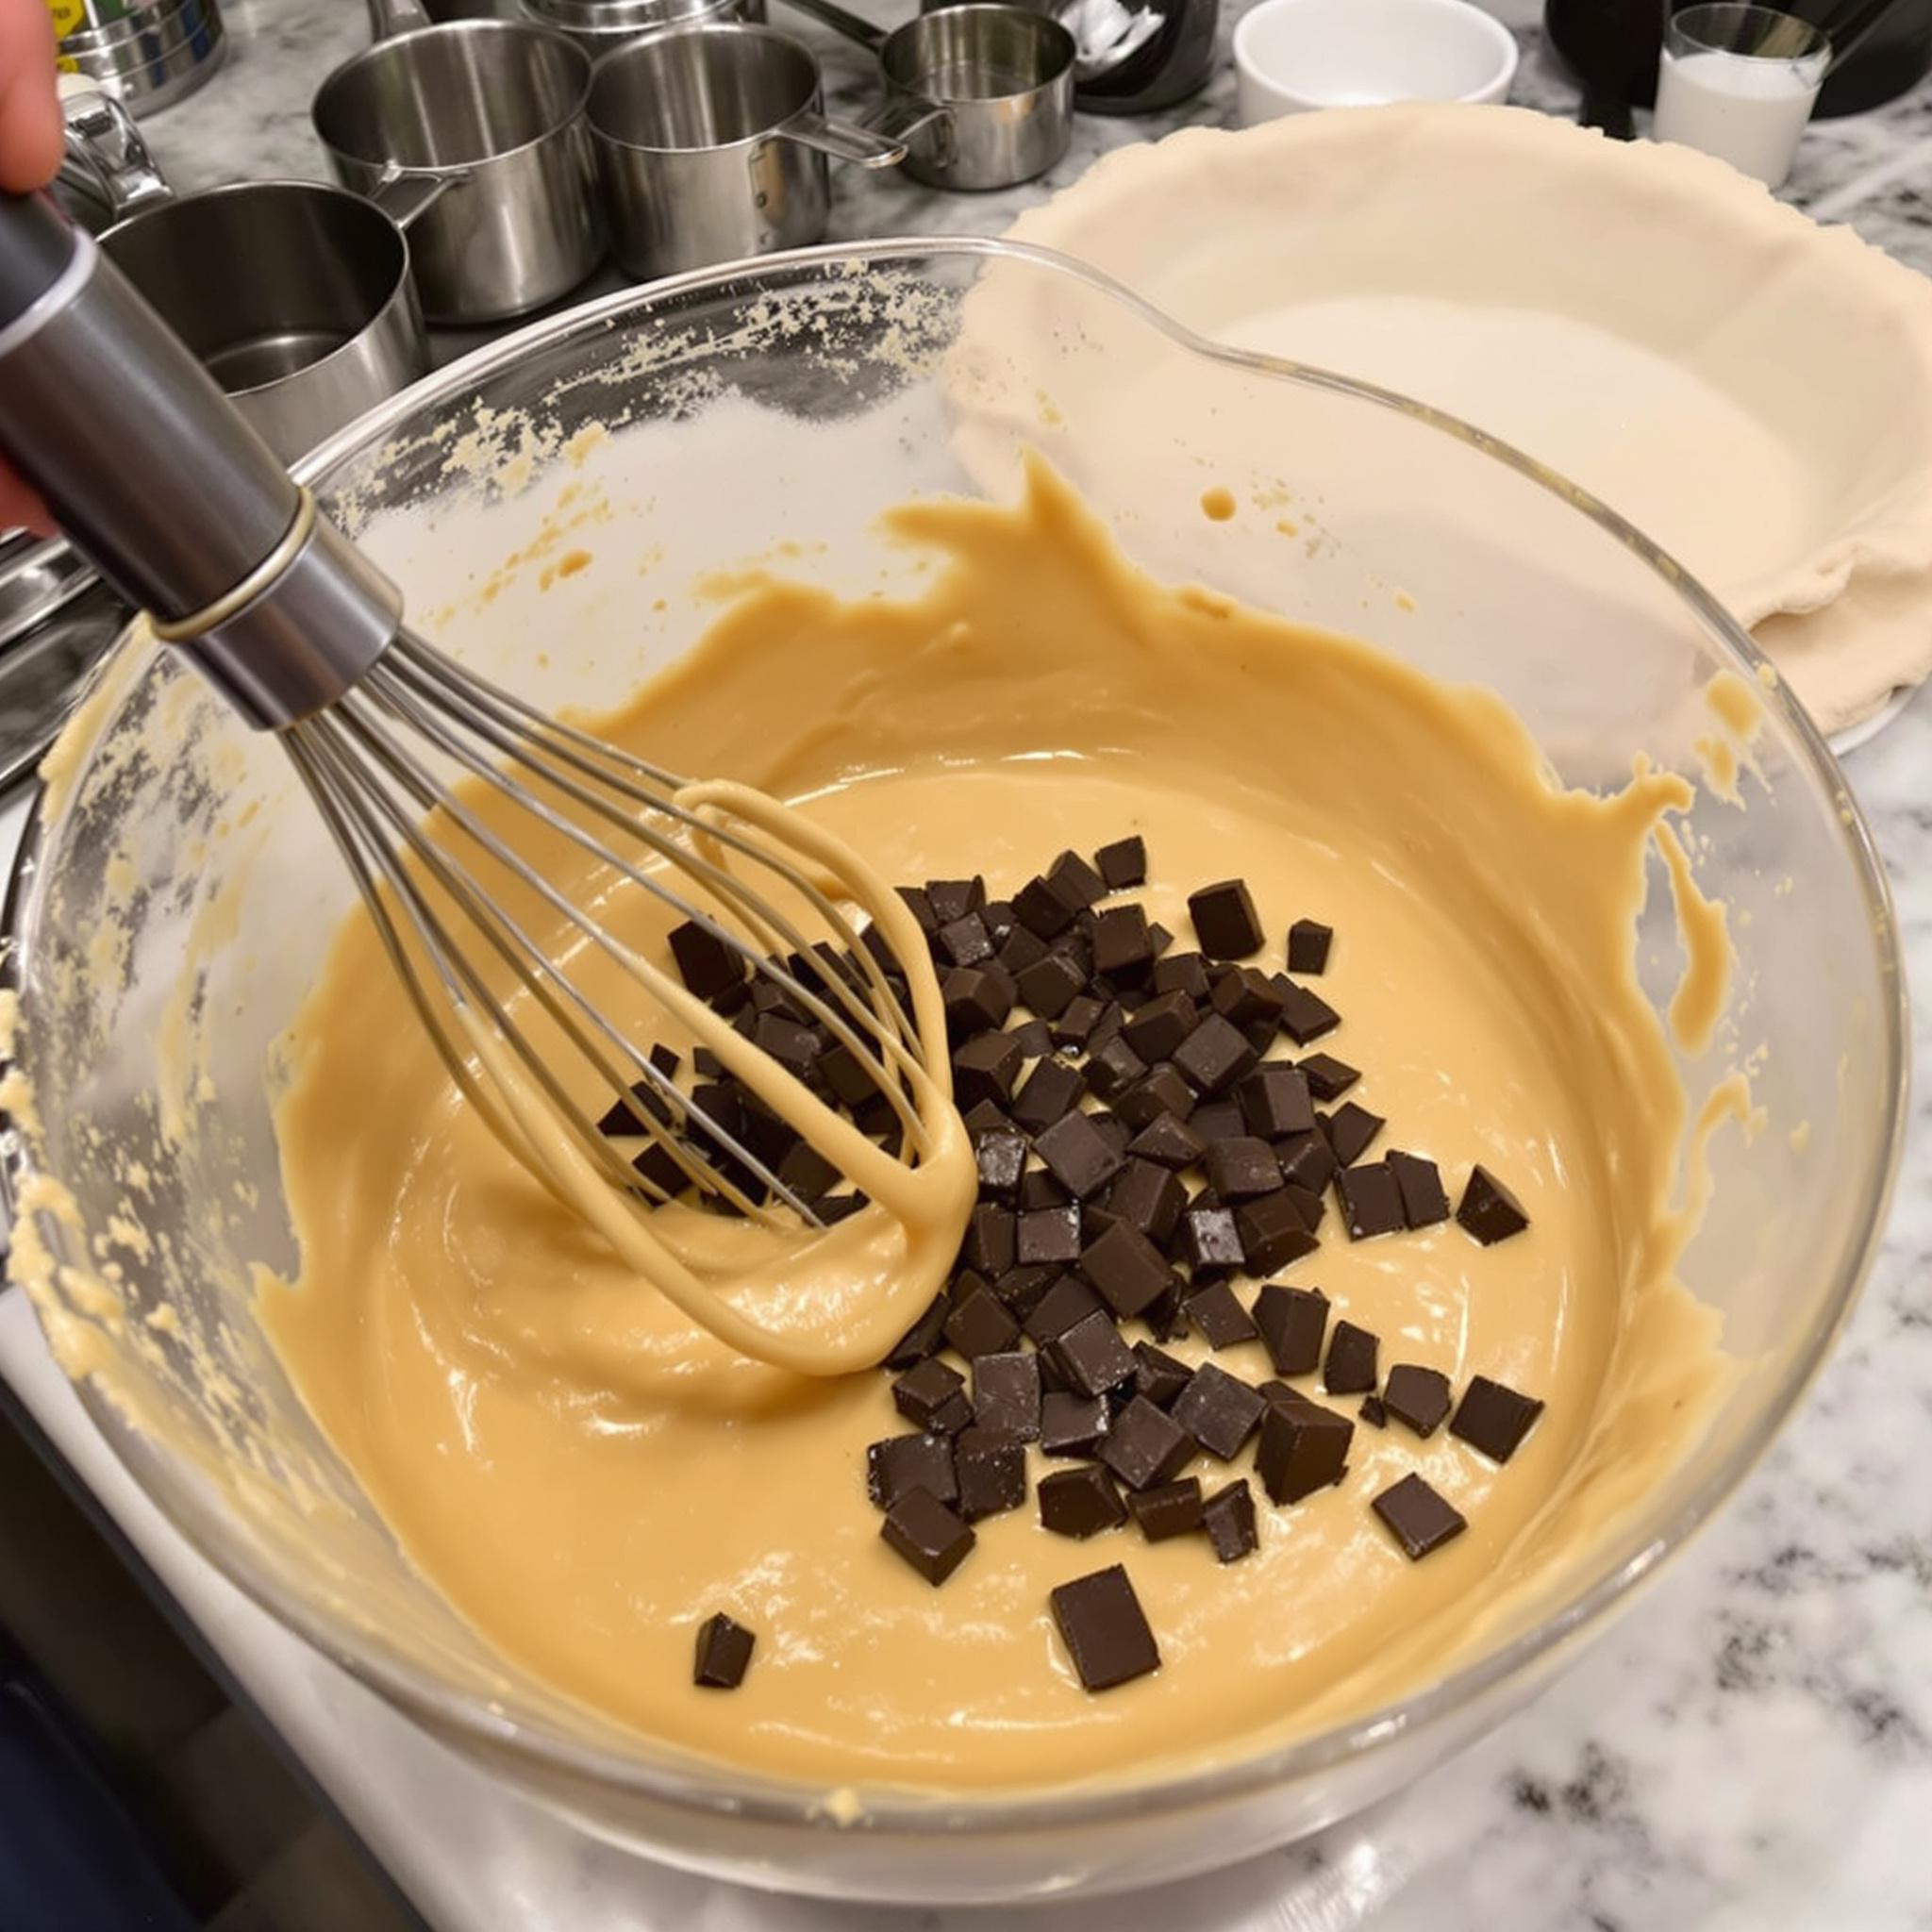
Step 3: Combine the Filling
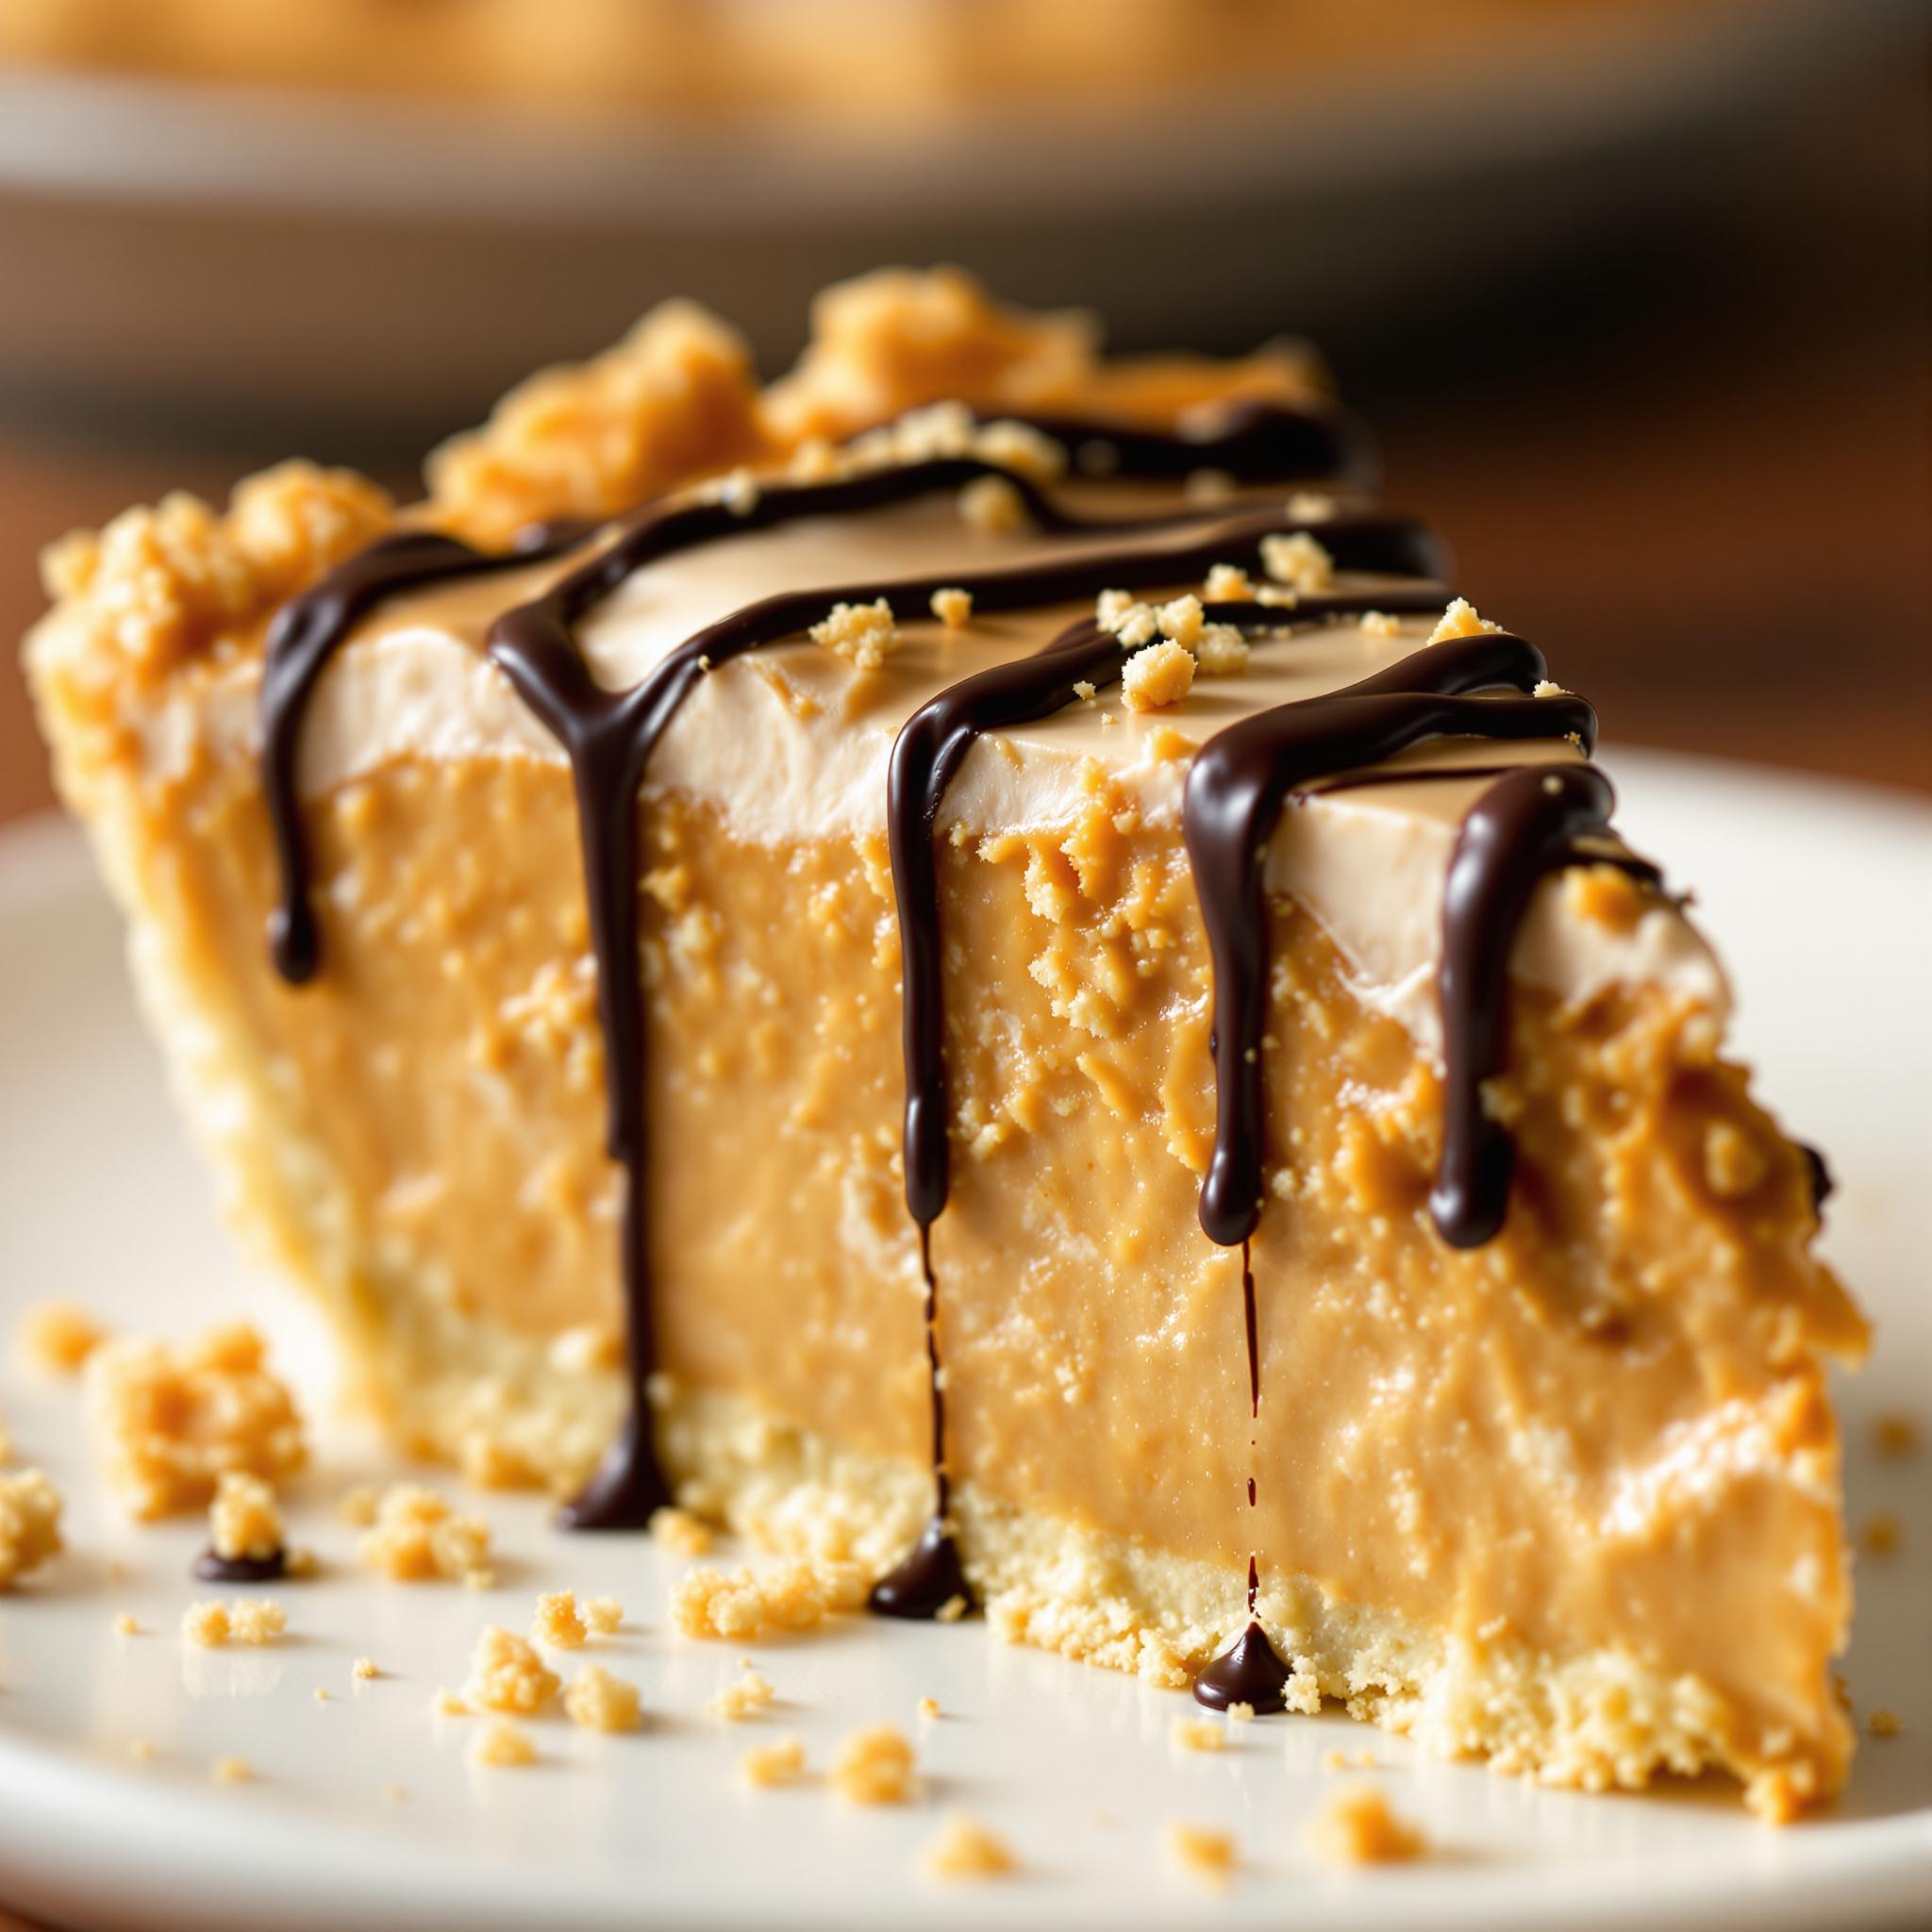
In another bowl, mix the peanut butter and vanilla extract until smooth. Gently fold in half of the whipped cream to lighten the mixture. Then, carefully incorporate the rest of the whipped cream, ensuring not to deflate it. The result should be a luscious, pale beige filling that smells heavenly. Transfer this delightful mixture into the prepared crust, smoothing the top with a spatula.
Step 4: Chill and Garnish
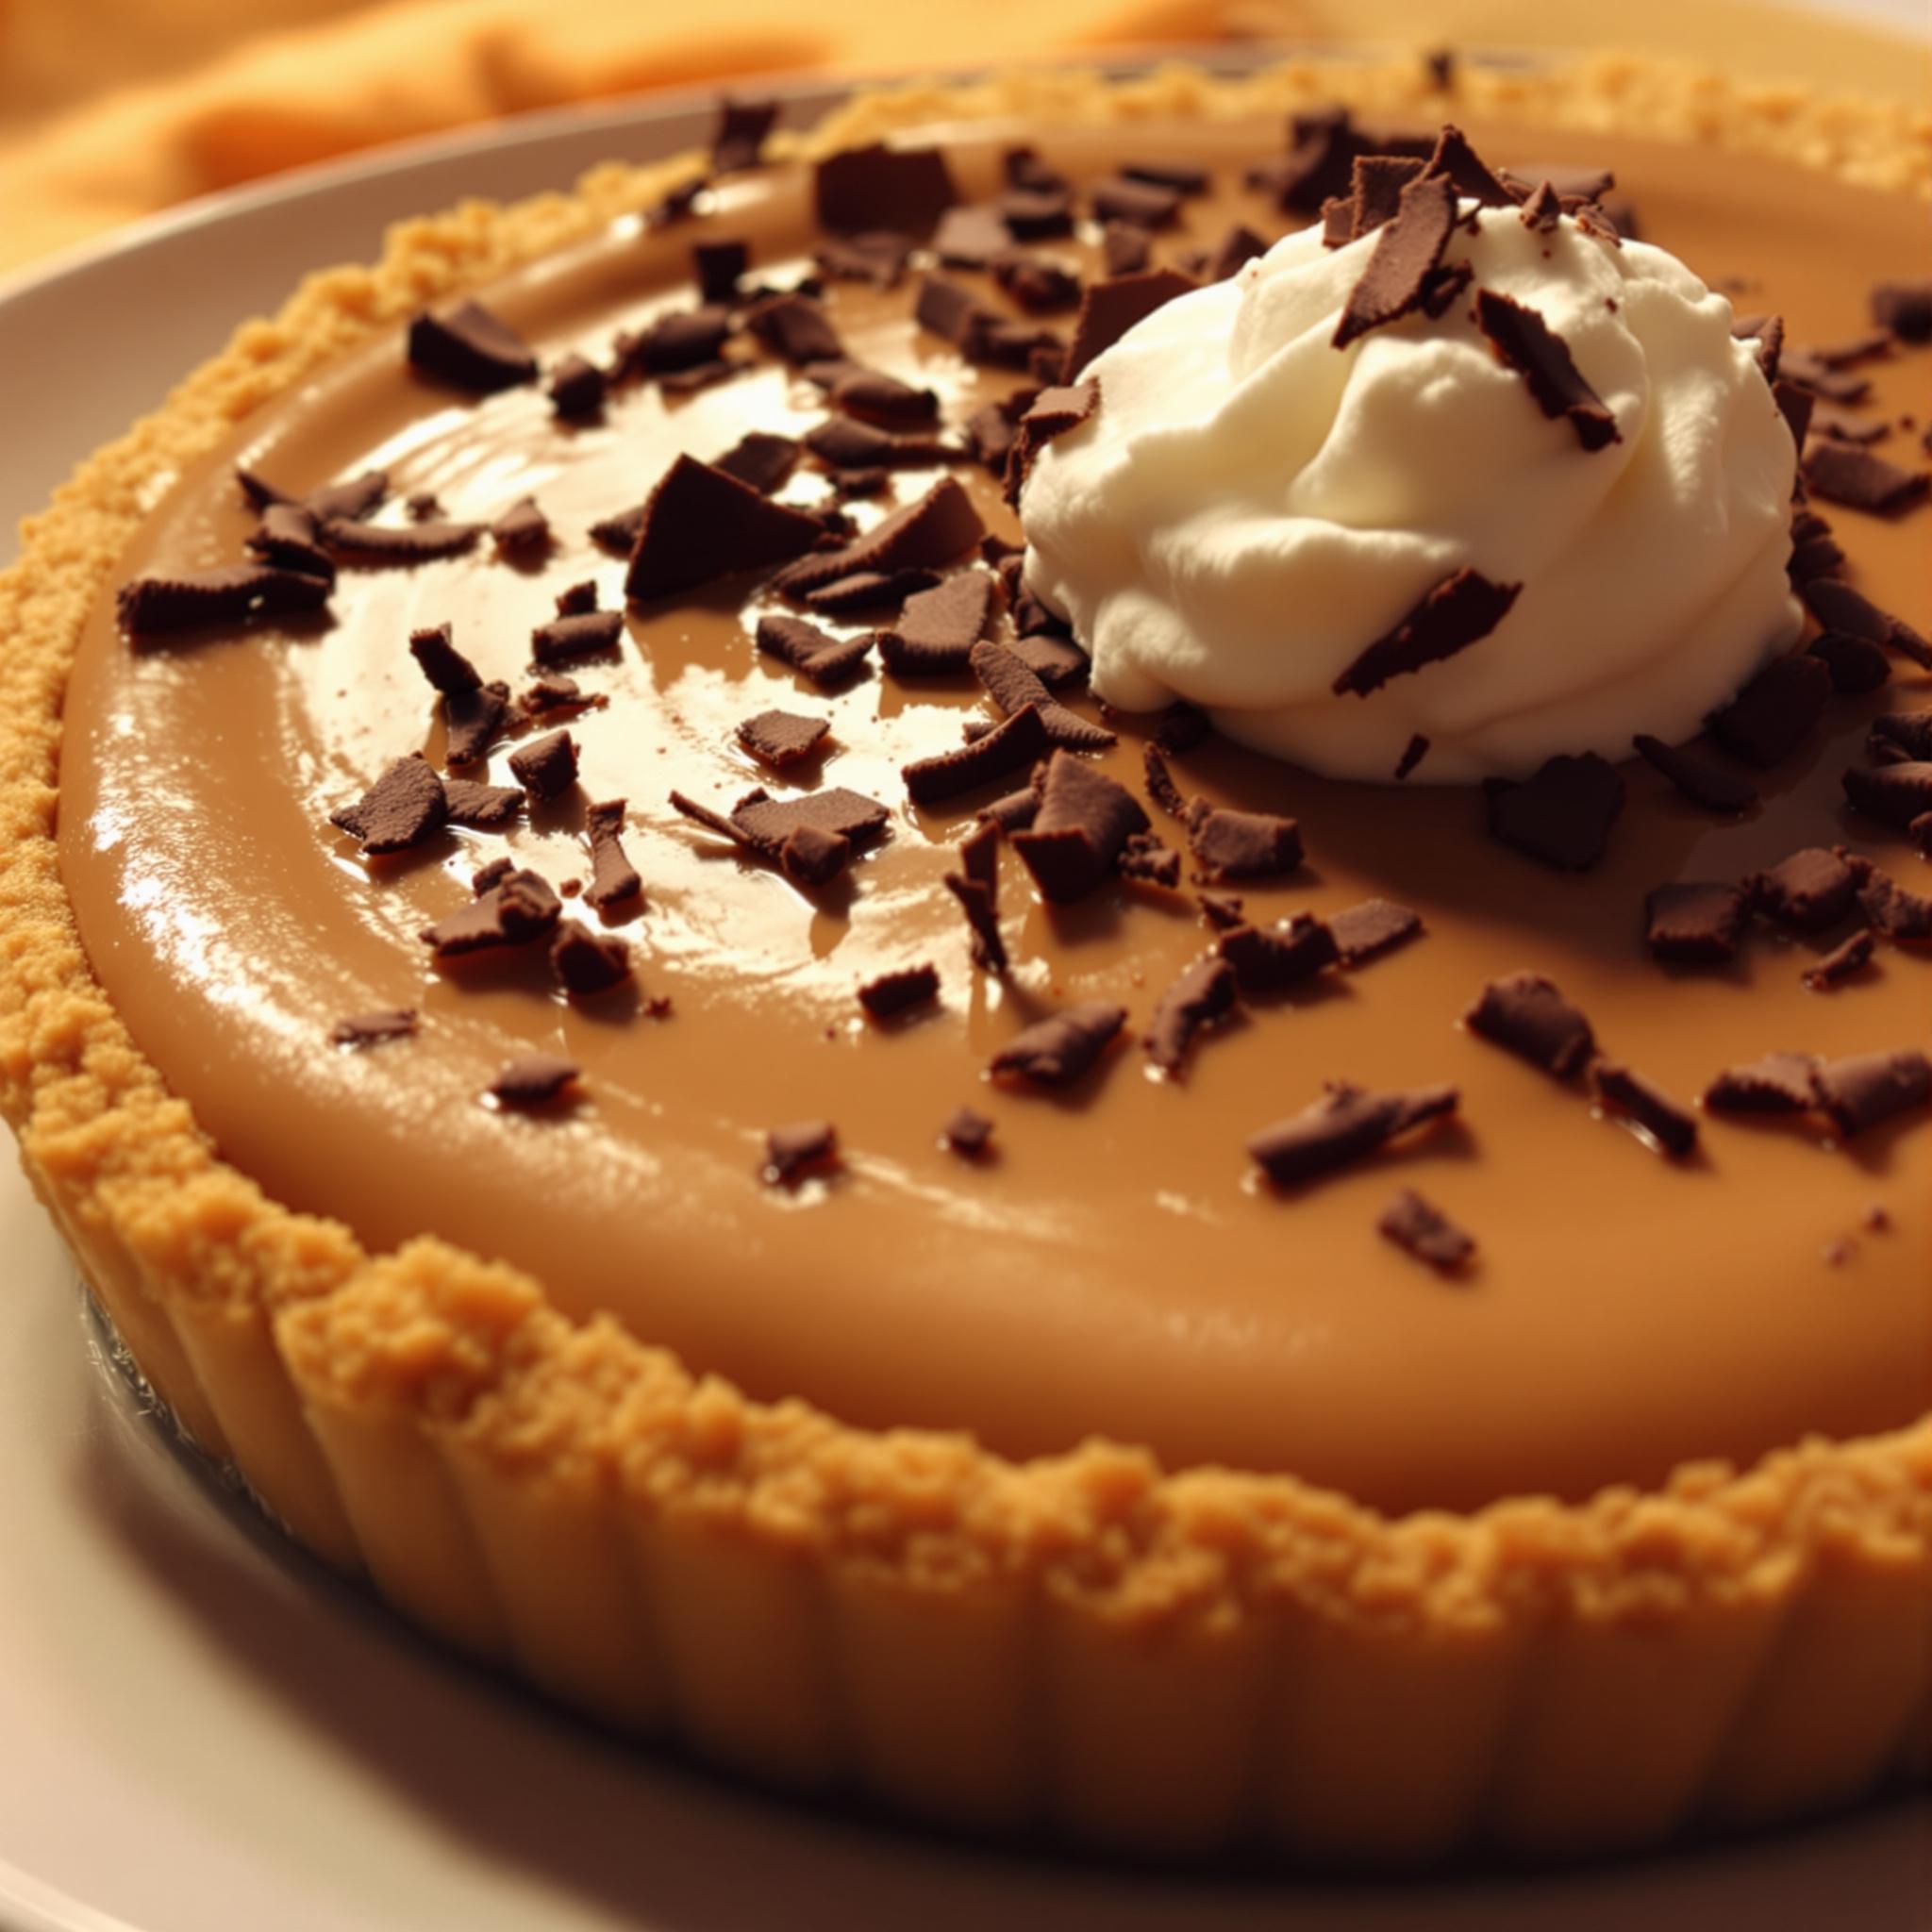
Once assembled, pop the pie into the refrigerator for at least 4 hours—or better yet, overnight. Chilling allows the flavors to meld and the filling to set beautifully. Before serving, sprinkle chopped peanuts on top for crunch and drizzle chocolate syrup for an extra touch of decadence. Voilà! Your peanut butter silk pie is ready to impress.
Chef’s Tip for Elevating Your Peanut Butter Dessert
For an extra layer of indulgence, toast the chopped peanuts before sprinkling them on top. Toasting enhances their nutty aroma and adds a deeper flavor contrast to the creamy filling. Trust me, it’s a game-changer!
Time Required to Make This Peanut Butter Pie
- Prep Time: 20 minutes
- Cooking Time: None (no-bake!)
- Resting/Chilling Time: 4-6 hours
- Total Time: Approximately 5 hours
Nutritional Information
Per serving (assuming 8 slices):
- Calories: 350
- Protein: 7g
- Fat: 25g
- Carbohydrates: 28g
- Sugar: 18g
An Interesting Curiosity About Peanut Butter
Did you know that peanut butter was originally developed as a protein-rich food for people who couldn’t afford meat? Today, it’s beloved worldwide for its versatility and taste. Fun fact: Americans consume over 700 million pounds of peanut butter annually!
Necessary Tools for Making Peanut Butter Silk Pie
- Mixing bowls
- Electric mixer or whisk
- Spatula
- Pie dish
- Refrigerator for chilling
Storage Instructions for Your Peanut Butter Pie
After slicing into this delightful peanut butter silk pie, proper storage is key to maintaining its freshness. First, cover the pie tightly with plastic wrap or aluminum foil to prevent it from absorbing odors in the fridge. Alternatively, transfer individual slices to airtight containers for easier portion control.
When stored correctly, the pie can last up to 3-4 days in the refrigerator. However, I doubt it’ll stick around that long once your family gets a taste! For longer storage, freeze the pie without toppings for up to 2 months. Just thaw it in the fridge overnight before serving.
Finally, avoid leaving the pie at room temperature for more than two hours, as dairy-based fillings can spoil quickly. Keep it chilled and enjoy it fresh for the best experience.
Tips and Tricks for Perfecting Your Peanut Butter Silk Pie
Here are a few insider tips to take your pie to the next level:
- Use high-quality peanut butter for a richer flavor.
- Don’t rush the chilling process—the longer it sits, the better it tastes.
- Experiment with different toppings like caramel sauce or crushed pretzels for a salty-sweet combo.
Serving Suggestions for Peanut Butter Silk Pie
Serve this pie alongside a hot cup of coffee or tea for a delightful afternoon treat. For dinner parties, pair it with a scoop of vanilla ice cream for an extra indulgent experience. You can also cut smaller portions and plate them elegantly for formal events.
Healthier Alternatives for Peanut Butter Silk Pie
If you’re looking to lighten up this recipe, here are six variations to consider:
- Low-Sugar Version: Replace powdered sugar with stevia or monk fruit sweetener.
- Vegan Option: Use coconut cream and a plant-based pie crust.
- Gluten-Free Twist: Opt for a gluten-free graham cracker crust.
- Reduced-Fat Filling: Substitute half the heavy cream with Greek yogurt.
- Nut-Free Alternative: Swap peanut butter with sunflower seed butter.
- Protein-Packed Pie: Add a scoop of protein powder to the filling.
Common Mistakes to Avoid When Making Peanut Butter Silk Pie
Mistake 1: Overwhipping the Cream
Overwhipping can turn your fluffy cream into butter, ruining the texture of the filling. To avoid this, stop whipping as soon as you see stiff peaks forming. A good test is to lift the beaters—if the cream holds its shape, it’s done.
Mistake 2: Skipping the Chilling Step
Chilling isn’t optional—it’s essential for setting the filling. Rushing this step results in a runny pie that won’t hold its shape. Patience pays off here, so plan ahead and allow ample chilling time.
Mistake 3: Using Old Peanut Butter
Old or separated peanut butter can affect the flavor and consistency of your pie. Always check the expiration date and give it a good stir before measuring.
Frequently Asked Questions About Peanut Butter Silk Pie
Can I Freeze This Pie?
Yes, you can freeze the pie without toppings for up to 2 months. Thaw it in the fridge overnight before serving.
Is This Recipe Gluten-Free?
It can be! Simply use a gluten-free pie crust or a crushed nut-based crust.
How Long Does It Last in the Fridge?
When stored properly, the pie lasts 3-4 days in the refrigerator.
Can I Use Chunky Peanut Butter?
Absolutely! Chunky peanut butter adds texture, though the pie may lose some of its “silky” quality.
What Can I Substitute for Heavy Cream?
Coconut cream or full-fat Greek yogurt works well as substitutes.
Do I Need to Bake the Crust?
If using a pre-made crust, baking isn’t necessary. Homemade crusts benefit from a quick bake to set.
Conclusion
This peanut butter silk pie is truly a showstopper—a simple yet sophisticated dessert that’s bound to become a family favorite. With its creamy texture, rich flavor, and endless customization options, it’s a recipe worth mastering. So grab your ingredients, whip up a batch, and share the joy of this delightful treat with loved ones. Happy baking!
Equipment
- Mixer
- Spatula
- Pie Dish
- Refrigerator
Ingredients
- 1 cup creamy peanut butter
- 1 cup heavy whipping cream
- 1/2 cup powdered sugar
- 1 teaspoon vanilla extract
- 1 pre-made pie crust or homemade crust
- 1/4 cup chopped peanuts optional, for garnish
- q.s. chocolate syrup or cocoa powder optional, for decoration
Instructions
- Start by prepping your pie crust. If you’re using a store-bought crust, place it in a pie dish and press it gently into shape. For a homemade crust, mix flour, butter, and a pinch of salt, then bake until golden brown.
- In a large mixing bowl, whip the heavy cream until stiff peaks form. Add powdered sugar gradually while whipping.
- In another bowl, mix peanut butter and vanilla extract until smooth. Fold in half of the whipped cream, then incorporate the rest carefully.
- Refrigerate for at least 4 hours. Before serving, garnish with chopped peanuts and drizzle with chocolate syrup.
Notes
Nutrition

Hi, I’m Olivia Parker, the founder of BakingSecret.com and a lifelong lover of all things sweet and homemade. I grew up in a small town in Oregon, where the smell of fresh cookies in my family’s kitchen sparked my passion for baking. Over the years, I turned that passion into a mission: to help home bakers feel confident, inspired, and creative.
After studying food science and working in several artisan bakeries across the U.S., I decided to create a space where everyone from beginners to seasoned bakers can find reliable recipes, expert tips, and a warm, welcoming community. BakingSecret.com is my way of sharing the magic of baking with the world. When I’m not testing new recipes, you’ll find me exploring farmers’ markets, collecting vintage cookbooks, or perfecting my sourdough technique.