
Why You’ll Fall in Love with Foam Chocolate Cake
There’s something magical about a dessert that feels light as air yet packs a punch of flavor. The first time I made this Foam Chocolate Cake, my family couldn’t stop raving about it. It’s creamy, indulgent, and surprisingly easy to whip up—perfect for those moments when you need a show-stopping treat without spending hours in the kitchen. Whether you’re a seasoned baker or just starting out, this recipe will become your go-to for impressing friends and family.
A Little History About Foam Cake
The origins of foam cakes trace back to classic European desserts, where simplicity met elegance. Traditionally, these cakes relied on whipped cream or egg whites to create their signature airy texture. Over time, modern twists like the addition of chocolate sockets or flavored creams have made them even more irresistible. My version stays true to its roots while adding a touch of decadence with tender bittersweet chocolate. Trust me—it’s a match made in dessert heaven.
Why This Recipe Stands Out
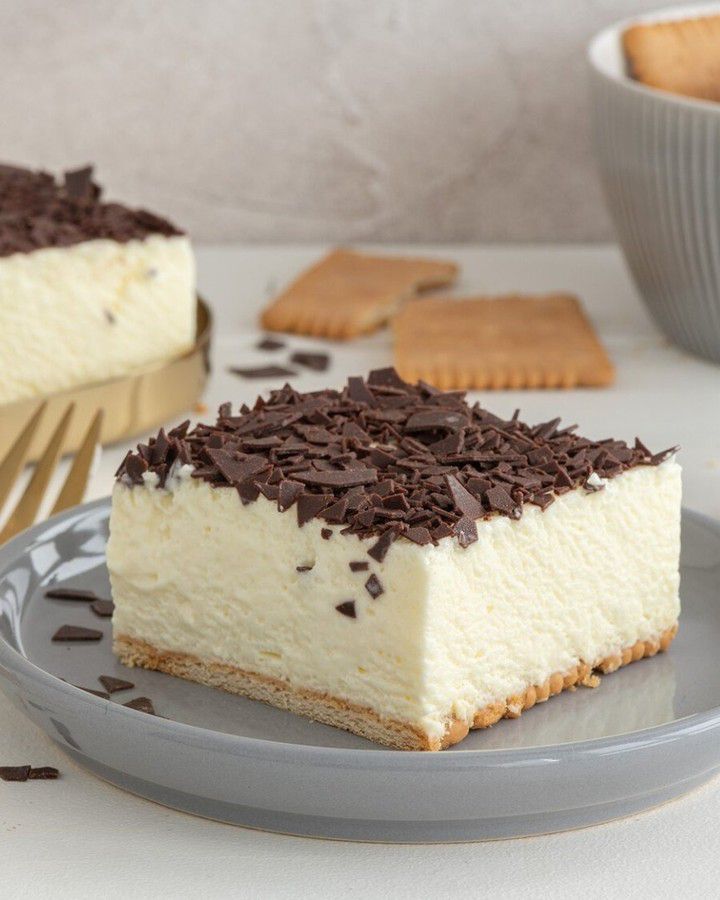
This Foam Chocolate Cake is all about balance. The buttery cookie base anchors the fluffy cream layer, while the chocolate sockets add a rich, slightly bitter contrast. What makes this recipe truly special? It’s versatile. You can customize the flavors to suit your mood, whether it’s vanilla, chocolate, or white chocolate. Plus, there’s no baking required, which means less time waiting and more time enjoying!
Perfect Occasions for Foam Chocolate Cake
This cake is perfect for almost any occasion. Serve it at birthday parties, holiday gatherings, or even casual weekend get-togethers. I once made it for a summer picnic, and it was the star of the dessert table. Its light texture makes it ideal for warmer weather, but honestly, who could resist a slice during winter holidays? Keep this recipe handy because you’ll want to make it again and again.
Ingredients You’ll Need
- 100 g butter cookies
- 400 ml milk
- 2 packages of dessert cream (no cooking required)
- 1 teaspoon vanilla extract
- 4 tablespoons sugar
- 500 g whipped cream
- 100 g tender bittersweet chocolate sockets
Substitution Options
Not everyone has every ingredient on hand, and that’s okay! Here are some swaps you can try:
- Butter cookies: Use graham crackers or digestive biscuits instead.
- Dessert cream: Swap for instant pudding mix if needed.
- Bittersweet chocolate sockets: Substitute semi-sweet chocolate chips or shavings.
- Whipped cream: Store-bought whipped topping works in a pinch.
Step 1: Preparing the Base
Start by lining your baking frame (39 x 21 cm) with butter cookies. These crunchy little gems form the foundation of our cake. Arrange them neatly so they cover the entire surface—think of it as building the first floor of a delicious skyscraper. If you’re feeling fancy, press down gently to ensure they stick together. Pro tip: Crush a few extra cookies to sprinkle on top later for added crunch.
Step 2: Mixing the Cream Filling
In a large bowl, beat the dessert cream with milk, vanilla extract, and sugar for about 5 minutes. Watch as the mixture transforms into a smooth, velvety delight. Next, whip the cream until stiff peaks form—it should look like clouds ready to float away. Gently fold the whipped cream into the dessert mixture. The result? A dreamy filling that’s both light and luscious. Spread this heavenly concoction evenly over the cookie base.
Step 3: Adding the Finishing Touches
Now comes the fun part: decorating! Break the bittersweet chocolate sockets into small pieces and scatter them generously over the cream layer. Their deep, cocoa-rich aroma complements the sweetness perfectly. For an extra wow factor, drizzle melted chocolate across the top. Pop the cake into the fridge and let it chill for at least 3 hours—or overnight if you’re patient enough. Patience pays off here, trust me.
Chef’s Tip: Go Bold with Flavors
Feeling adventurous? Experiment with different dessert cream flavors. Try swapping vanilla for caramel or hazelnut for a unique twist. Each variation brings something new to the table, making this Foam Chocolate Cake endlessly customizable. Your taste buds will thank you.
Timing Breakdown
- Prep Time: 20 minutes
- Cooking Time: None (no-bake recipe)
- Resting Time: At least 3 hours (chilling)
- Total Time: Approximately 3 hours and 20 minutes
Chef’s Secret
To achieve the silkiest cream filling, make sure your mixing bowl and beaters are cold before whipping the cream. This simple trick ensures maximum fluffiness and stability, giving your cake that professional bakery finish.
Extra Info
Did you know that bittersweet chocolate contains less sugar than semisweet varieties? That’s why it pairs so beautifully with the sweet cream filling. It’s like yin and yang in dessert form—a harmony of flavors that keeps you coming back for more.
Necessary Equipment
- Baking frame (39 x 21 cm)
- Mixing bowls
- Electric mixer or whisk
- Spatula
- Cake plate
Storage Tips
Store leftover slices of Foam Chocolate Cake in an airtight container in the refrigerator. This keeps the cream fresh and prevents it from absorbing odors from other foods. Make sure to cover the cake tightly with plastic wrap or foil to avoid freezer burn if freezing.
If freezing, place individual slices on a tray lined with parchment paper, then transfer them to a freezer-safe bag once frozen. This method prevents sticking and makes it easy to grab a slice whenever a craving strikes.
When serving leftovers, let the cake sit at room temperature for 10–15 minutes to soften slightly. This enhances the flavors and textures, ensuring each bite is as delightful as the first.
Tips and Advice
- Use high-quality ingredients for the best results—especially the chocolate.
- Chill the cake thoroughly before slicing to maintain clean edges.
- For a decorative touch, garnish with fresh berries or mint leaves.
Presentation Ideas
- Serve on a rustic wooden platter for a cozy vibe.
- Add a dusting of cocoa powder or powdered sugar for elegance.
- Pair with a dollop of whipped cream and a cherry on top.
Healthier Alternatives
Want to lighten things up? Here are six healthier spins on this classic recipe:
- Low-Sugar Option: Use sugar substitutes like stevia or monk fruit in place of regular sugar.
- Vegan Version: Replace dairy-based cream and milk with coconut cream and almond milk.
- Gluten-Free Twist: Opt for gluten-free cookies and chocolate sockets.
- Protein-Packed Cake: Add a scoop of protein powder to the cream mixture.
- Fruit-Infused Delight: Mix in pureed strawberries or mangoes for natural sweetness.
- Dark Chocolate Dream: Use dark chocolate with at least 70% cocoa content for antioxidant benefits.
Common Mistakes to Avoid
Mistake 1: Skipping the Chilling Step
One of the biggest mistakes people make is rushing the chilling process. Without proper time in the fridge, the layers won’t set properly, leading to a messy presentation. Be patient—it’s worth the wait!
Mistake 2: Overmixing the Cream
Overmixing the cream can cause it to lose its airy texture. Stop beating as soon as stiff peaks form to keep the filling light and fluffy.
Mistake 3: Using Low-Quality Ingredients
Cheap chocolate or artificial flavors can ruin the overall taste. Splurge on good-quality chocolate and real vanilla extract for the best results.
FAQs About Foam Chocolate Cake
Can I freeze this cake?
Absolutely! Wrap individual slices tightly in plastic wrap and store them in a freezer-safe bag. They’ll stay fresh for up to 3 months.
How do I prevent the cream from curdling?
Make sure all your ingredients are at the same temperature before mixing. Cold cream combined with warm milk can cause curdling.
What size pan should I use?
A 39 x 21 cm baking frame is ideal, but a similar-sized rectangular dish will work too. Just adjust the ingredient quantities accordingly.
Can I make this ahead of time?
Yes! Prepare it a day in advance and store it in the fridge. It actually tastes better after resting overnight.
Is this recipe kid-friendly?
Kids love it! The combination of cookies, cream, and chocolate is universally appealing.
How many servings does this recipe yield?
This recipe makes about 20 pieces, depending on how thickly you slice it.
Can I substitute heavy cream for whipped cream?
Yes, heavy cream works well. Just beat it until stiff peaks form and proceed as instructed.
What if I don’t have a baking frame?
No problem! Use a deep rectangular dish or even a springform pan. Line it with parchment paper for easy removal.
How long does it last in the fridge?
Stored properly, it lasts up to 5 days in the refrigerator.
Can I add alcohol to the filling?
Of course! A splash of rum, amaretto, or coffee liqueur adds depth and complexity to the flavor profile.
Final Thoughts
Whether you’re hosting a dinner party or simply craving something sweet, this Foam Chocolate Cake is sure to impress. With its creamy layers, crunchy base, and rich chocolate topping, it’s a dessert that checks all the boxes. So grab your ingredients, channel your inner chef, and get ready to create a masterpiece. Happy baking!
Equipment
- Mixing bowls
- Electric mixer or whisk
- Spatula
- Baking frame (39 x 21 cm)
- Cake plate
Ingredients
- 100 g butter cookies
- 400 ml milk
- 2 packages dessert cream (no cooking required)
- 1 teaspoon vanilla extract
- 4 tablespoons sugar
- 500 g whipped cream
- 100 g bittersweet chocolate sockets
Instructions
- Line your baking frame (39 x 21 cm) with butter cookies, covering the entire surface.
- In a large bowl, beat the dessert cream with milk, vanilla extract, and sugar for about 5 minutes until smooth.
- Whip the cream until stiff peaks form, then gently fold it into the dessert mixture.
- Spread the cream filling evenly over the cookie base.
- Scatter the bittersweet chocolate sockets over the cream layer and drizzle melted chocolate on top.
- Chill the cake in the fridge for at least 3 hours or overnight.
Notes
Nutrition

Hi, I’m Olivia Parker, the founder of BakingSecret.com and a lifelong lover of all things sweet and homemade. I grew up in a small town in Oregon, where the smell of fresh cookies in my family’s kitchen sparked my passion for baking. Over the years, I turned that passion into a mission: to help home bakers feel confident, inspired, and creative.
After studying food science and working in several artisan bakeries across the U.S., I decided to create a space where everyone from beginners to seasoned bakers can find reliable recipes, expert tips, and a warm, welcoming community. BakingSecret.com is my way of sharing the magic of baking with the world. When I’m not testing new recipes, you’ll find me exploring farmers’ markets, collecting vintage cookbooks, or perfecting my sourdough technique.