
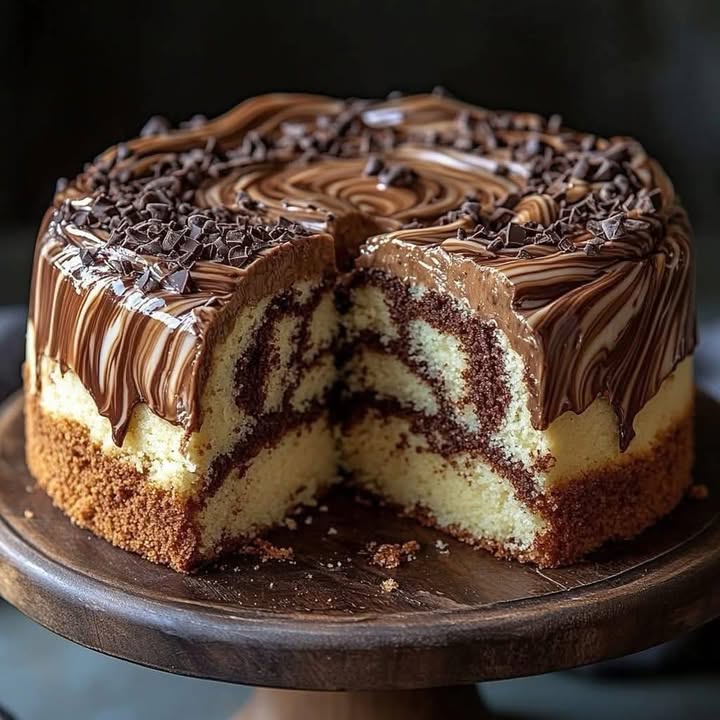
Why This Super Spongy Marble Chocolate Cake is a Must-Try
There’s something magical about the moment you slice into a marble chocolate cake. The swirls of rich chocolate and soft vanilla are like edible art, a feast for both the eyes and the taste buds. I remember the first time I baked this cake—it was for my niece’s birthday. She loves anything chocolate, but her mom wanted something “less sweet.” Enter this Super Spongy Marble Chocolate Cake. It was such a hit that it became my go-to dessert for family gatherings. Trust me, once you try it, you’ll understand why!
The Story Behind This Heavenly Treat
Marble cakes have been around since the 19th century, born out of a love for combining flavors and textures. Back then, bakers would use spices or molasses to create the “marbling” effect. Today, we’ve upgraded it with chocolate, making it richer and more indulgent. I tested this recipe after finding an old cookbook at a yard sale. It promised a “super spongy” texture, and boy, did it deliver! With its fluffy layers and gooey chocolate topping, this cake is a modern twist on a timeless classic.
Why You’ll Love This Recipe
This Marble Chocolate Cake is not just delicious; it’s also beginner-friendly. The ingredients are pantry staples, and the steps are simple enough for anyone to follow. Plus, who can resist that melt-in-your-mouth sponge paired with decadent chocolate veins? Whether you’re baking for a special occasion or just craving something sweet, this cake will win hearts every time.
Perfect Occasions to Whip Up This Cake
This cake shines at birthdays, potlucks, or even lazy Sunday afternoons. Imagine serving it at a holiday dinner—the swirls make it look festive, while the flavors appeal to everyone. It’s also perfect for gifting. Wrap a slice in parchment paper, tie it with ribbon, and watch someone’s face light up when they take their first bite.
Ingredients for Your Super Spongy Marble Chocolate Cake
- 3 eggs
- 2 cups sugar
- 3 sticks of margarine
- 1 cup milk
- 3 cups wheat flour
- 1 tablespoon baking powder
- 4 squares of chocolate powder (or cocoa powder)
Substitution Options
If you don’t have all the ingredients, no worries! Here are some swaps:
- Use butter instead of margarine for extra richness.
- Swap whole milk for almond or oat milk if you’re dairy-free.
- Replace chocolate powder with melted dark chocolate for deeper flavor.
- Use gluten-free flour if needed.
Step 1: Creaming the Base
Start by beating the eggs, sugar, and margarine until they’re creamy and fluffy. This step is crucial because it creates air pockets, giving your cake that signature sponginess. Pro tip: Make sure your margarine is softened but not melted. Cold margarine won’t blend well, and melted margarine won’t trap air properly. As you mix, notice how the mixture turns pale yellow and lightens in texture—it’s like watching magic happen!
Step 2: Adding Dry and Wet Ingredients
Now, slowly add the flour and milk, alternating between them. Mix gently to avoid deflating the batter. Overmixing can make your cake dense instead of airy. Picture the silky batter flowing smoothly as you stir—it should feel almost like velvet. Once combined, sprinkle in the baking powder and give it one last gentle fold. This little boost ensures your cake rises beautifully in the oven.
Step 3: Creating the Chocolate Magic
Divide the batter into two bowls. Leave one plain, and stir the chocolate powder into the other. Watch as the deep brown color transforms the second bowl—it’s like painting with food! For a marbled effect, alternate spoonfuls of each batter in your greased and floured pan. Use a fork to swirl them together gently. Don’t overdo it; you want distinct veins, not a muddy mix.
Step 4: Baking to Perfection
Bake your cake at 180°C (350°F) for about 40 minutes. The aroma wafting from the oven will drive everyone wild! Check for doneness by inserting a toothpick—if it comes out clean, your cake is ready. Let it cool completely before adding toppings. Rushing this step could cause the ganache or melted chocolate to slide right off.
Step 5: Finishing Touches
For that wow factor, drizzle melted chocolate or pour a glossy ganache over the cooled cake. Let it set slightly before slicing. Each piece will reveal those stunning chocolate swirls, guaranteed to impress anyone lucky enough to taste it.
Chef’s Tip
To enhance the chocolate flavor, add a pinch of salt to your batter. Salt balances sweetness and intensifies the cocoa notes. Trust me, it makes a world of difference!
Timing Breakdown
- Preparation Time: 20 minutes
- Cooking Time: 40 minutes
- Cooling Time: 30 minutes
- Total Time: 1 hour 30 minutes
Extra Info
Did you know that marble cakes were originally created as a way to stretch expensive ingredients? By mixing cheaper vanilla batter with pricier chocolate, bakers could feed more people without breaking the bank. Now, it’s all about the beauty of contrast!
Necessary Equipment
- Mixing bowls
- Electric mixer or whisk
- 9×13-inch baking pan
- Fork for swirling
- Oven
Storage Tips
To keep your Marble Chocolate Cake fresh, store it in an airtight container at room temperature for up to three days. If you live in a warm climate, refrigerate it to prevent spoilage. Just let it come to room temp before serving.
For longer storage, freeze individual slices wrapped in plastic wrap and foil. They’ll stay good for up to a month. Thaw overnight in the fridge before enjoying.
Avoid stacking slices directly on top of each other without parchment paper in between. This prevents sticking and keeps the presentation intact.
Tips and Advice
- Sift your flour and cocoa powder to avoid lumps.
- Don’t skip preheating the oven—it ensures even baking.
- Grease and flour your pan thoroughly to prevent sticking.
Presentation Ideas
- Dust powdered sugar over the top for elegance.
- Garnish with fresh berries for a pop of color.
- Serve with a dollop of whipped cream or ice cream.
Healthier Alternatives
Looking to lighten up this treat? Try these variations:
- Low-Sugar Version: Use stevia or monk fruit sweetener instead of sugar.
- Vegan Option: Substitute eggs with flaxseed meal and water.
- Gluten-Free: Swap wheat flour with almond or coconut flour.
- Oil-Free: Replace margarine with unsweetened applesauce.
- Protein-Packed: Add a scoop of protein powder to the batter.
- Spiced Delight: Mix cinnamon or nutmeg into the vanilla batter.
Mistake 1: Skipping the Cooling Step
Rushing to frost a warm cake is a rookie mistake. The heat melts the frosting, creating a messy, runny finish. Always let your cake cool completely on a wire rack. Pro tip: Place the cake in the fridge for 10 minutes if you’re short on time.
Mistake 2: Overmixing the Batter
Overmixing leads to a tough, dense cake instead of a light and fluffy one. Stir just until the ingredients are combined. Remember, a few lumps are okay—they’ll disappear during baking.
Mistake 3: Uneven Swirling
If your swirls look more like blobs, you might be swirling too aggressively. Use light, sweeping motions with a fork to achieve delicate patterns. Practice makes perfect!
Mistake 4: Opening the Oven Door Too Soon
Peeking too early can cause your cake to sink. Resist the urge to open the oven door during the first 30 minutes of baking. Patience pays off here!
FAQs About Marble Chocolate Cake
Can I use oil instead of margarine?
Yes, you can substitute oil for margarine, but the texture may differ slightly. Oil makes the cake moister, while margarine adds structure and flavor.
How do I know when the cake is done?
Insert a toothpick into the center. If it comes out clean or with a few crumbs, your cake is ready. Avoid underbaking, as it can result in a soggy middle.
What type of chocolate powder works best?
Unsweetened cocoa powder gives the richest flavor. Avoid hot chocolate mixes, as they contain added sugars that alter the taste.
Can I make this ahead of time?
Absolutely! Bake the cake a day in advance and store it covered at room temperature. Add the frosting right before serving.
Why did my cake crack on top?
Cracking happens when the batter rises too quickly. Lower the oven temperature by 10°C and bake for a bit longer next time.
Is this cake kid-friendly?
Kids adore this cake! The combination of vanilla and chocolate appeals to all ages, making it a crowd-pleaser.
Can I double the recipe?
Yes, doubling the recipe works fine. Just ensure your mixing bowl is large enough to accommodate the increased volume.
What if I don’t have a fork for swirling?
A skewer or knife works just as well. The goal is to create gentle swirls without overmixing.
How long does the cake stay fresh?
Stored properly, it stays fresh for up to three days at room temperature or a week in the fridge.
Can I freeze leftovers?
Definitely! Wrap slices individually and freeze for up to a month. Thaw in the fridge before enjoying.
Final Thoughts
Baking a Super Spongy Marble Chocolate Cake is like creating a masterpiece in your kitchen. From the creamy batter to the mesmerizing swirls and the heavenly aroma, every step brings joy. Whether you’re a seasoned baker or a newbie, this recipe promises success—and smiles from anyone who tries it. So grab your apron, preheat that oven, and let’s get baking!
Equipment
- Mixing bowls
- Electric mixer or whisk
- 9x13-inch baking pan
- Fork for swirling
- Oven
Ingredients
- 3 eggs
- 2 cups sugar
- 3 sticks margarine
- 1 cup milk
- 3 cups wheat flour
- 1 tablespoon baking powder
- 4 squares chocolate powder (or cocoa powder)
Instructions
- Beat the eggs, sugar, and margarine until creamy and fluffy.
- Slowly add the flour and milk, alternating between them, and mix gently.
- Divide the batter into two bowls; stir chocolate powder into one.
- Alternate spoonfuls of each batter in a greased and floured pan and swirl gently with a fork.
- Bake at 180°C (350°F) for about 40 minutes, checking for doneness with a toothpick.
- Once cooled, drizzle melted chocolate or ganache on top.
Notes
Nutrition

Hi, I’m Olivia Parker, the founder of BakingSecret.com and a lifelong lover of all things sweet and homemade. I grew up in a small town in Oregon, where the smell of fresh cookies in my family’s kitchen sparked my passion for baking. Over the years, I turned that passion into a mission: to help home bakers feel confident, inspired, and creative.
After studying food science and working in several artisan bakeries across the U.S., I decided to create a space where everyone from beginners to seasoned bakers can find reliable recipes, expert tips, and a warm, welcoming community. BakingSecret.com is my way of sharing the magic of baking with the world. When I’m not testing new recipes, you’ll find me exploring farmers’ markets, collecting vintage cookbooks, or perfecting my sourdough technique.