
Introduction to the Perfect Mother’s Day Strawberry Tart
There’s something about a homemade dessert that makes any occasion feel extra special, and this Mother’s Day Strawberry Tart is no exception. With its buttery crust, creamy filling, and fresh strawberries arranged in a beautiful pattern, it’s as delightful to look at as it is to eat. I first made this tart for my mom’s birthday last year, and it quickly became her favorite. Whether you’re celebrating Mother’s Day or simply want to surprise someone with a sweet treat, this strawberry tart recipe will steal hearts—and taste buds!
The Sweet History Behind the Strawberry Tart
Tarts have been a staple of French patisserie for centuries, but their origins trace back even further to medieval times when they were savory dishes filled with meats and vegetables. Over time, bakers began experimenting with sweeter fillings, leading to the fruit tarts we know today. The strawberry tart, in particular, gained popularity in the 19th century thanks to the widespread cultivation of strawberries across Europe. Modern versions often feature a custard or pastry cream base topped with fresh berries, making them both elegant and refreshing. My version adds a twist by incorporating a hint of vanilla and lemon zest, which enhances the natural sweetness of the strawberries.
Why You’ll Love This Mother’s Day Strawberry Tart Recipe
This strawberry tart is not only visually stunning but also incredibly delicious. The combination of flaky crust, smooth cream, and juicy strawberries creates layers of flavor and texture that are hard to resist. Plus, it’s surprisingly easy to make—even if you’re new to baking! Unlike overly complicated desserts, this one requires minimal effort while delivering maximum impact. It’s perfect for impressing guests or treating yourself on a cozy afternoon.
Perfect Occasions to Prepare Your Strawberry Tart
A homemade strawberry tart is ideal for so many occasions. Serve it as the grand finale at a spring brunch, bring it along to a picnic, or gift it to your mom on Mother’s Day. It’s also a fantastic choice for birthdays, bridal showers, or any gathering where you want to wow everyone with your culinary skills. Trust me—once you present this beauty, compliments will pour in faster than you can slice it!
Ingredients for Your Mother’s Day Strawberry Tart
- 1 ½ cups all-purpose flour (for the crust)
- ½ cup unsalted butter, chilled and cubed
- 3 tablespoons granulated sugar
- 1 large egg yolk
- 2 tablespoons ice water
- 1 cup heavy cream
- ¼ cup powdered sugar
- 1 teaspoon pure vanilla extract
- 1 pound fresh strawberries, hulled and sliced
- 2 tablespoons apricot jam (optional, for glazing)
Substitution Options for Your Strawberry Tart
If you’re looking to customize this strawberry tart recipe, here are some substitutions you can try:
- Swap the heavy cream for coconut cream for a dairy-free option.
- Use gluten-free flour instead of all-purpose flour for a gluten-free crust.
- Replace strawberries with raspberries, blueberries, or a mix of seasonal fruits.
- Omit the apricot glaze if you prefer a less sweet finish.
Preparation Steps for Your Mother’s Day Strawberry Tart
Step 1: Make the Perfect Crust
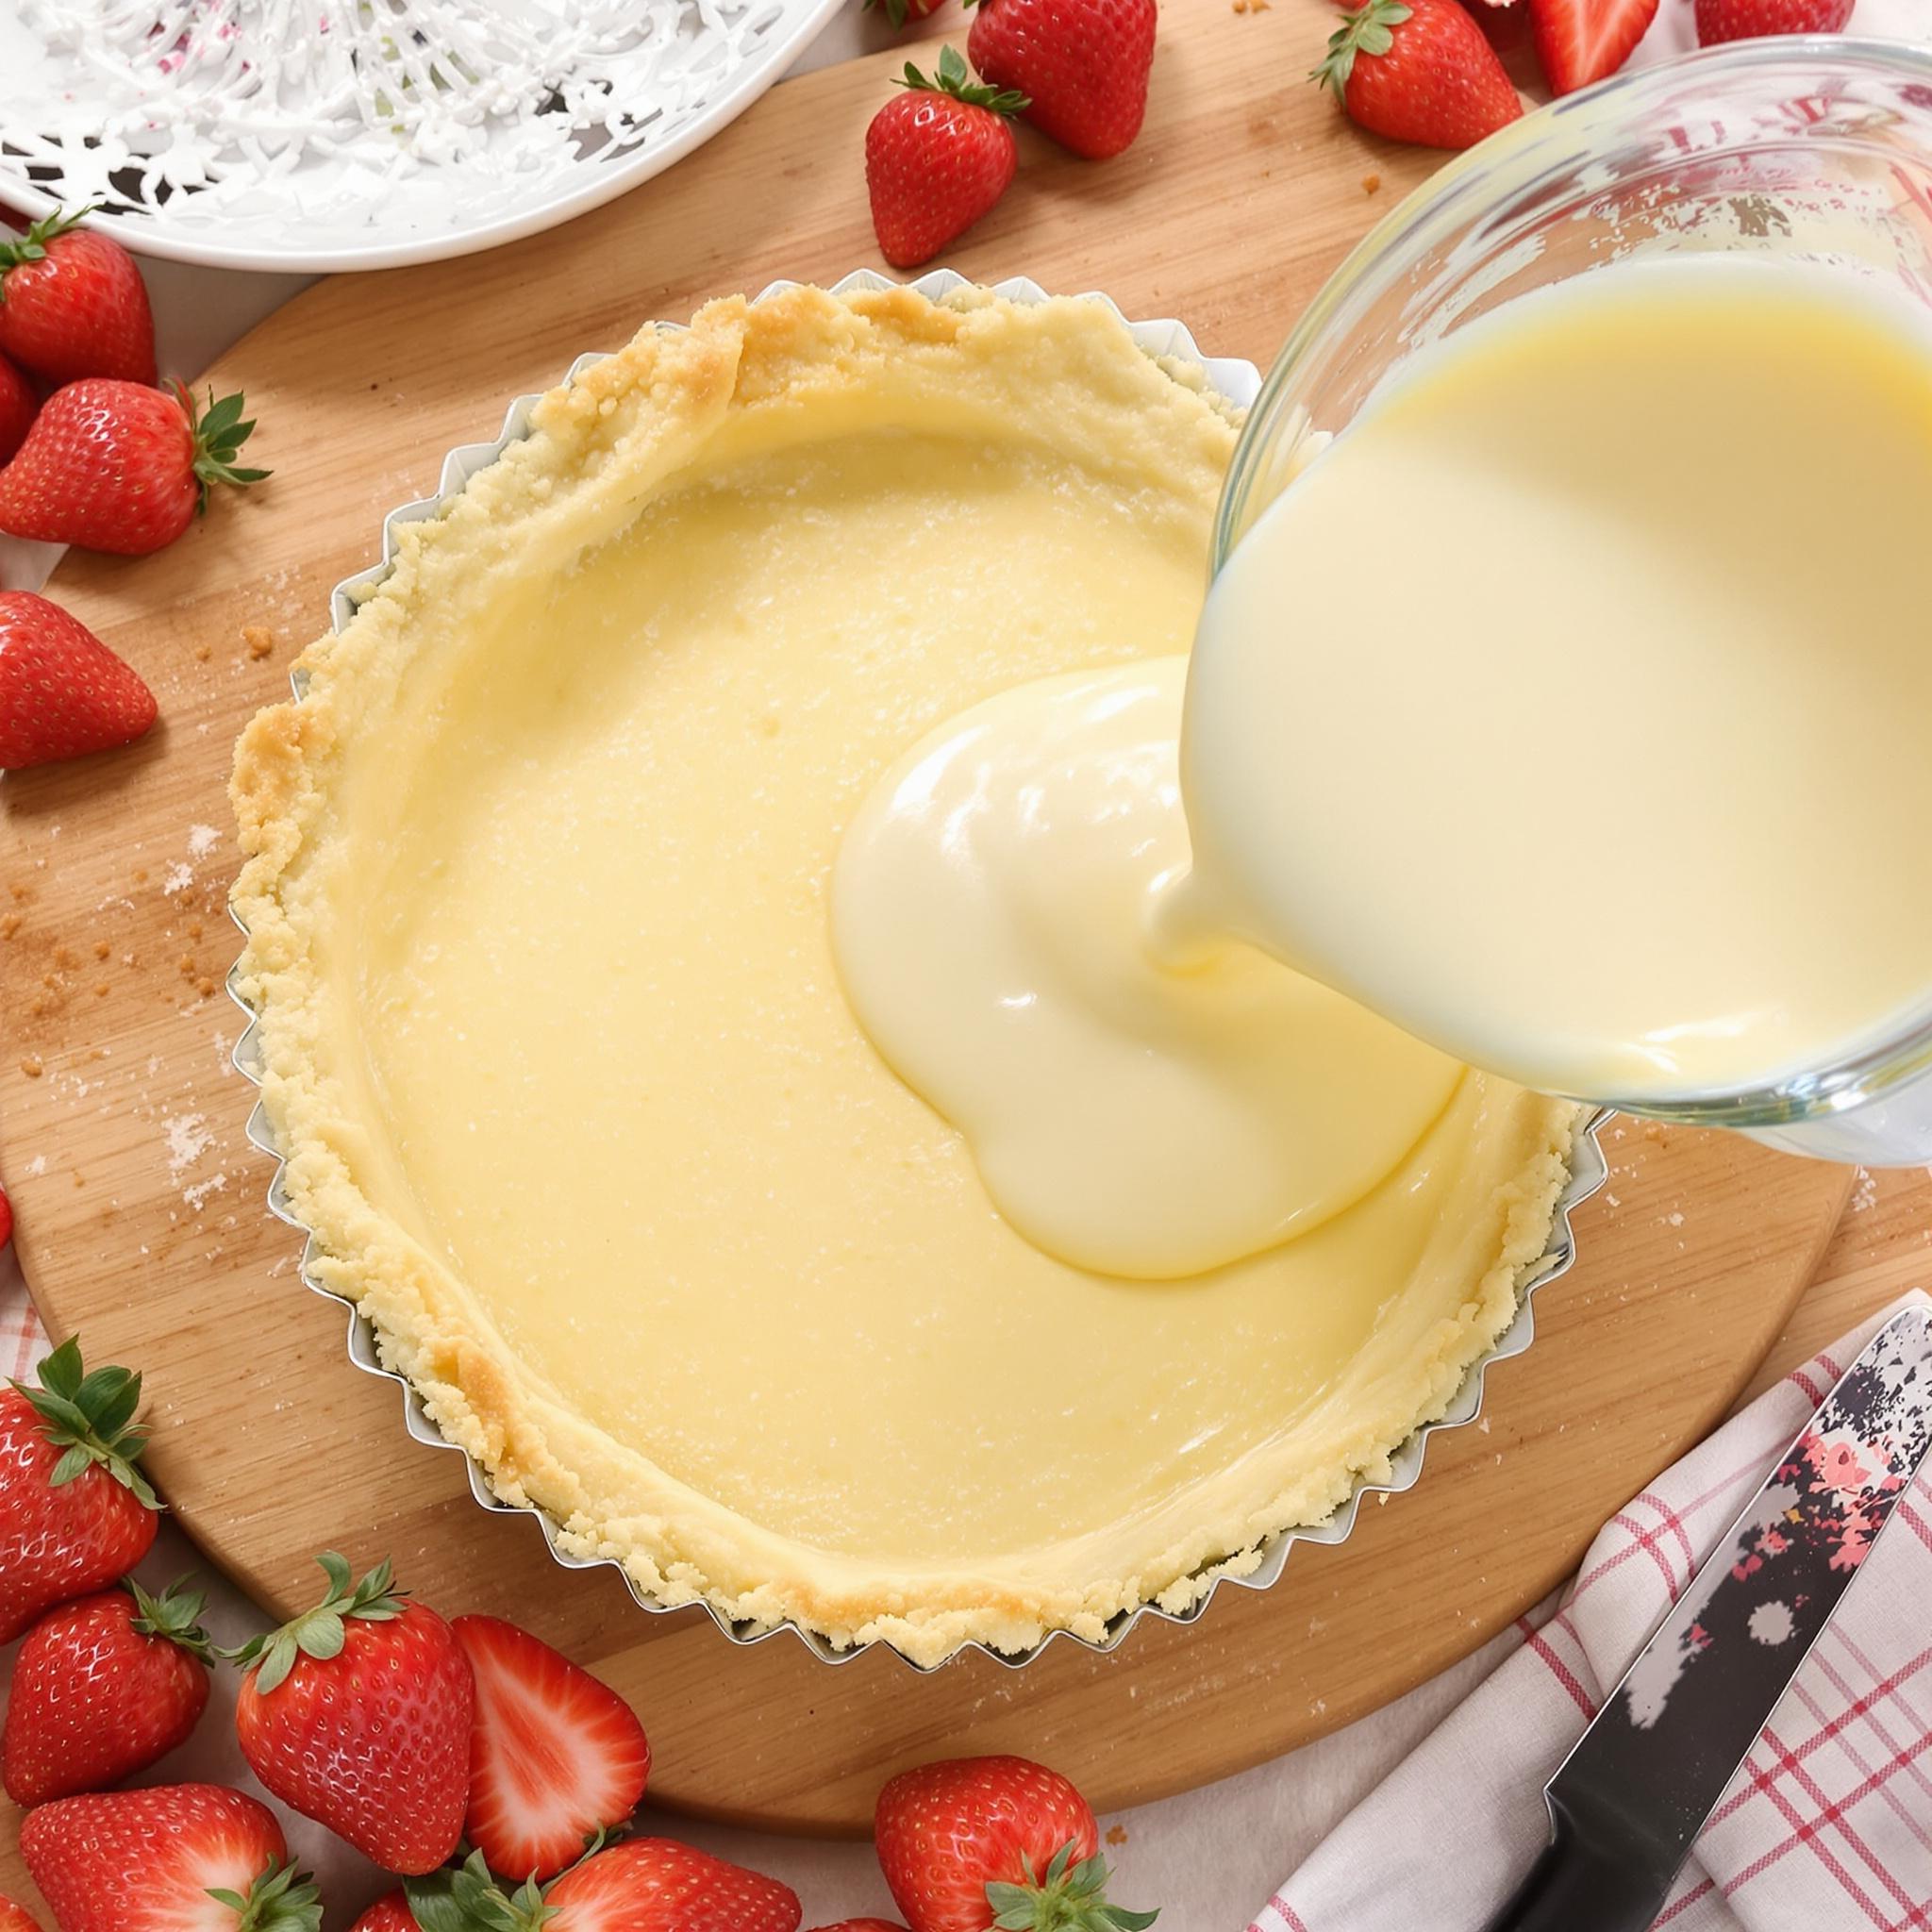
Start by combining the flour, cubed butter, and sugar in a food processor. Pulse until the mixture resembles coarse crumbs—this is key to achieving that flaky texture. Add the egg yolk and ice water, pulsing just until the dough comes together. Be careful not to overwork it! Transfer the dough onto a lightly floured surface, shape it into a disc, wrap it in plastic wrap, and chill it for at least 30 minutes. Pro tip: Chilling ensures the crust holds its shape during baking.
Step 2: Bake the Tart Shell
Once chilled, roll out the dough into a circle slightly larger than your tart pan. Press it gently into the pan, trimming off any excess edges. Prick the bottom with a fork to prevent puffing, then line it with parchment paper and fill it with pie weights or dried beans. Blind-bake the shell at 375°F (190°C) for about 15 minutes, or until golden brown. Let it cool completely before adding the filling. Pro tip: Cooling prevents the cream from melting into the crust.
Step 3: Whip Up the Cream Filling
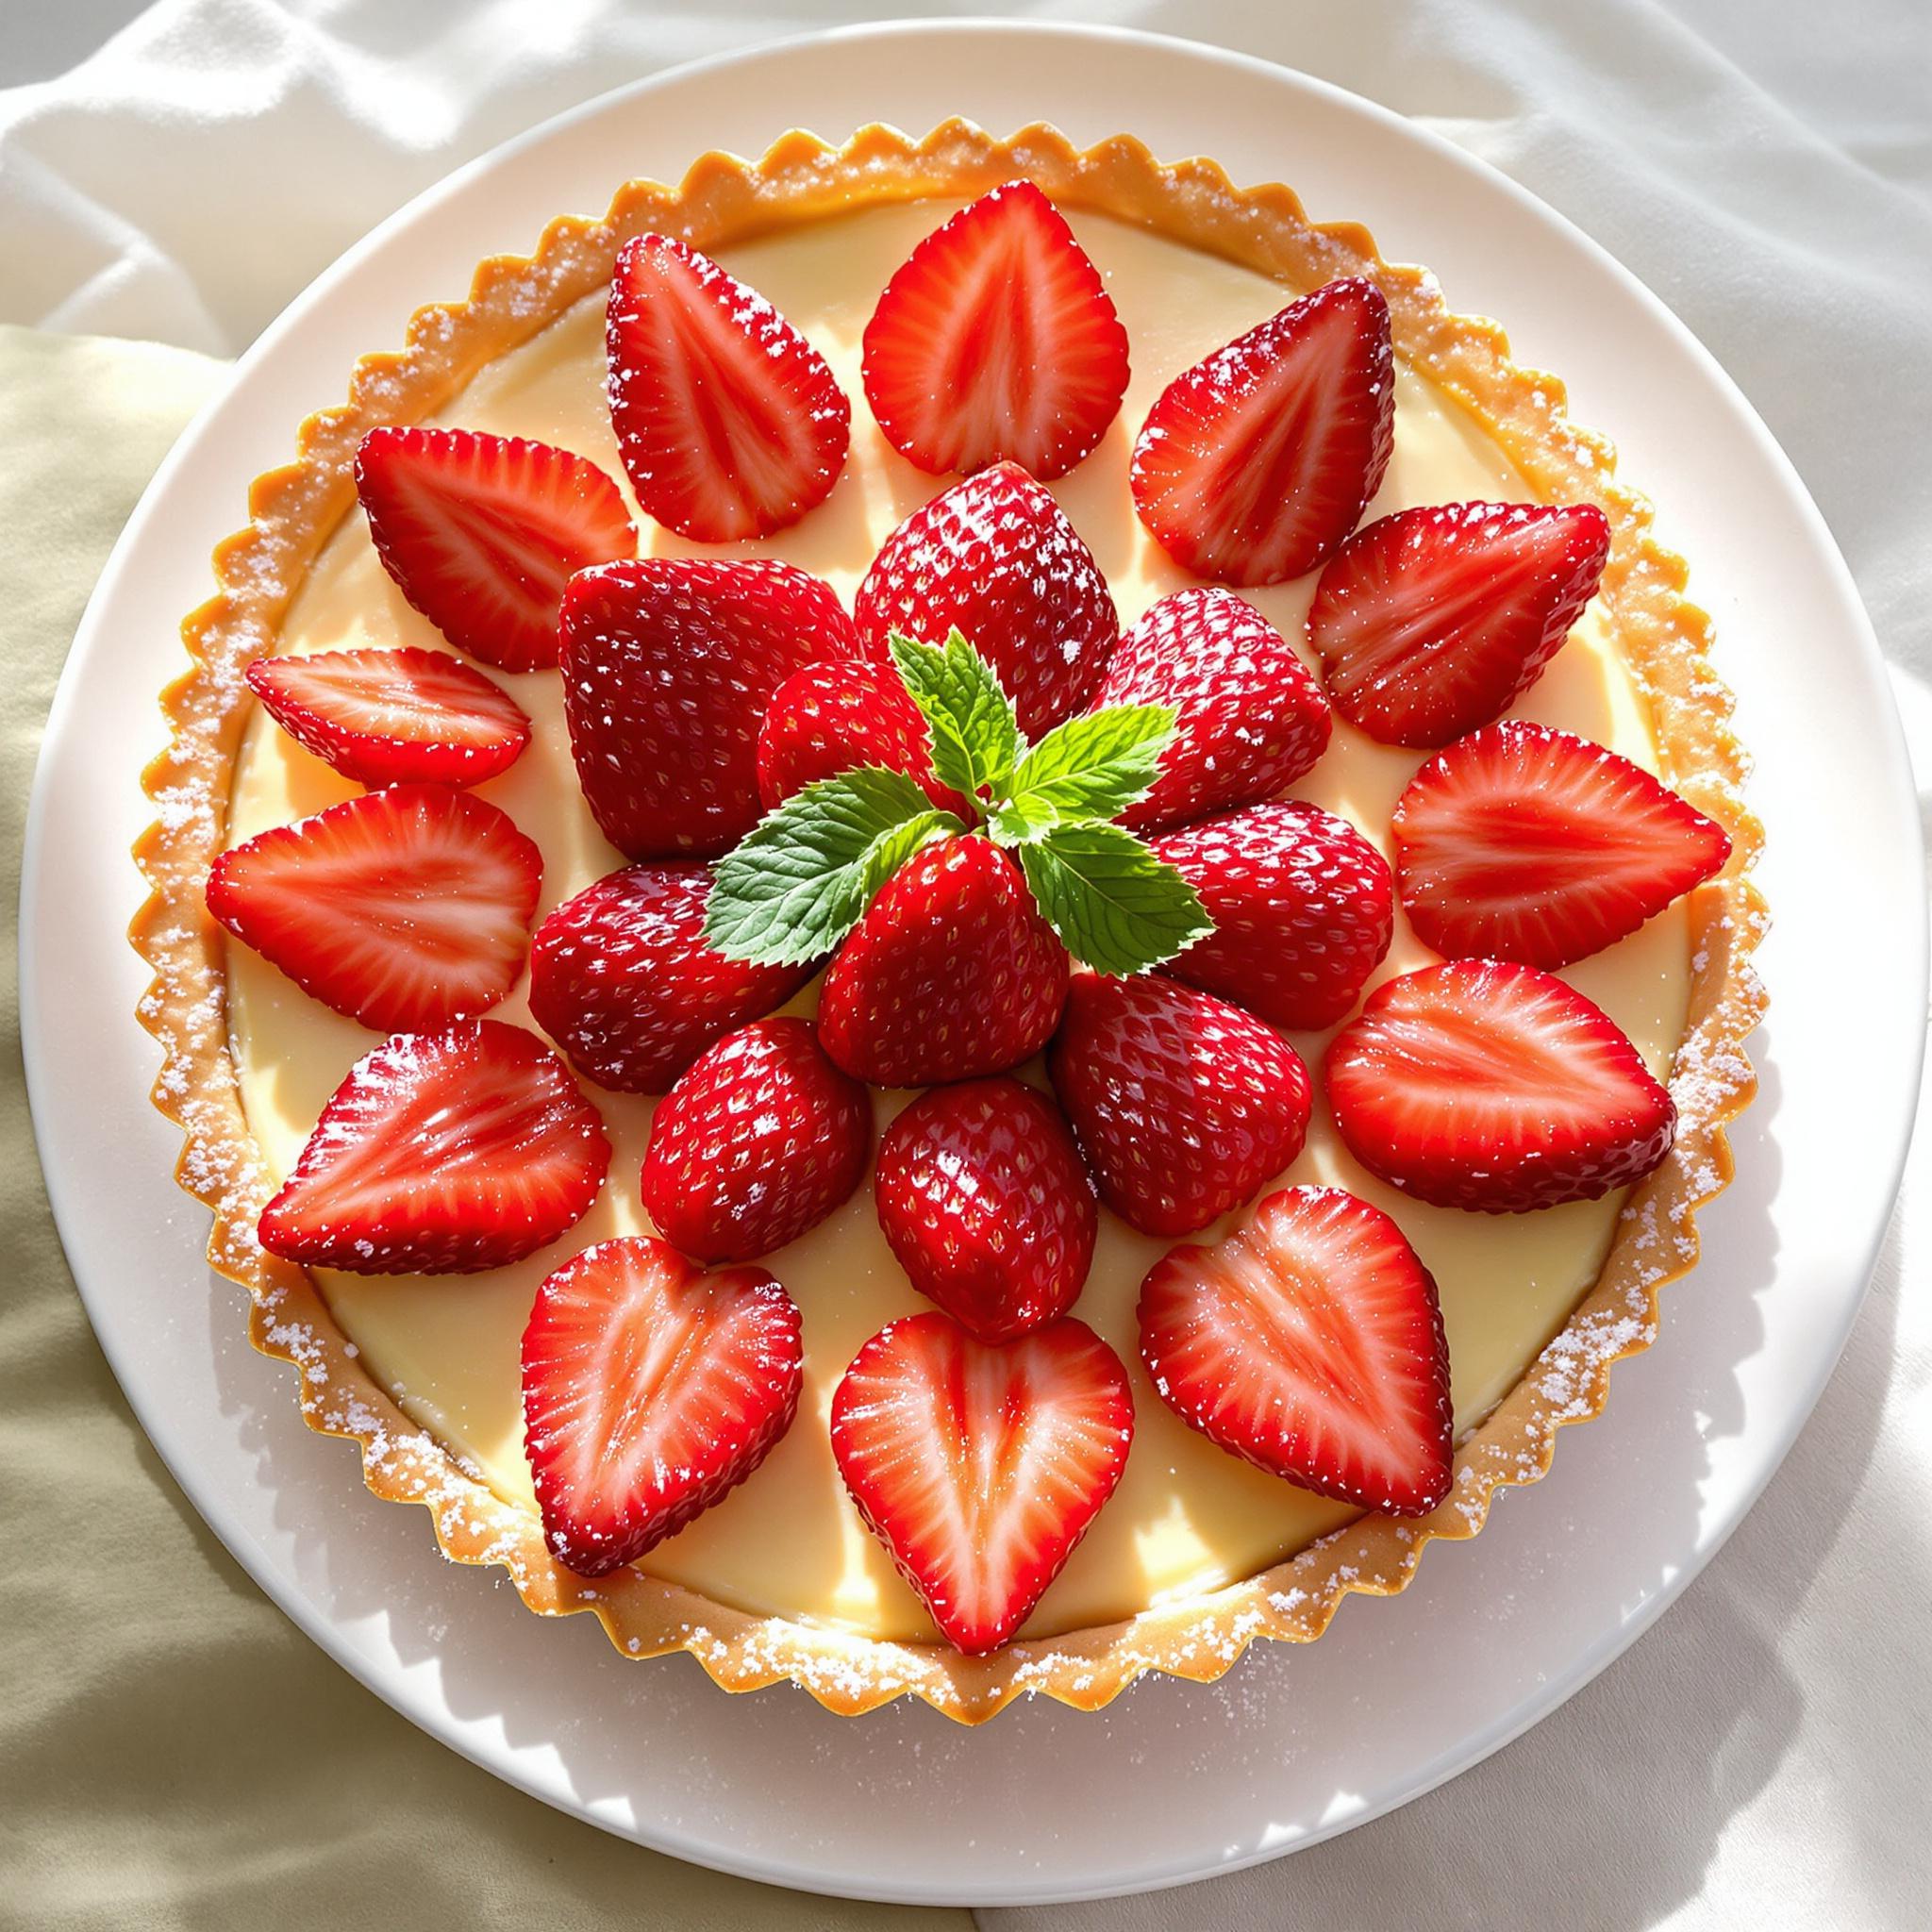
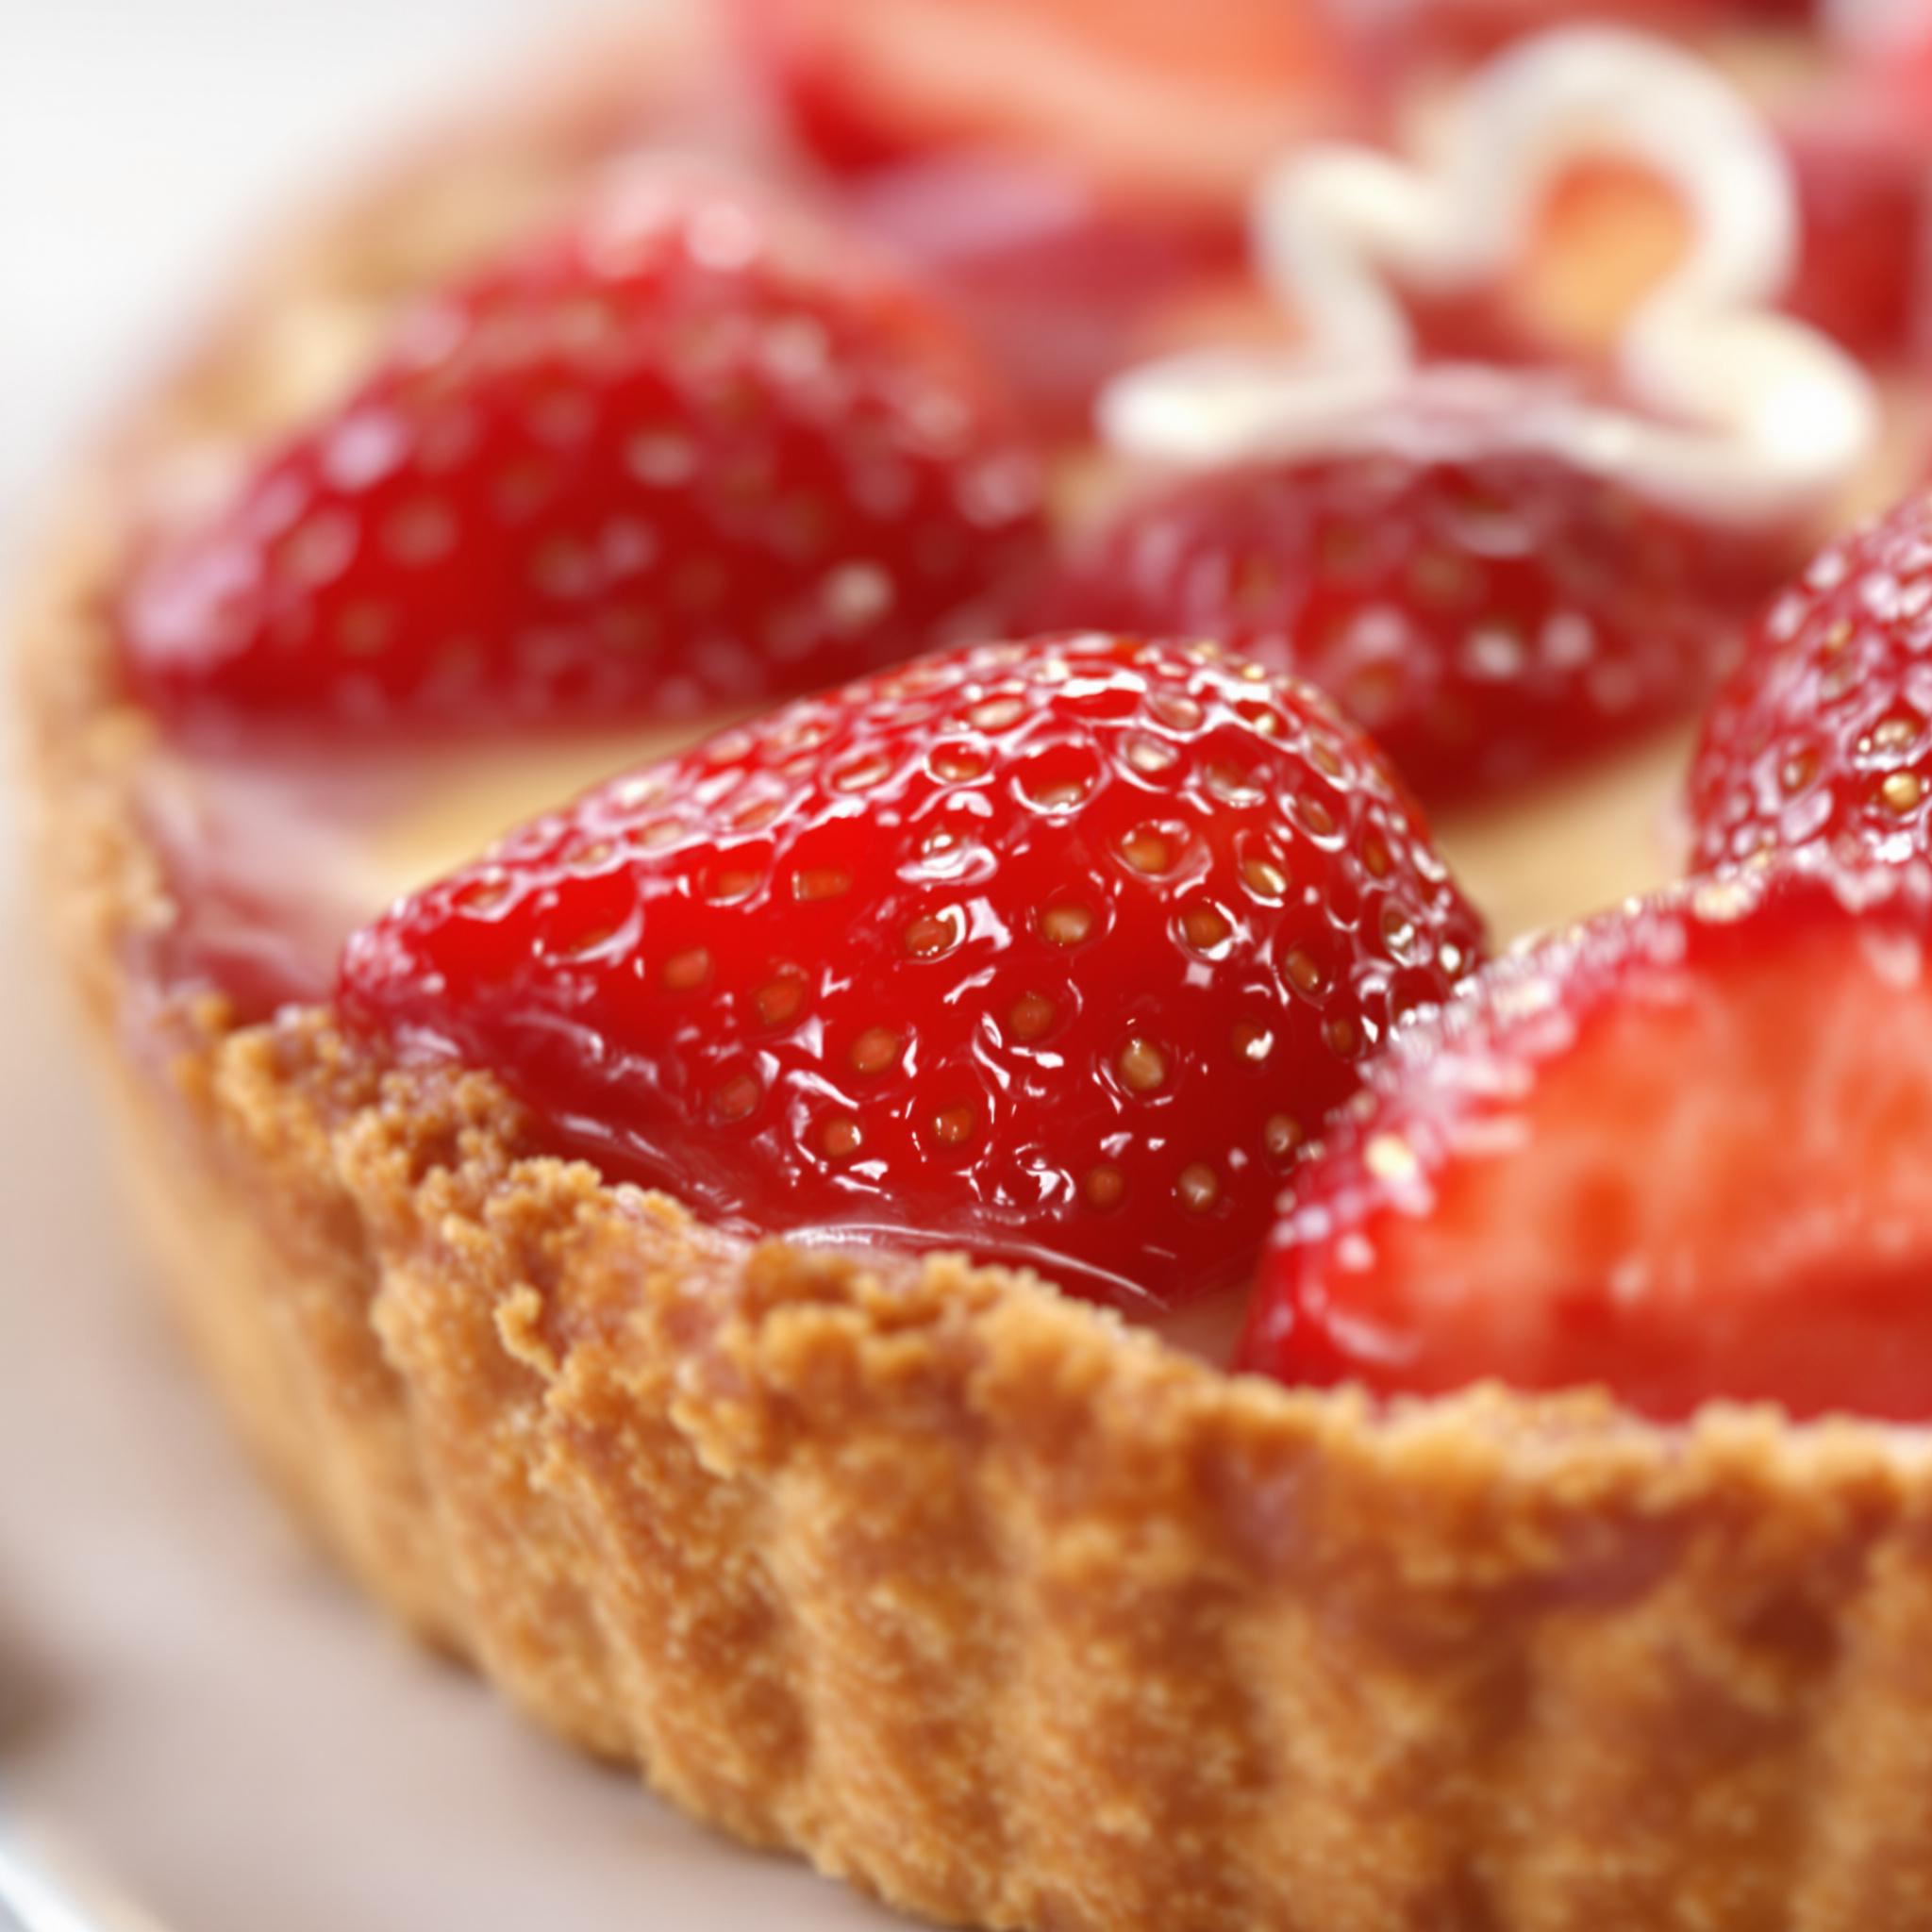
In a mixing bowl, whip the heavy cream, powdered sugar, and vanilla extract until soft peaks form. Spread the whipped cream evenly over the cooled tart shell, creating a smooth layer. Arrange the sliced strawberries on top in a decorative pattern—get creative! For an optional glossy finish, warm the apricot jam in the microwave and brush it over the strawberries. This step adds a professional touch and locks in freshness.
Chef’s Tip for an Extra Special Strawberry Tart
To elevate your strawberry tart, sprinkle a pinch of finely grated lemon zest into the whipped cream. The citrus notes complement the sweetness of the strawberries beautifully and add a subtle tang that balances the flavors perfectly.
Time Required for Your Strawberry Tart
Here’s a quick breakdown of the time needed to prepare this delicious strawberry tart:
- Prep time: 20 minutes
- Cooking time: 15 minutes
- Resting/chilling time: 30 minutes
- Total time: Approximately 1 hour and 5 minutes
Nutritional Information for Your Strawberry Tart
Per serving (based on 8 servings):
- Calories: 250 kcal
- Protein: 3g
- Fat: 15g
- Carbohydrates: 28g
- Sugar: 16g
An Interesting Curiosity About Strawberries
Did you know that strawberries are the only fruit with seeds on the outside? Each berry has around 200 tiny seeds, making them unique among fruits. They’re also packed with vitamin C, which makes them not only tasty but nutritious too!
Necessary Tools for Preparing Your Strawberry Tart
- Food processor or pastry cutter
- Rolling pin
- Tart pan with removable bottom
- Parchment paper
- Pie weights or dried beans
- Mixing bowls
- Electric mixer or whisk
Storage Instructions for Your Strawberry Tart
To keep your strawberry tart fresh, store it in the refrigerator. Cover it loosely with plastic wrap or place it in an airtight container to prevent the crust from becoming soggy. It’s best enjoyed within 1-2 days, as the strawberries may start to release moisture after that.
If you need to transport the tart, ensure it’s placed on a stable surface to avoid shifting. Avoid stacking anything on top of it to preserve the delicate arrangement of the strawberries.
For longer storage, freeze the unbaked tart shell and assemble the tart closer to serving time. This way, you can enjoy the freshest flavors without compromising quality.
Tips and Tricks for Baking Success
- Use cold ingredients for the crust to achieve optimal flakiness.
- Don’t skip chilling the dough—it’s crucial for preventing shrinkage.
- Choose ripe but firm strawberries for the best texture and appearance.
- Brush the glaze sparingly to avoid overwhelming the natural sweetness of the fruit.
Serving Suggestions for Your Strawberry Tart
Serve your strawberry tart with a dollop of freshly whipped cream or a scoop of vanilla ice cream for added indulgence. Pair it with a cup of tea or coffee for a classic afternoon treat. Alternatively, garnish each slice with a sprig of mint for a pop of color and freshness.
Healthier Alternatives for Your Strawberry Tart
Looking to lighten up your strawberry tart? Here are six variations to consider:
- Whole Wheat Crust: Substitute half of the all-purpose flour with whole wheat flour for added fiber.
- Low-Sugar Cream: Reduce the powdered sugar in the cream filling by half and use stevia or monk fruit sweetener instead.
- Vegan Option: Replace the heavy cream with coconut cream and use a plant-based butter substitute for the crust.
- No-Bake Version: Skip the baked crust and use a pre-made graham cracker crust for convenience.
- Fruit Medley: Mix strawberries with other low-sugar fruits like kiwi or blackberries.
- Gluten-Free Crust: Use almond flour or oat flour combined with a binding agent like xanthan gum.
Common Mistakes to Avoid When Making a Strawberry Tart
Mistake 1: Skipping the Chill Time for the Crust
One of the biggest mistakes people make is rushing through the chilling process. Without proper chilling, the crust can become tough or shrink excessively during baking. To avoid this, always chill the dough for at least 30 minutes before rolling it out. Pro tip: If you’re short on time, pop the dough in the freezer for 10-15 minutes instead.
Mistake 2: Overfilling the Tart Shell
Overfilling the tart shell with cream can lead to spills or uneven layers. Remember, less is more! Leave a small border around the edges to allow room for arranging the strawberries neatly. Pro tip: Use an offset spatula for precise spreading.
Mistake 3: Using Overripe Strawberries
While ripe strawberries are essential for flavor, overripe ones can turn mushy and watery, ruining the presentation. Always choose firm, bright red strawberries for the best results. Pro tip: Pat them dry with a paper towel before arranging to remove excess moisture.
Frequently Asked Questions About the Strawberry Tart Recipe
Can I make the tart ahead of time?
Absolutely! You can prepare the crust and cream filling a day in advance and assemble the tart closer to serving time. Just be sure to store the components separately to maintain freshness.
What can I use instead of apricot jam?
If you don’t have apricot jam, you can use apple jelly or even a light honey syrup as a substitute for glazing the strawberries.
How do I prevent the crust from getting soggy?
To prevent sogginess, let the baked crust cool completely before adding the cream filling. You can also brush a thin layer of melted chocolate on the bottom of the crust to create a barrier.
Can I freeze the tart?
Yes, you can freeze the unbaked tart shell for up to 3 months. Assemble and bake it when ready to serve. However, freezing the fully assembled tart isn’t recommended due to the fresh strawberries.
What type of pan should I use?
A tart pan with a removable bottom works best, as it allows for easy unmolding and presentation. A standard 9-inch round pan is ideal for this recipe.
How do I know when the crust is done?
The crust should be golden brown and firm to the touch. If it still feels soft or pale, return it to the oven for a few more minutes.
Can I use frozen strawberries?
It’s best to use fresh strawberries for this recipe, as frozen ones tend to release too much liquid and lose their shape. Save frozen berries for smoothies or jams.
What if I don’t have a food processor?
No problem! You can make the crust by hand using a pastry cutter or simply rub the butter into the flour with your fingertips until crumbly.
How can I make the tart gluten-free?
Substitute the all-purpose flour with a gluten-free flour blend designed for baking. Ensure all other ingredients are certified gluten-free as well.
Is this recipe suitable for vegans?
With a few tweaks, yes! Use coconut cream instead of heavy cream and opt for a plant-based butter substitute for the crust.
Conclusion
Baking a Mother’s Day Strawberry Tart is more than just following a recipe—it’s about creating memories and sharing joy with loved ones. Whether you’re a seasoned baker or a beginner, this tart is sure to impress with its vibrant colors, rich flavors, and elegant presentation. So grab your apron, gather your ingredients, and let’s get baking! Your family and friends will thank you for this sweet masterpiece.
Equipment
- Food processor or pastry cutter
- Rolling pin
- Tart pan with removable bottom
- Parchment paper
- Pie weights or dried beans
- Mixing bowls
- Electric mixer or whisk
Ingredients
- 1 ½ cups all-purpose flour for the crust
- ½ cup unsalted butter chilled and cubed
- 3 tablespoons granulated sugar
- 1 large egg yolk
- 2 tablespoons ice water
- 1 cup heavy cream
- ¼ cup powdered sugar
- 1 teaspoon pure vanilla extract
- 1 pound fresh strawberries hulled and sliced
- 2 tablespoons apricot jam optional, for glazing
Instructions
- Start by combining the flour, cubed butter, and sugar in a food processor. Pulse until the mixture resembles coarse crumbs. Add the egg yolk and ice water, pulsing just until the dough comes together. Transfer the dough onto a lightly floured surface, shape it into a disc, wrap it in plastic wrap, and chill it for at least 30 minutes.
- Once chilled, roll out the dough to a circle slightly larger than your tart pan. Press it gently into the pan, trimming off any excess edges. Prick the bottom with a fork to prevent puffing, then line it with parchment paper and fill it with pie weights or dried beans. Blind-bake at 375°F (190°C) for about 15 minutes, or until golden brown. Let it cool completely.
- In a mixing bowl, whip the heavy cream, powdered sugar, and vanilla extract until soft peaks form. Spread the whipped cream over the cooled tart shell, creating a smooth layer. Arrange the sliced strawberries on top in a decorative pattern. For an optional glossy finish, warm the apricot jam in the microwave and brush it over the strawberries.
Notes
Nutrition

Hi, I’m Olivia Parker, the founder of BakingSecret.com and a lifelong lover of all things sweet and homemade. I grew up in a small town in Oregon, where the smell of fresh cookies in my family’s kitchen sparked my passion for baking. Over the years, I turned that passion into a mission: to help home bakers feel confident, inspired, and creative.
After studying food science and working in several artisan bakeries across the U.S., I decided to create a space where everyone from beginners to seasoned bakers can find reliable recipes, expert tips, and a warm, welcoming community. BakingSecret.com is my way of sharing the magic of baking with the world. When I’m not testing new recipes, you’ll find me exploring farmers’ markets, collecting vintage cookbooks, or perfecting my sourdough technique.