
Why This Oreo Icebox Delight Will Make Dad Smile
Picture this: it’s a lazy Sunday afternoon, and I’m in the kitchen trying to whip up something sweet for my dad. He’s always been a fan of simple desserts—nothing too fancy, just something that screams love and comfort. That’s when I stumbled upon this **Oreo Icebox Delight** recipe. It’s creamy, dreamy, and oh-so-easy to make. No oven, no stress, just layers of happiness stacked together. Trust me, once you try this, it’ll become your go-to dessert for all occasions!
A Little History Behind the Magic
This dessert reminds me of those old-school icebox cakes my grandma used to make. Back in the day, people didn’t have ovens in every home, so they got creative with what they had. The concept was simple: stack cookies and cream, let them chill, and voila—a cake-like treat without the hassle. The Oreo Icebox Delight is a modern twist on that classic idea. It’s like a hug in dessert form, and it’s perfect for dads who don’t need anything flashy—just something made with love.
Why You’ll Love This Recipe
Let’s be real: life gets busy, and sometimes we need a dessert that doesn’t demand hours of prep. This Oreo Icebox Delight is exactly that. It’s quick, requires no baking, and tastes like a million bucks. Plus, it’s customizable! Whether you’re a chocolate fanatic or a caramel lover, you can tweak it to suit your taste buds. And here’s the kicker—it’s foolproof. Even if you’re new to the kitchen, you’ll nail this one.
Perfect Occasions to Whip Up This Dessert
This dessert is a crowd-pleaser, no matter the occasion. Need a last-minute Father’s Day treat? Check. Hosting a summer BBQ? Double-check. Want to surprise your dad on his birthday? Triple-check. It’s also great for potlucks, game nights, or even a cozy family dinner. Honestly, any excuse to make this is a good one!
Ingredients
- For creamy layers:
- 2 packages of Oreo cookies (one whole, one crushed)
- 2 cups of cold whipping cream
- 200g of cream cheese (optional but recommended)
- ½ cup of granulated sugar
- 1 teaspoon of vanilla extract
- To decorate:
- Whole Oreos
- Crushed Oreos
- Caramel sauce
Substitution Options
Not everyone has the same pantry staples, and that’s okay! If you don’t have cream cheese, you can skip it, though it does add extra creaminess. Swap granulated sugar with powdered sugar for a smoother texture. Vegan? Use coconut cream instead of whipping cream and dairy-free Oreos. The possibilities are endless!
Step 1: Prepare the Cream
Let’s start with the star of the show—the creamy filling. Grab your cold whipping cream and beat it until soft peaks form. Pro tip: Chill your mixing bowl beforehand to help the cream whip faster. In another bowl, mix the cream cheese, sugar, and vanilla until smooth. Now, gently fold the whipped cream into the cream cheese mixture. This step is where the magic happens—the colors blend beautifully, and the aroma of vanilla fills the air.
Step 2: Assemble the Cake
Time to layer! Grab a removable mold or tray and start with a base of whole Oreos. Spread a generous layer of the creamy mixture over the cookies. Repeat this process until you’ve used up all your ingredients, ending with a layer of cream on top. Chef’s tip: Press down lightly after each layer to ensure the cake holds together nicely.
Step 3: Refrigerate
Once assembled, cover the cake with plastic wrap and pop it in the fridge. Let it chill for at least 6 hours, or better yet, overnight. This resting time allows the cookies to soften and the flavors to meld together. Patience pays off here, trust me!
Step 4: Decorate Before Serving
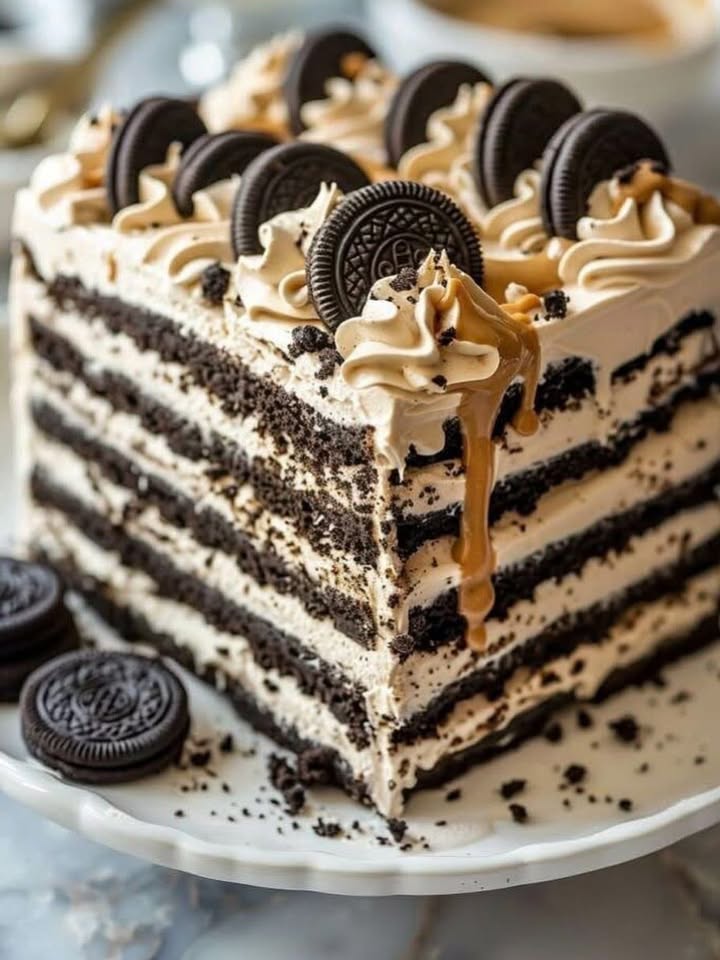
Before serving, unleash your inner artist. Top the cake with whole Oreos, crushed cookies, and a drizzle of caramel sauce. It’s like accessorizing an outfit—those finishing touches make all the difference. Your dad won’t just taste the love; he’ll see it too!
Timing
Here’s the lowdown on timing: prep takes about 20 minutes, chilling requires 6 hours (or overnight), and total time is around 8 hours. But hey, the wait is worth it!
Chef’s Secret
Want to take this dessert to the next level? Add a sprinkle of sea salt on top of the caramel sauce. The salty-sweet combo is irresistible and adds a gourmet touch.
Extra Info
Did you know Oreos were first introduced in 1912? Yep, they’ve been making people happy for over a century. Fun fact: the original design on the cookie had a flower pattern before it became the iconic logo we know today.
Necessary Equipment
You’ll need a few basic tools: a mixing bowl, an electric mixer, a spatula, a removable mold or tray, and plastic wrap. Nothing fancy, just kitchen essentials.
Storage
Storing this dessert is a breeze. Keep it covered in the fridge for up to 3 days. The flavors deepen over time, making it taste even better the next day. If you live in a hot climate, avoid leaving it out for too long—it’s best enjoyed chilled.
If you want to freeze it, wrap it tightly in plastic wrap and aluminum foil. It can last up to a month in the freezer. Just thaw it in the fridge overnight before serving.
Pro tip: Label your storage container with the date so you don’t forget how long it’s been sitting there. Nobody wants a mystery dessert!
Tips and Advice
Don’t rush the chilling process—it’s crucial for softening the cookies. Also, taste your cream mixture before assembling to ensure it’s sweet enough for your liking. Lastly, get creative with decorations. Fresh berries, chocolate shavings, or even sprinkles can elevate the look.
Presentation Tips
- Serve slices on colorful plates for a pop of contrast.
- Add a dollop of whipped cream on top for extra flair.
- Garnish with mint leaves or edible flowers for a fancy touch.
Healthier Alternative Recipes
Want to lighten things up? Here are six variations:
- Low-Sugar Version: Use sugar-free Oreos and a sugar substitute in the cream.
- Vegan Delight: Swap dairy ingredients with plant-based alternatives.
- Gluten-Free Treat: Use gluten-free cookies and ensure all other ingredients are safe.
- Fruit Lover’s Twist: Add layers of fresh strawberries or bananas between the cookies.
- Dark Chocolate Dream: Use dark chocolate Oreos for a richer flavor.
- Protein-Packed Option: Mix protein powder into the cream for a guilt-free indulgence.
Common Mistakes to Avoid
Mistake 1: Not Chilling Long Enough
Skipping the chilling step results in a cake that’s too firm or lacks flavor depth. Always refrigerate for at least 6 hours to let the cookies soften properly.
Mistake 2: Overmixing the Cream
Overmixing can deflate the whipped cream, leaving you with a dense filling. Fold gently to maintain that light, airy texture.
Mistake 3: Forgetting to Crush the Cookies
Using whole cookies for every layer makes slicing difficult. Crush some for easier cutting and a more balanced bite.
FAQ
Can I use store-bought whipped cream?
Absolutely! While homemade whipped cream has a fresher taste, store-bought works fine in a pinch.
Ensure you chill the cake long enough. Six hours minimum allows the cookies to soften perfectly.
Can I make this ahead of time?
Yes! This dessert actually benefits from being made ahead since the flavors meld better over time.
What if I don’t have a removable mold?
No worries! A regular loaf pan or square dish works just as well. Line it with parchment paper for easy removal.
Is this kid-friendly?
Definitely! Kids love helping assemble the layers and decorating the top.
Can I add alcohol for an adult version?
Sure thing! A splash of coffee liqueur or Baileys adds a sophisticated twist.
How do I fix grainy cream?
Grainy cream usually means the sugar wasn’t fully dissolved. Beat the mixture longer or sift the sugar beforehand.
Can I use Cool Whip instead of whipped cream?
Yes, Cool Whip is a convenient substitute, though fresh whipped cream offers a richer flavor.
What’s the best way to slice it?
Use a sharp knife dipped in hot water and wiped dry between cuts for clean slices.
Can I freeze leftovers?
Yes, wrap slices individually and freeze for up to a month. Thaw in the fridge before eating.
Final Thoughts
This Oreo Icebox Delight is more than just a dessert—it’s a celebration of simplicity, flavor, and love. Whether you’re making it for Dad, a special occasion, or just because, it’s bound to bring smiles all around. So grab those cookies, whip up some cream, and create a dessert that’s as sweet as your intentions.
Equipment
- Mixing bowl
- Electric mixer
- Spatula
- Removable mold or tray
- Plastic wrap
Ingredients
- 200 g cream cheese optional but recommended
- 2 packs Oreo cookies one whole, one crushed
- 2 cups cold whipping cream
- ½ cup granulated sugar
- 1 tsp vanilla extract
Instructions
- Beat cold whipping cream in a mixing bowl until soft peaks form.
- In another bowl, mix cream cheese, sugar, and vanilla until smooth.
- Gently fold the whipped cream into the cream cheese mixture.
- In a removable mold or tray, layer whole Oreos as the base.
- Spread a generous layer of the creamy mixture over the cookies.
- Repeat layering with cookies and creamy mixture until ingredients are used up, ending with cream on top.
- Cover the cake with plastic wrap and refrigerate for at least 6 hours or overnight.
- Before serving, decorate the cake with whole Oreos, crushed Oreos, and caramel sauce.
Notes
Nutrition

Hi, I’m Olivia Parker, the founder of BakingSecret.com and a lifelong lover of all things sweet and homemade. I grew up in a small town in Oregon, where the smell of fresh cookies in my family’s kitchen sparked my passion for baking. Over the years, I turned that passion into a mission: to help home bakers feel confident, inspired, and creative.
After studying food science and working in several artisan bakeries across the U.S., I decided to create a space where everyone from beginners to seasoned bakers can find reliable recipes, expert tips, and a warm, welcoming community. BakingSecret.com is my way of sharing the magic of baking with the world. When I’m not testing new recipes, you’ll find me exploring farmers’ markets, collecting vintage cookbooks, or perfecting my sourdough technique.