
What Makes Chilled Yogurt Delight So Special?
Picture this: a hot summer day, the sun blazing outside, and you’re craving something sweet but refreshing. That’s when I first stumbled upon the magic of Chilled Yogurt Delight. This no-bake dessert is creamy, cool, and oh-so-simple to make. I tested it for a family gathering last weekend, and let me tell you, it was love at first bite. Everyone raved about how light yet indulgent it felt. The best part? You don’t even need an oven!
A Little Background on This Creamy Treat
While the origins of yogurt-based desserts stretch back centuries, this modern twist feels like a gift from the dessert gods. It combines the crunch of Marias cookies with the smoothness of yogurt and condensed milk. Growing up, my grandma used to whip up something similar using leftover cookies and yogurt. She called it “lazy cake,” and it’s funny how her old-school version inspired this polished recipe. Today, we’re taking that idea and turning it into a showstopper.
Why You’ll Fall in Love with This Recipe
If you’re looking for a dessert that’s easy, quick, and utterly delicious, this one checks all the boxes. The Chilled Yogurt Delight is perfect for anyone who loves creamy textures with a hint of crunch. Plus, it’s versatile—you can tweak it to suit your taste buds or dietary needs. And did I mention it’s no-bake? That alone makes it a winner in my book.
Perfect Occasions to Whip Up This Dessert
This dish shines at casual get-togethers, potlucks, or even as an after-dinner treat on lazy weekends. I’ve served it at birthday parties, baby showers, and holiday dinners, and it never fails to impress. Its elegant appearance belies how simple it is to prepare. Trust me, your guests will think you spent hours slaving over it!
Ingredients You’ll Need
- 200 g of Marias cookies
- 1 can of condensed milk (395 g approx.)
- 6 g of whipping cream
- 4 cups of natural yogurt
- 8 sheets of flavorless gelatin
- Oil to grease the mold
Substitution Options
If you’re missing an ingredient or want to experiment, here are some swaps:
- Marias cookies: Substitute with graham crackers or digestive biscuits.
- Condensed milk: Try using sweetened condensed coconut milk for a tropical twist.
- Whipping cream: Heavy cream works just fine.
- Natural yogurt: Greek yogurt adds a thicker texture.
- Gelatin sheets: Use powdered gelatin (follow package instructions).
Step 1: Hydrate the Gelatin
Start by softening the gelatin sheets. Drop them into a bowl of cold water and let them soak for about 5 minutes. As they absorb the water, they’ll transform into a jelly-like consistency. Pro tip: Don’t skip this step—it ensures the gelatin dissolves evenly later.
Step 2: Prepare the Cookie Base
Next, grab your trusty food processor (or a ziplock bag and rolling pin) and crush those Marias cookies into fine crumbs. Think of it as a mini workout! These crumbs form the crunchy foundation of our Chilled Yogurt Delight, so take your time to get them nice and powdery.
Step 3: Mix the Sweet Magic
In a large mixing bowl, combine the yogurt and condensed milk. Stir until the mixture turns smooth and velvety. The contrast between the tangy yogurt and the rich sweetness of condensed milk is pure bliss. Imagine a cloud of creaminess ready to hug your taste buds.
Step 4: Beat the Cream
Now, let’s tackle the whipping cream. In a separate bowl, beat it until soft peaks form—not too stiff, not too runny. Picture fluffy white clouds dancing in your bowl. This step adds a luxurious lightness to the dessert.
Step 5: Dissolve the Gelatin
Squeeze out the excess water from the softened gelatin and pop it into a microwave-safe bowl. Heat it for 10–15 seconds until fully dissolved. Then, gently stir it into the yogurt mixture. This binds everything together, giving the dessert its signature firm yet wobbly texture.
Step 6: Combine Everything
Fold the whipped cream into the yogurt mixture using gentle, enveloping movements. Then, sprinkle in the crushed cookies. The result? A delightful swirl of creamy goodness dotted with cookie bits. Chef’s tip: Don’t overmix—keep those cookie crumbs intact for a satisfying crunch.
Step 7: Mold and Chill
Grease your mold lightly with oil to prevent sticking. Pour the mixture in, smoothing the top with a spatula. Pop it into the fridge for at least 4 hours—but overnight is ideal. Patience pays off here, folks!
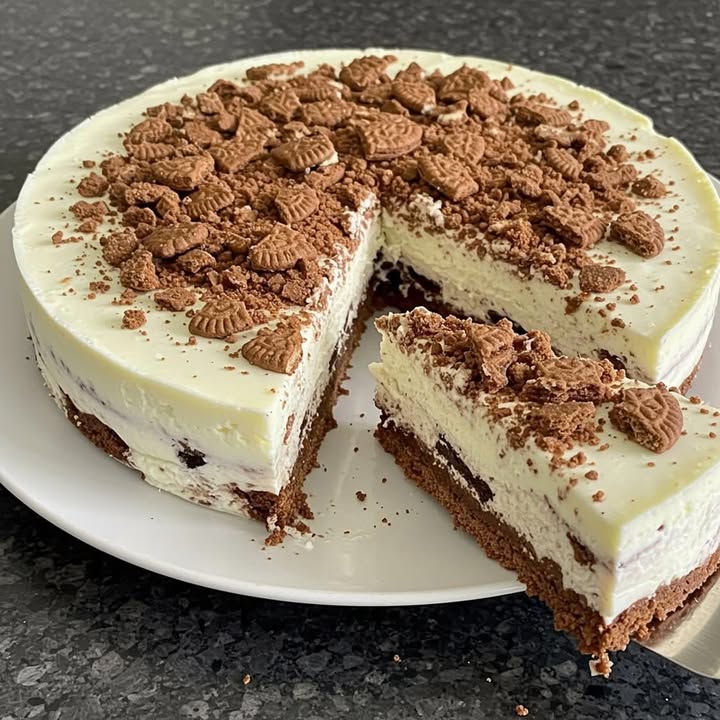
Step 8: Unmold and Decorate
Once chilled, carefully unmold the dessert onto a serving plate. Use whole or halved Marias cookies to decorate the top. Arrange them artfully for that wow factor. Voilà! Your Chilled Yogurt Delight is ready to steal the spotlight.
Timing Breakdown
Preparation time: 20 minutes
Cooking time: None (no-bake!)
Resting time: 4 hours minimum (overnight recommended)
Total time: Approximately 5 hours
Chef’s Secret
For an extra burst of flavor, add a teaspoon of vanilla extract or a splash of lemon zest to the yogurt mixture. It elevates the entire dessert without overpowering the delicate balance of flavors.
Did You Know?
Marias cookies were invented in France during the 19th century and have since become a pantry staple worldwide. Their buttery flavor pairs beautifully with creamy desserts, making them a star ingredient in recipes like this Chilled Yogurt Delight.
Necessary Equipment
- Food processor or rolling pin
- Large mixing bowls
- Whisk or electric mixer
- Microwave-safe bowl
- Spatula
- Rectangular or round mold
Storage Tips
To keep your dessert fresh, cover it tightly with plastic wrap or transfer it to an airtight container. Store it in the fridge for up to 3 days. The flavors deepen over time, making leftovers even tastier.
Freezing isn’t recommended, as the texture may change. However, if you must freeze, do so only for short periods (up to 1 week) and thaw in the fridge before serving.
Avoid exposing the dessert to warm temperatures for too long, as the gelatin might soften and compromise its structure.
Tips and Advice
- Use room-temperature ingredients for smoother blending.
- Don’t rush the chilling process—it’s key to achieving the perfect set.
- Experiment with different cookie types for unique flavor profiles.
Presentation Ideas
- Dust the top with cocoa powder for a chic finish.
- Add fresh berries for a pop of color and tartness.
- Drizzle honey or caramel sauce for extra decadence.
Healthier Alternatives
Want to lighten up this recipe? Here are six variations:
- Low-sugar option: Replace condensed milk with sugar-free syrup.
- Vegan delight: Swap dairy yogurt and cream for plant-based versions.
- Gluten-free: Use gluten-free cookies instead of Marias.
- Protein boost: Add a scoop of protein powder to the yogurt mix.
- Fruit infusion: Blend in mashed bananas or mangoes for natural sweetness.
- Lighter cream: Opt for half-and-half instead of heavy whipping cream.
Mistake 1: Skipping the Gelatin Hydration
Not hydrating the gelatin properly can lead to lumps in your dessert. Always soak the sheets in cold water first to ensure they dissolve smoothly. Pro tip: Set a timer to avoid forgetting them in the water.
Mistake 2: Overmixing the Cookies
Be gentle when folding in the cookie crumbs. Overmixing turns them into dust, losing their delightful crunch. Aim for a marbled effect instead.
Mistake 3: Rushing the Chilling Process
Patience is key! Skipping or shortening the chilling time results in a sloppy dessert. Let it rest undisturbed for at least 4 hours—or better yet, overnight.
Mistake 4: Using Warm Ingredients
Warm ingredients can cause the gelatin to set prematurely. Make sure everything is at room temperature before combining.
Mistake 5: Not Greasing the Mold
Forgetting to grease the mold makes unmolding a nightmare. A light coat of oil ensures your dessert slides out effortlessly.
Can I use flavored yogurt?
Absolutely! Flavored yogurt adds a fun twist, but stick to mild flavors like vanilla or strawberry to avoid overpowering the other ingredients.
How do I know when the gelatin is fully dissolved?
Heat it briefly in the microwave and stir until completely clear and liquid. If you see any granules, give it another few seconds.
Can I prep this dessert ahead of time?
Yes! In fact, it tastes better the longer it chills. Prep it a day in advance for maximum flavor and convenience.
What size mold should I use?
A standard 9×5-inch loaf pan works perfectly. Adjust quantities if using a larger or smaller mold.
Is this dessert kid-friendly?
Definitely! Kids adore the creamy texture and cookie crunch. Just supervise little ones while decorating with small cookie pieces.
Can I freeze leftovers?
While freezing isn’t ideal, you can store leftovers in the freezer for up to a week. Thaw in the fridge before serving to maintain texture.
What if I don’t have a food processor?
No problem! Place the cookies in a ziplock bag and crush them with a rolling pin or sturdy bottle.
Fold them in gently and pour the mixture into the mold immediately. Avoid letting it sit too long before chilling.
Can I double the recipe?
Of course! Simply double all ingredients and use a larger mold or multiple smaller ones.
What’s the best way to serve this dessert?
Slice it neatly and garnish with fresh fruit or a drizzle of sauce. Serve chilled for the ultimate refreshing experience.
Can I add alcohol for an adult version?
Yes! A splash of liqueur like Baileys or Amaretto pairs beautifully with the creamy layers.
There you have it—a dessert that’s as easy to make as it is to love. Whether you’re hosting a party or treating yourself, this Chilled Yogurt Delight is sure to bring smiles all around. So grab those Marias cookies, roll up your sleeves, and let’s create some sweet memories together!
Equipment
- Food processor or rolling pin
- Large mixing bowls
- Whisk or electric mixer
- Microwave-safe bowl
- Spatula
- Rectangular or round mold
Ingredients
- 200 g Marias cookies
- 395 g condensed milk
- 6 g whipping cream
- 4 cups natural yogurt
- 8 sheets flavorless gelatin
- oil to grease the mold
Instructions
- Start by softening the gelatin sheets in a bowl of cold water for about 5 minutes.
- Crush the Marias cookies into fine crumbs using a food processor or a rolling pin and a ziplock bag.
- In a large mixing bowl, combine the yogurt and condensed milk, stirring until smooth.
- In a separate bowl, beat the whipping cream until soft peaks form.
- Squeeze out excess water from the gelatin, heat it in a microwave-safe bowl for 10–15 seconds until dissolved, and stir it into the yogurt mixture.
- Gently fold the whipped cream into the yogurt mixture, then sprinkle in the crushed cookies.
- Grease the mold lightly with oil, pour the mixture in, and smooth the top with a spatula.
- Chill in the fridge for at least 4 hours or overnight, then carefully unmold onto a serving plate and decorate with whole or halved Marias cookies.
Notes
Nutrition

Hi, I’m Olivia Parker, the founder of BakingSecret.com and a lifelong lover of all things sweet and homemade. I grew up in a small town in Oregon, where the smell of fresh cookies in my family’s kitchen sparked my passion for baking. Over the years, I turned that passion into a mission: to help home bakers feel confident, inspired, and creative.
After studying food science and working in several artisan bakeries across the U.S., I decided to create a space where everyone from beginners to seasoned bakers can find reliable recipes, expert tips, and a warm, welcoming community. BakingSecret.com is my way of sharing the magic of baking with the world. When I’m not testing new recipes, you’ll find me exploring farmers’ markets, collecting vintage cookbooks, or perfecting my sourdough technique.