
Why This Creamy Cheesecake Delight Is a Game-Changer
There’s something magical about a cheesecake that’s so creamy, it melts in your mouth like a cloud. I remember the first time I tried making one—my kitchen turned into a flour tornado, and my family ended up laughing more at my “creative” disaster than actually eating it. But this recipe? Oh, it’s different. It’s foolproof, ultra-creamy, and so easy that even my 8-year-old nephew could help me make it. Whether you’re baking for a special occasion or just craving something sweet, this Creamy Cheesecake Delight will win hearts every single time.
A Little History of Cheesecake
Cheesecake has been around for centuries—yes, centuries! The earliest known version dates back to ancient Greece, where it was served to athletes during the first Olympic Games. Can you imagine? Fast forward to today, and cheesecake has evolved into countless variations: New York-style, no-bake, fruit-topped, you name it. My version is inspired by simplicity and modern flavors, with a touch of lemon zest to brighten things up. It’s perfect for anyone who loves tradition but craves a little twist.
Why You’ll Fall in Love with This Recipe
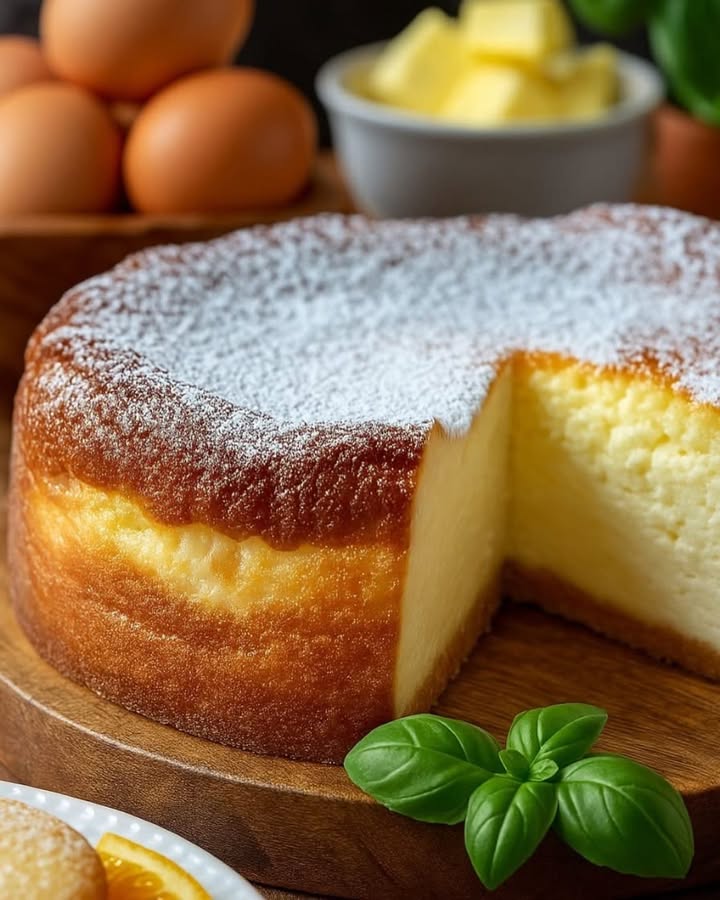
This Creamy Cheesecake Delight is all about balance. The cream cheese gives it that rich, velvety texture, while the yogurt adds a subtle tang. A hint of lemon zest keeps it fresh and vibrant. Plus, there’s no need for a water bath or fancy techniques—just mix, bake, and enjoy. Whether you’re a seasoned baker or a newbie, this recipe is your golden ticket to dessert success.
Perfect Occasions for This Cheesecake
This cheesecake is versatile enough for any occasion. Serve it at birthday parties, holiday gatherings, or even as a sweet treat after a cozy family dinner. I once made it for a potluck, and it disappeared within minutes. People were practically licking their plates! Trust me, it’s the kind of dessert that makes people smile.
Ingredients You’ll Need
- 500 g of cream cheese
- 4 eggs
- 1 natural yogurt (125 g)
- 200 g of sugar
- 2 tablespoons of cornstarch
- Lemon or vanilla zest to taste
Substitution Options
- Cream cheese: Use mascarpone for an even richer flavor.
- Eggs: Substitute with flax eggs if you’re vegan.
- Natural yogurt: Greek yogurt works beautifully here.
- Sugar: Swap with honey or maple syrup for a natural sweetener.
- Lemon zest: Vanilla extract is a great alternative.
Step 1: Beat the Cream Cheese and Sugar
Start by beating the cream cheese and sugar together until the mixture is soft and smooth. Think of it as giving your cheesecake a gentle massage—it should feel light and airy. This step is crucial because it sets the foundation for that dreamy texture we’re aiming for. If you’ve got a stand mixer, let it do the work for you. Otherwise, a hand mixer will do just fine.
Pro tip: Make sure your cream cheese is at room temperature. Cold cream cheese can be stubborn and won’t blend as smoothly.
Step 2: Add Yogurt, Cornstarch, and Zest
Next, add the yogurt, cornstarch, and lemon zest. Mix everything well until it’s fully combined. The yogurt brings a slight tanginess, while the cornstarch helps stabilize the cheesecake, keeping it firm yet creamy. As for the lemon zest, it adds a pop of freshness that cuts through the richness. Close your eyes and take a whiff—it smells amazing, doesn’t it?
Step 3: Incorporate the Eggs
Now, crack those eggs one by one into the mixture, beating lightly after each addition. This step is all about patience. Overmixing can cause cracks in your cheesecake later, so go easy. Picture yourself folding delicate petals into a flower arrangement—gentle hands are key.
Chef’s tip: Separate the eggs first and add the yolks before the whites. It helps maintain a silky texture.
Step 4: Pour Into the Mold
Pour the batter into a greased mold or line it with parchment paper. Spread it evenly, tapping the mold gently on the counter to release any air bubbles. Watching the batter settle into the mold feels oddly satisfying, like spreading frosting on a cake. Smooth and serene.
Step 5: Bake to Perfection
Bake the cheesecake at 170°C (340°F) for 50–60 minutes. Keep an eye on it—the edges should be set, but the center might still jiggle slightly. That’s okay; it’ll firm up as it cools. Imagine the warm aroma filling your kitchen—it’s pure happiness in the air.
Step 6: Cool and Garnish
Once baked, let the cheesecake cool completely before sprinkling it with icing sugar. Cooling is essential because it allows the flavors to meld together. Trust me, patience pays off here. When you finally slice into it, you’ll see why this Creamy Cheesecake Delight is worth the wait.
Timing Breakdown
- Prep time: 15 minutes
- Cooking time: 50–60 minutes
- Resting time: 2 hours (cooling)
- Total time: Approximately 3 hours
Chef’s Secret
Here’s a little trick: brush the top of the cheesecake with a thin layer of apricot jam after it’s cooled. It not only adds shine but also enhances the flavor subtly. Try it—you won’t regret it!
An Interesting Tidbit
Did you know that cheesecake isn’t technically a cake? It’s more of a custard pie! The lack of flour in most recipes places it in a category of its own. Fun, right?
Necessary Equipment
- Mixing bowls
- Electric mixer or whisk
- Baking pan or springform mold
- Parchment paper
- Oven
Storage Tips
To store your cheesecake, cover it tightly with plastic wrap or transfer slices to an airtight container. It stays fresh in the fridge for up to 5 days. For longer storage, freeze individual slices wrapped in foil—they’ll last up to 2 months. Thaw overnight in the fridge before serving.
If you’re freezing, label the container with the date. It’s easy to forget what’s hiding in the freezer!
Avoid leaving cheesecake out at room temperature for too long, as dairy products spoil quickly. Always refrigerate leftovers promptly.
Tips and Advice
- Use room-temperature ingredients for smoother mixing.
- Don’t overbake—jiggly centers are perfectly normal.
- Experiment with toppings like fresh berries or chocolate drizzle.
Presentation Ideas
- Dust with cocoa powder for a chic look.
- Add a dollop of whipped cream on each slice.
- Garnish with colorful fruits like strawberries or kiwi.
Healthier Alternatives
Looking to lighten up your cheesecake? Here are six healthier variations:
- Low-sugar option: Replace sugar with stevia or monk fruit sweetener.
- Vegan delight: Use cashew cream instead of cream cheese.
- Gluten-free crust: Crush gluten-free cookies for the base.
- Protein-packed: Add a scoop of vanilla protein powder to the batter.
- Fruit-infused: Blend pureed mango or raspberry into the mix.
- No-bake version: Set the cheesecake with gelatin instead of baking.
Mistake 1: Overbeating the Batter
Overbeating introduces too much air, leading to cracks during baking. To avoid this, stop mixing once the ingredients are combined. Remember, less is more when it comes to cheesecake batter.
Mistake 2: Opening the Oven Door Too Soon
Opening the oven door too early causes temperature fluctuations, which can ruin your cheesecake. Resist the urge to peek until the minimum baking time is reached. Patience is key!
Mistake 3: Skipping the Cooling Process
Rushing the cooling process can cause the cheesecake to sink or crack. Let it cool gradually at room temperature, then chill in the fridge. Your reward? A picture-perfect dessert.
FAQs About Creamy Cheesecake Delight
Can I make this cheesecake without an oven?
Absolutely! Try a no-bake version using gelatin or agar-agar to set the cheesecake. Simply mix the ingredients, pour into a mold, and refrigerate for a few hours.
What’s the best way to prevent cracks?
To minimize cracks, avoid overmixing, cool the cheesecake slowly, and don’t overbake. Adding a bit of cornstarch also helps stabilize the structure.
Can I use flavored yogurt?
Yes, but opt for mild flavors like vanilla or coconut. Stronger flavors may overpower the delicate balance of the cheesecake.
How do I know when it’s done?
The edges should be set, and the center should still have a slight jiggle. It will continue to firm up as it cools.
Can I freeze this cheesecake?
Yes, wrap slices individually in plastic wrap and foil, then freeze for up to 2 months. Thaw in the fridge before serving.
What tools do I need?
You’ll need mixing bowls, an electric mixer, a baking pan, parchment paper, and an oven. Simple tools for a simple recipe!
Is this cheesecake kid-friendly?
Definitely! Kids love helping mix the ingredients and decorating the finished product. Plus, they adore eating it too.
Can I double the recipe?
Yes, just ensure your pan is large enough to accommodate the increased volume. Adjust baking time slightly if needed.
What toppings pair well?
Fresh berries, caramel sauce, chocolate ganache, or a dusting of powdered sugar are all fantastic options.
Can I reduce the sugar?
Yes, you can cut the sugar by half without compromising the texture. Just keep in mind it will taste less sweet.
Final Thoughts
This Creamy Cheesecake Delight is more than just a dessert—it’s a labor of love that brings joy to everyone who tries it. Whether you’re baking for yourself or sharing it with loved ones, this recipe proves that simplicity can lead to extraordinary results. So grab your apron, preheat that oven, and get ready to create something truly magical. Happy baking!
Equipment
- Mixing bowls
- Electric mixer or whisk
- Baking pan or springform mold
- Parchment paper
- Oven
Ingredients
- 500 g cream cheese
- 4 eggs
- 125 g natural yogurt
- 200 g sugar
- 2 tbsp cornstarch
- to taste lemon or vanilla zest
Instructions
- Beat the cream cheese and sugar together until soft and smooth.
- Add yogurt, cornstarch, and lemon zest; mix until fully combined.
- Incorporate the eggs one by one, beating lightly after each addition.
- Pour the batter into a greased mold or line it with parchment paper.
- Bake the cheesecake at 170°C (340°F) for 50–60 minutes until the edges are set and the center jiggles slightly.
- Once baked, cool completely before sprinkling with icing sugar.
Notes
Nutrition

Hi, I’m Olivia Parker, the founder of BakingSecret.com and a lifelong lover of all things sweet and homemade. I grew up in a small town in Oregon, where the smell of fresh cookies in my family’s kitchen sparked my passion for baking. Over the years, I turned that passion into a mission: to help home bakers feel confident, inspired, and creative.
After studying food science and working in several artisan bakeries across the U.S., I decided to create a space where everyone from beginners to seasoned bakers can find reliable recipes, expert tips, and a warm, welcoming community. BakingSecret.com is my way of sharing the magic of baking with the world. When I’m not testing new recipes, you’ll find me exploring farmers’ markets, collecting vintage cookbooks, or perfecting my sourdough technique.