
Why Mini Cherry Cheesecakes Are the Ultimate Sweet Treat
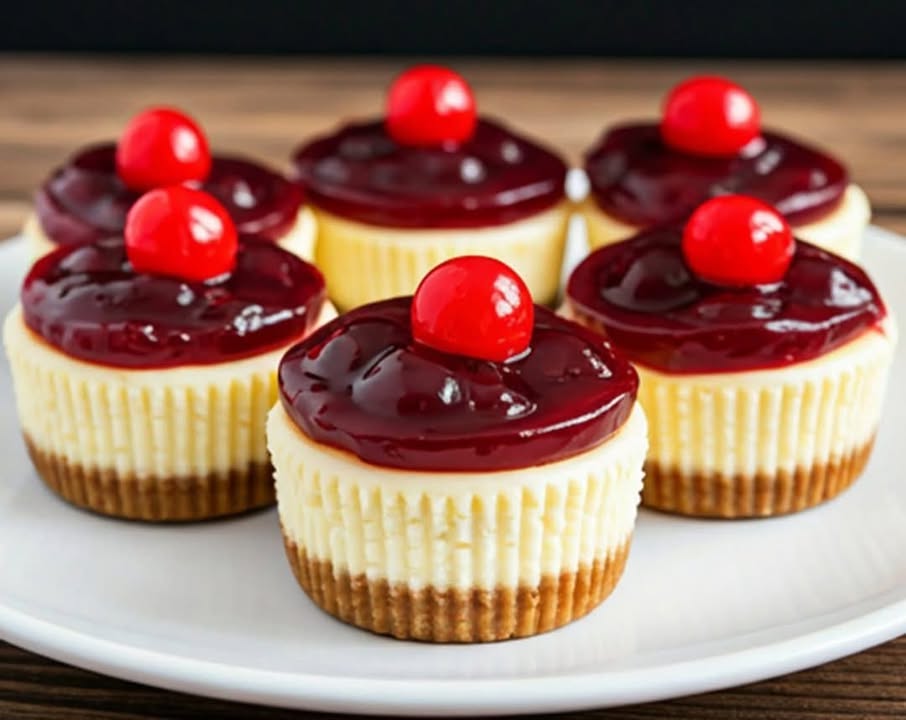
There’s something magical about bite-sized desserts. They’re cute, easy to share, and perfect for satisfying that sweet tooth without overdoing it. One day, while hosting a small get-together with friends, I decided to whip up these Mini Cherry Cheesecakes. The result? A room full of smiles and requests for the recipe. With their crispy cookie base, creamy filling, and juicy cherry topping, these little treats are impossible to resist.
A Bite-Sized History of Cheesecake
Cheesecake has been around for centuries, dating back to ancient Greece. Back then, it was more of a savory dish made with cheese, honey, and wheat. Fast forward to today, and cheesecake has evolved into a dessert superstar, especially in its mini form. These Mini Cherry Cheesecakes take the classic recipe and make it even more delightful by adding a pop of color and flavor with fresh cherries. Whether you’re serving them at a party or enjoying them solo, they’re sure to steal the show.
Why You’ll Love This Recipe
This recipe is simple, quick, and delivers big on flavor. The combination of a buttery cookie crust, smooth cream cheese filling, and tangy cherry topping is pure bliss. Plus, the mini size makes them feel extra special. Trust me, once you try these, you’ll want to keep the recipe handy for every occasion.
Perfect Occasions to Make Mini Cherry Cheesecakes
These Mini Cherry Cheesecakes are versatile. Serve them at birthday parties, bridal showers, or holiday gatherings. They’re also great for date nights or as a sweet surprise for your family after dinner. Their adorable presentation makes them a hit with both kids and adults.
Ingredients for Mini Cherry Cheesecakes
- Base:
- 1 cup graham-like cookies (crushed)
- ½ cup melted butter
- 2 tablespoons sugar
- Filling:
- 400g cream cheese (room temperature)
- ½ cup sugar
- 1 teaspoon vanilla extract
- 2 eggs
- Topping:
- 1 cup fresh or canned cherries
- 2 tablespoons sugar (optional)
- 1 tablespoon lemon juice (optional)
Substitution Options
No graham crackers? Use digestive biscuits or any crunchy cookie. If you’re out of fresh cherries, canned ones work just fine. For a dairy-free version, swap cream cheese with a plant-based alternative. And if you’re avoiding refined sugar, try using honey or maple syrup instead.
Step 1: Preheat and Prep
Start by preheating your oven to 160°C (325°F). While the oven heats up, crush your cookies into fine crumbs. Mix them with melted butter and sugar until the texture resembles wet sand. Press this mixture firmly into mini cheesecake molds, creating an even layer at the bottom. Pro tip: Use the back of a spoon to press down the base evenly.
Step 2: Make the Filling
In a mixing bowl, beat the cream cheese, sugar, and vanilla extract until smooth and creamy. Add the eggs one at a time, ensuring each egg is fully incorporated before adding the next. The mixture should be velvety and free of lumps. Pour this heavenly filling over the prepared bases, filling each mold about three-quarters full. Watch how the creamy batter contrasts beautifully with the golden crust.
Step 3: Bake to Perfection
Bake the cheesecakes for 20-25 minutes, or until the centers are set but still slightly jiggly. Avoid opening the oven door frequently, as this can cause cracks. Once done, let them cool completely before refrigerating for at least 2 hours. Patience is key here—chilling ensures the cheesecakes firm up properly.
Step 4: Prepare the Topping
If using fresh cherries, simmer them gently with sugar and lemon juice until they become glossy and syrupy. This step enhances their natural sweetness and gives them a jewel-like appearance. Canned cherries? Simply drain and rinse them. Spoon the cherries generously over each cheesecake for a burst of fruity goodness.
Timing Breakdown
- Prep Time: 15 minutes
- Cooking Time: 25 minutes
- Chilling Time: 2 hours
- Total Time: Approximately 2 hours and 40 minutes
Chef’s Secret
To prevent cracks, let the cheesecakes cool in the oven with the door slightly ajar after baking. This gradual cooling process helps maintain their smooth surface.
An Interesting Fact About Cherries
Did you know cherries are packed with antioxidants? They not only add vibrant color to desserts but also offer health benefits like reducing inflammation and boosting heart health. So go ahead, indulge guilt-free!
Necessary Equipment
- Muffin tin or mini cheesecake molds
- Mixing bowls
- Electric mixer or whisk
- Spatula
- Small saucepan (if preparing fresh cherries)
Storage Tips
Store your Mini Cherry Cheesecakes in an airtight container in the refrigerator. They’ll stay fresh for up to 3 days. For longer storage, freeze them without the cherry topping. Thaw overnight in the fridge before serving.
Avoid stacking the cheesecakes directly on top of each other, as this can damage the delicate layers. Instead, use parchment paper between layers for protection.
If freezing, wrap each cheesecake individually in plastic wrap to prevent freezer burn. Add the cherry topping only after thawing for the best texture and flavor.
Tips and Advice
For an extra-rich flavor, use full-fat cream cheese. Room-temperature ingredients blend better, so take them out of the fridge ahead of time. Lastly, don’t skip the chilling step—it’s what gives the cheesecakes their signature texture.
Presentation Ideas
- Garnish with mint leaves for a pop of green.
- Dust lightly with powdered sugar for elegance.
- Serve on a decorative platter with colorful napkins.
Healthier Alternatives
Here are six ways to make this recipe healthier:
- Low-Fat Version: Use low-fat cream cheese and yogurt instead of full-fat options.
- Gluten-Free Base: Substitute graham crackers with gluten-free cookies.
- Vegan Option: Replace cream cheese with cashew-based alternatives and use flax eggs.
- Reduced Sugar: Cut the sugar in half and rely on the natural sweetness of cherries.
- Protein Boost: Add a scoop of protein powder to the filling.
- Fruit Swap: Try blueberries or strawberries for a different twist.
Common Mistakes to Avoid
Mistake 1: Overmixing the Batter
Overmixing introduces too much air, which can cause the cheesecakes to puff up and crack during baking. Mix just until combined for a silky-smooth texture. Tip: Use a spatula to fold in the eggs gently.
Mistake 2: Skipping the Chill Time
Rushing the chilling process leads to soggy cheesecakes. Allow ample time for them to set in the fridge for the best results.
Mistake 3: Using Cold Ingredients
Cold cream cheese won’t blend smoothly, leaving lumps in your filling. Always bring your ingredients to room temperature first.
FAQs
Can I use frozen cherries?
Yes, you can! Just thaw and drain them before using. Fresh cherries have a brighter flavor, but frozen ones work well in a pinch.
How do I prevent cracks?
Avoid overbaking and let the cheesecakes cool gradually in the oven. Adding a water bath can also help retain moisture.
Can I make these ahead of time?
Absolutely! These cheesecakes can be made up to two days in advance and stored in the fridge.
What’s the best way to remove them from the molds?
Use silicone molds or line your muffin tin with cupcake liners for easy removal.
Do I need a stand mixer?
Nope! A hand mixer or even a sturdy whisk will do the job perfectly.
Can I double the recipe?
Of course! Just ensure your oven has enough space for all the cheesecakes to bake evenly.
Are these kid-friendly?
Kids love them! Their mini size makes them fun and easy to eat.
Can I use other fruits?
Definitely! Raspberries, blackberries, or mango slices would pair beautifully with the creamy filling.
What if I don’t have a muffin tin?
Use ramekins or small cups instead. Adjust the baking time accordingly.
How many servings does this recipe make?
This recipe yields about 12 mini cheesecakes, depending on the size of your molds.
Final Thoughts
These Mini Cherry Cheesecakes are proof that good things come in small packages. They’re easy to make, fun to serve, and absolutely delicious to eat. Whether you’re baking for a crowd or treating yourself, this recipe is sure to impress. So grab your apron, gather your ingredients, and let’s get baking!
Equipment
- Muffin tin or mini cheesecake molds
- Mixing bowls
- Electric mixer or whisk
- Spatula
- Small saucepan (if preparing fresh cherries)
Ingredients
- 1 cup graham-like cookies (crushed)
- ½ cup melted butter
- 2 tablespoons sugar (for base)
- 400 g cream cheese (room temperature)
- ½ cup sugar (for filling)
- 1 teaspoon vanilla extract
- 2 large eggs
- 1 cup fresh or canned cherries
- 2 tablespoons sugar (for topping) optional
- 1 tablespoon lemon juice optional
Instructions
- Preheat oven to 160°C (325°F) and crush cookies into fine crumbs.
- Mix cookie crumbs with melted butter and sugar until it resembles wet sand, then press into mini cheesecake molds.
- In a mixing bowl, beat cream cheese, sugar, and vanilla extract until smooth; add eggs one at a time until fully incorporated.
- Pour filling over prepared bases, filling each mold about three-quarters full.
- Bake for 20-25 minutes until centers are slightly jiggly; let cool completely before refrigerating for at least 2 hours.
- If using fresh cherries, simmer with sugar and lemon juice until glossy; spoon cherries over each cheesecake.
Notes
Nutrition

Hi, I’m Olivia Parker, the founder of BakingSecret.com and a lifelong lover of all things sweet and homemade. I grew up in a small town in Oregon, where the smell of fresh cookies in my family’s kitchen sparked my passion for baking. Over the years, I turned that passion into a mission: to help home bakers feel confident, inspired, and creative.
After studying food science and working in several artisan bakeries across the U.S., I decided to create a space where everyone from beginners to seasoned bakers can find reliable recipes, expert tips, and a warm, welcoming community. BakingSecret.com is my way of sharing the magic of baking with the world. When I’m not testing new recipes, you’ll find me exploring farmers’ markets, collecting vintage cookbooks, or perfecting my sourdough technique.