
A Cheesecake That’s Fresh, Fruity, and Full of Magic
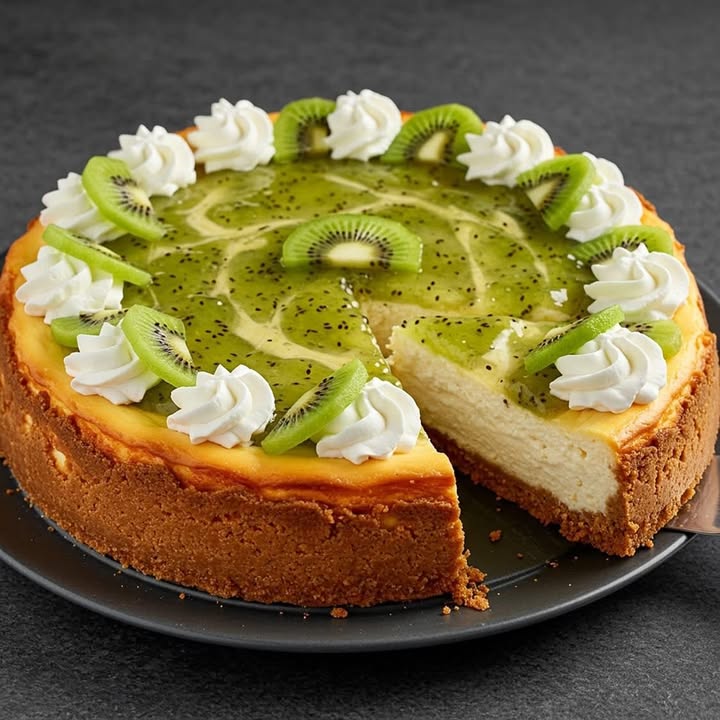
Picture this: a sunny afternoon, a slice of creamy cheesecake topped with vibrant kiwi slices, and a cup of coffee in hand. Sounds like bliss, right? That’s exactly how I felt when I first made this Kiwi Cheesecake Delight. It’s soft, fruity, and bursting with freshness—perfect for any occasion or just because you feel like treating yourself. What makes it extra special is the balance between the buttery base, the velvety filling, and the tangy-sweet kiwi topping. Trust me, once you try it, you’ll be hooked!
The Story Behind This Kiwi Cheesecake Delight
I discovered this recipe while experimenting in my kitchen one weekend. My family loves cheesecakes, but I wanted something unique—something that would make their eyes light up. That’s when I remembered how much my kids adore kiwis. They’re sweet, zesty, and oh-so-refreshing. So, I decided to combine the classic cheesecake with the tropical charm of kiwis. The result? A dessert so delightful that it became an instant hit at family gatherings. Over time, I’ve tweaked the recipe to perfection, and now I’m sharing it with you.
Why You’ll Love This Recipe
This Kiwi Cheesecake Delight is easy to make, even if you’re new to baking. The flavors are simple yet sophisticated—a creamy cheesecake base paired with the bright, citrusy notes of kiwi. Plus, it’s versatile! You can serve it as a show-stopping dessert at dinner parties or enjoy it as a cozy treat on a lazy Sunday afternoon. And let’s not forget—it looks absolutely stunning with those golden kiwi slices glistening on top.
Perfect Occasions to Prepare This Recipe
Whether you’re hosting a birthday party, celebrating a special milestone, or simply craving something sweet, this cheesecake fits the bill. It’s also a great choice for summer picnics or holiday feasts. Imagine bringing this beauty to a potluck—the compliments will roll in faster than you can say “cheesecake.”
Ingredients You’ll Need
Base:
- 200 g digestive cookies
- 100 g melted butter
Filling:
- 500 g cream cheese
- 200 ml liquid cream
- 150 g sugar
- 3 eggs
- 2 peeled and crushed kiwis
- 1 tsp vanilla extract
Topping:
- 2 kiwis, sliced
- 50 g sugar
- 1 tbsp lemon juice
Substitution Options
If you don’t have digestive cookies, graham crackers work just as well. For a dairy-free version, swap the cream cheese and liquid cream with plant-based alternatives like cashew cream or coconut cream. Instead of granulated sugar, you can use honey or maple syrup for a healthier twist. And if kiwis aren’t in season, mangoes or passion fruit puree make excellent substitutes.
Preparation Section
Step 1: Create the Base
Start by crushing the digestive cookies into fine crumbs. I usually pop them in a ziplock bag and crush them with a rolling pin—it’s oddly satisfying! Mix the crumbs with melted butter until they resemble wet sand. Press the mixture firmly into your cake mold to create an even layer. Bake it at 180°C (356°F) for about 10 minutes. Pro tip: Use the back of a spoon to press the base tightly; this prevents crumbling later.
Step 2: Make the Creamy Filling
In a large bowl, beat the cream cheese and sugar together until smooth and fluffy. Add the eggs one at a time, mixing gently after each addition. Pour in the liquid cream, kiwi puree, and vanilla extract, then whisk everything until fully combined. The batter should be thick but pourable. Pour it over the cooled base and smooth the surface with a spatula. Pro tip: Tap the mold lightly on the counter to release air bubbles.
Step 3: Bake to Perfection
Bake the cheesecake at 160°C (320°F) for 50 minutes. Keep an eye on it—it’s ready when the edges are set but the center still has a slight jiggle. Once done, turn off the oven and leave the door slightly ajar. Let the cheesecake cool inside the oven for another hour. This gradual cooling helps prevent cracks. Chef’s tip: Place a shallow pan of water on the lower rack during baking to keep the cheesecake moist.
Step 4: Prepare the Topping
While the cheesecake cools, caramelize the kiwi slices. Cook them in a pan with sugar and lemon juice over medium heat until they soften and develop a glossy finish. This step adds a touch of elegance and enhances the natural sweetness of the kiwis. Arrange the caramelized slices neatly on top of the cooled cheesecake for a picture-perfect finish.
Timing Breakdown
- Prep Time: 20 minutes
- Cooking Time: 60 minutes
- Resting Time: 1 hour (cooling)
- Total Time: Approximately 2 hours 20 minutes
Chef’s Secret
To ensure a flawless cheesecake, always bring your cream cheese and eggs to room temperature before starting. Cold ingredients can lead to lumps in the batter, which no one wants. Also, don’t skip the water bath trick—it really does wonders for texture!
Extra Info About Kiwis
Did you know that kiwis are packed with vitamin C and antioxidants? They’re not only delicious but also super healthy. In fact, New Zealand is famous for producing some of the world’s best kiwis. Fun fact: Kiwis were originally called Chinese gooseberries before being renamed to honor New Zealand’s national bird.
Necessary Equipment
- Cake mold (springform works best)
- Mixing bowls
- Whisk or electric mixer
- Rolling pin or food processor
- Oven-safe pan for water bath
Storage Tips
Once your Kiwi Cheesecake Delight is completely cool, cover it loosely with plastic wrap or aluminum foil. Store it in the refrigerator for up to 3 days. If you want to freeze it, wrap individual slices tightly in cling film and place them in an airtight container. Frozen slices can last up to 2 months.
When serving leftovers, allow the cheesecake to sit at room temperature for 10–15 minutes. This restores its creamy texture. Avoid freezing the kiwi topping separately, as it may lose its vibrant color and flavor.
If you live in a warm climate, keep the cheesecake chilled until you’re ready to serve. This ensures the filling stays firm and the kiwi slices retain their freshness.
Tips and Advice
- Use ripe but firm kiwis for the best flavor and texture.
- Don’t overmix the batter—this can cause cracks during baking.
- Garnish with mint leaves for an extra pop of color.
Presentation Ideas
- Serve each slice with a dollop of whipped cream.
- Drizzle honey or passion fruit syrup around the plate.
- Pair with a glass of sparkling wine for an elegant touch.
Healthier Alternative Recipes
Here are six ways to make this cheesecake healthier:
- Low-Sugar Version: Replace sugar with stevia or monk fruit sweetener.
- Vegan Option: Use cashew cream and coconut oil instead of cream cheese.
- Gluten-Free Base: Swap digestive cookies with gluten-free oat cookies.
- Protein-Packed: Add a scoop of vanilla protein powder to the filling.
- No-Bake Recipe: Skip the oven and chill the cheesecake overnight.
- Dairy-Free Topping: Use coconut yogurt mixed with fresh kiwi puree.
Common Mistakes to Avoid
Mistake 1: Overbaking the Cheesecake
Overbaking leads to a dry and cracked cheesecake. To avoid this, check for doneness early. The center should still wobble slightly when you gently shake the pan. If unsure, err on the side of underbaking—it will continue to set as it cools.
Mistake 2: Skipping the Water Bath
A water bath keeps the cheesecake moist and prevents cracks. Some people skip this step thinking it’s unnecessary, but trust me, it makes a huge difference. Simply place a shallow pan of hot water on the lower rack while baking.
Mistake 3: Rushing the Cooling Process
Letting the cheesecake cool gradually inside the oven is crucial. Opening the oven door too soon causes sudden temperature changes, which can lead to cracks. Patience is key here!
FAQs
Can I make this recipe without an oven?
Absolutely! You can prepare a no-bake version by setting the filling with gelatin or agar-agar. Chill it in the fridge for at least 4–6 hours before adding the topping.
How do I stop my cheesecake from cracking?
Cracks often happen due to overbaking or rapid cooling. Use a water bath and let the cheesecake cool slowly in the oven with the door slightly open.
What’s the best way to peel kiwis?
Use a small paring knife to cut off both ends, then carefully slice away the skin in long strips. Alternatively, scoop out the flesh with a spoon for minimal waste.
Can I use frozen kiwis?
It’s better to use fresh kiwis for the topping since freezing alters their texture. However, frozen kiwis work fine for making puree.
Is this cheesecake suitable for vegans?
With a few tweaks, yes! Substitute cream cheese with cashew cream and eggs with flax eggs. Top with fresh kiwi slices for a vegan-friendly treat.
How far in advance can I make this cheesecake?
You can prepare it up to 2 days ahead. Store it in the fridge and decorate with the kiwi topping just before serving.
Can I add other fruits to the topping?
Definitely! Berries, mango slices, or even pomegranate seeds pair beautifully with the creamy cheesecake.
Why is my cheesecake grainy?
Graininess often occurs when the cream cheese isn’t softened enough or if the batter was overmixed. Always start with room-temperature ingredients and mix gently.
Do I need a springform pan?
While not mandatory, a springform pan makes unmolding easier. If using a regular pan, line it with parchment paper for hassle-free removal.
How do I know when the cheesecake is fully baked?
Gently shake the pan. The edges should be set, but the center should still jiggle slightly. It will firm up as it cools.
Final Thoughts
This Kiwi Cheesecake Delight is more than just a dessert—it’s a celebration of flavors, textures, and creativity. Whether you’re baking for loved ones or indulging yourself, this recipe promises to deliver joy in every bite. So grab those kiwis, preheat your oven, and get ready to wow everyone with your culinary magic!
Equipment
- Cake mold (springform works best)
- Mixing bowls
- Whisk or electric mixer
- Rolling pin or food processor
- Oven-safe pan for water bath
Ingredients
- 200 g digestive cookies
- 100 g melted butter
- 500 g cream cheese
- 200 ml liquid cream
- 150 g sugar
- 3 eggs
- 2 peeled and crushed kiwis
- 1 tsp vanilla extract
- 2 kiwis sliced
- 50 g sugar
- 1 tbsp lemon juice
Instructions
- Crush the digestive cookies into fine crumbs and mix with melted butter until it resembles wet sand. Press into the cake mold.
- Bake the base at 180°C (356°F) for about 10 minutes.
- Beat the cream cheese and sugar together until smooth, then add the eggs one at a time, mixing gently after each.
- Add liquid cream, kiwi puree, and vanilla extract, whisk until combined, then pour over the cooled base.
- Bake the cheesecake at 160°C (320°F) for 50 minutes.
- Leave the cheesecake to cool in the oven with the door slightly ajar for another hour.
- While cooling, caramelize the kiwi slices in a pan with sugar and lemon juice over medium heat.
- Arrange the caramelized kiwi slices on top of the cooled cheesecake.
Notes
Nutrition

Hi, I’m Olivia Parker, the founder of BakingSecret.com and a lifelong lover of all things sweet and homemade. I grew up in a small town in Oregon, where the smell of fresh cookies in my family’s kitchen sparked my passion for baking. Over the years, I turned that passion into a mission: to help home bakers feel confident, inspired, and creative.
After studying food science and working in several artisan bakeries across the U.S., I decided to create a space where everyone from beginners to seasoned bakers can find reliable recipes, expert tips, and a warm, welcoming community. BakingSecret.com is my way of sharing the magic of baking with the world. When I’m not testing new recipes, you’ll find me exploring farmers’ markets, collecting vintage cookbooks, or perfecting my sourdough technique.