
Why You’ll Love This Hazelnut Chocolate Cake
Let me tell you about the time I stumbled upon this magical creation called Hanuta cake. It was a rainy afternoon, and my sweet tooth was screaming louder than my kids playing video games. I decided to whip up something special—something that combined the irresistible crunch of hazelnuts with rich chocolate cream. The result? A dessert so heavenly it felt like I’d unlocked cheat codes for baking success. If you’re looking for an easy yet impressive recipe, this **Hazelnut Chocolate Cake** is your golden ticket.
A Little Background on the Star of the Show
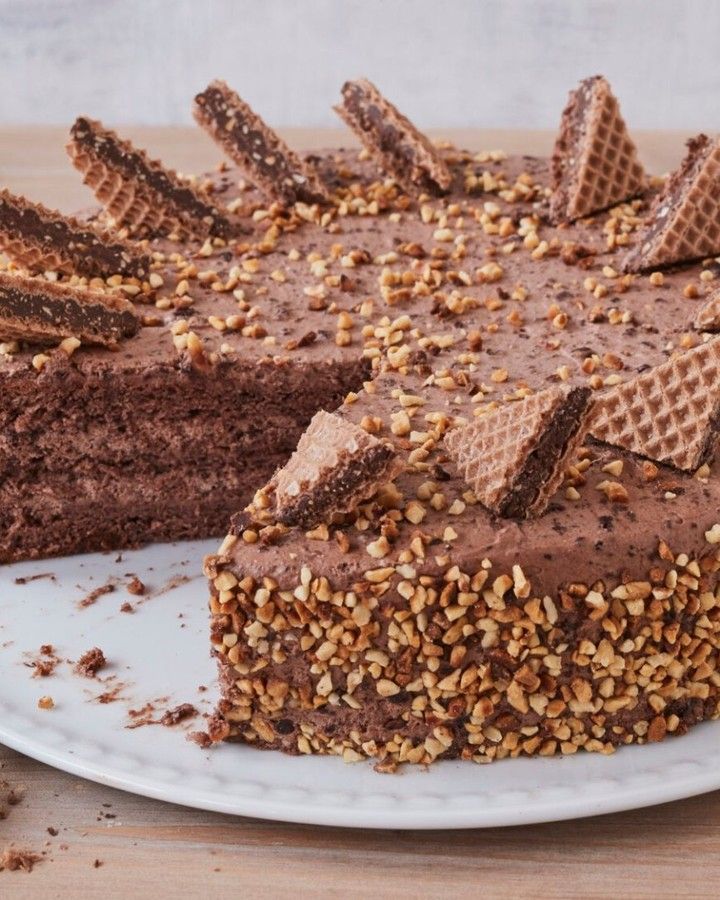
Now, let’s rewind a bit. The inspiration comes from Germany’s beloved Hanuta wafers—those thin layers of crispy wafer sandwiching creamy hazelnut filling and coated in chocolate. They’re like little bites of happiness wrapped in shiny foil. Turning these treats into a cake just seemed right. It combines nostalgia (hello childhood snack!) with modern flair (who doesn’t love a towering slice of decadence?). Whether you grew up munching on Hanutas or are discovering them now, trust me, this cake will win hearts at any table.
Why You’ll Fall Head Over Heels for This Recipe
What makes this **Hazelnut Chocolate Cake** stand out isn’t just its taste—it’s how simple it is to make. No fancy techniques here! Just straightforward steps that even beginner bakers can follow. Plus, who wouldn’t want a dessert bursting with nutty goodness and velvety chocolate? Every bite has layers of flavor and texture: soft sponge meets crunchy nuts meets dreamy cream. And did I mention how stunningly gorgeous it looks once assembled? It’s basically edible art.
Perfect Occasions for Your New Favorite Dessert
This cake screams celebration—from birthdays to holidays—or hey, Tuesday night because why not? Picture this: a cozy family dinner where everyone oohs and ahhs over dessert. Or maybe you’re hosting friends who claim they “don’t really eat sweets” until they try this masterpiece. Even as a potluck surprise, it’s guaranteed to steal the spotlight. Honestly, there’s no bad time to bake this beauty.
Ingredients You’ll Need
- For the biscuit:
- 6 eggs
- 180 g sugar
- 1 pinch salt
- 140 g wheat flour (type 405)
- 2 tablespoons baked cocoa
- For the cream:
- 5 Hanuta wafers (about 120 g)
- 50 ml milk
- 200 g sour cream
- 3 tablespoons baked cocoa
- 70 g sugar
- 400 g whipped cream
- 2 packs stabilizer for whipped cream
- Aside from that:
- 100 g chopped hazelnuts
- 8 mini Hanuta wafers for garnish
Substitution Options
Don’t have all the ingredients? No worries! Here’s what you can swap:
- If you can’t find type 405 flour, all-purpose flour works fine.
- Use dark cocoa powder instead of baked cocoa if needed.
- Swap sour cream with Greek yogurt for a tangier twist.
- Vegan? Try plant-based whipped cream and yogurt alternatives.
Step 1: Preheat and Prep
First things first, preheat your oven to 180°C (or 160°C fan-assisted). Line a springform pan with baking paper—it’s like giving your cake a comfy bed to rest on. Now grab those eggs, sugar, and salt. Beat them together using a mixer for at least 4 minutes on high speed. Watch how the mixture transforms into a pale yellow fluffiness—it smells amazing too!
Step 2: Sift and Fold
In another bowl, mix the flour and cocoa. Slowly sift this dry mix into the egg batter. Why sift? Because it keeps lumps away and ensures every bite is perfectly smooth. Gently fold everything together with a spatula. Be gentle; we don’t want to deflate our fluffy creation! Pour the batter into the prepared pan and pop it into the oven for about 45 minutes. When it’s done, let it cool completely before moving forward.
Step 3: Whip Up That Cream
While the cake cools, break the Hanuta wafers into rough chunks. Puree them with milk in a tall container until smooth. In a separate bowl, combine sour cream, sugar, and cocoa powder. Add the wafer puree and mix well. Now whip the cream with stabilizer until stiff peaks form—it should look like clouds ready to float away! Carefully fold this into the chocolate mixture for a light, airy cream layer.
Step 4: Assemble and Garnish
Toast the hazelnuts in a dry pan until golden brown—they’ll smell nutty and divine. Let them cool while you assemble the cake. Spread the cream generously over the cooled sponge, then sprinkle those toasted hazelnuts on top. For extra flair, decorate the edges with more nuts and halve the mini Hanutas to place around the rim. Chill the cake before serving—it’s worth the wait!
Timing Breakdown
- Prep Time: 20 minutes
- Cooking Time: 45 minutes
- Resting Time: At least 2 hours (chilling)
- Total Time: About 3 hours
Chef’s Secret
Here’s a pro tip: Toast the hazelnuts slightly longer than you think—you want their aroma to shine through. Also, chill the cake overnight if possible. The flavors meld beautifully, making each slice taste better than the last.
Extra Info
Did you know hazelnuts are packed with healthy fats and antioxidants? Not only do they add crunch, but they also bring some nutritional perks to the party. Bonus points for guilt-free indulgence!
Necessary Equipment
To make this cake, you’ll need:
- Mixer
- Spatula
- Springform pan
- Baking paper
- Tall container for blending
- Pan for toasting nuts
Storage Tips
After slicing, store leftovers in an airtight container in the fridge. This keeps the cake fresh and prevents it from absorbing fridge odors. Keep it chilled for up to two days—for best results, serve cold.
Avoid stacking heavy items on top of the container, as this might squish the delicate layers. If you’re planning ahead, freeze individual slices wrapped in plastic wrap for up to a month. Simply thaw in the fridge overnight when ready to enjoy.
If you live in a humid climate, consider adding a silica gel pack inside the storage container. This helps absorb moisture and keeps the cake from becoming soggy.
Tips and Advice
Want to take this cake to the next level? Use premium-quality chocolate wafers for deeper flavor. Make sure your eggs are room temperature—they whip up fluffier that way. And remember, patience is key when folding ingredients. Rushing leads to deflated batters.
Presentation Ideas
Sprinkle edible gold dust for a touch of elegance. Arrange whole hazelnuts in a circular pattern on top for symmetry. Serve each slice with a dollop of whipped cream and a drizzle of melted chocolate for extra wow factor.
Healthier Alternatives
Looking to lighten up? Try these swaps:
- Replace sugar with honey or maple syrup.
- Use almond flour instead of wheat flour for gluten-free options.
- Opt for low-fat Greek yogurt instead of sour cream.
- Make the cream layer vegan by using coconut cream.
- Add mashed avocado to the cream for richness without dairy.
- Use stevia-sweetened chocolate wafers for reduced sugar content.
Mistake 1: Overmixing the Batter
Overmixing happens when enthusiasm takes over, but it leads to dense cakes. To avoid this, stop mixing as soon as the flour is incorporated. Think of it like folding laundry—not too much pressure!
Mistake 2: Skipping the Cooling Step
Patience pays off here. Cutting into a warm cake ruins the structure. Let it cool completely before assembling. Pro tip: Place it near an open window for faster cooling during summer months.
Mistake 3: Underwhipping the Cream
Underwhipped cream means runny layers. Whip until stiff peaks form but be careful not to overdo it, or you’ll end up with butter. A hand mixer set to medium speed usually does the trick.
Mistake 4: Uneven Nut Roasting
Uneven roasting leaves some nuts raw while others burn. Stir frequently and keep an eye on them. Smell is your guide—if it smells burnt, it probably is.
Mistake 5: Overloading with Toppings
Too many toppings overwhelm the delicate balance of flavors. Stick to a light sprinkle of nuts and a few decorative wafers. Less is more when it comes to garnishing.
Frequently Asked Questions
Can I use regular cocoa powder?
Absolutely! Regular cocoa powder works fine, though baked cocoa gives a richer color. Either way, your cake will still be delicious.
How long does the cake stay fresh?
Stored properly in the fridge, this cake stays fresh for up to two days. After that, the texture may start to change slightly, but it’s still safe to eat.
Is this cake suitable for vegans?
With a few tweaks, yes! Swap eggs for flaxseed meal mixed with water, use plant-based cream, and opt for vegan wafers. Voilà—a vegan-friendly treat!
Can I freeze this cake?
Yes, freezing works great. Wrap slices individually in plastic wrap and store in a freezer-safe bag. Thaw in the fridge overnight before serving.
Do I need a stand mixer?
Nope! A handheld mixer works perfectly fine. Just ensure you beat the eggs long enough for maximum fluffiness.
What size pan should I use?
A standard 9-inch springform pan is ideal. If you only have a larger one, adjust the thickness of the layers accordingly.
Can I omit the nuts?
Sure thing! While hazelnuts add crunch, you can leave them out or replace them with other toppings like crushed cookies.
Why does my cream look grainy?
Grainy cream often happens due to uneven mixing. Ensure all components are fully blended before folding in the whipped cream.
Can I use different wafers?
Of course! Feel free to experiment with other chocolate-nut wafers. Just aim for ones with similar textures to maintain layer integrity.
Should I grease the pan?
Lining with baking paper is sufficient. Greasing isn’t necessary unless you prefer extra insurance against sticking.
Final Thoughts
There you have it—a showstopping **Hazelnut Chocolate Cake** recipe that’s equal parts fun to make and delightful to eat. Whether you’re baking for loved ones or treating yourself, this cake promises joy in every bite. So grab those ingredients, put on your favorite tunes, and get ready to create something truly unforgettable. Happy baking!
Equipment
- Mixer
- Spatula
- Springform Pan
- Baking Paper
- Tall Container for Blending
Ingredients
- 6 eggs eggs
- 180 g sugar
- 1 pinch salt
- 140 g wheat flour type 405
- 2 tablespoons baked cocoa
- 5 Hanuta wafers Hanuta wafers (about 120 g)
- 50 ml milk
- 200 g sour cream
- 3 tablespoons baked cocoa
- 70 g sugar
- 400 g whipped cream
- 2 packs stabilizer for whipped cream
- 100 g chopped hazelnuts
- 8 mini Hanuta wafers mini Hanuta wafers for garnish
Instructions
- Preheat the oven to 180°C (or 160°C fan-assisted) and line a springform pan with baking paper.
- Beat eggs, sugar, and salt together using a mixer for at least 4 minutes until fluffy.
- In a separate bowl, mix flour and cocoa, then sift into the egg mixture and gently fold in.
- Pour the batter into the prepared pan and bake for about 45 minutes. Let cool completely.
- While the cake cools, blend Hanuta wafers with milk until smooth.
- In another bowl, mix sour cream, sugar, and cocoa, then add the wafer puree and mix well.
- Whip the cream with stabilizer until stiff peaks form, then fold into the chocolate mixture.
- Toast hazelnuts in a dry pan until golden, then cool.
- Spread the cream over the cooled sponge, sprinkle with toasted hazelnuts, and garnish with mini Hanutas.
- Chill the cake before serving.
Notes
Nutrition

Hi, I’m Olivia Parker, the founder of BakingSecret.com and a lifelong lover of all things sweet and homemade. I grew up in a small town in Oregon, where the smell of fresh cookies in my family’s kitchen sparked my passion for baking. Over the years, I turned that passion into a mission: to help home bakers feel confident, inspired, and creative.
After studying food science and working in several artisan bakeries across the U.S., I decided to create a space where everyone from beginners to seasoned bakers can find reliable recipes, expert tips, and a warm, welcoming community. BakingSecret.com is my way of sharing the magic of baking with the world. When I’m not testing new recipes, you’ll find me exploring farmers’ markets, collecting vintage cookbooks, or perfecting my sourdough technique.