
Why This Magical Chocolate Cake is a Must-Try
Let me tell you about the time I baked this Magical Chocolate Cake for my best friend’s birthday. She’s the kind of person who claims she doesn’t like cake, but one bite of this masterpiece had her scraping the plate clean. What makes this cake so magical? It’s not just the rich chocolate layers or the creamy fillings—it’s the way it brings people together. Whether you’re a seasoned baker or a kitchen newbie, this recipe is your ticket to becoming everyone’s favorite dessert hero.
A Little History Behind the Magic
This cake reminds me of the classic layered cakes my grandma used to make. Back then, every layer was a labor of love, and the final result always felt like a warm hug. Over the years, bakers have added their own twists—like the velvety white cream filling and glossy chocolate ganache—but the heart of the recipe remains the same. It’s a celebration of flavors that feels both nostalgic and modern. When I first tried making it, I was nervous about getting the layers right, but trust me, it’s easier than it looks!
Why You’ll Love This Recipe
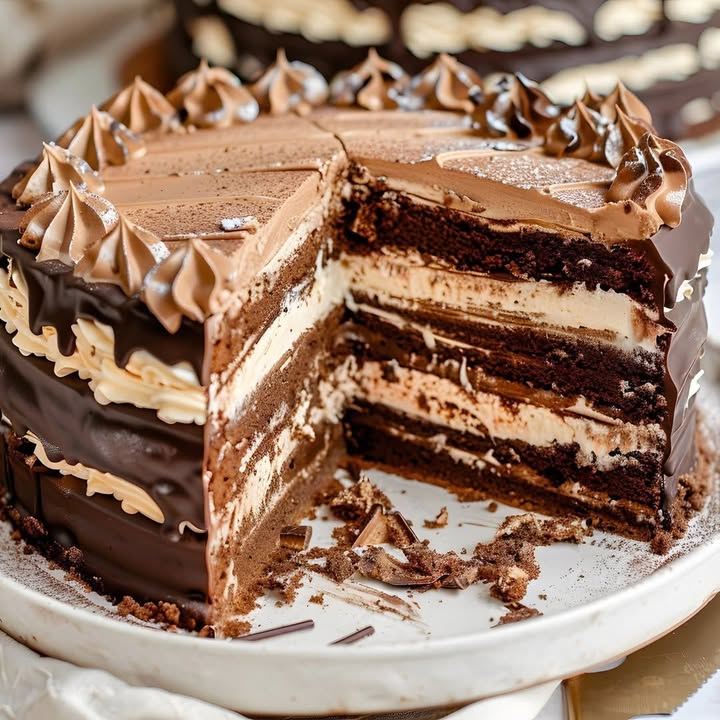
What sets this Magical Chocolate Cake apart is its balance of flavors and textures. The cocoa-infused crusts are soft yet sturdy, the white creamy filling is light and buttery, and the chocolate ganache adds a luxurious finish. Plus, it’s versatile enough to suit any occasion. Whether you’re baking for a crowd or treating yourself, this cake will impress without overwhelming you in the kitchen. And let’s not forget—it smells absolutely divine while baking!
Perfect Occasions to Whip Up This Cake
This cake is perfect for birthdays, anniversaries, or even just because. I once made it for a casual family dinner, and it turned an ordinary weeknight into something special. It’s also a showstopper at holiday gatherings or potlucks. Imagine slicing into those glossy chocolate layers as your friends ooh and aah—it’s a moment worth savoring.
Ingredients
- For the crusts:
- 6 eggs
- 200 g sugar
- 150 g flour
- 50 g cocoa powder
- 1 teaspoon of pastry powder
- 100 ml of milk
- 100 ml of oil
- For the white creamy filling:
- 500 ml of milk
- 100 g sugar
- 2 bags vanilla sugar
- 4 tablespoons cornstarch
- 200 g butter
- For the chocolate ganache cream:
- 200 g of black chocolate (at least 70% cocoa)
- 200 ml sweet sour cream
Substitution Options
Not everyone has the same pantry staples, so here are some swaps:
- Use almond milk instead of regular milk if you’re dairy-free.
- Swap vegetable oil for olive oil or melted butter.
- If you can’t find vanilla sugar, use 1 teaspoon of vanilla extract.
- Replace sour cream with heavy cream for the ganache.
Step 1: Preparing the Crusts
Start by whisking the eggs and sugar until they turn into a frothy, golden foam. This step is key to creating light and airy crusts. Slowly add the milk and oil, mixing gently to keep the air bubbles intact. In another bowl, sift the flour, cocoa powder, and pastry powder. Fold these dry ingredients into the wet mixture, being careful not to overmix. Divide the batter into three equal parts and bake each layer at 180°C for 15-20 minutes. Pro tip: Use parchment paper to line your pans for easy removal.
Step 2: Making the White Creamy Filling
Heat 400 ml of milk with sugar and vanilla sugar in a saucepan. While it warms, dissolve the cornstarch in the remaining 100 ml of milk. Once the milk boils, pour in the cornstarch mixture and stir continuously until thickened. Remove from heat and let it cool completely. Next, whip the butter until fluffy and fold it into the cooled filling. The result should be smooth and creamy, almost like a cloud.
Step 3: Crafting the Chocolate Ganache
Break the chocolate into small pieces and place them in a heatproof bowl. Heat the sour cream until it’s just about to boil, then pour it over the chocolate. Let it sit for a minute before stirring until glossy and smooth. Allow the ganache to cool at room temperature, then chill it briefly in the fridge. Chef’s tip: Add a pinch of salt to enhance the chocolate’s flavor.
Step 4: Assembling the Cake
Place the first crust on your serving plate and spread half of the white creamy filling evenly over it. Add the second crust and repeat with the remaining filling. Top with the third crust and cover the entire cake with the chocolate ganache. Use a spatula to create swirls or smooth it out for a polished look. Chill the cake for a few hours to let the flavors meld.
Timing
- Prep Time: 1 hour
- Cooking Time: 45 minutes
- Resting Time: 4 hours (chilling)
- Total Time: Approximately 6 hours
Chef’s Secret
To make your Magical Chocolate Cake extra moist, brush each crust with a little simple syrup before adding the filling. It’s a trick professional bakers swear by!
Extra Info
Did you know that dark chocolate contains antioxidants? That’s right—this indulgent treat has a healthy side too! Just don’t tell your kids.
Necessary Equipment
You’ll need a mixer, spatula, saucepan, whisk, baking pans, and a cooling rack. A good offset spatula is also handy for spreading the ganache.
Storage
Store your cake in the fridge, covered with plastic wrap or in an airtight container. It stays fresh for up to 5 days. For longer storage, freeze individual slices wrapped in foil. Thaw them overnight in the fridge before serving. Always bring the cake to room temperature before slicing for the best texture and flavor.
Tips and Advice
Don’t rush the chilling process—it’s essential for setting the layers. If your ganache splits, reheat it gently and stir until smooth. And remember, patience is key when assembling the cake.
Presentation Tips
Sprinkle crushed nuts or cocoa powder on top for a fancy touch. Serve slices with a dollop of whipped cream or fresh berries for added flair.
Healthier Alternative Recipes
Looking for lighter options? Try these variations:
- Gluten-Free: Swap regular flour for almond or oat flour.
- Vegan: Replace eggs with flax eggs and use plant-based milk and butter.
- Low-Sugar: Use stevia or monk fruit sweetener instead of sugar.
- Protein-Packed: Add protein powder to the crust batter.
- Fruit-Filled: Layer sliced strawberries between the crusts.
- Nutty Delight: Mix chopped hazelnuts into the ganache.
Common Mistakes to Avoid
Mistake 1: Overmixing the Batter
Overmixing leads to dense crusts. Mix just until the ingredients come together. Pro tip: Use a light hand when folding in the flour.
Mistake 2: Skipping the Cooling Step
If your fillings are warm, they’ll melt the crusts. Always let them cool completely before assembling.
Mistake 3: Rushing the Chilling Process
Chilling ensures the cake holds its shape. Give it at least 4 hours in the fridge.
FAQ
Can I make this cake ahead of time?
Absolutely! You can bake the crusts a day in advance and store them in an airtight container.
How do I prevent the ganache from splitting?
Heat the sour cream gently and stir the ganache constantly. If it splits, reheat it slightly and whisk vigorously.
Can I freeze this cake?
Yes, wrap individual slices in foil and freeze for up to 3 months. Thaw overnight in the fridge.
What if I don’t have pastry powder?
You can substitute it with baking powder for similar results.
Is this cake kid-friendly?
Definitely! Kids love the creamy filling and rich chocolate layers.
Can I use a different type of chocolate?
Feel free to experiment with milk or semi-sweet chocolate, though dark chocolate offers the best flavor.
How do I know when the crusts are done?
Insert a toothpick—if it comes out clean, they’re ready.
Can I double the recipe?
Yes, adjust the quantities accordingly and ensure your oven has enough space for all the layers.
What’s the best way to slice the cake?
Use a sharp knife dipped in hot water for clean cuts.
Can I add alcohol to the ganache?
A splash of liqueur like rum or brandy works beautifully for an adult twist.
Final Thoughts
Baking this Magical Chocolate Cake is more than just following a recipe—it’s about creating memories. From the aroma of cocoa wafting through your kitchen to the smiles around the table, this cake is pure joy. So grab your apron, gather your ingredients, and get ready to sprinkle a little magic into your day.
Equipment
- Mixer
- Whisk
- Spatula
- Baking pans
- Cooling rack
- Offset spatula (optional)
Notes
Nutrition

Hi, I’m Olivia Parker, the founder of BakingSecret.com and a lifelong lover of all things sweet and homemade. I grew up in a small town in Oregon, where the smell of fresh cookies in my family’s kitchen sparked my passion for baking. Over the years, I turned that passion into a mission: to help home bakers feel confident, inspired, and creative.
After studying food science and working in several artisan bakeries across the U.S., I decided to create a space where everyone from beginners to seasoned bakers can find reliable recipes, expert tips, and a warm, welcoming community. BakingSecret.com is my way of sharing the magic of baking with the world. When I’m not testing new recipes, you’ll find me exploring farmers’ markets, collecting vintage cookbooks, or perfecting my sourdough technique.