
Why These Mini Cheesecakes Will Make Your Day
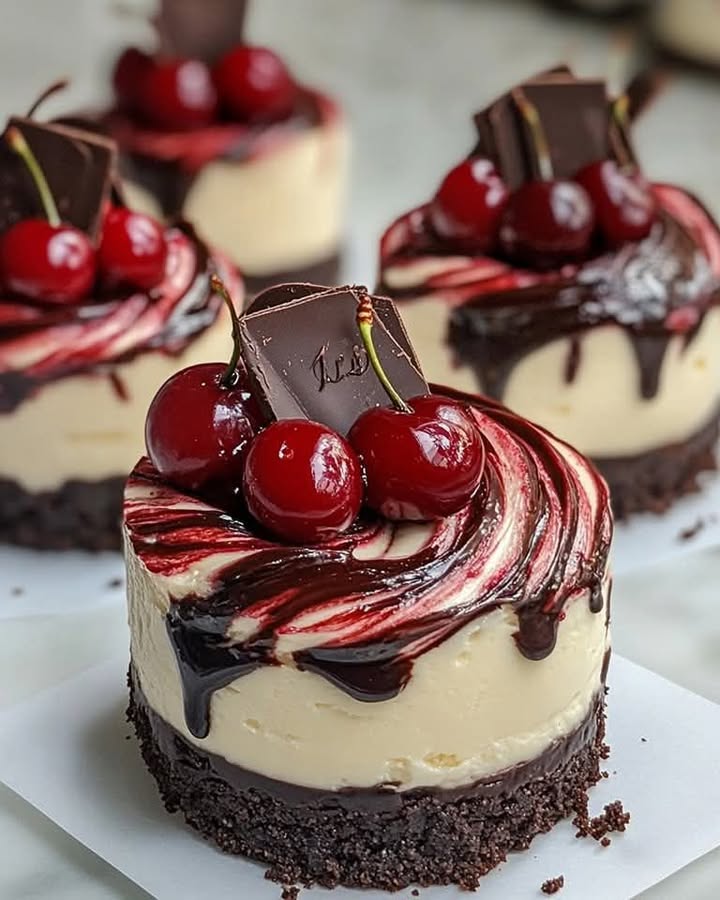
Let me tell you a little story. Last weekend, I decided to whip up something sweet for my book club. I wanted something small, easy to share, and—most importantly—delicious. Enter these Cherry Chocolate Cheesecakes. They’re like a bite-sized version of the classic Black Forest cake but with a creamy cheesecake twist. The first bite had everyone raving! The rich chocolate crust, the smooth filling, and that tangy cherry topping? Pure magic. If you’ve never made mini cheesecakes before, don’t worry—I’ll walk you through every step.
A Little History Behind the Flavors
The Black Forest cake hails from Germany, where it’s known as Schwarzwälder Kirschtorte. It traditionally combines chocolate, whipped cream, and cherries, often with a splash of kirsch (cherry brandy). While I skipped the alcohol for this family-friendly version, I kept the essence of the flavors alive. These mini cheesecakes are my modern take on the classic dessert. They’re perfect for anyone who loves the combo of chocolate and cherries but doesn’t want to bake a whole cake.
Why You’ll Love This Recipe
What’s not to love? These Cherry Chocolate Cheesecakes are rich, creamy, and bursting with flavor. Plus, they’re super easy to make—even if you’re new to baking. The best part? They’re portion-controlled, so you don’t have to feel guilty about indulging. Whether you’re hosting a party or just craving something sweet, this recipe has got you covered.
Perfect Occasions to Whip These Up
These mini cheesecakes are perfect for any occasion. Need a dessert for a dinner party? Done. Want to impress your coworkers with something homemade? Check. Hosting a holiday gathering? These will be the star of the table. They’re also great for casual get-togethers or even as a treat for yourself after a long day. Trust me, no matter the event, these cheesecakes will steal the show.
Ingredients You’ll Need
- For the Crust:
- 1 cup chocolate cookie crumbs
- 3 tablespoons unsalted butter, melted
- For the Cheesecake Filling:
- 8 oz cream cheese, softened
- 1/4 cup granulated sugar
- 1 large egg
- 1/4 cup sour cream
- 1/4 teaspoon vanilla extract
- For the Cherry Topping:
- 1 cup pitted cherries (fresh or canned)
- 1 tablespoon granulated sugar
- 1/2 tablespoon cornstarch
- 1 tablespoon water
- For the Chocolate Ganache:
- 1/4 cup heavy cream
- 1/4 cup dark chocolate chips
- For Garnishing:
- Whipped cream
- Chocolate squares or shavings
- Fresh cherries
Substitution Options
If you’re missing an ingredient, don’t panic! Here are some swaps:
- Use graham cracker crumbs instead of chocolate cookie crumbs for a lighter crust.
- Swap Greek yogurt for sour cream if you prefer a tangier filling.
- If fresh cherries aren’t in season, canned or frozen cherries work just fine.
- Milk chocolate chips can replace dark chocolate if you’re not a fan of bitter flavors.
Step-by-Step Preparation
Step 1: Preheat Oven
Start by preheating your oven to 325°F (163°C). Grease a silicone muffin tray or line a regular muffin tin with paper liners. This step is crucial because it ensures your cheesecakes won’t stick. Pro tip: Silicone trays are a lifesaver for easy removal!
Step 2: Prepare the Crust
In a bowl, mix chocolate cookie crumbs and melted butter until the mixture resembles wet sand. Press about 1 tablespoon of the mixture into the bottom of each muffin cup. The crust should be firm but not too thick. Set aside while you prepare the filling.
Step 3: Make the Cherry Topping
Combine cherries, sugar, cornstarch, and water in a small saucepan. Cook over medium heat, stirring constantly until the mixture thickens. It should look glossy and jam-like. Remove from heat and let it cool. The aroma of simmering cherries is absolutely heavenly!
Step 4: Prepare the Cheesecake Filling
Beat cream cheese and sugar in a mixing bowl until smooth and creamy. Add the egg, sour cream, and vanilla extract, mixing until fully combined. Be careful not to overmix—the filling should be silky, not airy. Chef’s tip: Let your cream cheese come to room temperature for easier blending.
Step 5: Swirl the Cherry Topping
Spoon the cheesecake filling evenly over the crusts. Drop small spoonfuls of the cooled cherry topping onto each cheesecake. Use a toothpick to swirl the cherry topping into the filling for a marbled effect. This step is where the magic happens—it’s like painting with food!
Step 6: Bake
Bake the cheesecakes for 15-18 minutes, or until the centers are just set. They’ll jiggle slightly when you shake the pan—that’s okay! Let them cool to room temperature before refrigerating for at least 2 hours. Patience is key here.
Step 7: Prepare the Ganache
Heat heavy cream in a small saucepan until it just begins to simmer. Pour the hot cream over the chocolate chips in a heatproof bowl. Stir until smooth and shiny. Allow the ganache to cool slightly before using. It should be pourable but not too runny.
Step 8: Assemble the Cheesecakes
Once chilled, pour a thin layer of ganache over each cheesecake. Top with a dollop of whipped cream, a decorative chocolate square or shavings, and a fresh cherry. Voilà—you’ve just created edible works of art!
Timing Breakdown
- Prep Time: 20 minutes
- Bake Time: 18 minutes
- Chill Time: 2 hours
- Total Time: 2 hours and 38 minutes
Chef’s Secret
Here’s a little secret: Always use room-temperature ingredients for the filling. Cold cream cheese or eggs can create lumps, and we want our cheesecake filling to be velvety smooth. Trust me, this one trick makes all the difference.
Fun Fact About Cherries
Did you know that cherries are part of the rose family? Yep, those tiny fruits are cousins to apples, pears, and even almonds. No wonder they smell so sweet when you cook them down!
Necessary Equipment
To make these Cherry Chocolate Cheesecakes, you’ll need:
- A muffin tin (silicone or regular)
- Paper liners (if not using silicone)
- A mixing bowl
- An electric mixer or whisk
- A small saucepan
- A toothpick or skewer for swirling
Storage Tips
Store these cheesecakes in an airtight container in the fridge. They’ll stay fresh for up to 3 days. If you need to store them longer, pop them in the freezer. Just thaw them in the fridge overnight before serving.
For freezing, wrap each cheesecake individually in plastic wrap to prevent freezer burn. When you’re ready to enjoy them, let them sit at room temperature for about 10 minutes to soften slightly.
If you’re taking them to a party, keep them chilled in a cooler until it’s time to serve. Nobody likes warm cheesecake!
Tips and Advice
- Don’t skip the chilling step—it firms up the cheesecakes and enhances the flavors.
- Use a light hand when swirling the cherry topping. Overmixing can muddy the colors.
- If you’re short on time, use store-bought cherry pie filling instead of making your own.
Presentation Ideas
Serve these Cherry Chocolate Cheesecakes on a tiered dessert stand for a fancy touch. Add a sprig of mint or a dusting of cocoa powder for extra flair. For holidays, use themed cupcake liners to match the occasion.
Healthier Alternatives
Want to lighten things up? Try these variations:
- Low-Sugar Version: Use a sugar substitute in the filling and topping.
- Vegan Option: Swap cream cheese for cashew-based cream cheese and use coconut cream instead of heavy cream.
- Gluten-Free: Use gluten-free cookies for the crust.
- Protein-Packed: Add a scoop of protein powder to the filling.
- Dairy-Free: Use almond milk yogurt instead of sour cream.
- Fruit Swap: Replace cherries with raspberries or strawberries for a different flavor profile.
Common Mistakes to Avoid
Mistake 1: Overmixing the Filling
Overmixing can incorporate too much air, causing cracks in your cheesecakes. To avoid this, mix just until the ingredients are combined. Pro tip: Scrape down the sides of the bowl to ensure everything is evenly mixed.
Mistake 2: Skipping the Chill Time
Chilling is essential for setting the cheesecakes. Rushing this step can result in a soft, messy texture. Be patient—it’s worth the wait!
Mistake 3: Using Cold Ingredients
Cold cream cheese or eggs can lead to lumpy filling. Always bring your ingredients to room temperature before starting.
Mistake 4: Overbaking
Overbaked cheesecakes can turn dry and crumbly. Bake just until the centers are set but still slightly jiggly. They’ll continue to firm up as they cool.
FAQ
Can I use a different fruit?
Absolutely! Raspberries, blueberries, or strawberries would work beautifully. Just adjust the sugar based on the fruit’s natural sweetness.
How do I prevent cracks?
Cracks often happen due to overmixing or overbaking. Mix gently and bake only until the centers are set. Cooling slowly also helps.
Can I make these ahead?
Yes! These cheesecakes can be made up to 2 days in advance. Store them in the fridge and garnish right before serving.
What if I don’t have a silicone muffin tray?
No problem! Use a regular muffin tin with paper liners. Just grease the liners lightly for easy removal.
Can I freeze these?
Definitely! Wrap them individually and freeze for up to 1 month. Thaw in the fridge overnight before serving.
Do I need an electric mixer?
Not necessarily. A good old-fashioned whisk will do, but an electric mixer makes the process faster and easier.
Can I use milk chocolate instead of dark?
Of course! Milk chocolate will give a sweeter, milder flavor. It’s all about personal preference.
How do I know when they’re done?
The edges should look set, and the centers should jiggle slightly. They’ll firm up as they cool.
What size muffin tin should I use?
A standard 12-cup muffin tin works perfectly. Each cheesecake will be the ideal bite-sized portion.
Can I double the recipe?
Yes! Just make sure you have enough muffin tins or bake in batches. Doubling is great for larger gatherings.
Final Thoughts
These Cherry Chocolate Cheesecakes are proof that big flavors can come in small packages. Whether you’re baking for a crowd or treating yourself, this recipe is sure to impress. So grab your apron, gather your ingredients, and get ready to create something truly special. Happy baking!
Equipment
- Mixing bowl
- Electric mixer or whisk
- Toothpick or skewer
- Muffin tin (silicone or regular)
- Small saucepan
Ingredients
- 1 cup chocolate cookie crumbs
- 3 tablespoons unsalted butter, melted
- 8 oz cream cheese, softened
- 1/4 cup granulated sugar
- 1 large egg
- 1/4 cup sour cream
- 1/4 teaspoon vanilla extract
- 1 cup pitted cherries (fresh or canned)
- 1 tablespoon granulated sugar for cherries
- 1/2 tablespoon cornstarch
- 1 tablespoon water
- 1/4 cup heavy cream
- 1/4 cup dark chocolate chips
Instructions
- Preheat your oven to 325°F (163°C) and prepare a muffin tin.
- Mix chocolate cookie crumbs and melted butter until it resembles wet sand, then press into muffin cups.
- Combine cherries, sugar, cornstarch, and water in a saucepan and cook until thickened. Let cool.
- Beat cream cheese and sugar until smooth, then add egg, sour cream, and vanilla until fully combined.
- Spoon filling into crusts, add cooled cherry topping, and swirl together.
- Bake for 15-18 minutes until centers are set; let cool and refrigerate for at least 2 hours.
- Prepare ganache by heating cream and pouring over chocolate chips, stirring until smooth.
- Once chilled, pour ganache on cheesecakes and top with whipped cream, chocolate, and cherries.
Notes
Nutrition

Hi, I’m Olivia Parker, the founder of BakingSecret.com and a lifelong lover of all things sweet and homemade. I grew up in a small town in Oregon, where the smell of fresh cookies in my family’s kitchen sparked my passion for baking. Over the years, I turned that passion into a mission: to help home bakers feel confident, inspired, and creative.
After studying food science and working in several artisan bakeries across the U.S., I decided to create a space where everyone from beginners to seasoned bakers can find reliable recipes, expert tips, and a warm, welcoming community. BakingSecret.com is my way of sharing the magic of baking with the world. When I’m not testing new recipes, you’ll find me exploring farmers’ markets, collecting vintage cookbooks, or perfecting my sourdough technique.