
Why This Banana Walnut Bliss Cake is a Must-Try
There’s something magical about the smell of bananas and walnuts mingling in the oven. It reminds me of cozy Sunday afternoons spent baking with my grandma. She always said, “A good cake doesn’t need to be fancy, just full of love.” That’s exactly what this Banana Walnut Bliss Cake is—simple, comforting, and absolutely delightful. Whether you’re a seasoned baker or just starting out, this recipe will win your heart (and stomach). Trust me, it’s become a family favorite!
A Little History Behind the Bliss
The humble banana cake has been around for decades, born out of necessity during times when overripe bananas needed saving from the trash bin. Over time, creative bakers added nuts like walnuts to give it extra crunch and flavor. My version of this classic is a modern twist with Greek yogurt instead of sour cream, making it lighter yet still rich in taste. I first made this cake for a friend’s birthday, and let’s just say, it was gone before the candles had a chance to burn out.
Why You’ll Love This Recipe
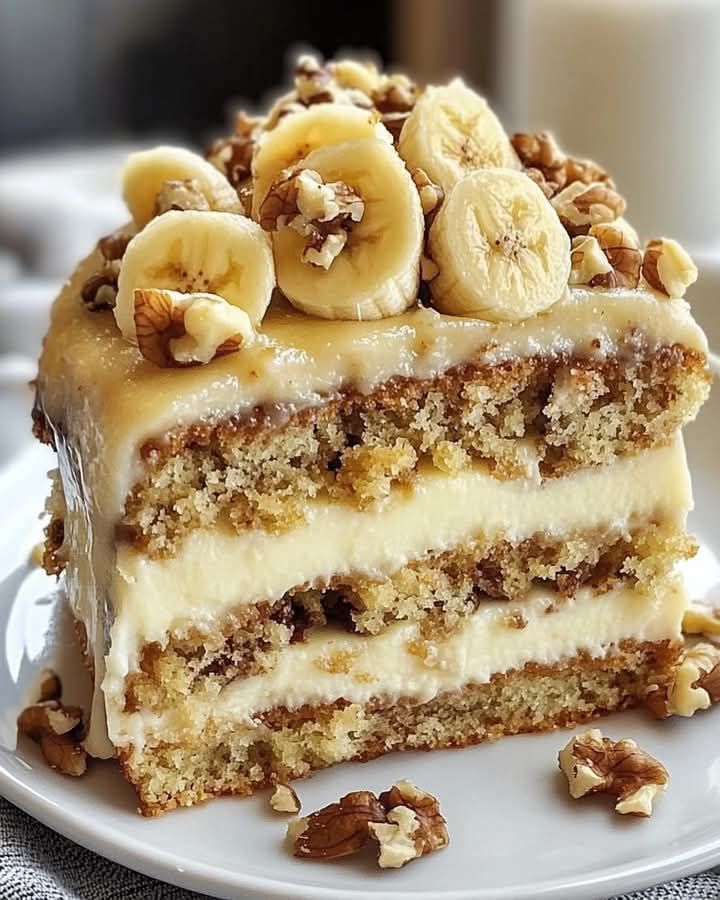
This Banana Walnut Bliss Cake is everything you want in a dessert: moist, flavorful, and easy to whip up. The mashed bananas keep the cake tender, while the walnuts add a satisfying crunch. Plus, it’s versatile! Serve it plain, dusted with powdered sugar, or topped with a dollop of whipped cream. And did I mention? It only takes 15 minutes to prep. Perfect for those days when you need a quick treat but don’t want to spend hours in the kitchen.
Perfect Occasions for This Cake
Need a dessert for brunch? Check. Want something sweet for an office potluck? Done. Hosting a casual dinner party? This cake fits right in. It’s also great as a snack with your afternoon coffee or tea. Honestly, there’s no bad time to enjoy a slice of Banana Walnut Bliss Cake. Its warm, inviting flavors make any occasion feel special.
What You’ll Need
- 1 cup chopped walnuts
- 2 ripe bananas, mashed
- 1 teaspoon vanilla extract
- 1 ½ cups all-purpose flour
- 1 cup granulated sugar
- 1 teaspoon baking soda
- ½ teaspoon salt
- ½ cup unsalted butter, softened
- 2 large eggs
- ½ cup sour cream or Greek yogurt
Substitution Options
If you’re looking to switch things up, here are some ideas:
- Gluten-free? Swap the all-purpose flour for a gluten-free blend.
- Dairy-free? Use coconut oil instead of butter and almond milk yogurt instead of sour cream.
- No walnuts? Pecans work beautifully too.
Step 1: Preheat and Prep
Start by preheating your oven to 350°F (175°C). Grease a 9-inch round cake pan—I prefer using nonstick spray with flour for extra insurance. This step ensures your cake slides out effortlessly later. While the oven heats up, gather all your ingredients. Pro tip: Measure everything beforehand so you’re not scrambling mid-recipe.
Step 2: Cream Butter and Sugar
In a mixing bowl, cream together the softened butter and sugar until light and fluffy. Think of it as giving them a little spa treatment—they should look pale and airy. This process traps air into the batter, which helps the cake rise beautifully. Don’t rush this step; patience pays off!
Step 3: Add Eggs and Vanilla
Crack in the eggs one at a time, mixing well after each addition. Stir in the vanilla extract—it’s the secret ingredient that ties all the flavors together. At this point, your kitchen will start smelling amazing, like a bakery on a sunny morning.
Step 4: Combine Bananas and Yogurt
In another bowl, mash the bananas and mix them with the Greek yogurt and baking soda. The mixture might foam slightly—that’s normal and means the baking soda is doing its job. Fold this banana goodness into the butter mixture gently to keep the texture light.
Step 5: Incorporate Dry Ingredients
Whisk the flour and salt in a separate bowl, then gradually add it to the wet ingredients. Mix until just combined—overmixing can make the cake dense. Chef’s tip: Sift the flour for an even lighter crumb.
Step 6: Fold in Walnuts
Gently fold in the chopped walnuts. They’ll add a lovely crunch to every bite. Imagine how satisfying it’ll feel to sink your fork into this soft, nutty masterpiece.
Step 7: Bake and Cool
Pour the batter into the prepared pan and smooth the top. Pop it into the oven for 30-35 minutes. A toothpick inserted into the center should come out clean. Let the cake cool in the pan for 10 minutes before transferring it to a wire rack. Cooling prevents sogginess—trust me, it’s worth the wait.
Timing Breakdown
Preparation Time: 15 minutes
Cooking Time: 35 minutes
Total Time: About 50 minutes
Chef’s Secret
For an extra layer of flavor, toast the walnuts before folding them in. Simply spread them on a baking sheet and bake at 350°F for 5-7 minutes. Toasting enhances their nuttiness and adds depth to the cake.
An Interesting Tidbit
Did you know bananas are technically berries? Yep, they belong to the same botanical family as blueberries and cranberries. Nature sure knows how to surprise us!
Necessary Equipment
- Mixing bowls
- Electric mixer or whisk
- Measuring cups and spoons
- 9-inch round cake pan
- Wire cooling rack
Storage Tips
To store this cake, wrap it tightly in plastic wrap or place it in an airtight container. Keep it at room temperature for up to two days. If you live in a warm climate, refrigerate it to extend its shelf life. For longer storage, freeze slices individually wrapped in parchment paper. Thaw overnight at room temperature when ready to enjoy.
Freezing is a lifesaver if you’re prone to snacking. Having pre-portioned slices means you won’t devour the whole cake in one sitting (though I wouldn’t blame you if you did).
When reheating, pop a slice in the microwave for 10-15 seconds to bring back that fresh-from-the-oven warmth. Pair it with a hot drink for ultimate comfort.
Tips and Advice
- Use very ripe bananas—their sweetness intensifies as they ripen.
- Don’t skip greasing the pan properly; no one likes stuck-on cake.
- Let the cake cool completely before slicing for clean edges.
Presentation Ideas
- Dust with powdered sugar for a rustic look.
- Top with a drizzle of caramel sauce for indulgence.
- Serve with a scoop of vanilla ice cream for a dreamy combo.
Healthier Alternatives
Want to lighten up this recipe? Here are six variations:
- Whole Wheat Version: Replace half the all-purpose flour with whole wheat flour for added fiber.
- Low-Sugar Option: Cut the sugar by a quarter and use mashed dates for natural sweetness.
- Vegan Twist: Substitute eggs with flax eggs and use plant-based butter and yogurt.
- Oil-Free: Swap butter with unsweetened applesauce.
- Protein-Packed: Add a scoop of vanilla protein powder to the batter.
- Spiced Delight: Mix in cinnamon and nutmeg for a warming flavor boost.
Mistake 1: Using Underripe Bananas
Underripe bananas lack the sweetness and moisture that make this cake shine. Always choose bananas with brown spots—they’re perfect for baking. Pro tip: Freeze overripe bananas for future use; they thaw quickly and mash easily.
Mistake 2: Overmixing the Batter
Overmixing leads to a tough, dense cake. Stop mixing as soon as the ingredients are incorporated. Remember, lumps are okay—they’ll disappear during baking.
Mistake 3: Skipping the Cooling Step
Rushing to remove the cake from the pan can cause it to break apart. Patience is key here. Let it rest for at least 10 minutes before attempting to transfer it.
Frequently Asked Questions
Can I use frozen bananas?
Absolutely! Just thaw them completely, drain excess liquid, and mash as usual. Frozen bananas often yield an even moister cake.
How do I know when the cake is done?
Insert a toothpick into the center. If it comes out clean or with a few crumbs, it’s ready. Avoid opening the oven door too often—it lowers the temperature and affects baking.
Can I double the recipe?
Yes, simply double all the ingredients and divide the batter between two pans. Adjust the baking time slightly if needed.
What if I don’t have Greek yogurt?
Sour cream works perfectly as a substitute. Both provide tanginess and moisture.
Is this cake kid-friendly?
Definitely! Kids love the combination of bananas and walnuts. You can omit the nuts if allergies are a concern.
Can I make cupcakes instead?
Of course! Fill cupcake liners two-thirds full and bake for 18-20 minutes. Perfect for parties or lunchbox treats.
How long does the cake last?
Stored properly, it stays fresh for up to five days. But let’s be honest—it rarely lasts that long!
Can I freeze the entire cake?
Yes, wrap it tightly in plastic wrap and foil. Freeze for up to three months. Thaw overnight in the fridge before serving.
Why is my cake dry?
Dryness usually happens from overbaking or incorrect measurements. Stick to the recommended times and quantities for best results.
Can I add chocolate chips?
You bet! Chocolate chips pair wonderfully with bananas and walnuts. Fold in ½ cup during Step 6.
Final Thoughts
This Banana Walnut Bliss Cake is more than just a dessert—it’s a hug in cake form. With its simple ingredients and foolproof steps, it’s a recipe anyone can master. So go ahead, grab those ripe bananas, and get baking. Your family and friends will thank you!
Equipment
- Mixing bowls
- Electric mixer or whisk
- Measuring cups and spoons
- 9-inch round cake pan
- Wire cooling rack
Ingredients
- 1 cup chopped walnuts
- 2 ripe bananas, mashed
- 1 teaspoon vanilla extract
- 1.5 cups all-purpose flour
- 1 cup granulated sugar
- 1 teaspoon baking soda
- 0.5 teaspoon salt
- 0.5 cup unsalted butter, softened
- 2 large eggs
- 0.5 cup sour cream or Greek yogurt
Instructions
- Preheat your oven to 350°F (175°C) and grease a 9-inch round cake pan.
- In a mixing bowl, cream together the softened butter and sugar until light and fluffy.
- Crack in the eggs one at a time, mixing well after each addition. Stir in the vanilla extract.
- In another bowl, mash the bananas and mix them with the Greek yogurt and baking soda. Fold this into the butter mixture gently.
- Whisk flour and salt in a separate bowl, then gradually add it to the wet ingredients until just combined.
- Gently fold in the chopped walnuts.
- Pour the batter into the prepared pan and smooth the top. Bake for 30-35 minutes, until a toothpick inserted comes out clean. Let it cool in the pan for 10 minutes before transferring to a wire rack.
Notes
Nutrition

Hi, I’m Olivia Parker, the founder of BakingSecret.com and a lifelong lover of all things sweet and homemade. I grew up in a small town in Oregon, where the smell of fresh cookies in my family’s kitchen sparked my passion for baking. Over the years, I turned that passion into a mission: to help home bakers feel confident, inspired, and creative.
After studying food science and working in several artisan bakeries across the U.S., I decided to create a space where everyone from beginners to seasoned bakers can find reliable recipes, expert tips, and a warm, welcoming community. BakingSecret.com is my way of sharing the magic of baking with the world. When I’m not testing new recipes, you’ll find me exploring farmers’ markets, collecting vintage cookbooks, or perfecting my sourdough technique.