
The Ultimate Indulgence: A Decadent Chocolate Mousse Cake
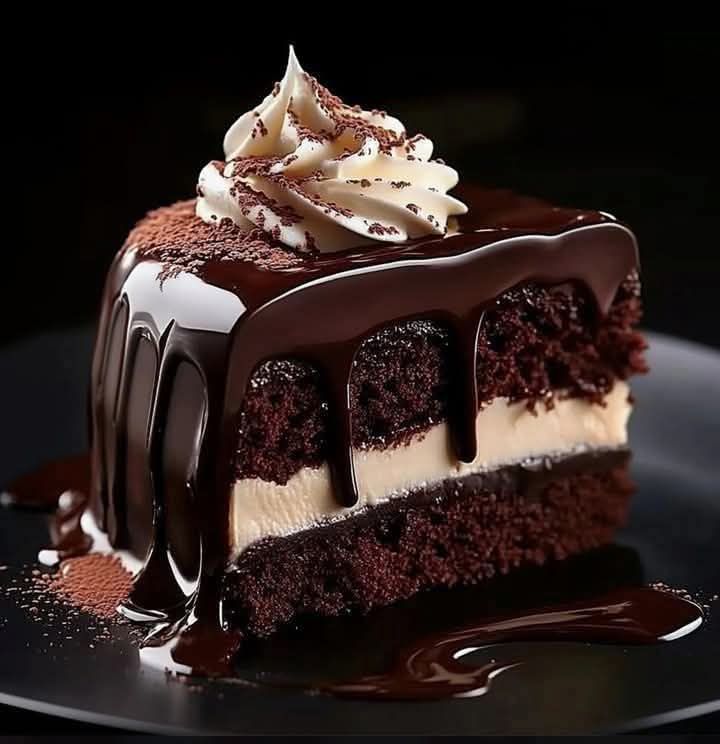
Imagine a dessert that combines the rich, velvety texture of chocolate mousse with the comforting, familiar taste of a classic chocolate cake. This Chocolate Mousse Cake is a dream come true for any chocoholic and a showstopper at any gathering. I first tried this recipe for my daughter’s birthday, and it was an instant hit. The layers of dark, milk, and white chocolate mousse over a moist chocolate cake base create a symphony of flavors and textures that are simply irresistible.
A Brief History and Background of the Chocolate Mousse Cake
Chocolate mousse and chocolate cake have been around for centuries, each with its own rich history. The combination of these two beloved desserts, however, is a more recent innovation. Traditionally, chocolate mousse was a French delicacy, while chocolate cake has roots in both European and American baking traditions. This Chocolate Mousse Cake brings together the best of both worlds, creating a modern twist on classic favorites. It’s a perfect blend of old and new, making it a timeless treat.
Why You’ll Love This Recipe
This Chocolate Mousse Cake is not just about the indulgence; it’s also about the simplicity and elegance. The layers of mousse add a luxurious touch, but the preparation is surprisingly straightforward. The rich, deep flavors of the dark and milk chocolate mousse complement the light, creamy white chocolate mousse, creating a balanced and delectable dessert. Plus, the moist chocolate cake base adds a comforting, familiar element that ties it all together. It’s a treat that’s as beautiful to look at as it is delicious to eat.
Perfect Occasions to Prepare This Recipe
This Chocolate Mousse Cake is perfect for special occasions like birthdays, anniversaries, or holiday gatherings. It’s a dessert that always impresses, whether you’re serving it at a formal dinner party or a casual family get-together. The layered mousse and cake make it a visually stunning centerpiece, and the rich, decadent flavors ensure that everyone will be asking for seconds.
Ingredients
- For the Cake:
- 1 cup all-purpose flour
- 1 cup granulated sugar
- 2 tsp baking powder
- 1/2 tsp salt
- 1/2 cup unsweetened cocoa powder
- 1/2 cup whole milk, room temperature
- 2 large eggs
- 1 tsp vanilla extract
- For the Mousse:
- 8 oz dark chocolate (70% cocoa), melted
- 8 oz milk chocolate, melted
- 8 oz white chocolate, melted
- 1 cup heavy cream
- 2 tbsp granulated sugar
- 1 tsp vanilla extract
- Optional Glaze for Topping:
- 1 cup semisweet chocolate chips
- 1 tbsp unsalted butter
Substitution Options
- If you don’t have dark chocolate, you can use bittersweet chocolate instead.
- For a dairy-free option, substitute the whole milk with almond milk and use coconut cream for the mousse.
- If you prefer a less sweet version, reduce the sugar in the mousse by half.
Preparation Section
Step 1: Make the Cake
Preheat your oven to 350°F (180°C). Line and grease a 9-inch round cake pan. In a bowl, whisk together the flour, sugar, baking powder, salt, and cocoa powder. Add the milk, eggs, and vanilla extract. Mix until the batter is smooth and free of lumps. Pour the batter into the prepared pan and bake for 25-30 minutes, or until a toothpick inserted in the center comes out clean. Let the cake cool completely before moving on to the next step.
Step 2: Prepare the Mousse Layers
Melt each type of chocolate—dark, milk, and white—separately and let them cool slightly. Whip the heavy cream with sugar and vanilla extract until stiff peaks form. Divide the whipped cream into three equal portions. Gently fold one portion of whipped cream into the dark chocolate, another into the milk chocolate, and the last into the white chocolate. Be sure to fold gently to maintain the airy texture of the mousse.
Step 3: Assemble the Cake
Place the cooled cake layer on a serving plate or in a springform pan. Spread the dark chocolate mousse evenly over the cake, followed by the milk chocolate mousse, and finally the white chocolate mousse. Smooth the top of the mousse and refrigerate the cake for 24 hours, or until it is set and firm.
Step 4: Optional Glaze
Melt the semisweet chocolate chips and butter in a small saucepan until smooth. Pour the glaze over the top of the set mousse cake and let it chill until firm. This adds a glossy, professional finish to your cake.
Step 5: Serve
Garnish the cake with chocolate shavings, chopped nuts, or fresh berries for a touch of color and texture. Slice the cake and serve it chilled. The combination of the rich mousse and the moist cake is a delightful treat for the senses.
Timing
- Prep Time: 30 minutes
- Cooking Time: 25-30 minutes
- Resting Time: 24 hours
- Total Time: 24 hours 55 minutes
Chef’s Secret
To enhance the flavor and texture of the mousse, add a pinch of sea salt to each chocolate mixture before folding in the whipped cream. This simple trick brings out the richness of the chocolate and balances the sweetness.
Extra Info
Did you know that the quality of the chocolate you use can significantly impact the taste of your mousse? Opt for high-quality, premium chocolate for the best results. The higher the cocoa content, the richer and more intense the flavor will be.
Necessary Equipment
- 9-inch round cake pan
- Mixing bowls
- Whisk
- Electric mixer or stand mixer
- Spatula
- Springform pan (optional)
- Saucepan for melting chocolate
Storage
To store the Chocolate Mousse Cake, keep it in the refrigerator. Cover the cake with plastic wrap or place it in an airtight container to prevent it from absorbing any odors. The cake will stay fresh for up to 5 days. If you need to store it longer, you can freeze the cake for up to 2 months. Just make sure to wrap it well in plastic wrap and then in aluminum foil before placing it in the freezer. When you’re ready to serve, thaw the cake in the refrigerator overnight.
Tips and Advice
- Make sure all your ingredients are at room temperature before starting. This ensures a smoother and more even batter.
- When whipping the cream, be careful not to overwhip, as this can result in a grainy texture. Stop when you see stiff peaks forming.
- For a cleaner presentation, use a hot knife to slice the cake. Dip the knife in hot water, wipe it dry, and then make a clean cut through the mousse and cake.
Presentation Tips
- Use a piping bag to create decorative swirls of whipped cream around the edges of the cake.
- Add a sprinkle of cocoa powder or powdered sugar on top for a professional touch.
- Arrange fresh berries or edible flowers on the cake for a pop of color and freshness.
Healthier Alternative Recipes
- Dark Chocolate Avocado Mousse Cake: Replace the heavy cream with pureed avocado for a healthier, plant-based option. The avocado adds a creamy texture and is packed with healthy fats.
- Low-Sugar Chocolate Mousse Cake: Use a sugar substitute like stevia or erythritol to reduce the overall sugar content. This is a great option for those watching their sugar intake.
- Vegan Chocolate Mousse Cake: Substitute the eggs and milk with plant-based alternatives like flax eggs and almond milk. Use vegan chocolate for the mousse layers.
- Gluten-Free Chocolate Mousse Cake: Replace the all-purpose flour with a gluten-free flour blend. This makes the cake accessible to those with gluten sensitivities.
- Keto Chocolate Mousse Cake: Use almond flour and a sugar substitute for the cake base. For the mousse, use unsweetened cocoa powder and a low-carb sweetener like xylitol.
- Coconut Cream Chocolate Mousse Cake: Replace the heavy cream with coconut cream for a dairy-free and naturally sweet option. The coconut adds a subtle, tropical flavor.
Common Mistakes to Avoid
Mistake 1: Overmixing the Cake Batter
Overmixing the cake batter can lead to a tough, dense cake. To avoid this, mix the ingredients just until they are combined. A few lumps are okay; they will smooth out during baking. Pro tip: Use a spatula to fold in the wet and dry ingredients gently.
Mistake 2: Not Chilling the Mousse Long Enough
If the mousse is not chilled long enough, it won’t set properly, and the layers will be runny. Make sure to chill the cake for at least 24 hours. This allows the mousse to set and the flavors to meld together. Pro tip: Chill the cake in the coldest part of your refrigerator for the best results.
Mistake 3: Overmelting the Chocolate
Overmelting the chocolate can cause it to seize and become grainy. Melt the chocolate slowly and gently, either in a double boiler or in short bursts in the microwave. Stir frequently to ensure even melting. Pro tip: Add a small amount of oil or butter to the chocolate to help it melt smoothly.
Mistake 4: Not Using Room Temperature Ingredients
Using cold ingredients can affect the texture and consistency of the cake and mousse. Make sure all your ingredients, especially the eggs and milk, are at room temperature before starting. This helps the ingredients blend more smoothly and evenly. Pro tip: Take the ingredients out of the fridge at least 30 minutes before you start preparing the recipe.
Mistake 5: Not Lining the Cake Pan
Failing to line the cake pan with parchment paper can make it difficult to remove the cake without breaking it. Always line the bottom of the pan with parchment paper and grease the sides. This ensures the cake comes out cleanly and easily. Pro tip: Use a bit of cooking spray to help the parchment paper stick to the pan.
FAQ
Can I use different types of chocolate for the mousse?
Yes, you can use different types of chocolate for the mousse. Feel free to experiment with bittersweet, semisweet, or even flavored chocolates. Just make sure they are of good quality for the best results.
How do I know if the cake is done?
The cake is done when a toothpick inserted into the center comes out clean. If the toothpick has a few crumbs, that’s okay, but it should not be wet or have raw batter on it.
Can I make the mousse ahead of time?
Yes, you can make the mousse ahead of time and store it in the refrigerator. Just make sure to fold it gently into the whipped cream right before assembling the cake to maintain its airy texture.
What if I don’t have a springform pan?
If you don’t have a springform pan, you can use a regular 9-inch round cake pan. Just make sure to line the bottom with parchment paper and grease the sides for easy removal.
Can I use a different type of milk?
Yes, you can use different types of milk. Almond milk, soy milk, or oat milk are good alternatives if you need a dairy-free option. Just make sure the milk is at room temperature before adding it to the cake batter.
How do I store leftover cake?
Store leftover cake in the refrigerator, covered with plastic wrap or in an airtight container. It will stay fresh for up to 5 days. For longer storage, you can freeze the cake for up to 2 months.
Can I add other flavors to the mousse?
Yes, you can add other flavors to the mousse. Try adding a teaspoon of espresso powder for a mocha flavor, or a dash of cinnamon for a hint of spice. Just be careful not to overpower the chocolate flavor.
What if the mousse doesn’t set?
If the mousse doesn’t set, it may be because it wasn’t chilled long enough or the chocolate was too warm when added to the whipped cream. Make sure to chill the cake for at least 24 hours and let the melted chocolate cool slightly before folding it into the whipped cream.
Can I use a different type of flour?
You can use a different type of flour, such as a gluten-free flour blend, if you need a gluten-free option. Just make sure to follow the instructions on the package for the best results.
How do I get a clean cut when slicing the cake?
To get a clean cut when slicing the cake, use a hot knife. Dip the knife in hot water, wipe it dry, and then make a clean, smooth cut through the mousse and cake. This helps prevent the mousse from sticking to the knife.
Conclusion
This Chocolate Mousse Cake is a true indulgence that combines the best of both worlds: the rich, velvety texture of chocolate mousse and the comforting, familiar taste of a classic chocolate cake. Whether you’re celebrating a special occasion or just treating yourself, this dessert is sure to be a hit. With its simple yet elegant preparation, it’s a recipe that you’ll return to again and again. So, gather your ingredients, preheat your oven, and get ready to create a dessert that’s as luxurious as it is delicious. Happy baking!
Equipment
- Grand bol
- Fouet
- Spatule
- Moule rond de 9 pouces
- Papier sulfurisé
Ingredients
- 1 tasse farine tout usage
- 1 tasse sucre granulé
- 2 cuil. à café poudre à lever
- 1/2 cuil. à café sel
- 1/2 tasse cacao en poudre non sucré
- 1/2 tasse lait entier, à température ambiante
- 1 cuil. à café extrait de vanille
- 8 oz chocolat noir (70% de cacao), fondu
- 8 oz chocolat au lait, fondu
- 8 oz chocolat blanc, fondu
- 1 tasse crème épaisse
- 2 cuil. à soupe sucre granulé
- 1 cuil. à café extrait de vanille
- 1 tasse pépites de chocolat mi-sucré
- 1 cuil. à soupe beurre non salé
Instructions
- Préchauffez votre four à 180°C (350°F). Graissez et tapissez un moule à gâteau rond de 9 pouces.
- Dans un bol, fouettez la farine, le sucre, la poudre à lever, le sel et le cacao. Ajoutez le lait, les œufs et l'extrait de vanille, puis mélangez jusqu'à obtention d'un mélange lisse.
- Versez la pâte dans le moule préparé et enfournez pendant 25-30 minutes, ou jusqu'à ce qu'un cure-dent inséré en ressorte propre. Laissez le gâteau refroidir complètement.
- Faites fondre le chocolat noir, le chocolat au lait et le chocolat blanc séparément et laissez-les légèrement refroidir.
- Battez la crème épaisse avec le sucre et l'extrait de vanille jusqu'à obtenir des pics fermes. Divisez la crème fouettée en trois portions et incorporez chaque portion au chocolat fondu séparément.
- Placez la couche de gâteau refroidie sur un plat de service. Étalez la mousse au chocolat noir, puis la mousse au chocolat au lait, et enfin la mousse au chocolat blanc. Lissez le dessus et réfrigérez pendant 24 heures.
- (Optionnel) Faites fondre les pépites de chocolat mi-sucré et le beurre dans une casserole et versez sur le gâteau mousse pris, en laissant refroidir jusqu'à ce qu'il soit ferme.
- Garnissez de copeaux de chocolat, de noix hachées ou de baies fraîches, tranchez et servez frais.
Notes
Nutrition

Hi, I’m Olivia Parker, the founder of BakingSecret.com and a lifelong lover of all things sweet and homemade. I grew up in a small town in Oregon, where the smell of fresh cookies in my family’s kitchen sparked my passion for baking. Over the years, I turned that passion into a mission: to help home bakers feel confident, inspired, and creative.
After studying food science and working in several artisan bakeries across the U.S., I decided to create a space where everyone from beginners to seasoned bakers can find reliable recipes, expert tips, and a warm, welcoming community. BakingSecret.com is my way of sharing the magic of baking with the world. When I’m not testing new recipes, you’ll find me exploring farmers’ markets, collecting vintage cookbooks, or perfecting my sourdough technique.