
You know that dessert. The one that makes everyone quiet for a second, then sigh with happy memories? For me, that’s the magic of a Classic Banana Pie. It’s not just a pie; it’s a hug on a plate. I remember watching my grandma make hers for every family get-together. The whole house would smell of vanilla and buttery crust. I’ve worked for years to perfect my own version, and I promise you, this one is a creamy, dreamy slice of pure comfort. It’s easier than you think to make, and the joy it brings is absolutely priceless.
More Than Just a Pie: A Slice of American History
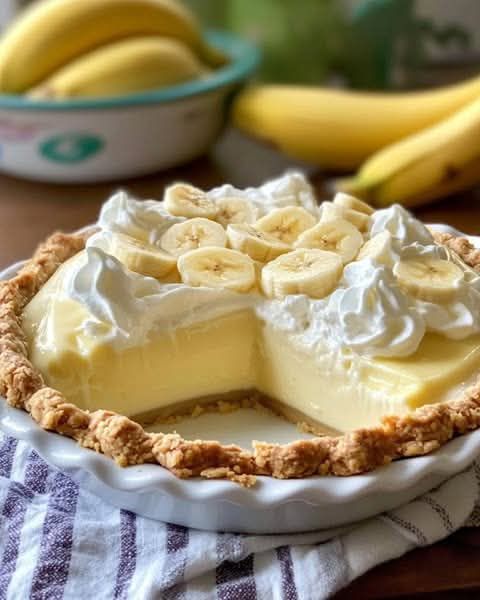
Every bite of this old-fashioned banana cream pie feels like a trip back in time. While cream pies have been around for centuries, the banana version became a true American classic in the early 1900s. This was when refrigerated transport made bananas more available across the country. Home cooks and diners alike fell in love with the sweet, custardy filling and the cheerful yellow slices of fruit. It became the star of church suppers, family dinners, and classic diner menus. Modern versions might use instant pudding, but the true soul of this dessert lies in the from-scratch vanilla custard. That silky, homemade texture is what separates a good pie from a legendary one. It’s a tradition worth keeping alive in your own kitchen!
Why You’ll Fall in Love With This Classic Banana Pie Recipe
If you’re looking for a dessert that’s both impressive and secretly simple, you’ve found it. First, the flavor is pure harmony. You get the creamy, rich custard, the sweet and slightly tangy bite of fresh banana, and that flaky, buttery crust all in one forkful. Second, it’s a fantastic make-ahead dessert. Making it the day before a party is brilliant. It gives the filling time to set perfectly and the flavors to become best friends. Finally, it’s a crowd-pleaser for all ages. From kids to grandparents, nobody can resist a towering slice of this nostalgic treat. It’s a guaranteed winner.
Perfect Occasions for Your Homemade Banana Cream Pie
This pie is your secret weapon for so many events! It’s perfect for a cozy Sunday family dinner, bringing a touch of special to an ordinary day. For potlucks or picnics, it travels beautifully and always disappears first. It makes a wonderful, heartfelt birthday dessert for someone who loves classic flavors more than fancy cakes. I love serving it for holidays like Easter or Thanksgiving alongside the other heavy hitters—it’s a lighter, refreshing sweet note. Honestly, any day that calls for a little extra joy is a good day for this pie.
Gathering Your Ingredients for Banana Bliss
This recipe uses simple, high-quality ingredients. Using the best you can find makes all the difference in taste.
- For the Pie Crust:
- 1 1/4 cups all-purpose flour
- 1/4 tsp salt
- 1/2 cup unsalted butter, cold and cut into cubes
- 4-6 tbsp ice water
- For the Banana Cream Filling:
- 3 large ripe (but not mushy) bananas, sliced
- 1 1/2 cups whole milk
- 3/4 cup granulated sugar
- 3 large egg yolks
- 1/4 cup cornstarch
- 1/4 tsp salt
- 2 tbsp unsalted butter
- 1 tsp vanilla extract
- For the Whipped Cream Topping:
- 1 cup heavy cream, very cold
- 2 tbsp powdered sugar
- 1 tsp vanilla extract
Simple Ingredient Swaps & Substitutions
No worries if you’re missing an item! Here are some easy swaps:
Milk: You can use 2% milk, but the filling won’t be quite as rich. For a dairy-free option, full-fat canned coconut milk works surprisingly well.
Crust: To save time, a high-quality store-bought pastry crust works just fine. I won’t tell!
Bananas: The key is ripeness. They should be yellow with a few brown spots for maximum sweetness and flavor.
Whipped Cream: For extra stability, add 1/4 teaspoon of cream of tartar when whipping. You can also use a stabilized whipped cream recipe if the pie needs to sit out longer.
Crafting Your Creamy Dream Pie: Step-by-Step Instructions
Step 1: Creating the Perfect Flaky Crust
Start by preheating your oven to 375°F (190°C). In a large bowl, whisk together the flour and salt. Now, add your cold, cubed butter. This is key! Using a pastry cutter, two forks, or even your fingertips, work the butter into the flour until the mixture looks like coarse, pebbly sand. You should still see some tiny butter pieces—this is what creates flaky layers. Now, drizzle in the ice water, one tablespoon at a time, gently stirring with a fork. Stop as soon as the dough starts to clump together. Turn it out onto a surface, form it into a disc, wrap it in plastic, and let it chill in the fridge. This relaxing time for the dough prevents a tough crust.
Pro tip: Keep everything as cold as possible. I even chill my flour and bowl for 10 minutes before starting.
Step 2: Blind Baking for a Crisp Base
After your dough has chilled for at least 30 minutes, roll it out on a lightly floured surface. Aim for a circle about 12 inches across to fit your 9-inch pie dish. Gently lift and settle the dough into the dish, then trim and crimp the edges as you like. Now, we “blind bake” it. Line the crust with parchment paper or foil and fill it with pie weights or dried beans. This keeps the crust from puffing up or shrinking. Bake it like this for 15-20 minutes, then carefully remove the paper and weights. Let it bake for another 5-10 minutes until it’s a beautiful, light golden brown. Set it aside to cool completely while you make the magic happen inside.
Step 3: Cooking the Luscious Vanilla Custard
This is the heart of the pie! In a medium saucepan, whisk together the sugar, cornstarch, and salt. Slowly whisk in the milk until smooth. Place the pan over medium heat and cook, stirring constantly with a whisk. You’ll see it slowly transform from a milky liquid to a thick, bubbling pudding. This takes about 5-7 minutes. In a separate bowl, whisk your egg yolks lightly. Here’s the important part: to keep the eggs from scrambling, you need to “temper” them. Slowly drizzle about half a cup of the hot milk mixture into the yolks while whisking non-stop. Then, pour this warmed yolk mixture back into the saucepan. Keep cooking and stirring for another 2-3 minutes until it’s very thick. Take it off the heat and stir in the butter and vanilla. The aroma is heavenly!
Chef’s tip: Constant stirring is non-negotiable for a lump-free, silky custard. Put on some music and enjoy the rhythm!
Step 4: Assembling the Layers of Joy
Let the custard cool for about 15 minutes, stirring occasionally so a skin doesn’t form. Slice your ripe bananas into 1/4-inch thick coins. Place a single layer of banana slices directly onto the bottom of your cooled pie crust. This gives you a fruity surprise in every bite. Now, gently fold the remaining banana slices into the warm (not hot) custard. Pour this beautiful, speckled filling into the crust over your banana layer. Smooth the top with a spatula. To prevent a skin from forming on the pie filling itself, press a piece of plastic wrap directly onto the surface. Let it cool on the counter for an hour before moving to the fridge.
Step 5: Topping With Clouds of Whipped Cream
Just before serving, make the whipped cream topping. For best results, chill your bowl and beaters in the freezer for 10 minutes. Pour the cold heavy cream into the bowl, add the powdered sugar and vanilla. Start beating on medium speed, then increase to high. Watch as it transforms from liquid to soft, billowy peaks. It should hold its shape when you lift the beaters. Uncover your chilled pie and spread this cloud of cream over the top, making pretty swirls with your spatula. For a final touch, you can garnish with a few extra banana slices (dipped in lemon juice to prevent browning) or a light dusting of cinnamon or nutmeg.
Timeline for Your Classic Banana Pie
| Prep Time | Cook Time | Chill Time | Total Time |
|---|---|---|---|
| 40 minutes | 40 minutes | 4+ hours (best overnight) | About 5.5 hours |
The Baker’s Secret for the Best Slice
The absolute best-kept secret for a perfect banana cream pie? Letting it chill overnight. I know, the wait is hard! But those extra hours in the fridge allow the custard to set up firmly and the flavors to deepen and meld together beautifully. The pie slices cleanly, and every flavor layer shines. If you can plan ahead, your patience will be richly rewarded.
A Sweet Slice of History
Did you know the banana cream pie was one of the most popular desserts in American diners throughout the 1950s? It symbolized comfort, simplicity, and joy. The technique of baking a custard on the stovetop is an ancient one, but combining it with the tropical banana was a stroke of genius. If you don’t already have one, getting a good, heavy-bottomed saucepan is a game-changer for custards and other delicate sauces—it helps prevent scorching.
Kitchen Tools You’ll Need
- 9-inch pie dish (glass or ceramic is best)
- Pastry cutter or two forks
- Medium saucepan (heavy-bottomed)
- Whisk and mixing bowls
- Rolling pin
- Electric mixer or whisk for whipped cream
- Plastic wrap
Storing Your Banana Cream Pie Masterpiece
Because this pie contains dairy and fresh fruit, it must be stored in the refrigerator. Cover it loosely with plastic wrap or place it under a pie dome. The whipped cream can start to weep or deflate a bit after a day, so it’s truly best enjoyed within 48 hours.
You can prepare components ahead of time. The pie crust can be baked and stored at room temperature for a day. The custard filling can be made, covered directly with plastic, and refrigerated for up to two days. When ready, simply fold in fresh bananas and assemble. This is a huge timesaver for parties!
Unfortunately, this pie does not freeze well. The custard can become grainy and the bananas will turn brown and mushy upon thawing. It’s a dessert meant to be enjoyed fresh and shared with loved ones quickly!
Pro Tips for a Flawless Classic Banana Pie
- Banana Timing: Use bananas that are ripe but still firm. Overly soft, mushy bananas will make the filling watery.
- Custard Consistency: The custard must come to a full, gentle boil while you stir to activate the cornstarch. If it doesn’t get thick enough on the stove, it will never set properly in the fridge.
- Cool Completely: Make sure your pie crust is completely cool before adding the filling. A warm crust will make the bottom soggy.
- Whipping Cream: Everything must be cold for stiff peaks—the cream, the bowl, and the beaters. Use powdered sugar instead of granulated; it dissolves instantly and helps stabilize the cream.
How to Present Your Pie Like a Pro
A beautiful presentation makes dessert even more special! Try piping the whipped cream on top using a large star tip for a bakery-worthy look. Garnish with thin banana slices that have been brushed with a tiny bit of lemon juice to keep them bright. A drizzle of caramel sauce or a sprinkle of toffee bits adds amazing texture and flavor. For individual servings, use a sharp knife dipped in hot water to get perfectly clean slices. Serve on pretty plates with a sprig of mint or a dusting of cocoa powder for contrast.
6 Delicious Variations to Try
Love the original? Mix it up with one of these fun twists:
- Chocolate Banana Cream Pie: Add a layer of rich chocolate ganache to the bottom of the baked crust before adding the bananas and custard.
- Peanut Butter Banana Pie: Swirl 1/3 cup of creamy peanut butter into the warm custard before chilling for a nutty flavor combo. If you love peanut butter and chocolate, our Decadent Peanut Butter Cake is also a must-try.
- Banana Coconut Cream Pie: Use coconut milk instead of whole milk and toast 1/2 cup of shredded coconut to sprinkle on top with the whipped cream.
- Caramel Banana Pie: Drizzle the bottom of the crust with salted caramel sauce, then layer bananas and custard on top.
- Nutella Swirl Pie: Drop spoonfuls of Nutella onto the custard after pouring it into the crust, then use a knife to gently swirl it for a marbled effect.
- Banana Split Pie: Top the finished pie with crushed pineapple, strawberries, chopped nuts, and a cherry on top for a pie version of the classic sundae.
For another stunning rolled dessert, the Chocolate Caramel Forest Cake Roll offers a beautiful and elegant alternative.
Common Mistakes to Avoid for Your Banana Cream Pie
Mistake 1: Using Green or Overly Brown Bananas
This is the most common flavor killer. Green bananas are starchy and lack sweetness, while brown, mushy bananas can make the filling watery and have an overpowering fermented taste. You want bright yellow bananas with a few brown speckles. They are at their peak sweetness and will hold their shape perfectly in the creamy custard, giving you that classic fresh banana flavor in every bite.
Mistake 2: Not Tempering the Egg Yolks
If you pour cold egg yolks directly into the hot milk mixture, they will instantly cook into little scrambled egg bits. No one wants scrambled eggs in their pie! Tempering is simple and crucial. Always whisk a small amount of the hot liquid into the beaten yolks first to gently warm them up. Then, you can safely stir the yolk mixture back into the hot pan. This creates a silky, smooth, and lump-free custard every single time.
Mistake 3: Skipping the Blind Bake for the Crust
A soggy bottom is a sad pie. Because the banana cream filling is cold and not baked, the crust must be fully cooked beforehand. This is called “blind baking.” If you skip the pie weights and parchment paper, the crust will puff up and shrink. If you don’t bake it long enough, it will be doughy and soft. Baking it with weights, then briefly without, gives you a sturdy, flaky, and golden-brown vessel that can proudly hold your creamy filling without getting soggy.
Mistake 4: Not Letting the Pie Chill Long Enough
Impatience is the enemy of a perfect slice. The custard needs ample time to cool and set. If you try to slice the pie after only an hour or two, it will be a delicious but soupy mess. For the filling to firm up and the flavors to truly marry, you need a minimum of 4 hours. I strongly recommend making it the day before and letting it chill overnight. This patience is rewarded with perfect, clean slices and the most incredible flavor.
Frequently Asked Questions About Classic Banana Pie
Can I use a store-bought pie crust?
Absolutely! A high-quality, refrigerated pie crust or even a pre-made graham cracker crust are great shortcuts. Just be sure to still blind bake a pastry-style crust according to its package directions, as most need it even if the box says “ready to fill.” A graham cracker crust does not need pre-baking.
How far in advance can I make this pie?
You can bake the crust up to two days in advance and store it at room temperature, tightly wrapped. The custard filling can be made, covered directly with plastic wrap, and refrigerated for up to two days. However, slice the bananas and assemble the entire pie no more than a day ahead. The bananas will start to brown and soften if added too early.
Why did my whipped cream topping get runny?
This usually happens if the cream, bowl, or beaters weren’t cold enough, or if you over-beat the cream. Cream should be beaten to stiff peaks, but if you go too far, it will start to separate into butter and buttermilk. To avoid this, start with everything cold and stop beating as soon as the cream holds a firm peak when you lift the beater.
Can I use instant pudding mix instead?
You can, but the texture and flavor will be different. Homemade custard is richer, smoother, and has a more complex vanilla flavor. The instant version tends to be sweeter and have a more gelatinous texture. If you’re in a pinch, follow the “cook & serve” pudding directions on the box, not instant, for a thicker result, and use less milk than called for.
How do I prevent the bananas from turning brown in the pie?
You can toss the sliced bananas in a little lemon or pineapple juice before adding them to the custard. This adds a slight tang but prevents oxidation. The best method, however, is to ensure the custard has cooled enough before folding them in, and to serve the pie within 1-2 days.
Can I make this pie without eggs?
Making a true custard without eggs is challenging, as the yolks are key for thickness and richness. You could try using a cornstarch-only pudding recipe (increasing the cornstarch to 1/3 cup), but the mouthfeel will be different. For a vegan version, explore recipes using full-fat coconut milk and a thickener like tapioca starch.
What’s the difference between this and a banana pudding?
Banana pudding is typically layered in a dish with vanilla wafers or ladyfingers. A classic banana cream pie is assembled in a baked pastry crust, which provides a wonderful buttery, crunchy contrast to the creamy filling. The pie is also usually topped with a mountain of whipped cream instead of meringue.
My custard is lumpy. Can I fix it?
Yes! Straining the cooked custard through a fine-mesh sieve into a bowl will catch any small scrambled egg bits or cornstarch lumps. Just press it through with a spatula. This is a great habit to get into for perfectly silky custard every time.
Can I freeze leftover banana cream pie?
I do not recommend it. The custard can become grainy and separate upon thawing, the bananas will turn black and mushy, and the whipped cream will collapse. This pie is best enjoyed fresh from the fridge within a couple of days.
What other crusts can I use?
A graham cracker or vanilla wafer crust is a delicious no-bake option. A shortbread cookie crust or even a chocolate cookie crust (like Oreo) would be fantastic. For more pastry inspiration, you can browse all our delicious pie and tart recipes. If you’re a chocolate lover, our Classic Chocolate Cake is another timeless favorite.
Creating this pie from scratch is a wonderful skill in baking that connects us to generations of home cooks. It’s a reminder that the best recipes are often the simplest ones, made with care and shared with love.
Wrapping It Up With a Sweet Bow
There you have it, friends! My tried-and-true recipe for the ultimate old-fashioned banana cream pie. It might take a little love and patience, but the result—a creamy, dreamy, nostalgic slice of heaven—is worth every single minute. Whether you’re keeping a family tradition alive or starting a new one, this pie brings pure happiness to the table. So preheat that oven, grab your whisk, and get ready for the compliments. Don’t forget to save a slice for yourself! For another irresistible peanut butter-chocolate combo, check out our Reeses Peanut Butter Roll Cake for your next baking adventure.
Equipment
- Plaque à pâtisserie
- Fouet
- Spatule
- Grand bol
- Papier sulfurisé
Ingredients
- 1 1/4 tasse farine tout usage
- 1/4 cuil. à café sel
- 1/2 tasse beurre non salé, froid et coupé en cubes
- 4-6 cuil. à soupe eau glacée
- 3 grands bananes mûres (mais pas molles), tranchées
- 1 1/2 tasse lait entier
- 3/4 tasse sucre granulé
- 3 grands jaunes d'œufs
- 1/4 tasse fécule de maïs
- 2 cuil. à soupe beurre
- 1 cuil. à café extrait de vanille
- 1 tasse crème épaisse, très froide
- 2 cuil. à soupe sucre glace pour saupoudrer
- 1 cuil. à café extrait de vanille pour assaisonner
Instructions
- Préchauffez votre four à 190°C.
- Dans un grand bol, fouettez ensemble la farine et le sel.
- Ajoutez le beurre froid en cubes et utilisez un coupe-pâte ou des fourchettes pour combiner jusqu'à ce que le mélange ressemble à du sable grossier.
- Versez de l'eau glacée, une cuillère à soupe à la fois, jusqu'à ce que la pâte commence à s'agglomérer. Formez une disque et réfrigérez.
- Étalez la pâte sur une surface farinée pour qu'elle s'adapte à un plat à tarte de 9 pouces.
- Placez la pâte dans le plat, pincez les bords, et tapissez de papier sulfurisé et de poids.
- Faites cuire à blanc pendant 15-20 minutes, retirez les poids, et faites cuire encore 5-10 minutes jusqu'à ce que ce soit doré. Laissez refroidir complètement.
- Dans une casserole moyenne, fouettez ensemble le sucre, la fécule de maïs et le sel; incorporez lentement le lait.
- Cuisinez à feu moyen, en remuant constamment, jusqu'à ce que le mélange épaississe (5-7 minutes).
- Battez légèrement les jaunes d'œufs dans un bol séparé; tempérez avec le mélange de lait chaud, puis remettez dans la casserole.
- Faites cuire encore 2-3 minutes jusqu'à ce que ce soit très épais. Retirez du feu et incorporez le beurre et la vanille.
- Laissez refroidir la crème pendant 15 minutes; disposez quelques tranches de banane au fond de la croûte refroidie.
- Incorporez les tranches de banane restantes dans la crème, versez dans la croûte et lissez le dessus.
- Pressez du film plastique sur la surface de la crème et réfrigérez pendant au moins 4 heures.
- Juste avant de servir, battez la crème épaisse, le sucre glace et la vanille jusqu'à ce que des pics mous se forment.
- Étalez la crème fouettée sur la tarte et décorez avec des tranches de banane supplémentaires ou des épices selon vos envies.
Notes
Nutrition

Hi, I’m Olivia Parker, the founder of BakingSecret.com and a lifelong lover of all things sweet and homemade. I grew up in a small town in Oregon, where the smell of fresh cookies in my family’s kitchen sparked my passion for baking. Over the years, I turned that passion into a mission: to help home bakers feel confident, inspired, and creative.
After studying food science and working in several artisan bakeries across the U.S., I decided to create a space where everyone from beginners to seasoned bakers can find reliable recipes, expert tips, and a warm, welcoming community. BakingSecret.com is my way of sharing the magic of baking with the world. When I’m not testing new recipes, you’ll find me exploring farmers’ markets, collecting vintage cookbooks, or perfecting my sourdough technique.