
I’ll never forget the look on my nephew’s face when I surprised him with a soccer ball cake for his eighth birthday. His eyes lit up brighter than the candles on top. That moment made all the effort worthwhile. If you’re planning a party for a soccer fan in your life, a soccer ball cake might be exactly what you need to make their day special.
Creating a soccer ball cake brings something unique to birthdays and special events. It shows you put thought and care into the celebration. The best part? You don’t need to be a professional baker to pull it off. Whether you’re aiming for a simple soccer cake design or planning something more elaborate, the process is easier than you think.
Soccer cakes for birthdays come in all shapes and sizes. You can make a classic 3D round cake that looks just like the real thing. You might prefer a soccer ball cake flat design that sits nicely on a platter. Some people love making soccer ball cake pops for parties where guests can grab and go. The beauty of this themed cake is its flexibility. You can adjust the design to match your skill level and the time you have available.
Gathering Your Supplies for Your Soccer Ball Cake
Before you start mixing batter, let’s talk about what you’ll need. Having everything ready makes the whole process smoother and way less stressful. I learned this the hard way after running to the store twice during my first attempt at a soccer ball birthday cake.
For the cake itself, you’ll need your favorite cake recipe ingredients. I usually stick with vanilla or chocolate. Vanilla works great because it gives you a neutral base that pairs well with any frosting. You’ll need flour, sugar, eggs, butter, baking powder, salt, and milk. Don’t forget vanilla extract for flavor.
The frosting is where things get interesting. Buttercream frosting works best for a soccer ball cake. It’s stable, easy to work with, and holds up well for decorating. You’ll need butter, powdered sugar, a splash of milk, and vanilla extract. Some people ask me, “What kind of frosting is best for a soccer ball cake?” I always say buttercream. It spreads smoothly and gives you the clean look you want.
You’ll also need food coloring. Black is essential for those classic pentagon patterns. Some designs call for green frosting if you want to add a grass effect around the base. Start with gel food coloring instead of liquid. It gives you richer colors without making your frosting runny.
Essential baking tools include:
- Mixing bowls in various sizes
- Electric mixer or stand mixer
- Measuring cups and spoons
- Rubber spatula for scraping bowls
- Cooling racks
- Offset spatula for frosting
- Piping bags and tips
Now let’s talk about the soccer ball cake pan. This specialized pan makes creating the round shape much easier. It usually comes in two hemisphere pieces that you bake separately, then stack together. You can find these pans at craft stores, baking supply shops, or online. They’re worth the investment if you plan to make themed cakes regularly.
But what if you don’t have a soccer ball cake pan? Don’t worry. You have options. Many bakers wonder how to make a soccer ball cake without a pan, and it’s totally doable. You can use regular round cake pans and stack them. Then you carve the cake into a rounded shape. It takes a bit more effort, but the results can be just as impressive.
Another option is using oven-safe bowls. Pick two identical heat-safe bowls and bake your cake batter in them. This creates the hemisphere shapes you need. Just make sure your bowls are truly oven-safe. Check the manufacturer’s guidelines before trying this method.
A soccer ball cake template makes decorating much simpler. These templates show you exactly where to place the black pentagon and white hexagon shapes. You can find a soccer ball cake template printable online for free. Many baking websites offer downloadable versions. Print it out on regular paper, cut out the shapes, and use them as guides on your frosted cake.
If you’re making a flat soccer ball cake instead of a 3D version, you still need a template. The flat version sits on a sheet cake or round layer cake. You use the template to draw or pipe the soccer ball pattern on top. This approach works great for beginners who want something simpler.
Additional decorating supplies you might need:
- Fondant (optional, for cleaner lines)
- Toothpicks for tracing templates
- Small knife or cutting tool
- Cake board or serving platter
- Dowels or straws for support if stacking
The tools you need for a soccer ball cake depend on your chosen design. A basic version needs minimal equipment. More complex soccer ball cake ideas might require specialty tips for piping or fondant tools for smooth finishes. Start simple and add complexity as you gain confidence.
How long does it take to bake a soccer ball cake? The baking time varies based on your pan size and oven. Most soccer ball cake pans need about 45 to 60 minutes at 350 degrees Fahrenheit. Regular round pans might take 30 to 40 minutes. Always do the toothpick test. Insert a toothpick in the center. If it comes out clean, your cake is done.
Remember that baking is just part of the timeline. You need to factor in cooling time, which can take an hour or more. Frosting and decorating add another hour or two, depending on detail level. I always plan to start my soccer cakes the day before the event. This removes pressure and gives me time to fix any mistakes.
Keep your workspace organized as you gather supplies. Set out ingredients in the order you’ll use them. This prep work makes the actual baking process flow smoothly. Trust me, there’s nothing worse than realizing you’re out of powdered sugar halfway through making frosting.
One last tip about supplies: buy a little extra of everything. Running short on frosting when you’re almost done is frustrating. I always make more buttercream than I think I’ll need. Leftover frosting stores well in the fridge for a week or freezer for months.

Baking the Cake
Now that you’ve got everything laid out and ready, it’s time for the fun part—actually baking your soccer ball birthday cake.
The first thing I do is preheat my oven to 350 degrees Fahrenheit. Sounds basic, right? But I can’t tell you how many times I’ve forgotten this step and ended up waiting around with mixed batter getting sad in the bowl. Give your oven a solid 15 minutes to reach the right temperature.
While the oven heats, prepare your pans. If you’re using a soccer ball cake pan, grease both hemispheres really well. I mean really well. Use butter or cooking spray, then dust with flour. Tap out the excess. This step prevents your cake from sticking, which would be a disaster when you’re trying to get that perfect round shape out.
Here’s the thing about mixing your batter: don’t overthink it. Whether you’re using a box mix or making cakes using condensed milk from scratch, follow your recipe but don’t overmix. I learned this from my grandmother who made the fluffiest cakes I’ve ever tasted. She always said to mix until just combined. Overmixing develops too much gluten and makes your cake tough instead of tender.
When you pour batter into your soccer ball cake pan, fill each hemisphere about two-thirds full. The cake needs room to rise without spilling over the edges. If you’re using regular round pans or oven-safe bowls instead, the same rule applies. Leave that expansion space.
Pop your pans in the oven on the middle rack. This position gives the most even heat distribution. Set a timer for 45 minutes if you’re using a specialty soccer ball pan. Regular round pans usually take 30 to 35 minutes. But here’s my pro tip: start checking five minutes before your timer goes off. Every oven runs a little different. Mine runs hot, so I always check early.
The toothpick test is your best friend. Stick a toothpick or cake tester into the deepest part of the cake. It should come out clean or with just a few moist crumbs. If you see wet batter, give it another five minutes and check again.
One problem I’ve run into with hemisphere pans is uneven baking. The top browns faster than the sides sometimes. If this happens to you, tent some aluminum foil loosely over the top for the last 15 minutes. This protects the surface while the inside finishes cooking.
After your cakes come out, resist the urge to remove them from the pans immediately. Let them cool in the pans for about 10 minutes. This cooling period helps them firm up. Then turn them out onto cooling racks. If you try to flip them too soon, they might crack or fall apart. Patience pays off here.
Let me tell you about the time I tried to rush this cooling process. I had a party starting in two hours and thought I could speed things up by frosting a warm cake. Big mistake. The frosting melted into a puddle. My soccer ball looked more like a lumpy cloud. Since then, I always let my cakes cool completely—at least an hour at room temperature.
By the way, if you decide to make soccer ball cake pops instead of a full cake, the process changes a bit. Bake your cake in a regular rectangular pan. After it cools, crumble it up in a big bowl. Mix in frosting until it holds together like play dough. Roll into balls, stick lollipop sticks in them, and decorate with the black pentagon pattern. They’re honestly easier than the full cake and perfect for kids’ parties where everyone wants their own portion.
For those looking at simple soccer cake ideas without all the 3D complexity, a flat sheet cake works beautifully. Bake two layers in 9-inch round pans. Stack them with frosting between. Then frost the top smooth and use your template to create the soccer ball pattern right on the flat surface. This approach takes way less time and still looks impressive.
Another variation I’ve made is using angel food cake as the base. It’s lighter than traditional cake and has fewer calories if that matters to anyone at your party. The texture is different but works fine with buttercream frosting. Just be extra gentle when handling it since angel food is more delicate.
Decorating the Cake
Decorating is where your soccer ball cake really comes to life. This part intimidated me at first, but I promise it gets easier with practice.
Start by leveling your cake layers if needed. If the tops domed during baking, use a serrated knife to slice off the rounded parts. You want flat surfaces that stack evenly. Save those scraps though—baker’s treat! They’re perfect for snacking while you work.
Place one hemisphere flat-side down on your cake board or serving platter. Spread a layer of frosting on top. Then add the second hemisphere flat-side down on top of the first. You now have a ball shape. If there’s a visible seam where they meet, don’t panic. We’ll cover that with frosting.
Now comes the crumb coat. This is a thin layer of frosting that seals in all the loose crumbs. Spread it all over your ball using an offset spatula. It doesn’t need to look perfect. In fact, it’ll look kind of messy. That’s fine. Pop the whole thing in the fridge for 20 minutes to let this layer set.
While you wait, prepare your final frosting layer. Buttercream is definitely the best frosting for a soccer ball cake. It’s stable at room temperature, easy to color, and spreads smoothly. Some people use fondant for that super-clean professional look, but I find fondant harder to work with and not as tasty. Kids especially prefer the flavor of buttercream.
Make your buttercream nice and smooth. If it seems too thick, add a teaspoon of milk at a time until it reaches a spreadable consistency. Too thin? Add more powdered sugar. Getting the texture right makes decorating so much easier.
Take your chilled cake out of the fridge. Apply a generous layer of white frosting all over the ball. Work in sections, smoothing as you go. An offset spatula works great for this. Keep a bowl of warm water nearby to dip your spatula in—the warm, wet spatula creates an incredibly smooth finish when you run it over the frosting.
Once your white base coat looks good, it’s time for the soccer ball pattern. This is where your template becomes essential. If you’re anything like me and drawing freehand makes you nervous, that template is a lifesaver.
Print out your soccer ball cake template printable. Cut out the pentagon shapes. Lightly press them onto your frosted cake to mark where they’ll go. A traditional soccer ball has 12 black pentagons surrounded by white hexagons. You don’t have to be exact with placement—just aim for evenly distributed black shapes around your ball.
Here’s a trick I learned: use a toothpick to trace around your template shapes before removing them. This gives you an outline to follow when piping. Remove the paper templates and you’ll see faint lines showing exactly where to pipe your black frosting.
Color some of your buttercream black using gel food coloring. You’ll need quite a bit of coloring to get a true black—it usually starts out gray. Don’t be shy with the gel. Fill a piping bag fitted with a small round tip with your black frosting. If you’re comfortable with piping, outline the pentagon shapes first, then fill them in. If piping feels too advanced, spread the black frosting into the marked shapes using a small offset spatula or butter knife.
Funny enough, my first soccer ball cake had wobbly pentagons that looked more like amoebas than geometric shapes. But you know what? The birthday boy didn’t care one bit. He thought it was amazing. So don’t stress about perfection. Your effort and thoughtfulness matter more than flawless lines.
For an extra touch, some people pipe white stitching details on the black pentagons to mimic real soccer ball stitching. This is totally optional but adds nice dimension. Use a tiny round tip and white frosting for these details.
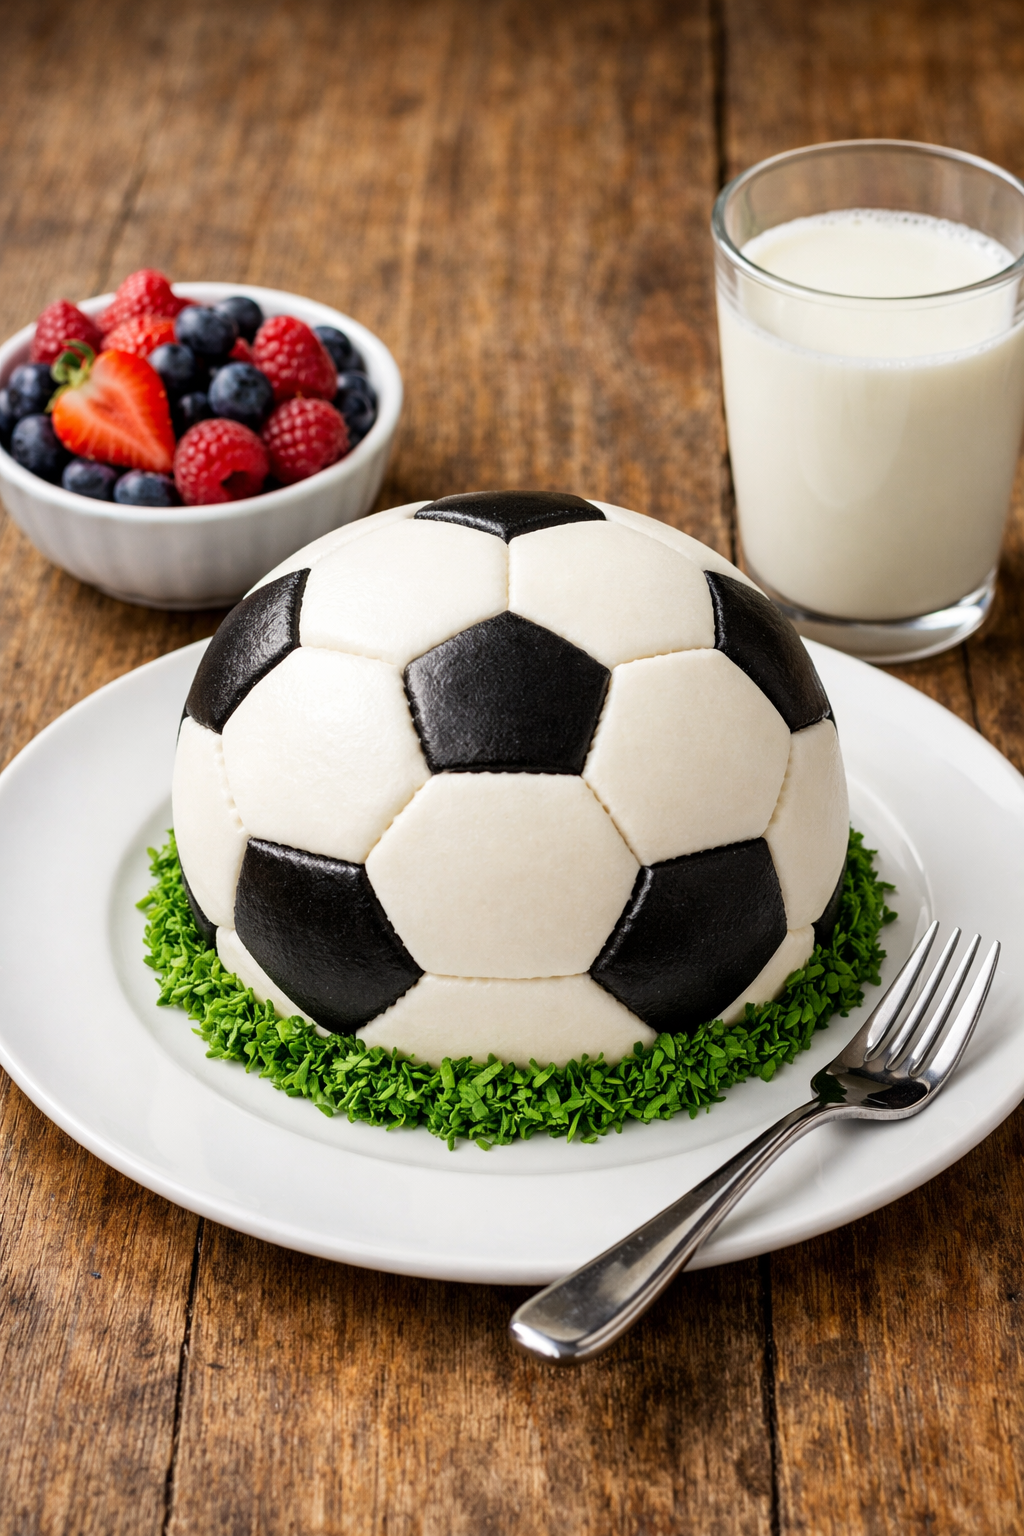
If you want to add a grass effect around the base, color some frosting green. Use a grass piping tip (the ones with multiple small openings) to pipe green “grass” around the bottom edge where your ball sits. This creates context and makes the whole thing look more dynamic. I’ve also seen people add little fondant soccer cleats or a goal post as decorations. Get creative with it!
One more finishing touch I love: a small banner or topper with the birthday person’s name and age. You can make these from cardstock and toothpicks in about five minutes. Stick it right in the top of your soccer ball cake.
The decoration process reminds me a bit of making an Oreo dump cake—there’s room for creativity and personal touches. Unlike precise French pastries, themed birthday cakes welcome your unique spin on things.
If you’re going for soccer ball cake ideas that skip the complicated piping, consider using pre-made fondant cutouts. Many craft stores sell these. Just stick them onto your frosted cake. Instant professional look with minimal effort. Another shortcut is using black frosting in a squeeze bottle instead of a piping bag. The squeeze bottles give you more control if you’re not experienced with piping bags.
After decorating, I always step back and look at my cake from different angles. Sometimes you’ll notice a bare spot or uneven section that needs touching up. Fix these little things before the frosting fully sets. Once everything looks good, refrigerate your completed cake until about an hour before serving. This firms up the frosting and makes transporting easier if you need to take it somewhere.
Creating a strawberry whipped cream cake might be easier in some ways, but there’s something special about the wow factor of a themed cake like this. When you bring out that soccer ball cake and see faces light up, all the effort feels worth it. That’s the magic of baking for people you care about.
Creative Ideas and Variations for Your Soccer Ball Cake
Here’s where things get really fun. Once you’ve mastered the basic soccer ball birthday cake, you can start playing around with all sorts of creative twists. I’ve made probably a dozen variations over the years, and each one taught me something new.
One of my favorite additions is incorporating team colors. If the birthday person has a favorite soccer team, why not reflect that? I once made a cake for my friend’s son who’s obsessed with FC Barcelona. Instead of plain white frosting between the black pentagons, I used their signature blue and red. The pentagons stayed black, but I alternated blue and red hexagons around them. It took a bit more planning, but his reaction made it totally worth the extra effort.
You can take this team theme even further by adding a small fondant or buttercream jersey on top. Cut out a simple jersey shape from rolled fondant, paint or pipe the team number and colors on it, and place it right on your soccer ball. Some people get really ambitious and create an entire soccer field scene. Imagine your soccer ball cake sitting on a rectangular sheet cake frosted to look like grass, with little goal posts made from pretzel sticks and fondant. Add some toy soccer players around it and you’ve got an entire stadium setup.
Speaking of fields, edible grass made from green coconut flakes looks incredibly realistic. Just toss shredded coconut with green food coloring in a plastic bag, shake it up, and sprinkle it around your cake base. Kids go crazy for this detail. I used this trick at a party last summer and the kids kept asking if they could eat the “grass.” Of course they could—that’s the best part!
Another variation I’ve experimented with is the cupcake version. Bake regular cupcakes and frost them white. Then pipe the black pentagon pattern on top of each one. You end up with individual soccer ball cupcakes that are perfect for classroom parties or large gatherings. Way easier to serve than cutting a cake, and everyone gets their own decorated treat. Plus, it’s a great project if you want to involve kids in the decorating process. Give them each a few cupcakes and let them pipe their own pentagons. They won’t be perfect, but they’ll have a blast.
For the really ambitious bakers out there, I’ve seen people create soccer cleat cakes to go alongside the ball. Use a loaf pan to bake a rectangular cake, carve it into a cleat shape, and decorate it to match. Put the cleat and ball together on the same board and you’ve got a showstopper. Fair warning though—this takes serious time and patience.
Flavor variations matter too. Sure, vanilla and chocolate are classics, but don’t be afraid to branch out. I made a strawberry soccer ball cake once that turned out beautifully. The pink cake layers peeking out when you cut into it looked amazing against the white and black exterior. Lemon cake works great too, especially for spring or summer birthdays. The bright, fresh flavor feels perfect for outdoor soccer season celebrations.
Funny enough, someone once asked me if healthier cake options work for this design. Absolutely! You can make versions using whole wheat flour, reduced sugar, or even incorporating vegetables like zucchini or carrots into the batter. While we all love a good treat, being mindful of ingredients matters, especially if you’re serving kids regularly. Balancing celebrations with general wellness—like keeping an eye on heart health through smart food choices—doesn’t mean giving up fun themed cakes. It just means making thoughtful ingredient swaps when possible.
The soccer ball cake flat design opens up tons of possibilities I haven’t even mentioned yet. You can make it on a half-sheet cake and add a whole birthday message written in frosting around the ball design. Or create multiple small soccer balls across the surface of a larger cake. I did this for a soccer team party once—made twelve small soccer ball designs on one big rectangular cake, each with a different player’s number inside. The coach nearly cried. Okay, maybe that’s an exaggeration, but she was definitely moved.
Edible images are another shortcut worth mentioning. You can order a printed edible image of a soccer ball pattern from bakery supply stores or online. Just peel and stick it onto your frosted cake. Done. Takes about thirty seconds. If you’re short on time but still want that impressive look, this method is a total lifesaver. I used this technique when I had to make a last-minute cake for my nephew’s tournament celebration. Nobody knew it wasn’t hand-piped until I told them.
Here’s something I’ve been wanting to try but haven’t yet—a surprise-inside cake. You know those cakes where you slice into them and colorful candy spills out? Imagine cutting into a soccer ball cake and having green and white M&Ms tumble out like tiny soccer balls. You create a cavity in the middle of your stacked cake before decorating, fill it with candy, then seal it up. The reveal would be incredible. Maybe I’ll attempt this for the next birthday on my calendar.
Seasonal variations work nicely too. For a winter birthday, add some silver or white pearl dust to give your soccer ball a frosty, sparkly look. Summer cakes might benefit from tropical flavors like coconut or pineapple. Fall birthdays could feature a soccer ball sitting on “leaves” made from cornflakes mixed with food coloring and butter. Spring celebrations might include little fondant flowers around the base.
Don’t forget about dietary restrictions. I’ve successfully made gluten-free soccer ball cakes using cup-for-cup gluten-free flour blends. They turn out just as good as regular cakes. Dairy-free versions work too—substitute plant-based butter and milk in your buttercream. The texture might be slightly different, but it’s still delicious and looks identical once decorated. Making sure everyone at the party can enjoy the cake feels important to me. Nobody should miss out on celebration food because of allergies or dietary needs.
One creative direction I love is combining soccer with other interests. Got a kid who loves both soccer and dinosaurs? Add a little T-Rex figurine holding the soccer ball. Music and soccer fan? Create edible musical notes around the base. The combination possibilities are endless. This personalization transforms a simple soccer cake into something that really captures the individual’s personality.
Size variations matter depending on your guest count. The standard soccer ball cake pan serves about 10-12 people. Need to feed more? Make multiple balls in different sizes and stack them into a tiered display. Need less? Soccer ball cake pops or a small 6-inch version works perfectly for intimate celebrations. I’ve even made mini soccer balls using large muffin tins for individual servings at an adult birthday where the guy just wanted something fun but not too over-the-top.
By the way, presentation counts for a lot. I’ve learned that the cake board or platter you choose affects the overall impact. A simple white board keeps focus on the cake itself. A green board suggests a grass field without additional decorating. Mirrored boards create a modern, sleek look. I once used a wooden cutting board for a rustic outdoor party theme and it looked fantastic in photos.
Transportation tips deserve mention because I’ve had disasters. If you’re taking your soccer ball cake somewhere, make sure it’s completely chilled and firm before moving it. Place it in a large box with non-slip material underneath. Drive carefully—no sudden stops! I learned this lesson after a quick brake sent my soccer ball rolling across the passenger seat. Thankfully it survived, but my heart definitely skipped a few beats.
For those wanting to explore even more cake designs and expand their baking repertoire beyond soccer themes, browsing through different cakes and cupcakes recipes can spark new ideas and techniques that you might incorporate into future projects.
The absolute best thing about making soccer ball cakes is that there’s no single right way to do it. Every cake I’ve made has been different. Some turned out exactly as planned. Others required improvising when things went sideways. But every single one brought joy to someone I care about, and that’s what really matters. Your soccer ball birthday cake doesn’t need to look like it came from a professional bakery. It just needs to come from your heart and show that you put time and thought into making someone’s day special.
Making a soccer ball cake connects you to a tradition of celebration and creativity. It’s about more than just dessert. It’s about creating memories, learning new skills, and expressing love through something you made with your own hands. So grab those supplies, preheat that oven, and give it a try. Your first attempt might not be perfect, but I guarantee it’ll be appreciated more than any store-bought cake ever could be.
Frequently Asked Questions About Soccer Ball Cakes
What kind of frosting is best for a soccer ball cake?
Buttercream frosting is hands-down the best choice for soccer ball cakes. It’s stable at room temperature, spreads smoothly, and holds its shape well for piping those black pentagon designs. The texture is creamy and delicious, which kids and adults both love. While fondant gives you ultra-smooth professional-looking results, it’s harder to work with and many people find the taste less appealing. Stick with buttercream, especially if you’re new to cake decorating.
How long does it take to bake a soccer ball cake?
The actual baking time for a soccer ball cake ranges from 45 to 60 minutes if you’re using a specialty hemisphere pan at 350 degrees Fahrenheit. Regular round pans take about 30 to 40 minutes. But remember, baking is just one part of the timeline. You need to factor in cooling time—at least an hour—plus another hour or two for frosting and decorating. I always plan to start the day before my event to avoid feeling rushed.
What tools do you need for a soccer ball cake?
You’ll need basic baking equipment like mixing bowls, an electric mixer, measuring cups, and a rubber spatula. For decorating, grab an offset spatula, piping bags with tips, and a soccer ball template for the pattern. A specialty soccer ball cake pan makes shaping easier, but you can also use regular round pans or oven-safe bowls. Don’t forget gel food coloring for that rich black color on the pentagons. A cake board or serving platter completes your setup.
Can I make a soccer ball cake without a special pan?
Absolutely! You have several options for making a soccer ball cake without buying a specialty pan. Use two oven-safe bowls of the same size to create hemisphere shapes. Or bake regular round cakes and stack them, then carve into a rounded ball shape using a serrated knife. Another approach is making a flat soccer ball design on top of a sheet cake or round layer cake. It takes a bit more effort than using a dedicated pan, but the results can be just as impressive.
How do I get the soccer ball pattern right?
Using a soccer ball cake template printable makes this so much easier. Download and print a free template online, cut out the pentagon shapes, and lightly press them onto your frosted cake to mark placement. Trace around them with a toothpick before removing the paper. A traditional soccer ball has 12 black pentagons surrounded by white hexagons, but you don’t need to be mathematically perfect. Just distribute the black shapes evenly around your cake and it’ll look great.
Can I make soccer ball cake pops instead of a full cake?
Soccer ball cake pops are actually easier than a full cake and perfect for parties. Bake a regular sheet cake, let it cool completely, then crumble it into a large bowl. Mix in frosting until the mixture holds together like dough. Roll into balls, insert lollipop sticks, and chill until firm. Dip in white candy melts or white chocolate, let them set, then pipe or draw the black pentagon pattern with black candy melts. Kids love having their own individual soccer ball treat.
How far in advance can I make a soccer ball cake?
You can bake the cake layers up to two days ahead and store them wrapped tightly in plastic wrap at room temperature. Buttercream frosting keeps well in the fridge for up to a week. I recommend assembling and decorating the cake the day before your event. Once decorated, keep it refrigerated and take it out about an hour before serving so it comes to room temperature. The flavors taste better when the cake isn’t cold straight from the fridge.
What flavors work best for soccer ball cakes?
Vanilla and chocolate are classics that never disappoint, but don’t be afraid to experiment. Strawberry creates beautiful pink layers when you slice into it. Lemon works wonderfully for spring and summer birthdays. Funfetti adds colorful excitement inside. Even flavors like red velvet or cookies and cream can work. Just make sure whatever flavor you choose pairs well with buttercream frosting since that’s what you’ll use for decorating the exterior.
How do I transport a soccer ball cake safely?
Chill your completely decorated cake for at least an hour before moving it so the frosting firms up. Place it in a sturdy box that’s slightly larger than the cake, with non-slip material like a damp towel underneath to prevent sliding. Keep the box level in your vehicle—the floor behind the front seat works well. Drive carefully with no sudden stops or sharp turns. If possible, have someone hold the box steady during transport. I’ve learned these lessons the hard way!
What is Kamala Harris’ favorite cake?
This is a fun bit of trivia! Vice President Kamala Harris has mentioned that she loves pound cake, particularly her grandmother’s recipe. She’s also talked about enjoying chocolate cake for special occasions. While this doesn’t relate directly to soccer ball cakes, it’s interesting how everyone—from kids celebrating birthdays to vice presidents—has their own cake preferences and memories. Food, especially cake, connects us all through celebration and tradition regardless of who we are.
Equipment
- Soccer ball cake pan
- Electric mixer
- Rubber spatula
- Cooling racks
- Piping bags and tips
Ingredients
- 2.5 cups all-purpose flour
- 2 cups sugar
- 4 large eggs
- 1 cup unsalted butter
- 2.5 teaspoons baking powder
- 1 teaspoon salt
- 1 cup milk
- 1 tablespoon vanilla extract
- 1 cup unsalted butter
- 4 cups powdered sugar
- 2-3 tablespoons milk
- 1 tablespoon vanilla extract
- to taste black gel food coloring
- optional green gel food coloring
Instructions
- Preheat the oven to 350°F (175°C).
- Grease and flour the soccer ball cake pan hemispheres (or regular round pans).
- Mix flour, sugar, baking powder, and salt in a bowl.
- In another bowl, cream together butter and sugar until light and fluffy.
- Add eggs and vanilla to the creamed mixture, mixing well.
- Gradually add the dry ingredients to the wet ingredients, alternating with milk, until just combined.
- Pour the batter into the prepared pans, filling them about two-thirds full.
- Bake for 45-60 minutes (check with a toothpick).
- Allow cakes to cool in pans for 10 minutes, then remove and cool completely on racks.
- Level the cake layers if necessary.
- Stack the two cake hemispheres with frosting in between.
- Apply a thin crumb coat of frosting and refrigerate for 20 minutes.
- Frost the cake with a generous layer of white buttercream.
- Use a soccer ball template to outline black pentagons and white hexagons on the cake.
- Fill in the outlined shapes with black frosting using a piping bag or spatula.
- Optionally, add grass frosting around the base.
- Finish with decorations or a birthday banner as desired.
- Refrigerate the cake until an hour before serving.
Notes
Nutrition

Hello! I’m Sarah Mitchell, and I’m passionate about bringing creativity and innovation to baking. My love for baking started in high school when I first tried my hand at decorating cupcakes for a class project. What began as a fun hobby quickly became a full-time passion. I’ve spent the past decade working in bakeries and dessert shops, honing my skills in everything from simple cookies to intricate wedding cakes.
After working in some of the top bakeries across the country, I realized that baking was about more than just following recipes — it was about infusing your personality into each creation. At BakingSecret.com, I love creating recipes that push boundaries while staying true to the heart of classic baking. I specialize in creating delicious and visually stunning pastries that will wow your guests.
When I’m not baking, I enjoy teaching baking classes, trying out new cake decoration techniques, and traveling to find inspiration in global dessert traditions. I’m so excited to share my tips and tricks with you to help elevate your baking game!