
The Ultimate No-Bake Banana Caramel Cheesecake Adventure
Have you ever opened your fruit bowl, seen those extra-ripe bananas, and thought, “I should make banana bread… again”? I have. But one rainy afternoon, I decided to rebel. I combined those bananas with my family’s love for peanut butter and my weakness for caramel, and magic happened. This Easy Banana Caramel Peanut Butter Cheesecake was born. It’s the dessert that made my kids stop scrolling on their phones and actually talk at the dinner table. That’s a win in my book!
A Slice of Comfort: The Story Behind This Dessert
Cheesecake has a long history, but my version is a happy accident from my own kitchen. The classic New York-style cheesecake is timeless. Yet, I wanted something that felt like a warm hug. Adding peanut butter for protein-packed creaminess and ripe bananas for natural sweetness felt right. Topping it with salted caramel? That was the stroke of genius that tied it all together. It’s a modern twist on a classic, born from a desire to use what I had on hand and create pure joy.
Why You’ll Fall in Love With This Banana Caramel Cheesecake
This isn’t just another dessert recipe. It’s your secret weapon for potlucks, birthdays, or “I need chocolate now” moments. The crust is a crunchy, buttery hug for the incredible filling. The filling itself is unbelievably smooth and rich, with a subtle nutty flavor from the peanut butter. Then, you get the fresh sweetness of bananas and the gooey luxury of caramel sauce. Every bite is a perfect mix of textures and tastes. Plus, it looks fancy but is surprisingly simple to make. No water bath needed!
When to Whip Up This Showstopper
This cheesecake is incredibly versatile. It’s perfect for:
- Family Gatherings: It’s a crowd-pleaser that serves 12 happily.
- Potluck Dinners: You’ll be the most popular person there. Guaranteed.
- Weekend Treat: Why wait for a special occasion? Make your Saturday special.
- Birthdays: Skip the store-bought cake and give a homemade gift of love.
Gathering Your Banana Caramel Cheesecake Ingredients
Here’s your shopping list for this creamy dream. Using room-temperature ingredients is key for a silky filling!
- 1 1/2 cups graham cracker crumbs
- 1/4 cup melted butter
- 3/4 cup creamy peanut butter
- 24 oz cream cheese, softened
- 1 cup granulated sugar
- 3 large eggs
- 1 tsp vanilla extract
- 1/2 cup heavy cream
- 3 ripe bananas, sliced
- 1 cup caramel sauce
- 1/2 cup chopped peanuts
- 1/4 cup chopped almonds
Easy Swaps: Your Cheesecake, Your Rules
Don’t have an ingredient? No panic! Here are some easy swaps:
- Graham Cracker Crumbs: Use digestive biscuits, vanilla wafers, or even Oreo crumbs (without the filling).
- Peanut Butter: Any nut or seed butter works. Try almond butter or sunflower seed butter.
- Heavy Cream: Full-fat sour cream or Greek yogurt can be used for a slight tang.
- Nuts: Use any nuts you love! Pecans or walnuts would be fantastic here.
- Caramel Sauce: A good quality store-bought sauce is fine, or make your own if you’re feeling fancy.
Crafting Your Perfect Peanut Butter Cheesecake
Let’s get baking! Follow these steps for a flawless, creamy banana caramel cheesecake.
Step 1: Preheat & Prep
Start by heating your oven to 325°F (165°C). Grab your 9-inch springform pan and give it a light greasing. This little step of kindness ensures your beautiful caramel peanut butter cheesecake will release without a fight. Trust me, a stuck cheesecake is a sad cheesecake. Have your ingredients measured and ready to go—this makes the process smooth and enjoyable.
Step 2: Create the Buttery Crust
In a medium bowl, mix the graham cracker crumbs with the melted butter. The crumbs should look like wet sand and hold together when you pinch them. Pour this mixture into your prepared pan. Use the bottom of a glass or a measuring cup to press it firmly and evenly into the bottom. A solid, compact crust is the essential foundation for our easy banana caramel cheesecake.
Step 3: Whip Up the Dreamy Filling
Now for the star! In a large bowl, beat the creamy peanut butter and softened cream cheese together until perfectly smooth and lump-free. Gradually add the sugar and beat until the mixture becomes light and fluffy. This takes about 2-3 minutes. Add the eggs one at a time, beating well after each addition. Finally, mix in the vanilla and heavy cream until the batter is gloriously silky. Pro tip: Don’t overbeat after adding the eggs, as this can incorporate too much air and cause cracks.
Step 4: Bake to Golden Perfection
Pour this lush filling over your waiting crust. Gently tap the pan on the counter to release any air bubbles. Place it in the center of your preheated oven. Bake for 50-60 minutes. The edges should be set and puffed, but the center should still have a slight jiggle—like Jell-O—when you gently shake the pan. It will firm up as it cools. This patience is the secret to a creamy, not dry, cheesecake.
Step 5: The Art of Cooling & Chilling
Once baked, run a thin knife around the edge of the pan to loosen the sides. This prevents cracking as it cools. Let it cool completely at room temperature. Then, and this is crucial, refrigerate it for at least 4 hours, but overnight is best. This long chill sets the texture and develops the flavors, making your banana peanut butter cheesecake sliceable heaven.
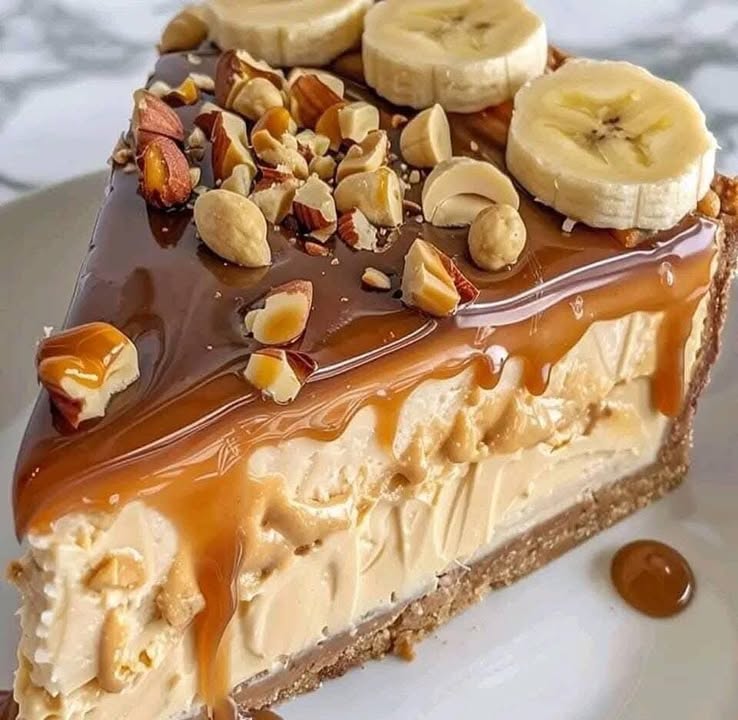
Step 6: The Grand Finale: Toppings!
Just before serving, artfully arrange the sliced bananas on top. Drizzle generously with that gorgeous caramel sauce. Finish with a hearty sprinkle of chopped peanuts and almonds for the perfect crunch. Chef’s tip: Add the bananas right before serving to keep them from turning brown. For a gorgeous glossy finish, you can also warm the caramel sauce slightly so it drizzles like a dream.
Your Cheesecake Timeline
Good things take time, but this recipe is efficient!
- Prep Time: 20 minutes (mostly mixing and smiling)
- Cook Time: 60 minutes (your house will smell amazing)
- Chill Time: At least 4 hours (the hardest part—waiting!)
- Total Time: About 4 hours 20 minutes
- Servings: 12 generous slices
- Kcal: Approximately 550 per serving
Chef’s Secret: The Room Temperature Rule
My number one secret for a lump-free, ultra-creamy filling? Every dairy ingredient must be at room temperature. Take your cream cheese, eggs, and heavy cream out of the fridge at least an hour before you start. Cold cream cheese will never blend smoothly, and you’ll end up over-mixing, which can lead to a dense cheesecake. Patience here pays off in silkiness!
A Little Sweet History
Did you know the earliest forms of cheesecake date back to ancient Greece? It was served to athletes at the first Olympic games for energy! While my easy banana caramel cheesecake is a far cry from those honey-and-wheat versions, it’s fun to think we’re part of a delicious tradition thousands of years old. We’ve just added peanut butter and caramel, which I think is a major upgrade.
Gear You’ll Need
- 9-inch springform pan (non-negotiable for easy release)
- Electric hand mixer or stand mixer
- Mixing bowls (medium and large)
- Measuring cups and spoons
- Spatula
- Knife for slicing bananas
Keeping Your Cheesecake Happy
In the Fridge: Once assembled with toppings, cover the cheesecake tightly with plastic wrap or place it in a cake carrier. It will keep beautifully in the refrigerator for up to 3 days. The bananas are best on the first day but will still taste great afterward.
Freezing for Later: You can freeze the banana caramel cheesecake (without toppings) for up to 2 months. Wrap the cooled, chilled cheesecake tightly in plastic wrap, then in foil. Thaw overnight in the fridge before adding your fresh bananas, caramel, and nuts.
Slicing Tips: For clean slices, dip a sharp knife in hot water and wipe it dry between each cut. This gives you those picture-perfect pieces every time.
My Best Tips for Success
- Ripe is Right: Use bananas with lots of brown spots. They are sweeter and have a stronger banana flavor.
- Prevent Cracks: Avoid overmixing after adding eggs and don’t open the oven door during baking.
- No Springform Pan? You can use a deep-dish pie plate, but serving will be messier.
- Toast Your Nuts: For an even deeper flavor, lightly toast the peanuts and almonds before chopping.
Presenting Your Masterpiece
You made this stunning dessert—show it off! Here are some ideas:
- Drizzle extra caramel in a zig-zag pattern on each serving plate before placing the slice.
- Add a dollop of freshly whipped cream or a scoop of vanilla ice cream on the side.
- Finish with a light dusting of cocoa powder or a sprinkle of sea salt over the caramel.
- Serve on a beautiful cake stand for a real “wow” moment at the table.
Love This? Try These Other Crazy-Good Desserts!
If you adored the layers of flavor in this cheesecake, you might be ready for another challenge. For a stunning layered dessert, try this elegant Raspberry Chocolate Mousse Cake with its delicious fruit insert. Chocolate lovers, you simply must experience the pure decadence of this Triple Chocolate Mousse Cake. For a tropical twist, the Mango Tango Cheesecake Cake combines fruity layers with creamy cheesecake. And if you’re in the mood for something bright and zesty, these Zesty Lemon Meringue Pie Cannolis are a fun, handheld treat. For more inspiration, browse our entire collection of creamy, dreamy cheesecake recipes.
Common Mistakes to Avoid
Mistake 1: Using Cold Ingredients
This is the #1 cause of a lumpy cheesecake batter. Cold cream cheese does not blend smoothly with other ingredients. You’ll be tempted to overmix, which adds too much air and can make the cheesecake puff up and then crack as it falls. Always plan ahead. Take your cream cheese, eggs, and heavy cream out of the fridge at least 60-90 minutes before you start baking. They should feel cool to the touch, not cold.
Mistake 2: Overbaking the Cheesecake
A dry, crumbly cheesecake is often an overbaked cheesecake. The goal is a set edge with a center that still jiggles slightly when you gently shake the pan. It will continue to cook from residual heat as it cools. If you bake it until the center is completely firm, it will be overdone by the time it chills. Trust the jiggle test! Pull it out when it looks a little underdone in the middle.
Mistake 3: Skipping the Gradual Cool-Down
Taking your hot cheesecake and shoving it straight into the fridge is a shock to its system. The sudden temperature change can cause the top to crack and pull away from the edges. After baking, let it cool on the stovetop or a wire rack until it reaches room temperature. This slow cooling process helps the structure set gently, preventing those unsightly cracks.
Mistake 4: Topping Too Soon
Adding the banana and caramel toppings hours before serving is a recipe for a soggy, brown mess. The bananas will oxidize and turn brown, and the caramel can make the crust soft. For the freshest look and best texture, add the sliced bananas, drizzle the caramel, and sprinkle the nuts right before you are ready to serve and enjoy your creation.
Your Banana Caramel Cheesecake Questions, Answered
Can I make this cheesecake ahead of time?
Absolutely! In fact, I highly recommend it. You can bake the cheesecake (without toppings) up to two days in advance. Let it cool completely, wrap it tightly, and store it in the refrigerator. The flavors actually improve with a little time. Just add the fresh banana slices, caramel, and nuts right before you serve it. This makes it a perfect, stress-free dessert for parties.
How do I know when the cheesecake is done baking?
This is the most common worry. The edges of the cheesecake should look puffed and set, but the center (about a 3-inch circle in the middle) should still wobble like Jell-O when you gently shake the pan. It will not be liquid, but it will have a distinct, soft jiggle. Remember, it continues to cook and set as it cools. If the center is completely firm in the oven, it will be overbaked and dry after chilling.
My cream cheese is still lumpy. What can I do?
First, make sure it’s truly at room temperature. If you still have a few small lumps, you can pass the entire finished batter through a fine-mesh sieve. This is a bit of extra work but guarantees a perfectly silky texture. For next time, let your cream cheese sit out longer, and beat it alone first until it’s completely smooth before adding any other ingredients.
Can I use natural peanut butter instead of creamy?
You can, but be cautious. Natural peanut butter (the kind that separates) often has a thinner, oilier consistency and can be less sweet. This might change the texture and sweetness of your filling. If you use it, make sure to stir it very well first. A “no-stir” creamy commercial peanut butter will give you the most consistent and reliable results for this recipe.
Why did my cheesecake crack on top?
Cracks usually happen from too much air in the batter (overmixing), a sudden temperature change, or overbaking. To prevent this, mix just until ingredients are combined after adding the eggs. Cool the cheesecake slowly on the counter before refrigerating. And most importantly, don’t overbake it! A small crack isn’t a disaster, though—you’ll cover it with delicious toppings.
Can I freeze the whole cheesecake?
Yes, you can freeze this cheesecake beautifully for up to 2 months. Freeze it without the banana and caramel toppings. Wrap the cooled, chilled cheesecake tightly in plastic wrap, then in a layer of aluminum foil. Thaw it overnight in the refrigerator when you’re ready to eat it. Then, add your fresh toppings. The texture remains wonderfully creamy.
What’s the best way to cut clean slices?
Use a long, thin, sharp knife. Run it under very hot water, wipe it completely dry with a towel, and make your cut. The heat helps the knife glide through the creamy filling and crunchy crust without dragging. Wipe the knife clean and reheat it under water for each new slice. You’ll get clean, professional-looking pieces every single time.
Can I use a different kind of nut?
Of course! This recipe is very flexible. Instead of peanuts and almonds, try using chopped pecans, walnuts, or hazelnuts. You could even use a single type of nut. Toasting the nuts first in a dry skillet for a few minutes will bring out their natural oils and make them taste even more incredible on top of your caramel peanut butter cheesecake.
Do I have to use a springform pan?
A springform pan is highly recommended because the removable sides make it easy to get the cheesecake out without flipping it. If you don’t have one, you can use a 9-inch deep-dish pie plate. You’ll serve it directly from the dish, which is just as tasty but a little less elegant for presentation.
Is there a way to make this recipe gluten-free?
Easily! To make a gluten-free banana caramel cheesecake, simply swap the graham cracker crumbs for an equal amount of gluten-free graham cracker crumbs or crushed gluten-free cookies (like gluten-free shortbread or ginger snaps). Ensure all your other ingredients, like the caramel sauce, are certified gluten-free as well.
Final Thoughts on This Decadent Dessert
This Easy Banana Caramel Peanut Butter Cheesecake is more than just a list of ingredients and steps. It’s a way to create a moment of pure happiness. It’s about the smell of baking that fills your kitchen, the anticipation as it chills, and the joy on your friends’ faces with that first bite. It combines simple, wholesome flavors—like the natural sweetness of ripe bananas—in a spectacular way. For more ideas on using the best seasonal foods in your baking, it’s always a great idea to see what’s fresh and flavorful. So, tie on your apron, put on some music, and treat yourself to the baking adventure. You’ve got this!
Equipment
- Grand bol
- Fouet
- Spatule
- Moule à gâteau de 23 cm
- Papier sulfurisé
Ingredients
- 1.5 tasse chapelure de biscuits Graham
- 0.25 tasse beurre fondu
- 0.75 tasse beurre de cacahuète crémeux
- 24 oz fromage à la crème ramolli
- 1 tasse sucre granulé
- 3 grands œufs
- 1 cuil. à café extrait de vanille
- 0.5 tasse crème épaisse
- 3 bananes mûres tranchées
- 1 tasse sauce caramel
- 0.5 tasse cacahuètes hachées
- 0.25 tasse amandes hachées
Instructions
- Préchauffez votre four à 165°C (325°F) et graissez un moule à charnière de 23 cm.
- Mélangez les miettes de biscuits Graham avec le beurre fondu jusqu'à obtenir une texture sableuse.
- Pressez le mélange fermement au fond du moule préparé pour former la croûte.
- Dans un grand bol, battez ensemble le beurre de cacahuète et le fromage à la crème ramolli jusqu'à obtenir un mélange lisse.
- Ajoutez progressivement le sucre et battez jusqu'à obtenir une consistance légère et mousseuse, environ 2-3 minutes.
- Ajoutez les œufs un à un, en mélangeant bien après chaque ajout.
- Incorporez l'extrait de vanille et la crème épaisse pour obtenir une texture soyeuse.
- Versez la garniture sur la croûte, en tapotant légèrement le moule pour libérer les bulles d'air.
- Faites cuire au four pendant 50-60 minutes jusqu'à ce que les bords soient pris et que le centre tremble légèrement.
- Après la cuisson, passez un couteau autour des bords du moule, laissez refroidir à température ambiante, puis réfrigérez pendant au moins 4 heures ou toute la nuit.
- Avant de servir, disposez les bananes tranchées sur le dessus, nappez de sauce au caramel et saupoudrez de cacahuètes et d'amandes hachées.
Notes
Nutrition
Hi there! I’m Emma Lawson, and I’m thrilled to be part of the BakingSecret.com team! Baking has been a part of my life since I was a little girl, growing up in a family that loved to bake together. From birthday cakes to cookies, I learned early on that the kitchen was a place of creativity and connection.
After studying culinary arts at The Culinary Institute of America, I fell in love with the science behind baking. Understanding how different ingredients interact and how slight adjustments can change the final product is something that continues to fascinate me. My background in pastry arts and food science has helped me develop recipes that are not only delicious but also reliable.
At BakingSecret.com, I’m excited to share recipes that cater to all levels, from beginners to seasoned bakers. My goal is to make sure that you feel confident in the kitchen and have fun with every bake. When I’m not in the kitchen, you can find me experimenting with new flavor combinations, hiking, or trying out new coffee shops in town!