
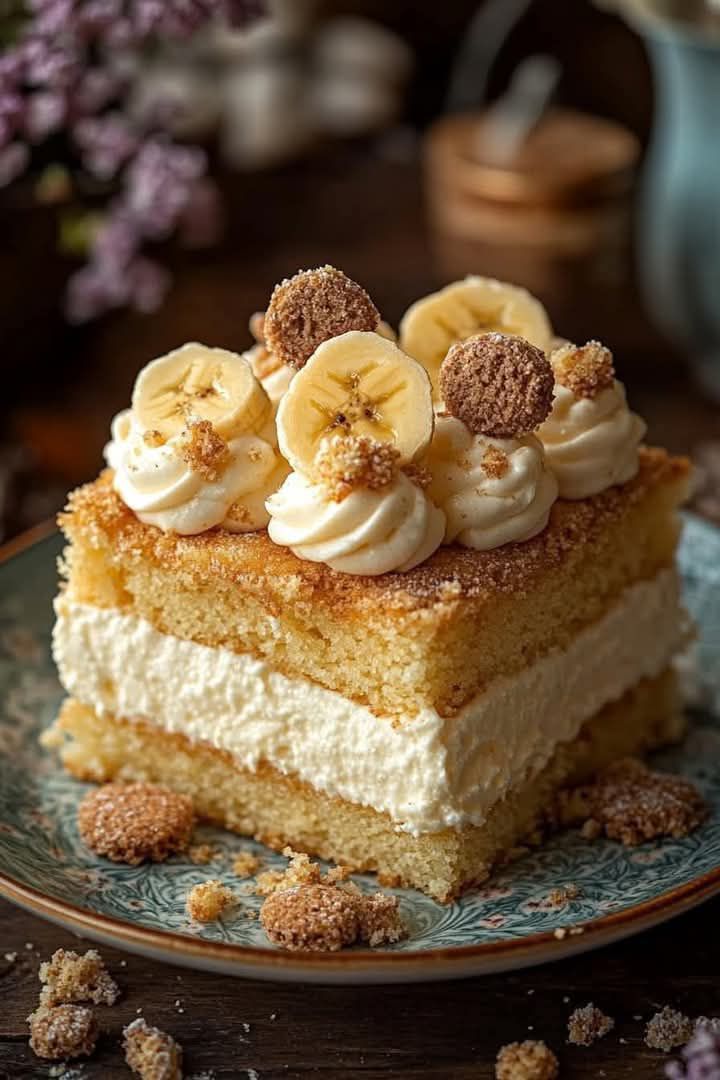
The Cozy Magic of Banana Pudding Cake
Is there anything better on a chilly day than the smell of baking cake? I remember one snowy afternoon, my kids were bored, and the pantry held just a box of yellow cake mix and some overripe bananas. It was like a sign. We decided to get creative and layer in creamy pudding and fluffy whipped cream. What came out of the oven (and the fridge) was pure magic. This Banana Pudding Cake isn’t just a dessert. It’s a warm hug in dessert form, combining all the best parts of banana pudding into one easy, scoopable cake.
Where Did This Sweet Idea Come From?
Banana pudding is a beloved Southern classic, with roots tracing back to the late 1800s. Traditionally, it’s a layered trifle of vanilla wafers, banana slices, and creamy custard. Our Banana Pudding Cake takes that soulful spirit and reimagines it as a simple, bake-and-top sheet cake. It’s the easy, modern way to get that same comforting combination of soft cake, fruity bananas, and luscious cream. You get all the nostalgia without the fuss of layering individual glasses. It’s a perfect example of how home cooks love to play with tradition and create new family favorites.
Why You’ll Fall in Love With This Banana Pudding Delight
Let me count the ways! First, it’s incredibly easy. The cake mix base is a lifesaver on busy days. Second, the flavor is out of this world. The warm cake makes the bananas inside almost caramelize. The cool, creamy pudding and whipped topping add the perfect contrast. Finally, it’s a total crowd-pleaser. I’ve brought this to potlucks and watched it disappear faster than you can say “seconds, please!” It’s a guaranteed smile-maker.
Perfect Times to Bake This Winter Classic
This cake fits any cozy gathering. It’s my go-to for Sunday family dinners, where everyone can grab a big slice. It’s a superstar at holiday parties, sitting proudly next to the pie. I’ve even made it for book club, where it fueled some serious discussion! Anytime you need a dessert that feels special but is secretly simple, this is your winner.
What You’ll Need for Your Banana Pudding Cake
Here’s your simple grocery list. You might already have most of it!
- 1 box yellow cake mix (15.25 oz)
- Ingredients listed on the cake mix box (usually eggs, oil, and water, but we’ll use milk instead!)
- 1 cup milk (for the cake batter)
- 3 large ripe bananas (the spottier, the sweeter!)
- 1 package instant vanilla pudding (3.4 oz)
- 1 cup cold milk (for the pudding)
- 1 cup heavy whipping cream
- 1/2 cup powdered sugar
- 1 tsp vanilla extract
- 1/2 cup crushed vanilla wafers
Easy Swaps for Your Pantry
No worries if you’re missing something! Here are my tried-and-true swaps:
- Cake Mix: A white or butter cake mix works just as well as yellow.
- Bananas: No ripe bananas? Use 1 cup of mashed, very ripe banana (about 2). For extra flavor, you can even use banana cream pudding instead of vanilla.
- Heavy Cream: In a pinch, use an 8 oz tub of frozen whipped topping, thawed. Just skip the whipping step and spread it on.
- Vanilla Wafers: Graham cracker crumbs or even crushed shortbread cookies make a delicious crunch on top.
How to Make Your Own Banana Pudding Delight
Follow these simple steps to dessert heaven. I promise, it’s as fun to make as it is to eat!
Step 1: Prep and Batter Up!
First, get your oven humming at 350°F (175°C). Grease and flour a 9×13-inch baking dish—this little step prevents sticking like a charm. In a big bowl, make your cake batter. But here’s our first secret: swap the water on the box for that 1 cup of milk. It makes the cake extra rich and tender. Whisk it all until smooth. Your kitchen already smells promising!
Step 2: The Banana Bounty
Peel your ripe bananas. The scent is amazing, right? Slice them into thin rounds. Now, pour that lovely yellow batter into your prepared dish. Take your banana slices and gently press them into the top of the batter. Don’t push them all the way to the bottom. Let them nestle in halfway so they bake right into the cake. They’ll become sweet, soft little pockets of flavor.
Step 3: Bake to Golden Perfection
Slide your pan into the hot oven. Now, the hardest part: waiting! Bake for 30-35 minutes. You’ll know it’s done when the top is a beautiful golden brown and a toothpick poked in the center comes out clean, maybe with just a few moist crumbs. Take it out and let it cool completely on a rack. Pro tip: Letting it cool is key! If you top it while warm, the whipped cream will melt.
Step 4: Whip Up the Creamy Layers
Once your cake is cool, it’s topping time! In a medium bowl, whisk the instant pudding mix with 1 cup of cold milk. Whisk for a full 2 minutes until it starts to thicken, then set it aside for 5 minutes to set. In another bowl (or a stand mixer), pour the heavy cream, powdered sugar, and vanilla. Whip it on high until you see soft peaks form. This means when you lift the beaters, the cream forms gentle mounds that hold their shape. It’s light, fluffy, and dreamy.
Step 5: Assemble and Chill
Now for the fun part! Take your set pudding and spread it evenly over the entire surface of the cooled cake. It’s like putting a silky vanilla blanket on it. Next, carefully spread the fluffy whipped cream over the pudding layer. Finally, sprinkle your crushed vanilla wafers all over the top. For a pretty finish, add a few fresh banana slices. Now, the final test of patience: chill the whole cake in the fridge for at least 1 hour. This lets all the flavors mingle and the layers set perfectly. Chef’s tip: For the very best texture, make this a day ahead! The cake gets even more moist and the flavors deepen overnight.
Your Banana Pudding Cake Timeline
- Prep Time: 20 minutes
- Bake Time: 30-35 minutes
- Cooling Time: 1 hour
- Chilling Time: 1 hour (minimum)
- Total Time: About 2.5 hours (mostly hands-off)
The Secret to the Best Flavor
My number one trick? Use bananas that are almost too ripe to eat on their own. Those black spots mean maximum sweetness and banana flavor. They’ll practically melt into the cake as it bakes, creating an incredible moisture and taste that underripe bananas just can’t match.
A Sweet Little Fact
Did you know the vanilla wafer’s journey to banana pudding is a classic American story? In the early 1900s, the Nabisco company began marketing them as an accompaniment to fruit and pudding. Home cooks, always brilliant, saw a perfect pairing and started layering them with bananas and custard. Our cake is a delicious tribute to that innovation!
Tools You’ll Need
- 9×13-inch baking dish
- Mixing bowls (2-3)
- Electric hand mixer or stand mixer (for whipping cream)
- Whisk
- Spatula
- Measuring cups and spoons
Keeping Your Cake Fresh
Because this cake has fresh fruit and whipped cream, it’s best stored in the refrigerator. Cover the pan tightly with plastic wrap or aluminum foil. It will stay fresh and delicious for up to 3 days. The cake itself will remain wonderfully moist from the banana and pudding layers.
I do not recommend freezing this assembled cake. The whipped cream and pudding layers can become watery and separate when thawed. However, you can freeze the baked and cooled cake base (without toppings) for up to a month. Just wrap it well. Thaw it overnight in the fridge before adding your pudding and whipped cream.
If you need to make it ahead, you can bake the cake a day in advance. Let it cool, cover it at room temperature, and then add the toppings the day you plan to serve. The chilled, assembled cake actually cuts into cleaner slices, making it a great make-ahead dessert for parties.
Common Mistakes to Avoid
Mistake 1: Using Underripe Bananas
It’s tempting to use the yellow, firm bananas you just bought. Resist! Underripe bananas lack sweetness and that deep, floral banana flavor. They also won’t soften as much during baking. Always wait for those bananas to get plenty of brown speckles. The riper they are, the more they’ll taste like banana candy in your cake.
Mistake 2: Topping a Warm Cake
I know it’s hard to wait when your kitchen smells amazing. But if you spread the pudding and whipped cream on a warm cake, you’ll create a soupy mess. The heat will melt the whipped cream and thin out the pudding layer. Let the cake cool completely on a wire rack. This usually takes about an hour. Patience here is the secret to clean, beautiful layers.
Mistake 3: Over- or Under-Whipping the Cream
Whipping cream can be tricky. Under-whipped cream is runny and won’t hold its shape on the cake. Over-whipped cream turns grainy and buttery. The sweet spot is “soft peaks.” Stop your mixer when the cream holds a gentle, droopy peak when you lift the beaters. It should look smooth and billowy, not stiff or chunky.
Mistake 4: Skipping the Chill Time
That one hour in the fridge is not a suggestion, it’s a recipe step! This chilling time allows the pudding layer to firm up and the whole dessert to set. It makes it infinitely easier to slice and serve. The flavors also have time to get to know each other, resulting in a more cohesive and delicious bite. For the ultimate experience, chill it overnight.
My Top Tips for Success
A few extra thoughts from my kitchen to yours! For a stunning look, reserve a few whole vanilla wafers and some banana slices for garnish right before serving. If you’re taking this to a party, keep it chilled in a cooler until it’s time to eat. For a fun twist, try adding a tablespoon of banana liqueur to the whipped cream. Remember, eating well includes enjoying the treats you love, especially when they’re homemade with care.
How to Make It Look Fancy
- Serve it in a beautiful glass trifle dish. Just cube the baked cake and layer it with the pudding, whipped cream, and extra bananas.
- Use a piping bag to add pretty swirls of whipped cream on top instead of just spreading it.
- Create a pattern with the crushed wafers and banana slices for a professional touch.
- Serve individual portions in mason jars for a cute, portable dessert.
6 Fun Ways to Mix Up Your Banana Pudding Cake
Once you’ve mastered this classic, the fun begins! Here are some delicious twists to try.
1. Chocolate Banana Bliss: Use a chocolate cake mix and chocolate instant pudding. It’s like a chocolate-covered banana in cake form!
2. Peanut Butter Banana: Swirl 1/2 cup of creamy peanut butter into the cake batter before baking. Top with chopped peanut butter cups instead of wafers.
3. Tropical Dream: Add 1 cup of shredded coconut to the cake batter and use coconut cream pudding. Garnish with toasted coconut.
4. “Nilla”Berry Shortcake: Layer fresh strawberries or a mix of berries on top of the pudding layer before adding the whipped cream.
5. Salted Caramel Swirl: Drizzle salted caramel sauce over the pudding layer, then add the whipped cream. The sweet-salty combo is incredible.
6. Nutty Crunch: Substitute the vanilla wafer crumbs with finely chopped toasted pecans or walnuts for a deeper, nutty flavor and crunch.
Frequently Asked Questions
Can I make this cake ahead of time?
Absolutely! In fact, I recommend it. You can bake the cake base up to a day in advance. Let it cool completely, then wrap it tightly and keep it at room temperature. Assemble with the pudding and whipped cream the day you plan to serve it. For the best texture and flavor, make the full assembled cake the night before. The longer it chills, the more the flavors blend and the easier it is to slice neatly. Just add the final garnish of fresh banana slices right before serving so they don’t brown.
My whipped cream turned out runny. What did I do wrong?
This usually happens for one of three reasons. First, your cream or your bowl wasn’t cold enough. Chill your bowl and beaters in the freezer for 15 minutes before starting. Second, you might have under-whipped it. Keep whipping until you get those soft, defined peaks. Third, if you accidentally over-whhip it, it can start to separate and look grainy. If that happens, sadly, you can’t fix it. Start over with new cold cream. A pro tip is to make sure your heavy cream has a high fat content, around 36% or more, for the best results.
Can I use homemade pudding instead of instant?
You can, but it changes the process a bit. Homemade cooked pudding needs to be chilled completely before you spread it on the cake. This takes several hours. If you spread warm pudding, it will melt your cake and make it soggy. The instant pudding is great here because it sets quickly, is reliably thick, and saves a lot of time. If you have a favorite cooked pudding recipe you love, just be sure to plan for that extra chilling time.
How do I prevent the banana slices on top from turning brown?
The best way is to add fresh banana slices just before serving. If you need to garnish ahead of time, you can dip the slices in a little lemon juice, pineapple juice, or even honey water. This creates a barrier that slows down the browning (oxidation). Just pat them very dry with a paper towel before placing them on the cake so they don’t add liquid to your whipped cream.
Can I use a different size pan?
Yes, but baking times will change. A 9×13-inch pan is ideal. If you use a smaller pan (like a 9-inch square), the cake will be thicker and will need a longer baking time. Start checking with a toothpick after 35 minutes. If you use a larger sheet pan (like a 10×15-inch jelly roll pan), the cake will be thinner and will bake faster, likely in 20-25 minutes. Always rely on the toothpick test for doneness, not just the timer.
What can I use instead of heavy whipping cream?
The most common substitute is an 8-ounce tub of frozen whipped topping (like Cool Whip), thawed in the fridge. Just skip the whipping step and spread it over the pudding. You can also use a stabilized whipped cream by adding a tablespoon of instant pudding powder to the cream as you whip it—this helps it hold its shape for days. For a dairy-free option, chill a can of full-fat coconut milk overnight, scoop out the solid cream, and whip it with powdered sugar.
Is it okay to use fresh whipped cream?
It’s more than okay—it’s fantastic! Fresh whipped cream has a light, pure flavor that can’t be beaten. The recipe calls for it! Just be sure to whip it to soft peaks, not stiff peaks, so it’s easy to spread and stays luscious. Some store-bought whipped toppings can be very sweet, so making your own lets you control the sugar level perfectly.
Why did my bananas sink to the bottom of the cake?
This often happens if the batter is too thin or if the banana slices are too heavy. Make sure you’re following the cake mix instructions correctly (using milk helps create a thicker batter). Also, don’t slice the bananas too thick. Thin slices are lighter. Finally, just press them gently into the top of the batter; don’t drop them in. They’ll sink a little as the cake rises around them, which is perfect.
How many servings does this cake make?
This cake is quite rich and satisfying! In a 9×13-inch pan, you can easily get 12 generous servings. For a potluck or party where people might be trying multiple desserts, you can cut smaller squares and get 15-18 portions. It’s a great dessert for a crowd because it goes a long way and is so easy to serve.
Can I turn this into cupcakes?
You sure can! Prepare the batter as directed and line muffin tins with papers. Fill each cup about 2/3 full. Press one or two small banana slices into the top of each. Bake at 350°F for about 18-22 minutes, until a toothpick comes out clean. Let them cool completely. Then, you can pipe or spoon the pudding and whipped cream on top of each cupcake and garnish with a tiny vanilla wafer. They’re adorable and perfect for individual servings!
There you have it—a foolproof guide to an amazing dessert. For more baking inspiration, explore all sorts of wonderful ideas in our main collection of easy cake and cupcake recipes. You might love a decadent Black Forest Cheesecake for a special date night or a festive Caramel Apple Cheesecake in the fall. If you’re a chocolate lover, our Cookie Dough Brownies are legendary, and for a summer hit, nothing beats a Chocolate Chip Cookie Dough Ice Cream Cake.
Ready for the Ultimate Comfort Food?
This Banana Pudding Cake is more than just a list of ingredients. It’s a promise of a cozy kitchen, a simple project, and slices of pure joy shared with people you love. It has that magical power to turn an ordinary day into something a little sweeter. So grab those spotty bananas and let’s get baking. Your new favorite winter classic is waiting for you. Don’t forget to share a picture and tag it with #BananaPuddingCake so I can see your beautiful creation!
Equipment
- Grand bol
- Fouet
- Spatule
- Plaque à pâtisserie
- Papier sulfurisé
Ingredients
- 1 boîte mélange à gâteau jaune (15.25 oz)
- 3 grands bananes mûres plus elles sont tachetées, plus elles sont sucrées !
- 1 paquet pudding à la vanille instantané (3.4 oz)
- 1 tasse lait pour la pâte à gâteau
- 1 tasse lait froid pour le pudding
- 1 tasse crème fouettée épaisse
- 1/2 tasse sucre glace
- 1 cuil. à café extrait de vanille
- 1/2 tasse biscuit à la vanille écrasé
Instructions
- Préchauffez le four à 175°C et graissez une plaque à pâtisserie de 9x13 pouces.
- Dans un grand bol, préparez la pâte à gâteau en utilisant le mélange à gâteau jaune et substituez l'eau par 1 tasse de lait, en fouettant jusqu'à obtenir une pâte lisse.
- Pelez et coupez les bananes en fines rondelles et versez la pâte à gâteau dans le plat préparé.
- Enfoncez délicatement les rondelles de banane dans le dessus de la pâte.
- Faites cuire pendant 30-35 minutes jusqu'à ce qu'elles soient dorées et qu'un cure-dent en ressorte propre ; laissez refroidir complètement sur une grille.
- Dans un bol moyen, fouettez le mélange de pudding instantané avec 1 tasse de lait froid pendant 2 minutes, puis laissez reposer pendant 5 minutes.
- Dans un autre bol, battez la crème fouettée, le sucre glace et la vanille jusqu'à ce que des pics mous se forment.
- Étalez le pudding uniformément sur le gâteau refroidi, puis ajoutez la couche de crème fouettée sur le dessus, et parsemez de biscuits écrasés.
- Faites refroidir le gâteau au réfrigérateur pendant au moins 1 heure avant de servir.
Notes
Nutrition

Hi, I’m Olivia Parker, the founder of BakingSecret.com and a lifelong lover of all things sweet and homemade. I grew up in a small town in Oregon, where the smell of fresh cookies in my family’s kitchen sparked my passion for baking. Over the years, I turned that passion into a mission: to help home bakers feel confident, inspired, and creative.
After studying food science and working in several artisan bakeries across the U.S., I decided to create a space where everyone from beginners to seasoned bakers can find reliable recipes, expert tips, and a warm, welcoming community. BakingSecret.com is my way of sharing the magic of baking with the world. When I’m not testing new recipes, you’ll find me exploring farmers’ markets, collecting vintage cookbooks, or perfecting my sourdough technique.