
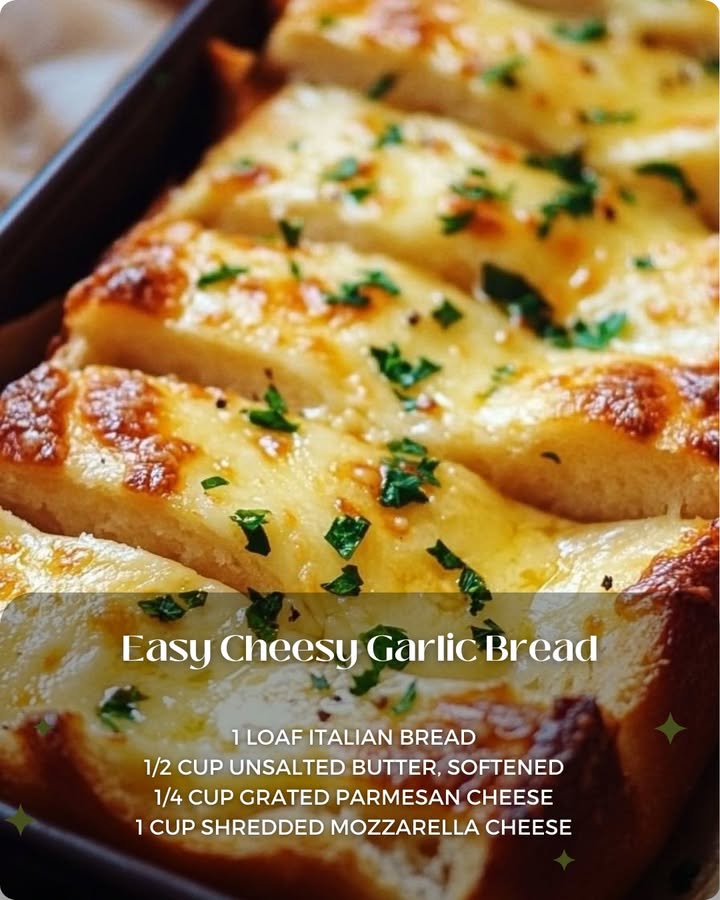
The Ultimate Easy Cheesy Garlic Bread: A Hug in Every Bite
Do you ever just crave that perfect, gooey, garlicky mess of a side dish? You know the one I mean. The kind that makes everyone at the table go silent except for the happy chewing sounds? That’s this recipe right here. Picture this: crusty bread, a golden, bubbling blanket of cheese, and the scent of roasted garlic filling your whole kitchen. It’s not just food; it’s a whole mood. I first made this for a last-minute game night, and let’s just say the bowl of chips went completely ignored. This easy cheesy garlic bread is the star.
A Little Story Behind the Bubbly Cheese
Garlic bread is the friendliest of foods. While it has roots in Italian cuisine, America has given it its own wonderful, cheesy personality. The classic version is often just butter and garlic. But adding not one, but two kinds of cheese? That’s pure joy. It turns a simple side into the main event. In my house, this dish is a tradition. We have it with spaghetti, we have it with soup, and sometimes we just have it on a Tuesday because Tuesdays deserve cheese, too. It’s the modern, no-fuss version of a comfort food classic.
Why You’ll Fall in Love With This Cheesy Garlic Bread Recipe
You’ll love this recipe because I’ve tested it to be foolproof! The magic is in the simple mix. You don’t need fancy tools or skills. It’s all about that perfect blend of creamy butter, sharp Parmesan, and wonderfully melty mozzarella. In under 20 minutes, you get crispy edges, a soft center, and a flavor punch that beats any store-bought box. It’s the kind of recipe you’ll memorize after making it once. Perfect for beginner cooks and busy families who want a big reward for little effort.
When to Whip Up This Cheesy Goodness
This bread is your secret weapon for so many occasions! It’s the perfect partner for a cozy family like this rich and creamy tomato soup. It’s a must-have for pizza night, movie marathons, and summer barbecues. Bring it to a potluck and watch it disappear first. Hosting friends? Serve it straight from the oven with a good dip. It turns an ordinary weeknight dinner into a celebration. Any event gets better with warm, cheesy garlic bread on the table.
Gathering Your Easy Cheesy Garlic Bread Ingredients
Here’s your simple shopping list for this incredible garlic cheese bread:
- 1 loaf Italian bread: Look for a soft, wide loaf with a sturdy crust.
- 1/2 cup unsalted butter, softened: This is key for a smooth, spreadable mix.
- 1/4 cup grated Parmesan cheese: Adds a salty, nutty depth of flavor.
- 1 cup shredded mozzarella cheese: The king of the melt! Pre-shredded is fine for convenience.
- 3 cloves garlic, minced: Fresh is best for the brightest, most aromatic punch.
- 2 tablespoons fresh parsley, chopped (optional): Adds a pop of color and fresh flavor.
- Salt and pepper to taste: A little seasoning makes all the flavors sing.
Handy Substitutions for Your Garlic Bread
No worries if you’re missing something! Cooking is all about making it work.
- Bread: A French baguette or even ciabatta works great.
- Butter: Salted butter is okay, just taste before adding extra salt.
- Parmesan: Try Asiago or Romano cheese for a similar sharp taste.
- Mozzarella: A Mexican cheese blend or provolone will also melt beautifully. For a different twist, try a cheddar-based recipe like these savory cheddar herb scones.
- Garlic: 3/4 teaspoon of garlic powder can stand in for fresh.
- Parsley: Use 2 teaspoons dried parsley, or try fresh chives or basil.
How to Make Your Perfect Cheesy Garlic Bread
Let’s get to the fun part! Follow these simple steps for the best garlic cheese bread you’ve ever made.
Step 1: Preheat Your Oven
First things first, get that oven hot and ready. Set it to 375°F (190°C). This gives the oven time to reach the perfect, steady temperature for baking. A hot oven is what gives us that beautiful, golden-brown crust and bubbly cheese top. While it warms up, get your ingredients out. Letting the butter soften at room temperature makes the next step so much easier.
Step 2: Make the Magic Cheese Mixture
This is where the magic happens. In a medium bowl, plop in your softened butter. It should be creamy and easy to stir. Add the minced fresh garlic—you’ll smell its sharp, pungent aroma right away. Toss in the grated Parmesan and the fluffy mountain of shredded mozzarella. Add a pinch of salt and pepper. Now, mix it all together with a fork or a spatula. You’ll see it transform into a thick, chunky, and incredibly fragrant paste. Every bit is packed with flavor!
Step 3: Prep the Bread Canvas
Take your loaf of Italian bread and place it on a cutting board. Using a serrated bread knife, carefully slice it in half lengthwise. You want two long, open-faced pieces. This creates the perfect surface area for all that cheesy goodness. Place the halves cut-side-up on a baking sheet. If you line the sheet with parchment paper, cleanup is a breeze. Now you’re ready to decorate your crispy canvas.
Step 4: Spread and Garnish
Grab a butter knife or a small spatula. Scoop up generous amounts of your cheese mixture and spread it evenly over the entire cut surface of each bread half. Don’t be shy—get it right to the edges! The more coverage, the better. This is also the time to sprinkle on that chopped fresh parsley if you’re using it. The green flecks make it look like it came from a fancy bakery. Pro tip: For extra flavor, you can lightly toast the cut sides of the bread for 3-4 minutes before spreading. This helps prevent sogginess.
Step 5: Bake to Golden Perfection
Carefully slide the baking sheet into your preheated oven. Now, the hardest part: waiting! Bake for 10 to 15 minutes. You’ll know it’s done when the cheese is completely melted into a bubbly, golden pool and the exposed edges of the bread turn a deep, crispy brown. Your kitchen will smell absolutely heavenly. Chef’s Tip: For extra browning on top, you can switch the oven to broil for the last 1-2 minutes. Watch it closely so it doesn’t burn!
Step 6: Slice, Serve, and Savor
Use oven mitts to take the tray out of the oven. Let the bread rest for just a minute on the counter. This lets the cheese set slightly so it doesn’t all slide off when you cut it. Then, use a sharp knife or a pizza cutter to slice it into thick, dippable strips. Serve it immediately while it’s warm, melty, and irresistible. It’s perfect all on its own or paired with a marinara sauce for dipping.
Your Cheesy Garlic Bread Timetable
This recipe is wonderfully quick!
- Prep Time: 8 minutes
- Cooking Time: 12 minutes
- Resting Time: 2 minutes
- Total Time: 22 minutes
The Chef’s Secret for the Best Garlic Flavor
Here’s my little secret for next-level garlic bread: use roasted garlic. Instead of mincing raw cloves, roast a whole head of garlic in the oven until it’s soft and caramelized. Squeeze the sweet, mellow paste into your butter mixture. It removes the harsh bite and adds an incredible, deep, nutty sweetness that will make everyone ask for your recipe.
A Fun Fact About Our Star Ingredient
Garlic isn’t just tasty; it’s ancient! It’s been used for over 5,000 years, both for cooking and as a natural medicine. The strong smell comes from a compound called allicin, which is released when you chop or crush the cloves. That’s why freshly minced garlic gives you the most powerful flavor in dishes like our cheesy garlic bread. It’s a flavor with a long history!
What You’ll Need to Make It
You don’t need any special gadgets for this easy recipe.
- Cutting board
- Serrated bread knife
- Medium mixing bowl
- Fork or spatula
- Butter knife or small offset spatula
- Baking sheet
- Parchment paper (optional, for easy cleanup)
How to Store Your Leftover Cheesy Garlic Bread
Let any leftover bread cool completely to room temperature. Do not store it while it’s still warm, as this will create steam and make the bread soggy. Wrap the leftover slices tightly in aluminum foil, or place them in a single layer in an airtight container.
For short-term storage, you can keep it at room temperature for up to one day. For longer storage, pop it in the refrigerator. It will stay good there for 3-4 days. The cheese will harden, and the bread will lose its initial crispness, but it’s still delicious.
The best way to reheat it is in the oven or a toaster oven. Preheat to 350°F (175°C) and warm the foil-wrapped bread for about 10 minutes, or until heated through. For a crispier texture, unwrap it for the last few minutes. Avoid the microwave, as it will make the bread very chewy and soft.
My Top Tips for Garlic Bread Success
- For the best texture, shred your own mozzarella from a block. Pre-shredded cheese has anti-caking agents that can make the melt less smooth.
- If you love heat, add a pinch of red pepper flakes or a dash of hot sauce to the butter mixture.
- Make it a meal by topping it with cooked ground Italian sausage, pepperoni, or sautéed veggies before baking.
- If your butter is too cold, you can soften it quickly by cutting it into small cubes and letting it sit for 10 minutes.
Make It Look as Good as It Tastes
Presentation is easy when your food is this beautiful!
- Serve it right on the wooden cutting board for a rustic, family-style look.
- Garnish with a final sprinkle of fresh parsley or chopped basil right before serving.
- Place a small bowl of warm marinara or a cool, creamy ranch dip in the center of the bread strips for dipping.
- For a party, slice it into small, bite-sized pieces for easy grabbing.
6 Delicious Variations to Try
Love this recipe? Mix it up with one of these fun twists!
- Everything Bagel Garlic Bread: After spreading the cheese, sprinkle generously with everything bagel seasoning before baking.
- Pesto Swirl: Mix 2 tablespoons of basil pesto into the butter mixture for a herby, green-flecked delight.
- Bacon & Cheddar: Swap mozzarella for sharp cheddar and mix in 1/2 cup of cooked, crumbled bacon.
- Pizza Bread: Spread a thin layer of pizza sauce over the bread first, then add the cheese mix and top with mini pepperoni.
- Herb Garden: Add 1 teaspoon each of dried oregano, basil, and thyme to the butter for an Italian herb explosion.
- Cheesy Buffalo Chicken: Top the baked bread with shredded rotisserie chicken tossed in buffalo sauce and a drizzle of blue cheese dressing. It’s a full meal!
Common Mistakes to Avoid for Perfect Cheesy Garlic Bread
Mistake 1: Using Cold, Hard Butter
This is the number one mistake! If your butter is straight from the fridge, it’s impossible to mix smoothly with the cheese and garlic. You’ll end up with lumpy, uneven clumps that tear the bread when you try to spread it. The result is patchy coverage and some bites that are bland. How to avoid it: Plan ahead! Take your butter out of the fridge at least 30 minutes before you start cooking. It should be soft to the touch but not melted.
Mistake 2: Overloading with Wet Ingredients
It’s tempting to add more flavor with things like fresh tomatoes or a lot of sauce. But adding very wet ingredients directly into the cheese mixture is a recipe for soggy bread. The moisture soaks into the bread before the cheese can melt and protect it, leading to a mushy, disappointing center. How to avoid it: If you want to add extras like tomatoes or olives, pat them very dry with a paper towel first. Or, add them on top of the cheese layer, not mixed into it.
Mistake 3: Slicing the Bread Too Thinly
Using a loaf that is too narrow or slicing it into wafer-thin pieces won’t give you the proper base you need. There isn’t enough sturdy bread to hold up against the rich, heavy cheese topping. It can become flimsy, overcook quickly, or break apart. How to avoid it: Choose a wide, robust loaf of Italian or French bread. You want a good balance of a crispy exterior and a soft, airy interior that can support the weight and moisture of the topping.
Mistake 4: Not Watching the Broiler
Using the broiler to get a beautiful, browned top is a great trick. But walking away for even a minute is dangerous! The high, direct heat can turn your golden cheese from perfect to burnt and bitter in seconds. This is a very common kitchen accident. How to avoid it: If you use the broiler, set a timer for 1 minute. Stand right by the oven and watch it like a hawk. Open the door slightly so you can see the color change. Pull it out the second it looks perfectly golden.
Your Cheesy Garlic Bread Questions, Answered!
Can I make cheesy garlic bread ahead of time?
You absolutely can! This is a great time-saver for parties. Prepare the bread halves and spread the cheese mixture on them completely. Instead of baking, wrap them tightly in plastic wrap and store them in the refrigerator for up to 24 hours. When you’re ready, just pop them directly from the fridge into your preheated oven. You may need to add 2-3 extra minutes to the baking time since you’re starting with a cold base. The flavor might even be better as the garlic has more time to meld with the butter and cheese.
Can I freeze garlic cheese bread?
Yes, freezing works well for this recipe. After you assemble the bread (spread the cheese mixture on), place the unbaked halves on a baking sheet and flash-freeze them for about an hour, until the topping is solid. This prevents them from sticking together. Then, wrap each half tightly in plastic wrap and again in aluminum foil or a freezer bag. They can be stored for up to 2 months. To cook, bake them from frozen in a 375°F oven, adding about 5-10 minutes to the original baking time. The texture will be slightly different but still delicious.
What’s the best cheese blend for maximum melt?
While mozzarella and Parmesan are the classic stars, the best melt often comes from a combination. Mozzarella provides that iconic stretchy, gooey texture. Adding a bit of Monterey Jack or provolone will increase the creaminess of the melt. For extra sharp flavor, keep the Parmesan or add a little Pecorino Romano. Avoid using only hard, aged cheeses like straight cheddar or Parmesan by themselves, as they can become oily when melted alone. The blend in this recipe is perfect because mozzarella melts smoothly, and Parmesan adds punch without compromising texture.
My bread got soggy. What did I do wrong?
A soggy center is usually caused by one of two things. First, the butter mixture might have been too wet (see the mistake about wet ingredients above). Second, and very common, is storing or covering the bread while it’s still steaming hot. The steam has nowhere to go and gets trapped, softening the crispy crust. To fix it next time, ensure your add-ins are dry and always let the baked bread cool on a wire rack for a few minutes before putting it in any container. This lets the steam escape upwards.
Can I use garlic powder instead of fresh garlic?
You can use garlic powder in a pinch, but the flavor profile will be different. Fresh minced garlic gives a brighter, more pungent, and aromatic flavor. Garlic powder is more mellow and earthy. If you need to substitute, use about 3/4 teaspoon of garlic powder for the 3 fresh cloves called for in the recipe. Mix it directly into the softened butter. For the best of both worlds, some cooks use a combination of both to create a more complex garlic flavor.
Is there a way to make this recipe healthier?
You can make a few simple tweaks for a lighter version. Use a whole-grain or multigrain loaf for more fiber. Swap half the butter for a light olive oil or Greek yogurt spread. Use part-skim mozzarella and a strong, flavorful cheese like a finely grated aged Parmesan so you can use less but still get a big taste. Remember, enjoying foods you love is part of a balanced approach to smart eating habits. It’s all about moderation and making choices that work for you.
What can I serve with cheesy garlic bread?
This bread is the ultimate companion dish! It’s a must with any pasta, like spaghetti and meatballs or fettuccine Alfredo. It turns a simple bowl of soup or salad into a filling meal. It’s fantastic alongside grilled meats and vegetables at a barbecue. For a real treat, serve it with a homemade classic marinara sauce for dipping. It also pairs wonderfully with lighter dishes, like a big garden salad, to add that comforting, savory element.
How do I get the cheese extra golden and bubbly on top?
For a professional-looking, deeply golden top, use a two-step baking process. First, bake the bread as directed at 375°F until the cheese is mostly melted. Then, move an oven rack to the top position and switch your oven to BROIL on the high setting. Watch it carefully! Broil for just 1-2 minutes, until the cheese develops those beautiful brown spots and bubbles. The direct top heat works magic. Just don’t walk away—it can burn in an instant.
Can I make this in an air fryer?
The air fryer is a fantastic tool for this recipe, especially for small batches! It makes the bread extra crispy. Prepare your bread halves as directed. Because air fryer baskets are smaller, you will likely need to cut each half into smaller sections to fit them in a single layer without overlapping. Air fry at 350°F for about 6-8 minutes, checking halfway through. The cooking time is faster, and the concentrated heat gives an incredible crunch. It’s perfect for making just a few servings at a time.
My cheese didn’t melt smoothly. Why?
If your cheese remained clumpy or separated into grease, the type of cheese might be the issue. Pre-shredded bagged cheeses are coated with starches (like potato starch or cellulose) to prevent clumping. These starches can sometimes inhibit a smooth melt and make the cheese seem grainy or oily. For the silkiest, smoothest melt, always buy a block of cheese and shred it yourself just before using. It’s a small extra step that makes a huge difference in the final texture of your garlic cheese bread.
If this recipe has you excited about baking, you’ll find so many more wonderful ideas in our main collection of bread and muffin recipes.
Go Forth and Bake That Bread!
So there you have it. Your guide to the easiest, cheesiest, most crowd-pleasing side dish ever. It’s more than just a recipe; it’s a way to make any meal feel special. Whether you’re feeding your family on a busy weeknight or impressing a group of friends, this cheesy garlic bread never lets you down. It’s simple, it’s joyful, and it’s packed with flavor in every single bite. Now, go preheat that oven, and get ready for some seriously happy eaters. You’ve got this!
Equipment
- Grand bol
- Fouet
- Spatule
- Plaque à pâtisserie
- Papier sulfurisé
Ingredients
- 1 pain pain italien
- 113 g beurre non salé ramolli
- 25 g fromage parmesan râpé
- 113 g fromage mozzarella râpé
- 3 gousse ail émincé
- 2 cuillère à soupe persil frais, haché (facultatif)
- q.s. sel et poivre au goût
Instructions
- Préchauffez votre four à 190°C.
- Dans un grand bol, mélangez le beurre ramolli, l'ail émincé, le fromage parmesan, le fromage mozzarella, une pincée de sel et de poivre. Remuez jusqu'à obtenir un mélange homogène.
- Coupez le pain italien en deux dans le sens de la longueur et placez-le coupé vers le haut sur une plaque de cuisson.
- Étalez uniformément le mélange de fromage sur les deux moitiés de pain et saupoudrez de persil haché si désiré.
- Cuire au four préchauffé pendant 10 à 15 minutes jusqu'à ce que le fromage soit fondu et bouillonnant.
- Laissez le pain reposer pendant une minute, puis découpez en bandes et servez chaud.
Notes
Nutrition

Hi, I’m Olivia Parker, the founder of BakingSecret.com and a lifelong lover of all things sweet and homemade. I grew up in a small town in Oregon, where the smell of fresh cookies in my family’s kitchen sparked my passion for baking. Over the years, I turned that passion into a mission: to help home bakers feel confident, inspired, and creative.
After studying food science and working in several artisan bakeries across the U.S., I decided to create a space where everyone from beginners to seasoned bakers can find reliable recipes, expert tips, and a warm, welcoming community. BakingSecret.com is my way of sharing the magic of baking with the world. When I’m not testing new recipes, you’ll find me exploring farmers’ markets, collecting vintage cookbooks, or perfecting my sourdough technique.