
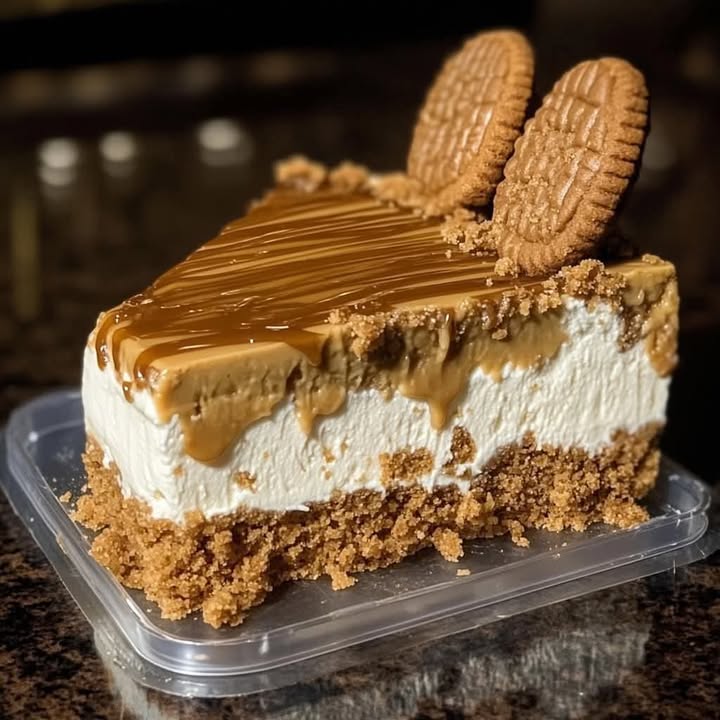
The Biscoff Caramel Cheesecake That Will Steal Your Heart
There are a few sounds in this world that genuinely spark joy for me: the *crunch* of a Biscoff cookie, the satisfied sighs around my dinner table, and the silence that falls when I bring this showstopper of a dessert out from the fridge. This Biscoff Caramel Cookie Butter Cheesecake is my not-so-secret weapon for turning any ordinary day into a celebration. It combines my family’s love for the spiced, caramelized flavor of Biscoff with the creamy, dreamy texture of a no-bake cheesecake. Every bite is a little slice of heaven, and honestly? It’s easier to make than you might think.
From Airplane Cookie to Baking Superstar
Isn’t it funny how the humble Biscoff cookie went from a complimentary airline treat to a global baking phenomenon? I remember first tasting them on a flight years ago, and I was instantly hooked. That unique blend of cinnamon, nutmeg, and caramelized sugar is simply irresistible. Now, the magic doesn’t stop with the cookies. The creamy, spreadable Cookie Butter—a genius invention—lets us bake that iconic flavor into everything. This cheesecake is my tribute to that journey. It takes the classic, elegant American cheesecake and gives it a modern, deliciously spiced twist that feels both comforting and exciting.
Why You’ll Fall in Love With This Biscoff Cheesecake Recipe
If you’re still on the fence, let me count the ways this dessert will win you over. First, it’s a no-bake recipe. That means no water baths, no cracked tops, and no oven-watching stress. Second, the flavor is out-of-this-world. The spiced cookie crust, the luscious cream cheese filling, and that silky cookie butter caramel topping create a perfect harmony. Finally, it’s incredibly versatile. I’ve made it in a big springform pan for parties and in little jars for individual treats. It’s a guaranteed crowd-pleaser every single time.
The Perfect Occasion for Your Cookie Butter Creation
This isn’t just a “someday” dessert. It’s your go-to for making moments special. I love bringing it to potlucks because it travels so well and always gets rave reviews. It’s also perfect for birthdays, holidays, or just a fancy Friday night in. When my book club meets at my house, this cheesecake is the requested centerpiece. Honestly, any time you want to bake something that looks incredibly impressive but is secretly simple, this is your recipe.
Gathering Your Biscoff Cheesecake Ingredients
Let’s get everything together! Having your ingredients ready makes the process so smooth. Here’s what you’ll need:
- For the Crust: 2 cups Biscoff cookie crumbs (about 20 cookies) and 6 tbsp unsalted butter, melted.
- For the Filling: 16 oz cream cheese (softened), ¾ cup granulated sugar, 1 tsp vanilla extract, and 1 cup whipped cream or whipped topping.
- For the Topping: 1 cup Biscoff cookie butter (melted) and ¼ cup caramel sauce.
- For Garnish: Whole and crushed Biscoff cookies.
Handy Substitutions for Your Pantry
Don’t panic if you’re missing an item! Here are some easy swaps I’ve tried:
- Cookie Butter: If you can’t find Biscoff brand, any speculoos cookie butter will work.
- Whipped Cream: You can use the stabilized kind from a tub, or make your own fresh whipped cream sweetened with a little powdered sugar.
- Crust: Graham cracker crumbs make a fine, though less spiced, substitute.
- Caramel Sauce: A good store-bought salted caramel is wonderful, or you can make a quick homemade one.
Step-by-Step to Cheesecake Bliss
Follow these simple steps, and you’ll have a masterpiece in no time. The key is patience during the chilling!
Step 1: Build Your Spiced Cookie Foundation
First, preheat your oven to 325°F (160°C). Take your Biscoff cookies and crush them into fine crumbs. I use a food processor for speed, but a zip-top bag and a rolling pin work just as well—and it’s a great stress reliever! In a bowl, mix the fragrant, brown cookie crumbs with the melted butter. It will look and feel like wet, spiced sand. Press this mixture firmly into the bottom of a 9-inch springform pan. I like to use the bottom of a measuring cup to get it nice and even. Pop it in the fridge to set while you make the filling. This chilling helps the crust stay crisp once you add the creamy layer.
Step 2: Whip Up the Dreamy Filling
Now, for the cloud-like filling. In a large mixing bowl, beat the softened cream cheese and granulated sugar together until completely smooth. No lumps allowed! This might take 2-3 minutes with an electric mixer. Then, beat in the vanilla extract. In a separate bowl, whip your cream until it holds soft peaks if you’re using fresh. If you’re using pre-made whipped topping, just give it a quick fluff with a spatula. Here’s the secret: gently fold the whipped cream into the cream cheese mixture. Use a big, wide spatula and turn the mixture over carefully to keep it light and airy. You’ll see it transform into a pale, fluffy, and utterly delicious cloud.
Step 3: Assemble and Let the Magic Happen
Retrieve your chilled crust from the fridge. Spoon the luxurious cheesecake filling over the top, spreading it out evenly with your spatula. Give the pan a gentle tap on the counter to release any air bubbles. Now, the hardest part: patience. Cover the pan with plastic wrap and chill it in the refrigerator for at least 4 hours, but overnight is truly best. This long chill is non-negotiable—it’s what gives the cheesecake its perfect, sliceable texture and allows all the flavors to meld together beautifully.
Step 4: Create the Glossy Cookie Butter Topping
When you’re ready to serve, it’s time for the grand finale. Gently melt your Biscoff cookie butter. You can do this in the microwave in 20-second bursts, stirring between each, or in a small saucepan over very low heat. Once it’s melted and smooth, stir in the caramel sauce. Let this divine mixture cool for a few minutes so it’s warm, not piping hot. Then, slowly pour it over the center of your fully set cheesecake. Using the back of a spoon or a small offset spatula, gently guide the topping to the edges, letting it cascade beautifully over the sides.
Step 5: Garnish, Slice, and Savor!
The final touch is all about presentation. Place a few whole Biscoff cookies artistically on top. For extra texture and a professional baker’s touch, sprinkle some of the reserved cookie crumbs around the edges. To get those picture-perfect slices, run a thin, sharp knife under hot water and wipe it dry before each cut. Serve each gorgeous slice and watch the smiles appear. This rich, creamy, and indulgent dessert is a true celebration in every bite!
Your Cheesecake Timeline
Plan ahead for the best results. Active prep time is only about 20-25 minutes of hands-on work. However, the crucial chilling time is a minimum of 4 hours. I highly recommend making it the day before you need it. That way, it sets perfectly overnight, and all you have to do before your event is add the topping and garnish. Total time from start to finish is about 4 and a half hours, mostly hands-off chilling.
My Secret for the Perfect Slice
Here’s a chef’s tip that makes all the difference: for the cleanest, most beautiful slices, dip your sharp knife in very hot water and wipe it clean with a towel between each cut. The heat helps the knife glide smoothly through the cold, creamy layers and the sticky cookie butter topping without dragging or pulling. It’s a simple trick that makes your cheesecake look like it came from a professional bakery.
A Little Cookie Butter Trivia
Did you know the famous speculoos spice blend, which gives Biscoff its signature taste, traditionally includes cinnamon, nutmeg, cloves, ginger, cardamom, and white pepper? This blend was historically baked into cookies for St. Nicholas’ Day in parts of Europe. So when you enjoy this cheesecake, you’re savoring a little piece of a centuries-old festive tradition!
Equipment You’ll Need
You won’t need any fancy tools. A 9-inch springform pan is ideal as it has removable sides, making serving a breeze. You’ll also need:
- Mixing bowls
- Electric hand mixer or stand mixer
- Spatula
- Food processor or zip-top bag for crushing cookies
- Measuring cups and spoons
Storing Your Biscoff Delight
This cheesecake stores beautifully, which is great for make-ahead planning. Keep it covered tightly in the refrigerator for up to 5 days. The crust may soften slightly after a couple of days, but the flavor will still be fantastic.
You can also freeze it for longer storage. Freeze the cheesecake (without the topping) on a baking sheet until solid, then wrap it tightly in plastic wrap and aluminum foil. It will keep for up to 2 months. Thaw it overnight in the fridge before adding the cookie butter caramel topping and serving.
For the leftover slices, just cover them with plastic wrap or place them in an airtight container in the fridge. The caramel topping might firm up when cold, but it will soften again slightly at room temperature.
Tips and Advice for Cheesecake Success
- Softened Cream Cheese is Key: Take your cream cheese out of the fridge at least an hour before you start. Softened cheese blends smoothly and prevents a lumpy filling.
- Don’t Overmix the Filling: Once you add the whipped cream, fold gently. Overmixing can deflate the air you whipped in, leading to a denser cheesecake.
- Chill Thoroughly: Rushing the chilling time is the number one reason a no-bake cheesecake won’t set. Give it the full time, or even longer.
- Customize Your Topping: Add a pinch of sea salt to the caramel topping for a salted caramel twist, or sprinkle chopped, toasted nuts on top for extra crunch.
Presentation Ideas to Impress Your Guests
A beautiful dessert deserves a beautiful presentation! Try one of these ideas:
- Serve on a cake stand with a dusting of powdered sugar around the plate.
- Top each slice with a dollop of extra whipped cream and a single Biscoff cookie.
- For individual portions, make the recipe in small mason jars or dessert glasses.
- Drizzle a little extra caramel sauce on the serving plate in an artistic design before placing the slice.
Lighter and Different Takes on This Recipe
Want to mix things up? Here are six delicious variations I’ve tried and loved:
- Chocolate Swirl Biscoff Cheesecake: Melt ½ cup of semi-sweet chocolate chips. After adding the filling to the crust, dollop the melted chocolate on top and swirl with a knife before chilling.
- Biscoff Cheesecake Bars: Press the crust into a 9×13-inch pan lined with parchment paper. Spread the filling on top, chill, then add topping. Lift out and cut into easy-to-serve bars.
- Mini Cheesecake Bites: Use a mini muffin tin with liners. Press a tablespoon of crust mixture into each, top with filling using a piping bag, and chill. Perfect for parties!
- Frozen Biscoff Cheesecake: After assembling, freeze the whole cheesecake. Slice while slightly frozen for a firm, ice-cream-like treat on a hot day.
- Lighter Version: Use reduced-fat cream cheese and light whipped topping. The flavor will still be wonderful, just a bit lighter.
- Espresso-Biscoff Cheesecake: Dissolve 1 tablespoon of instant espresso powder into the vanilla extract before adding it to the filling for a delicious coffee kick.
If you’re a fan of rich, decadent desserts, you might also love exploring our recipe for a classic decadent fudgy brownie cake. For a fruity contrast, our raspberry cream cake is a summer delight. Or, if tropical flavors call to you, our creamy coconut bliss cake is pure paradise. And for a stunning mix of berry and chocolate, try the dramatic flavors of our dark velvet strawberry cake.
Common Mistakes to Avoid
Mistake 1: Using Cold, Hard Cream Cheese
Starting with cold cream cheese straight from the fridge is a sure path to a lumpy, difficult-to-mix filling. The sugar won’t incorporate properly, and you’ll be tempted to overmix, which can make the final cheesecake dense. Always plan ahead and let your cream cheese sit on the counter until it’s soft to the touch, about 30-60 minutes. It should feel like very thick, spreadable butter.
Mistake 2: Rushing the Chilling Process
The most common pitfall is not letting the cheesecake chill long enough. Four hours is the absolute minimum, but if you try to slice it then, it might still be too soft and messy. The filling needs that long, undisturbed time in the fridge to firm up properly. For the perfect, clean slice that holds its shape, chilling overnight is the golden rule. Patience truly is the secret ingredient here.
Mistake 3: Skipping the Crust Chill
It’s tempting to pour the filling into the crust right after pressing it in. Don’t skip the initial 15-20 minute chill for the crust in the fridge! This short step helps the butter in the crust re-solidify. It creates a firm base that won’t crumble when you spread the filling or cut the final slices. Think of it as giving your dessert a solid foundation.
Mistake 4: Pouring Hot Topping on a Cold Cheesecake
Melting the cookie butter and immediately pouring it over the chilled cheesecake can cause problems. If the topping is too hot, it can start to melt the top layer of the creamy filling, creating an uneven surface. Always let your melted cookie butter and caramel mixture cool for 5-7 minutes until it’s just warm. It should still be pourable but not hot. This ensures a beautiful, glossy, distinct layer on top.
Always check your dairy products like cream cheese and whipped cream for freshness before using them. For the best quality and safety, follow the FDA’s guidelines on food expiration dates.
Frequently Asked Questions
Can I make this cheesecake ahead of time?
Absolutely, and I highly recommend it! This Biscoff Caramel Cheesecake is the perfect make-ahead dessert. You can prepare the crust and filling up to two days in advance. Keep it covered tightly in the refrigerator. Add the cookie butter caramel topping and the garnish on the day you plan to serve it. This not only makes party planning stress-free but also gives the flavors more time to develop and the texture more time to perfect itself in the fridge. It’s a win-win.
Don’t worry, there are great alternatives. Any brand of speculoos cookie spread will work as a direct substitute. The flavor profile is very similar. If you’re in a real pinch, you could try using a smooth peanut butter or a different nut butter for a completely different but still delicious twist. Just note that the iconic spiced Biscoff flavor will be different. You can also make a quick mock-cookie-butter by blending Biscoff cookie crumbs with a little melted butter and vegetable oil until smooth.
Why is my no-bake cheesecake filling too soft?
A soft filling usually points to two issues. First, the cream cheese may not have been beaten long enough with the sugar. Make sure the mixture is completely smooth and lump-free before adding the whipped cream. Second, and most likely, it needed more chilling time. The fridge time is essential for the structure. If it’s still soft after 4 hours, just give it more time. Also, ensure your whipped cream was whipped to firm peaks before folding it in, as this adds stability.
Can I freeze this cheesecake?
Yes, you can freeze it successfully. I recommend freezing it before adding the cookie butter topping for the best texture. Place the chilled, uncovered cheesecake (topping-free) on a flat surface in the freezer for about 2 hours, or until it’s solid. Then, wrap it tightly in several layers of plastic wrap and a layer of aluminum foil. It will keep for up to 2 months. Thaw it overnight in the refrigerator, then add the topping and garnish before serving.
I have two favorite methods. The fastest is to use a food processor. Just pulse the cookies until they become fine, uniform crumbs. If you don’t have one, place the cookies in a sturdy zip-top plastic bag, seal it tightly, and use a rolling pin to crush them. Roll over the bag until you have fine crumbs. Be sure to crush them finely for a crust that holds together well. A few larger pieces are okay for texture, but mostly you want a sandy consistency.
If your caramel sauce is thick and hard to stir, warm it gently first. You can scoop the needed amount into a small microwave-safe bowl and heat it for 10-15 seconds until it’s more fluid. Then, mix it with the warmed cookie butter. This ensures a smooth, pourable topping. If the combined mixture still seems too thick after cooling slightly, you can stir in a tiny bit of milk or cream, just a teaspoon at a time, to reach your desired consistency.
Can I use a different pan if I don’t have a springform?
You can, but serving will be trickier. A regular 9-inch pie plate or deep cake pan will work. To serve, you’ll need to slice it directly from the pan. For cleaner slices, line the pan with parchment paper so you can lift the whole cheesecake out in one piece. Individual dessert cups or a trifle dish are also fantastic, no-bake options where you can layer the crust, filling, and topping.
How long can this cheesecake sit out at a party?
Because it’s a dairy-based dessert, you don’t want to leave it out for too long. It’s safe to sit out at room temperature for up to 2 hours. After that, you should return any leftovers to the refrigerator. To keep it chilled longer during a party, you can place the serving plate on a larger tray filled with ice. This helps maintain its cool, firm texture while on display.
Can I make this recipe without an electric mixer?
You can, but it will require some elbow grease! For the crust, no mixer is needed. For the filling, ensure your cream cheese is very, very soft. Use a sturdy wooden spoon or silicone spatula to vigorously beat the cream cheese and sugar together until completely smooth. This might take several minutes of stirring. For the whipped cream, you can use a whisk and a very cold bowl, or you can use pre-whipped topping from the dairy aisle to save effort.
What other garnishes work well with this flavor?
While Biscoff cookies are the classic garnish, you can get creative! A drizzle of melted chocolate or white chocolate adds a lovely contrast. A sprinkle of flaky sea salt on top of the caramel enhances all the sweet, buttery flavors. For a textural pop, try toasted and chopped pecans or walnuts. A simple dollop of freshly whipped cream on each slice is always a welcome addition. For more incredible cheesecake inspiration, from classic New York style to fruity swirls, explore our full collection of cheesecake recipes.
The Final Slice
This Biscoff Caramel Cheesecake is more than just a dessert. It’s a conversation starter, a celebration centerpiece, and a guaranteed way to make someone’s day a little sweeter. The combination of that spiced cookie crust, the light yet rich filling, and the decadent caramel topping is truly magical. It proves that the most impressive desserts don’t have to be complicated. So grab your favorite spatula, crush those cookies, and get ready for the compliments. Trust me, this cheesecake is about to become your new signature treat. Now, go enjoy a slice—you’ve earned it!
Equipment
- Moule à charnière de 9 pouces
- Grands bols
- Mélangeur électrique ou mixeur sur socle
- Spatule
- Robot culinaire ou sac en plastique pour écraser les biscuits
Ingredients
- 2 tasses miettes de biscuits Biscoff
- 6 cuillères à soupe beurre non salé fondu
- 450 g fromage à la crème ramolli
- 150 g sucre granulé
- 1 cuillère à café extrait de vanille
- 240 ml crème fouettée ou garniture fouettée
- 240 ml beurre de biscuits Biscoff fondu
- 60 ml sauce caramel
Instructions
- Préchauffez votre four à 160°C.
- Écrasez les biscuits Biscoff en miettes fines et mélangez-les avec le beurre fondu.
- Appuyez fermement sur le mélange de miettes de biscuits au fond d'un moule à charnière de 9 pouces et réfrigérez.
- Battez le fromage à la crème et le sucre jusqu'à obtenir un mélange homogène, puis ajoutez l'extrait de vanille.
- Montez la crème en chantilly jusqu'à ce qu'elle forme des pics souples et incorporez-la délicatement au mélange de fromage à la crème.
- Répartissez le mélange sur la croûte réfrigérée et égalisez-le bien, puis réfrigérez pendant au moins 4 heures ou toute la nuit.
- Faites fondre le beurre de biscuits Biscoff et incorporez la sauce caramel.
- Laissez refroidir légèrement, puis versez-le sur le cheesecake en l'étalant jusqu'aux bords.
- Décorez avec des biscuits Biscoff entiers et broyés avant de servir.