
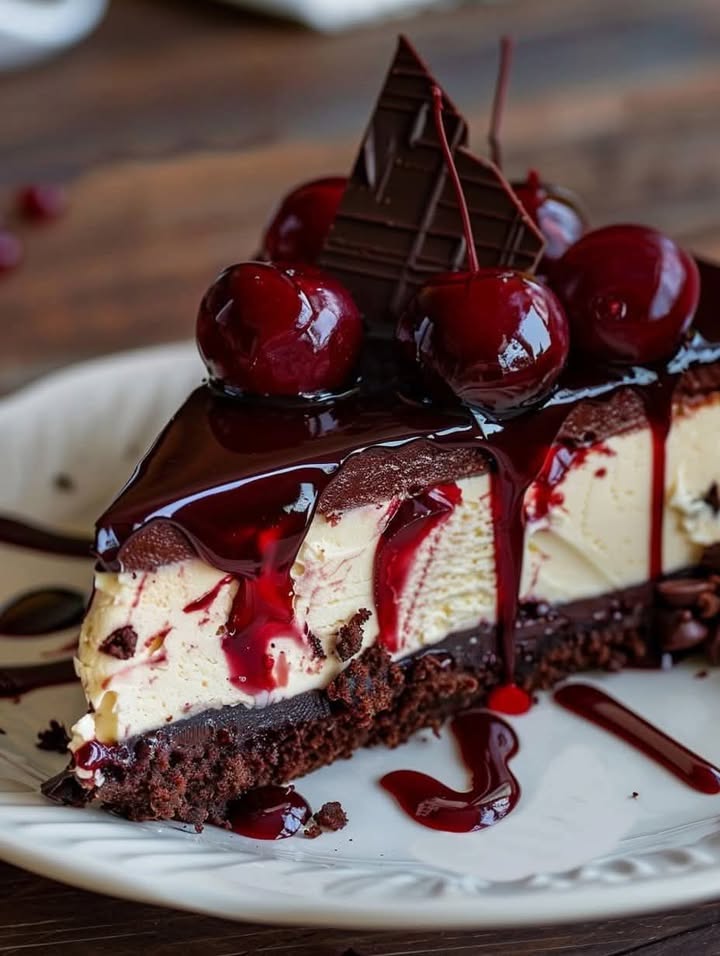
Black Forest Cheesecake: A Dreamy Twist on a Classic
There’s something magical about the combination of chocolate and cherry. It always reminds me of my favorite childhood dessert, the classic Black Forest cake. One rainy afternoon, I decided to give that beloved flavor a cheesecake makeover. The result? Pure magic! This Black Forest Cheesecake is now my go-to showstopper for family gatherings. It’s the perfect marriage of creamy, tangy cheesecake, juicy cherries, and rich chocolate. Every slice feels like a decadent celebration.
A Slice of History in a Springform Pan
The original Black Forest gâteau comes from Germany. It’s famous for its layers of chocolate cake, whipped cream, and sour cherries. My version takes all those amazing flavors and bakes them into one incredible cheesecake. It’s a modern, no-fuss take on the tradition. You get the familiar, comforting taste but with the lush texture of a New York-style cheesecake. It’s a fun fusion that always gets compliments and requests for the recipe.
Why You’ll Love This Cherry Chocolate Cheesecake
You will adore this recipe for three big reasons. First, the flavor is simply unforgettable. Sweet cherries and chocolate chips dance in every creamy bite. Second, it’s surprisingly simple. If you can beat cream cheese, you can make this. No water bath needed! And third, it looks absolutely professional. Topped with pillowy whipped cream and shiny cherries, it’s a dessert that proudly says, “I made this!”
Perfect Occasions for Your Cheesecake Masterpiece
This isn’t just a dessert; it’s an event maker. It’s perfect for birthdays, especially for the chocolate lover in your life. Bring it to a holiday potluck and watch it disappear first. It’s also ideal for a fancy dinner party dessert. Honestly, any day that ends with “y” is a good day for this Black Forest Cheesecake. It turns an ordinary Tuesday into a treat.
Gathering Your Black Forest Cheesecake Ingredients
Here’s your shopping list for this delicious dessert. Make sure everything is at room temperature for the smoothest batter!
For the Crust:
- 2 cups chocolate cookie crumbs (like Oreos)
- 1/4 cup unsalted butter, melted
For the Cheesecake Filling:
- 24 oz (680g) cream cheese, softened
- 1 cup granulated sugar
- 1 cup sour cream
- 1 teaspoon vanilla extract
- 3 large eggs
- 1/2 cup cherry pie filling
- 1/2 cup chocolate chips
For the Topping:
- Whipped cream
- Chocolate shavings
- Maraschino cherries
Easy Ingredient Swaps and Substitutions
No problem! Here are some easy swaps. Use graham cracker crumbs instead of chocolate cookie crumbs for the crust. Swap the cherry pie filling for blueberry or strawberry pie filling. Not a fan of chocolate chips? Try white chocolate chips or even chopped dark chocolate. For a nutty crunch, fold in 1/4 cup of chopped toasted almonds. It adds a lovely authentic Black Forest touch.
How to Make Black Forest Cheesecake: Step-by-Step
Step 1
First, heat your oven to 325°F (163°C). Grab your 9-inch springform pan and give it a good grease. I use a little butter or baking spray on the bottom and sides. This simple step is your insurance policy for a clean release later. Now, let’s make that irresistible chocolate crust. The smell of the crumbs mixing with melted butter is just heavenly.
Step 2
In a bowl, mix your chocolate cookie crumbs and melted butter. Stir until it looks like dark, wet sand. Pour it into your prepared pan. Use the bottom of a glass or a measuring cup to press it down firmly and evenly. You want a solid, compact layer. Bake this for just 10 minutes, then set it aside to cool. Pro tip: Let the crust cool completely before adding the filling. A warm crust can make the bottom soggy.
Step 3
Now for the best part—the filling! In a large bowl, beat the softened cream cheese until it’s completely smooth and lump-free. This is key for a silky texture. Scrape down the bowl. Add the sugar, sour cream, and vanilla extract. Beat it all together until it’s beautifully creamy. Add the eggs one at a time, mixing just until each egg disappears into the batter. Over-beating eggs can incorporate too much air. Finally, gently fold in the cherry pie filling and chocolate chips with a spatula. Those vibrant red swirls and chocolate pockets are what make this cheesecake so special.
Step 4
Carefully pour the luscious pink-speckled batter over your cooled crust. Use your spatula to spread it into a smooth, even layer. Tap the pan gently on the counter a few times. This helps pop any large air bubbles that might cause cracks during baking. Now, it’s ready for its slow transformation in the oven.
Step 5
Place the pan in your preheated 325°F oven. Bake for 60 to 70 minutes. The cheesecake is done when the edges look set but the very center still has a slight, gentle jiggle—like Jell-O. It will firm up as it cools. Now, here’s my favorite secret: turn off the oven and crack the door open with a wooden spoon. Let the cheesecake cool slowly inside for about an hour. This prevents sudden temperature shocks that lead to major cracks.
Step 6
After its oven nap, take the cheesecake out and let it cool on the counter. Once it’s at room temperature, it’s time for the chill. Cover it with plastic wrap and refrigerate it for at least 4 hours, but overnight is truly best. This long rest allows all the flavors to mingle and the texture to become perfectly firm and sliceable. Patience pays off!
Step 7
The grand finale! Run a thin knife around the edge of the springform pan before unlocking the collar. Pile on clouds of fresh whipped cream. Sprinkle elegant chocolate shavings over the top. Finally, crown it with bright, shiny maraschino cherries. Chef’s tip: Pat the cherries dry with a paper towel before placing them. This keeps the whipped cream from getting soggy and sliding off.
Your Black Forest Cheesecake Timeline
Let’s break down the time commitment so you can plan your baking day.
- Prep Time: 30 minutes (for crust and batter)
- Baking Time: 60-70 minutes
- Cooling Time in Oven: 1 hour
- Chilling Time: Minimum 4 hours (overnight recommended)
- Total Time: Approximately 5 hours 40 minutes (mostly hands-off)
- Servings: 12 beautifully rich slices
Chef’s Secret for the Perfect Texture
My biggest secret? Room temperature ingredients are non-negotiable. Take your cream cheese, sour cream, and eggs out of the fridge at least an hour before you start. Cold cream cheese will never blend smoothly. You’ll end up with a lumpy batter. Room temperature ingredients blend together quickly and evenly. This creates that legendary velvety, melt-in-your-mouth cheesecake texture we all love.
A Sweet Little Extra Fact
Did you know the “Black Forest” in the name refers to the Black Forest region in Germany? The traditional cake uses a special cherry brandy called Kirschwasser. While we’re using a simpler cherry pie filling, the spirit of that classic combination is alive and well in every bite of this cheesecake.
Equipment Checklist
You don’t need fancy tools! Here’s what to grab:
- 9-inch springform pan
- Electric hand mixer or stand mixer
- Mixing bowls (large and medium)
- Measuring cups and spoons
- Spatula
- Wooden spoon (for propping the oven door)
Storing Your Leftover Black Forest Cheesecake
Cover any leftover cheesecake tightly with plastic wrap or store it in an airtight container. It will keep beautifully in the refrigerator for up to 5 days. The flavor actually gets better after a day or two!
You can also freeze this cheesecake for long-term storage. Wrap the whole cheesecake or individual slices tightly in plastic wrap. Then, wrap it again in aluminum foil or place it in a freezer bag. It will keep for up to 2 months.
To thaw frozen cheesecake, simply transfer it to the refrigerator and let it thaw slowly overnight. This helps maintain the perfect creamy texture. Add fresh whipped cream and cherries just before serving again.
Top Tips for Cheesecake Success
- Don’t over-mix the batter once the eggs are added. Mix just until combined to avoid incorporating too much air.
- Always use a springform pan. It’s the only sure way to get the cheesecake out in one beautiful piece.
- For super clean slices, dip your knife in hot water and wipe it dry between each cut.
- If you love extra cherry flavor, add a tablespoon of Kirsch (cherry brandy) to the batter with the vanilla.
Presentation Ideas to Wow Your Guests
- Serve each slice with a dollop of whipped cream and a drizzle of melted chocolate.
- Add a sprinkle of cocoa powder on the plate for a professional touch.
- Use fresh, pitted cherries in season instead of maraschino ones for a natural look.
- Pair with a small cup of strong coffee or a glass of dessert wine.
6 Delicious Recipe Variations to Try
Love this format? Here are more tasty twists on the classic cheesecake idea!
- Peanut Butter Cup Swirl: Swirl creamy peanut butter into the batter and use crushed peanut butter cookies for the crust. It’s a peanut butter lover’s dream.
- Tropical Escape: Fold in 1/2 cup of toasted coconut and 1/2 cup of crushed pineapple (well-drained). Use a graham cracker crust.
- Cookies and Cream: Fold 1 cup of crushed Oreo pieces into the batter. Use an Oreo crust for double the chocolate cookie goodness.
- Lemon Berry Blast: Use a vanilla wafer crust. Add 2 tablespoons of lemon zest to the batter and fold in 1/2 cup of mixed fresh raspberries and blueberries.
- Salted Caramel Pretzel: Use a pretzel crust for a salty-sweet base. Swirl 1/2 cup of salted caramel sauce into the batter before baking.
- Mocha Chip: Dissolve 1 tablespoon of instant espresso powder into the vanilla extract. Fold in chocolate chips for a coffee-chocolate delight.
If you’re looking for another fabulous rolled dessert, you must try my indulgent Peanut Butter Cup Cake Roll. For a bright citrus treat, this easy Lemon Condensed Milk Drizzle Cake is always a crowd-pleaser. Chocolate and strawberry fans will adore this stunning Chocolate Cake with Fresh Strawberry Filling. And for a no-bake freezer wonder, my Ferrero Rocher Ice-Cream Terrine is impossible to resist.
Common Mistakes to Avoid
Mistake 1: Using Cold Ingredients
This is the number one reason for a lumpy cheesecake batter. Cold cream cheese and sour cream just won’t blend smoothly with the sugar and eggs. You’ll see little white flecks of cream cheese in your baked cake. To avoid this, plan ahead. Take your dairy and eggs out of the fridge at least an hour before you start baking. They should feel cool to the touch, not cold.
Mistake 2: Over-beating the Batter
Once you add the eggs, it’s time to be gentle. Over-beating incorporates too much air into the batter. This air expands in the oven and then collapses as the cake cools. The result? A cheesecake that puffs up and then cracks badly on the surface. Mix the eggs in on low speed, just until the yolk disappears. A few extra seconds of mixing can make a big difference.
Mistake 3: Skipping the Slow Cool Down
Pulling a hot cheesecake straight out of the oven is a big shock. The sudden temperature change causes the center to fall faster than the edges, leading to cracks. Always let it cool down gradually. Simply turn off the oven, crack the door open, and leave it there for an hour. This gentle cooling helps the structure set perfectly.
Mistake 4: Not Letting it Chill Long Enough
I know it’s hard to wait, but slicing into a cheesecake before it’s fully set is a recipe for a goopy mess. The texture needs that long, cold rest to firm up properly. Four hours is the bare minimum, but overnight is ideal. This patience ensures you get those clean, Instagram-worthy slices. Think of the chill time as an essential ingredient, not just a waiting period.
Frequently Asked Questions
Can I use fresh cherries instead of pie filling?
You can, but it requires a few extra steps. Fresh cherries will release a lot of juice during baking, which can make the cheesecake watery. If you want to use fresh, pit and chop about 1 cup of cherries. Cook them in a small saucepan with 2 tablespoons of sugar and 1 teaspoon of cornstarch until they soften and the juice thickens. Let this mixture cool completely before folding it into the batter. This creates a more stable fresh cherry swirl. Remember, a treat like this is part of joyful eating, and the National Institutes of Health notes that finding balance is key for long-term healthy eating.
Why did my cheesecake crack on top?
Cracks are usually caused by two things: over-mixing the batter (which adds too much air) or a drastic temperature change. To prevent this, mix gently after adding eggs and always cool the cheesecake slowly in the turned-off oven. Don’t worry if a small crack appears! It will be covered with delicious whipped cream and no one will ever know.
Can I make this cheesecake ahead of time?
Absolutely! This cheesecake is actually better made ahead. The flavors develop and the texture sets perfectly overnight. Bake it the day before you need it. Let it cool, chill it overnight, and then add the toppings just an hour or two before serving. It’s the ultimate make-ahead dessert for stress-free entertaining.
Do I need to use a water bath?
For this specific recipe, a water bath is not necessary. The sour cream in the batter helps keep it creamy and prevents overcooking and cracking. The key is baking at a low temperature (325°F) and following the slow cooling method. This gives you a smooth, crack-free top without the hassle of wrapping the springform pan in foil and dealing with hot water.
Can I freeze Black Forest Cheesecake?
Yes, you can! Freeze the cheesecake (without the whipped cream and cherry topping) for up to 2 months. Wrap it tightly in plastic wrap, then in foil. Thaw it overnight in the refrigerator. Add fresh whipped cream, chocolate shavings, and cherries just before serving. The texture remains wonderfully creamy.
What’s the best way to get clean slices?
Use a thin, sharp knife. Dip the blade in a tall glass of very hot water and wipe it clean with a towel before each cut. The hot knife glides through the cold, firm cheesecake and chocolate layers cleanly. This gives you those beautiful, professional-looking slices you see in bakeries.
Can I use low-fat cream cheese and sour cream?
I don’t recommend it for the best texture. Full-fat cream cheese and sour cream give the cheesecake its rich, dense, and creamy structure. Low-fat versions have more water and gums, which can lead to a softer, sometimes grainy texture that may not set as firmly. For a special dessert, the full-fat version is worth it.
My crust is too crumbly. What went wrong?
The crust likely needed a bit more butter. The mixture should hold together when you pinch it. If it’s too dry, add another tablespoon of melted butter and mix it in. Also, make sure you press it into the pan very firmly and evenly. A good, compact crust won’t fall apart when you slice the cake.
How do I know when the cheesecake is done baking?
Don’t rely on time alone. The edges should look puffed and set, but the center (about a 3-inch circle) should still have a slight, gentle jiggle when you tap the pan. It will look underdone, but it will continue to cook from residual heat as it cools. Overbaking is the main cause of a dry, dense cheesecake.
What other crusts can I use?
Get creative! A classic graham cracker crust is always delicious. For a nuttier flavor, try using ground-up toasted hazelnuts mixed with cookie crumbs. You can even use crushed Oreos (with the filling) for an extra chocolatey base. Just keep the total crumb quantity and butter ratio the same. For more decadent dessert ideas, check out our full collection of creamy cheesecake recipes.
A Final Sweet Note
I hope this Black Forest Cheesecake becomes a star in your kitchen just like it is in mine. It brings together the cozy taste of tradition with the creamy joy of cheesecake. It’s a bake that’s sure to create happy memories around your table. So, gather your ingredients, take your time, and get ready for the compliments to roll in. Happy baking!
Equipment
- Grand bol
- Fouet
- Spatule
- Moule à charnière de 9 pouces
- Papier sulfurisé
Ingredients
- 2 tasses chapelure de biscuits au chocolat comme les Oreos
- 1/4 tasse beurre non salé fondu
- 680 g fromage à la crème ramolli
- 1 tasse sucre
- 1 tasse crème aigre
- 1 cuil. extrait de vanille
- 3 grands œufs
- 1/2 tasse garniture de tarte aux cerises
- 1/2 tasse pépites de chocolat
Instructions
- Préchauffez le four à 163°C et graissez un moule à charnière de 9 pouces.
- Dans un grand bol, mélangez la chapelure de biscuits au chocolat et le beurre fondu jusqu'à obtenir un aspect de sable humide. Pressez le mélange dans le moule préparé et faites cuire pendant 10 minutes ; laissez refroidir complètement.
- Dans un grand bol, battez le fromage à la crème ramolli jusqu'à ce qu'il soit lisse ; ajoutez le sucre, la crème aigre et l'extrait de vanille en mélangeant jusqu'à ce que le tout soit crémeux.
- Ajoutez les œufs un par un, en mélangeant juste jusqu'à ce qu'ils soient incorporés, puis incorporez délicatement la garniture de tarte aux cerises et les pépites de chocolat.
- Versez la pâte sur la croûte refroidie et lissez le dessus ; tapez le moule pour éliminer les bulles d'air.
- Faites cuire pendant 60 à 70 minutes jusqu'à ce que les bords soient pris et que le centre tremble légèrement.
- Éteignez le four et laissez la porte entrebâillée pour laisser refroidir lentement le cheesecake pendant environ 1 heure.
- Laissez refroidir le cheesecake à température ambiante, puis couvrez-le et réfrigérez pendant au moins 4 heures ou toute la nuit.
- Avant de servir, passez un couteau autour du bord du moule à charnière, puis décorez avec de la crème fouettée, des copeaux de chocolat et des cerises maraschino.
Notes
Nutrition

Hi, I’m Olivia Parker, the founder of BakingSecret.com and a lifelong lover of all things sweet and homemade. I grew up in a small town in Oregon, where the smell of fresh cookies in my family’s kitchen sparked my passion for baking. Over the years, I turned that passion into a mission: to help home bakers feel confident, inspired, and creative.
After studying food science and working in several artisan bakeries across the U.S., I decided to create a space where everyone from beginners to seasoned bakers can find reliable recipes, expert tips, and a warm, welcoming community. BakingSecret.com is my way of sharing the magic of baking with the world. When I’m not testing new recipes, you’ll find me exploring farmers’ markets, collecting vintage cookbooks, or perfecting my sourdough technique.