
Discover the Magic of Blender Bread Recipe
There’s something magical about pulling a warm, golden loaf of bread out of the oven. The smell alone makes you want to grab a slice and slather it with butter. But let me tell you, I used to dread making bread. All that kneading? No thanks! Then one day, while chatting with a friend, she mentioned her secret: a blender bread recipe. Skeptical but intrigued, I gave it a shot. And guess what? It changed my life. This simple, no-knead method produces an incredibly soft loaf that’s perfect for breakfast or snacks. Let me take you through this delightful journey.
A Little History Behind This Recipe
Bread has been a staple in kitchens for centuries, but traditional methods often involve hours of work. My grandmother used to spend entire mornings kneading dough by hand. While I admire her dedication, I’m all about shortcuts these days. This blender bread recipe is a modern twist on classic baking. It skips the fuss but keeps the flavor. Once I tried it, I realized how versatile it is. Whether you’re a beginner or a seasoned baker, this recipe will become your go-to.
Why You’ll Love This Blender Bread Recipe
Here’s the deal: this recipe is as easy as it gets. No sticky hands, no complicated steps—just toss everything into a blender, mix, and bake. The result? A soft, fluffy loaf that tastes like it came from a fancy bakery. Plus, it’s budget-friendly and uses ingredients you probably already have at home. I love serving it during family brunches because everyone always asks for seconds.
Perfect Occasions to Make This Bread
This bread is perfect for lazy Sunday mornings when you want something homemade but don’t feel like spending hours in the kitchen. It also shines at tea parties, picnics, or even as a last-minute gift for a neighbor. Imagine pairing it with jam, honey, or avocado spread—it’s simply irresistible.
Ingredients List
- 2 eggs
- 1 1/4 cups of warm milk
- 1/4 cup of sugar
- 1/2 cup of oil
- A pinch of salt
- 3 cups of wheat flour
- 1 packet (10 g) of dry yeast
Substitution Options
If you’re out of certain ingredients, don’t worry. You can swap warm milk with almond or oat milk for a dairy-free option. Coconut oil works great instead of regular oil, and if you prefer less sweetness, reduce the sugar slightly. Just make sure your yeast is fresh—it’s key to getting that fluffy texture.
Preparation Steps
Step 1: Blend the Wet Ingredients
Start by cracking two eggs into your blender. Add the warm milk, oil, sugar, and a pinch of salt. Blend everything together for about a minute and a half. The mixture should look smooth and slightly frothy. Pro tip: Use warm (not hot) milk to help activate the yeast later on. The aroma of the blended mixture is heavenly—like a promise of good things to come.
Step 2: Mix in the First Batch of Flour
Pour the blended mixture into a large mixing bowl. Gradually add two cups of wheat flour, stirring gently until combined. The batter will start to thicken, but it won’t be fully dough-like yet. Don’t rush this step; mixing slowly ensures even incorporation. You’ll notice the texture changing right before your eyes—it’s like watching magic happen.
Step 3: Incorporate Yeast and Final Flour
Now comes the fun part. In a small bowl, mix the remaining cup of flour with the dry yeast. Sprinkle this over the batter and stir well. This step is crucial because it helps distribute the yeast evenly. As you mix, the dough will start to pull away from the sides of the bowl. Chef’s tip: Let the dough rest for five minutes before moving to the next step. This gives the yeast a head start.
Step 4: Let It Rise
Grease a 25 cm loaf pan and transfer the dough into it. Smooth the top with a spatula. Now, cover the pan with a clean kitchen towel and let it rise for 30 minutes. During this time, the dough will double in size. Watching it puff up is oddly satisfying—it’s like seeing your hard work pay off. Keep it in a warm spot, away from drafts, for best results.
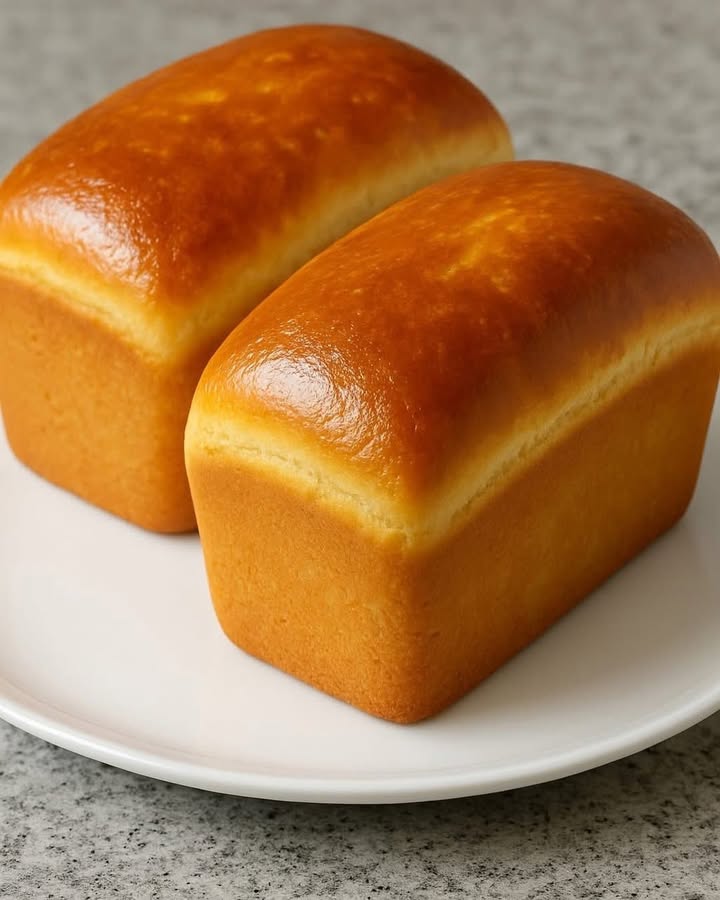
Step 5: Bake to Golden Perfection
Preheat your oven to 180°C (350°F). Once the dough has risen, pop it into the oven and bake until the top turns a beautiful golden brown. The smell wafting through your kitchen will make you drool. When done, remove the bread from the mold and let it cool on a wire rack. Patience is key here—cutting it too soon can ruin the texture.
Timing Breakdown
Here’s a quick overview of the timing involved:
- Prep Time: 15 minutes
- Rising Time: 30 minutes
- Cooking Time: 30-35 minutes
- Total Time: About 1 hour and 15 minutes
Chef’s Secret
To get an extra soft crust, brush the top of the baked bread with melted butter immediately after removing it from the oven. Trust me, it makes a world of difference.
Extra Info
Did you know that using warm liquids helps activate yeast faster? That’s why we use warm milk in this recipe. It speeds up the rising process without compromising flavor.
Necessary Equipment
You’ll need a blender, a large mixing bowl, a spatula, a greased loaf pan, and an oven. Simple, right?
Storage Tips
Store your bread in an airtight container or wrap it tightly in plastic wrap. This keeps it fresh for up to three days. If you live in a humid area, consider storing it in the fridge to prevent mold. For longer storage, slice the bread and freeze it. Simply toast a slice whenever you crave it.
When freezing, place parchment paper between slices to prevent them from sticking together. Reheating frozen slices in the toaster brings back that just-baked texture.
If you find the crust becoming too hard, revive it by wrapping the loaf in foil and warming it in the oven for a few minutes.
Tips and Advice
Always check the expiration date on your yeast. Old yeast won’t rise properly, leaving you with dense bread. Also, avoid opening the oven door while baking—this can cause the bread to collapse. Lastly, experiment with flavors by adding herbs or spices to the dough.
Presentation Ideas
- Serve slices with a dollop of whipped butter and fresh berries.
- Create mini sandwiches using thinly sliced bread.
- Dust the top with powdered sugar for a sweet touch.
Healthier Alternatives
Want to tweak the recipe? Here are six variations:
- Whole Wheat Version: Replace half the wheat flour with whole wheat flour for added fiber.
- Gluten-Free Option: Use a gluten-free flour blend and xanthan gum.
- Low-Sugar Twist: Cut the sugar in half and add mashed bananas for natural sweetness.
- Herbed Bread: Stir in dried rosemary or thyme for a savory kick.
- Seed Lover’s Delight: Sprinkle sesame or sunflower seeds on top before baking.
- Vegan-Friendly: Substitute eggs with flax eggs and use plant-based milk.
Common Mistakes to Avoid
Mistake 1: Using Cold Milk
Cold milk can slow down the yeast activity, resulting in poor rising. Always use warm milk to give your dough a fighting chance. Pro tip: Test the temperature by dipping your finger—if it feels comfortably warm, it’s good to go.
Mistake 2: Overmixing the Dough
Overmixing can lead to tough bread. Stop mixing once the dough pulls away from the bowl. Remember, gentle handling yields softer results.
Mistake 3: Skipping the Resting Time
Rushing the resting phase is a big no-no. Give the yeast enough time to work its magic. Skipping this step means flat, dense bread.
Mistake 4: Opening the Oven Door Too Soon
Resist the urge to peek! Opening the oven door lets heat escape, which can affect the bread’s rise. Wait until the minimum baking time is up before checking.
Frequently Asked Questions
Can I Use a Stand Mixer Instead of a Blender?
Absolutely! A stand mixer works fine, though a blender creates a smoother consistency. Just ensure you blend the wet ingredients thoroughly.
How Do I Know When the Bread Is Done?
Tap the bottom of the loaf—it should sound hollow. Alternatively, insert a toothpick; if it comes out clean, it’s ready.
Can I Double the Recipe?
Yes, doubling is easy. Just use two loaf pans and adjust the baking time slightly if needed.
What Can I Serve With This Bread?
Pair it with soups, stews, or salads. It’s also fantastic with spreads like hummus or Nutella.
Is This Recipe Kid-Friendly?
Definitely! Kids love helping pour ingredients and watching the dough rise. Plus, they adore eating it afterward.
Can I Add Nuts or Dried Fruits?
Of course! Fold them in during Step 3 for a delicious twist.
Why Did My Bread Sink After Baking?
This usually happens if the dough didn’t rise long enough or if the oven temperature was too low.
How Long Does Homemade Bread Last?
Stored correctly, it stays fresh for 2-3 days. Freezing extends its shelf life significantly.
Do I Need Special Yeast?
Nope, regular active dry yeast works perfectly. Instant yeast is fine too.
Can I Make Rolls Instead of a Loaf?
Yes! Divide the dough into smaller portions, shape them into rolls, and bake for 15-20 minutes.
Final Thoughts
There you have it—a simple, foolproof blender bread recipe that delivers amazing results every time. Whether you’re a busy parent, a student, or someone who loves baking, this recipe fits seamlessly into your routine. So grab your blender, gather your ingredients, and let’s get baking. Your house will smell amazing, and your taste buds will thank you!
Equipment
- Blender
- Large mixing bowl
- Spatula
- Loaf pan 25 cm
- Oven
Ingredients
- 2 eggs
- 1.25 cups warm milk
- 0.25 cups sugar
- 0.5 cups oil
- a pinch salt
- 3 cups wheat flour
- 10 g dry yeast
Instructions
- Start by cracking two eggs into your blender. Add the warm milk, oil, sugar, and a pinch of salt. Blend everything together for about a minute and a half until smooth and slightly frothy.
- Pour the blended mixture into a large mixing bowl. Gradually add two cups of wheat flour, stirring gently until combined.
- In a small bowl, mix the remaining cup of flour with the dry yeast. Sprinkle this over the batter and stir well.
- Grease a 25 cm loaf pan and transfer the dough into it. Cover the pan with a clean kitchen towel and let it rise for 30 minutes.
- Preheat your oven to 180°C (350°F). Once the dough has risen, bake until the top turns a golden brown, about 30-35 minutes. Remove and let cool on a wire rack.
Notes
Nutrition

Hi, I’m Olivia Parker, the founder of BakingSecret.com and a lifelong lover of all things sweet and homemade. I grew up in a small town in Oregon, where the smell of fresh cookies in my family’s kitchen sparked my passion for baking. Over the years, I turned that passion into a mission: to help home bakers feel confident, inspired, and creative.
After studying food science and working in several artisan bakeries across the U.S., I decided to create a space where everyone from beginners to seasoned bakers can find reliable recipes, expert tips, and a warm, welcoming community. BakingSecret.com is my way of sharing the magic of baking with the world. When I’m not testing new recipes, you’ll find me exploring farmers’ markets, collecting vintage cookbooks, or perfecting my sourdough technique.