
The Ultimate Caramel Apple Cheesecake: Your New Favorite Dessert
Is there anything better than that moment of pure silence after everyone takes the first bite of your dessert? You know the one. The eyes widen, a slow smile spreads, and then comes the chorus of “Oh my gosh, you HAVE to give me this recipe!” That’s exactly what happened when I first served this Caramel Apple Cheesecake at my family’s Thanksgiving. My uncle, a man of few words, asked for a second slice. That’s when I knew this recipe was a keeper. It’s the perfect marriage of creamy, tangy cheesecake, sweet-tart apples, and that rich, buttery caramel we all crave in the fall. It looks like it came from a fancy bakery but trust me, it’s totally doable in your own kitchen.
A Slice of Comfort: The Story Behind Caramel Apple Cheesecake
Cheesecake itself is ancient, with roots going back to Greece. The caramel apple, on the other hand, is a classic American fairground treat. Some genius decided to marry these two icons, and let’s just send them a thank-you card! This Caramel Apple Cheesecake is a beautiful example of a modern mash-up. It takes the timeless elegance of a New York-style cheesecake and gives it a fun, homey twist with the flavors of a caramel apple. I love how it feels both special for a holiday and cozy enough for a casual Sunday dinner. It’s a dessert that tells a story of tradition with a deliciously modern plot twist.
Why You Will Absolutely Adore This Recipe
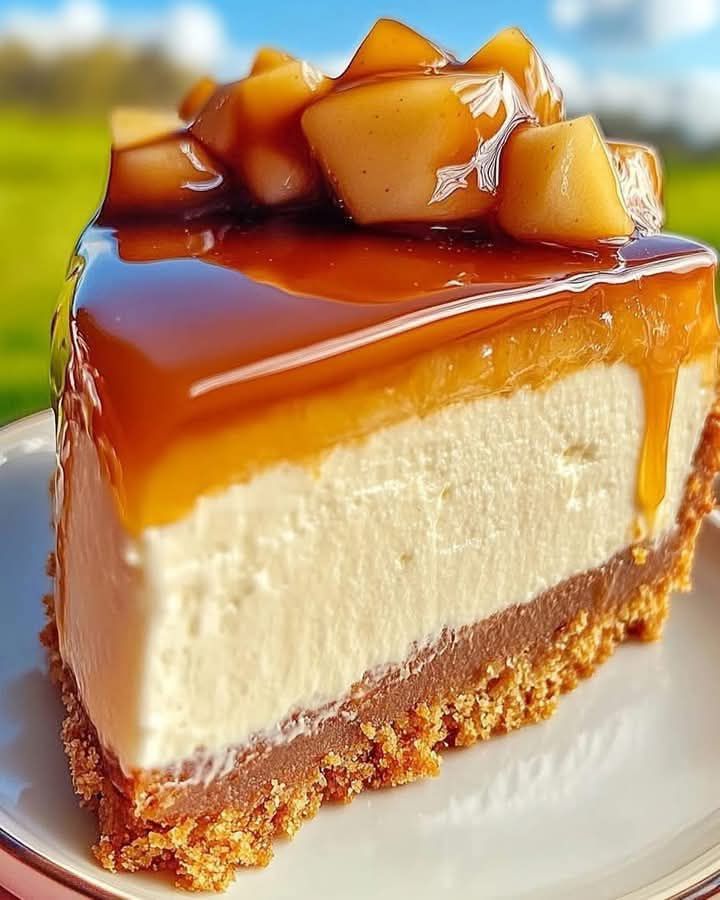
First, the texture is pure magic. You get that crisp graham cracker crust, the unbelievably creamy filling, and the soft, gooey apple layer in the middle. Then there’s the flavor explosion: sweet caramel, fresh apple, and rich cream cheese playing together perfectly. Second, while it does require some patience (good things come to those who chill!), the steps are simple. You don’t need any fancy techniques. Finally, it’s a total crowd-pleaser. It impresses every single time, making you look like a pastry rockstar with minimal stress.
Perfect Occasions for This Show-Stopping Dessert
- Thanksgiving or Fall Gatherings: It captures the essence of the season better than pumpkin pie, in my humble opinion!
- Potlucks and Parties: It travels well and serves a crowd, guaranteeing you’ll go home with an empty plate.
- Birthdays or Celebrations: A wonderful alternative to birthday cake for the cheesecake lover in your life.
- Just Because: Sometimes, a Tuesday night deserves a spectacular dessert. No occasion needed!
Caramel Apple Cheesecake Ingredients
Gathering your ingredients is the first step to success. Using full-fat, room-temperature dairy is non-negotiable for the creamiest texture imaginable.
- For the Crust: 1 1/2 cups graham cracker crumbs, 1/4 cup granulated sugar, 1/2 cup melted butter
- For the Filling: 24 oz (three 8-oz blocks) cream cheese, softened, 1 cup granulated sugar, 3 large eggs, 1 tsp vanilla extract, 1 cup sour cream, 1/2 cup caramel sauce
- For the Swirl & Garnish: 1 cup apple pie filling, 1 chopped apple (like Honeycrisp or Granny Smith), extra caramel sauce and graham cracker crumbs for topping
Easy Ingredient Substitutions
Don’t have something? No panic! Here are some simple swaps:
- Graham Cracker Crumbs: Use crushed digestive biscuits, vanilla wafers, or even ginger snaps for a spiced twist.
- Sour Cream: Plain, full-fat Greek yogurt is an excellent 1:1 substitute.
- Apple Pie Filling: You can make your own! Simmer 2 chopped apples with 2 tbsp sugar, 1/2 tsp cinnamon, and 1 tbsp water until soft.
- Caramel Sauce: A good store-bought jar is perfect. For a homemade touch, gently warm 1 cup of sugar in a pan until amber-colored, then whisk in 6 tbsp of butter and 1/2 cup of heavy cream.
How to Make Caramel Apple Cheesecake: Step-by-Step
Step 1: Prep Your Pan and Oven
Start by preheating your oven to 325°F (163°C). This lower temperature is key for a gentle, even bake that prevents cracks. Thoroughly grease the bottom and sides of a 9-inch springform pan. I like to use a little butter on a paper towel for this. Taking the time now means your beautiful cheesecake will release perfectly later. Place the prepared pan on a small sheet of foil; you’ll thank me when no butter leaks out during baking.
Step 2: Create the Buttery Crust
In a medium bowl, mix the graham cracker crumbs and 1/4 cup of sugar. Pour in the melted, golden butter. Stir until the mixture resembles wet sand and holds together when you pinch it. Dump it into your pan and press it firmly and evenly into the bottom. I use the bottom of a flat glass or measuring cup to get it nice and compact. This creates a solid foundation that won’t crumble when you slice it. Pro tip: For a higher crust, press some of the mixture about an inch up the sides of the pan.
Step 3: Make the Dreamy Cheesecake Filling
In a large bowl, beat the softened cream cheese and 1 cup of sugar with a hand or stand mixer. Beat it for a good 2-3 minutes until it’s completely smooth and creamy, scraping the bowl down often. Add the eggs one at a time, beating just until the yellow disappears after each. Overbeating eggs introduces too much air, which can lead to cracks. Finally, mix in the vanilla and sour cream on low speed until the whole mixture is velvety and uniform. The smell is already heavenly!
Step 4: Layer in the Flavor
Now for the fun part! Pour slightly more than half of the cheesecake batter over your prepared crust. Smooth it out gently. Take spoonfuls of the apple pie filling and dollop them over the batter. Do the same with your 1/2 cup of caramel sauce. Take a knife or a skewer and gently swirl it through the apples and caramel—just a few figure-eight motions to create pretty pockets. Carefully pour the remaining batter over the top, covering the swirls. Use a spatula to smooth the top, sealing in all that flavor.
Step 5: The Low and Slow Bake
Place your cheesecake in the preheated oven. Bake for 50 to 60 minutes. The edges should look set, but the center should still have a slight, gentle jiggle—like Jell-O—when you tap the pan. This is crucial! The cheesecake will continue to set as it cools. When done, turn off the oven, crack the door open with a wooden spoon, and let the cheesecake cool inside for 1 hour. This gradual temperature change is the #1 secret to preventing major cracks.
Step 6: The Chill (The Hardest Part!)
After its oven nap, move the cheesecake to a wire rack to cool to room temperature. Then, cover it loosely and refrigerate for at least 4 hours, but overnight is truly best. This long chill allows the texture to firm up perfectly, making it sliceable and letting all the flavors deepen and meld together. Patience is your most important ingredient in this step!
Step 7: The Grand Finale – Decorate!
Run a thin knife around the edge of the chilled cheesecake before unclasping the springform pan ring. Now, let your creativity shine! Drizzle generous ribbons of caramel sauce over the top. Sprinkle with fresh, crisp chopped apple and a few leftover graham cracker crumbs for texture. Slice with a sharp, hot knife (dip it in hot water and wipe it dry between cuts) for the cleanest pieces. Every gorgeous slice is now an irresistible invitation to indulge.
Caramel Apple Cheesecake Time Breakdown
| Stage | Time Needed |
|---|---|
| Prep Time | 25 minutes |
| Bake Time | 55 minutes (average) |
| Cooling in Oven | 1 hour |
| Chilling in Fridge | 4+ hours (best overnight) |
| Total Time | About 6+ hours |
Servings: 12 rich slices | Calories: Approximately 480 per slice
My Chef’s Secret for the Perfect Slice
For absolutely pristine, clean slices every single time, use dental floss! Yes, really. Take a long piece of unflavored dental floss, hold it taut between both hands, and press it down through the cheesecake to the crust. Pull the ends out to the side, and you’ll have a perfect cut without dragging any filling. Wipe the floss and repeat. It’s a game-changer for presentation!
A Fun Fact About Cheesecake
Did you know the first recorded mention of something resembling cheesecake was on a Greek island over 4,000 years ago? Athletes were served a form of it at the first Olympic Games in 776 BC for energy! Our modern version, with cream cheese, didn’t appear until the late 1800s in New York. So when you make this Caramel Apple Cheesecake, you’re participating in a delicious, ancient tradition—with a much tastier crust, I might add.
Necessary Equipment
- 9-inch Springform Pan (essential for easy removal)
- Electric Hand Mixer or Stand Mixer
- Large and Medium Mixing Bowls
- Measuring Cups and Spoons
- Rubber Spatula
- Wire Cooling Rack
How to Store Your Caramel Apple Cheesecake
Once decorated and served, any leftovers should be covered tightly and stored in the refrigerator. The best method is to place it back in the springform pan or on a cake stand with a secure dome lid. It will keep beautifully for up to 5 days. The flavors actually get better on day two and three!
You can also freeze this cheesecake for longer storage. Wrap the whole cheesecake or individual slices tightly in plastic wrap, then again in foil. Place them in a freezer-safe bag. It will keep for up to 2 months. To serve, thaw overnight in the refrigerator and add fresh garnishes just before serving.
Remember that the fresh apple garnish is best added right before serving. If you need to store a decorated cheesecake, the apple pieces may brown slightly and soften. A quick squeeze of lemon juice on the chopped apples can help slow this down if you need to prep them ahead.
Pro Tips for Cheesecake Success
- Room Temperature is Rule #1: Make sure your cream cheese, eggs, and sour cream are out of the fridge for at least an hour. This ensures a smooth, lump-free batter.
- Don’t Overmix: Once you add the eggs, mix just until combined. Overbeating adds air bubbles that can expand and cause cracks.
- Use a Water Bath for Ultimate Creaminess: For an even more luxurious texture, wrap the outside of your springform pan in foil and place it in a larger roasting pan. Pour hot water into the roasting pan until it comes halfway up the sides of the springform. Bake as directed.
- Resist the Peek: Do not open the oven door during the first 45 minutes of baking. The sudden temperature drop can make your cheesecake fall or crack.
Presentation Ideas to Wow Your Guests
- Serve each slice on a pool of extra caramel sauce with a tiny scoop of vanilla ice cream on the side.
- Garnish with a fan of thinly sliced apples and a sprig of fresh mint for a pop of color.
- For a dinner party, plate individual mini cheesecakes made in a muffin tin, following the same layering method.
- Add a sprinkle of flaky sea salt over the caramel drizzle. The sweet-salty combo is incredible.
Healthier & Creative Recipe Variations
Love the idea but want to mix it up? Here are six delicious twists on the classic caramel apple theme:
- Keto Caramel Apple Cheesecake: Use an almond flour crust, sugar-free caramel syrup, and a keto-friendly sweetener like erythritol in the filling. Fold in chopped, sautéed low-carb apples like Granny Smith.
- No-Bake Caramel Apple Cheesecake: Perfect for summer! Use a press-in crust, and make the filling with whipped cream, cream cheese, and condensed milk folded together. Set in the fridge. Top with apple compote and caramel.
- Caramel Apple Cheesecake Bars: Press the crust into a 9×13 pan. Layer the filling, swirl, and bake. These are easier to transport and serve at potlucks or as finger food.
- Pumpkin Caramel Swirl Cheesecake: Replace the apple pie filling swirl with a cup of pumpkin puree mixed with pumpkin pie spices. Keep the caramel swirl for a decadent fall fusion dessert.
- Chocolate Crust Caramel Apple Cheesecake: Swap the graham cracker crust for one made with chocolate cookie crumbs (like Oreos). The chocolate, caramel, and apple combination is out of this world, much like our decadent Black Forest Cheesecake.
- Individual Mini Cheesecakes: Use a muffin pan with liners. Follow the same layering steps but reduce baking time to about 20 minutes. Great for parties where everyone gets their own perfect little dessert.
Common Mistakes to Avoid
Mistake 1: Using Cold Ingredients
This is the most common pitfall. Pulling cold cream cheese and eggs straight from the fridge and mixing them leads to a lumpy, uneven batter. No amount of mixing will fix it once those lumps form. The fats need to be soft to emulsify smoothly with the sugar and eggs. How to avoid it: Plan ahead! Set your cream cheese, eggs, and sour cream on the counter for at least 60-90 minutes before you start baking. Your filling will be silky smooth.
Mistake 2: Overbeating the Batter After Adding Eggs
Once you add the eggs, it’s time to switch to a gentle hand. Beating on high speed incorporates too much air. These air bubbles expand in the oven’s heat, then collapse as the cheesecake cools, creating cracks and an uneven texture. How to avoid it: After adding each egg, mix on medium-low speed just until the yolk is fully incorporated and the mixture looks uniform. Scrape the bowl well between each addition. A few small air bubbles are fine, but you don’t want it frothy.
Mistake 3: Overbaking the Cheesecake
A dry, crumbly cheesecake is often an overbaked cheesecake. Many bakers wait for the top to be completely firm, which is too late. Cheesecake relies on residual heat to finish setting. How to avoid it: Look for the “jiggle test.” At 50 minutes, gently shake the pan. The outer 2-3 inches should be set, but the very center (about the size of a lemon) should have a slight, gentle wobble. It will firm up perfectly during the slow cool-down process.
Mistake 4: Skipping the Gradual Cooling Steps
Taking a hot cheesecake straight from the oven and plopping it in the fridge is a recipe for disaster. The drastic temperature shock almost guarantees a major crack down the middle. How to avoid it: Follow the cooling ritual. Let it cool in the turned-off oven with the door ajar first. This allows it to adjust slowly. Then cool on the counter before refrigerating. This patience pays off in a flawless surface.
Mistake 5: Cutting with a Dull or Dirty Knife
Using a regular knife to cut a cold cheesecake results in messy, squished slices with crumbs and filling stuck to the blade. It ruins your beautiful presentation. How to avoid it: Use the hot knife trick. Fill a tall glass with very hot water. Dip a sharp, thin-bladed knife into the water and wipe it completely dry with a clean towel. Make a slice. Repeat the dip-wipe-cut process for every slice. You’ll get clean, professional-looking pieces every time.
Frequently Asked Questions
Can I use fresh apples instead of apple pie filling?
Absolutely! Using fresh apples gives you more control over sweetness and texture. Peel and finely chop 2 medium apples (like Granny Smith or Honeycrisp). In a small saucepan, cook them with 2 tablespoons of brown sugar, 1/2 teaspoon of cinnamon, and a tablespoon of water over medium heat for about 8-10 minutes, until softened. Let this compote cool completely before swirling it into the cheesecake batter. It adds a lovely, fresh apple flavor.
Why did my cheesecake crack on top?
Cracks usually happen for one of three reasons: overmixing the batter (adding too much air), overbaking, or cooling too quickly. Don’t worry, it’s still delicious! The beauty of this recipe is the caramel and apple garnish will cover any minor cracks. To prevent them next time, ensure ingredients are room temp, don’t overbeat after adding eggs, perform the jiggle test, and always cool the cheesecake gradually in the turned-off oven first.
How do I know when the cheesecake is done baking?
The visual and tactile “jiggle test” is your best friend. At the minimum bake time, gently shake the cheesecake pan. The edges should look set and puffed slightly. The center (about the size of a lemon) should have a slight wobble—it should jiggle like Jell-O, not like liquid. Remember, it will continue to cook from residual heat as it cools in the oven. If the center is completely firm in the oven, it’s likely overbaked.
Can I make this cheesecake ahead of time?
Yes, and I highly recommend it! Cheesecake actually tastes better the next day after the flavors have fully melded. You can bake it up to two days in advance. Let it cool completely, then cover tightly and store in the refrigerator. Add your fresh apple and final caramel drizzle garnish just before you plan to serve it to keep everything looking crisp and beautiful. This makes it a perfect, stress-free dessert for entertaining.
Can I freeze caramel apple cheesecake?
You sure can, and it freezes wonderfully. To freeze the whole cheesecake, cool it completely and chill it. Do not add the fresh apple garnish. Wrap the entire chilled cheesecake (still in the pan or on a plate) tightly in plastic wrap, then in foil. Freeze for up to 2 months. Thaw overnight in the refrigerator before garnishing and serving. You can also freeze individual slices for a quick sweet treat!
What’s the best way to get a smooth cheesecake filling?
The secret is in the prep and the mixing. First, ensure all your dairy is at true room temperature. Beat the cream cheese and sugar alone for a full 2-3 minutes until it’s completely smooth and no lumps remain, scraping the bowl often. Add the eggs one at a time on a low to medium speed, mixing just to combine. Finally, fold in the sour cream and vanilla gently. Using a spatula to give the batter a final stir by hand can help pop any last air bubbles.
My crust stuck to the pan! How do I prevent that?
Proper greasing is key. Don’t just grease the bottom; make sure you get a light coating of butter or non-stick spray on the sides of the springform pan as well. After pressing in the crust, you can also bake it alone for 8-10 minutes before adding the filling. This helps it “set” and form a barrier. Finally, always run a thin knife around the edge of the chilled cheesecake before releasing the springform clamp.
Is a water bath necessary for this recipe?
It’s not strictly necessary for success, especially with the slow-bake and cool method in this recipe. However, a water bath (or bain-marie) provides the most gentle, even, and humid heat. This drastically reduces the risk of cracking and yields an incredibly creamy, delicate texture. If you have the time and don’t mind the extra step of wrapping your pan in foil, I recommend trying it. It’s the professional’s choice for perfect cheesecake.
Can I use a different size pan?
Yes, but baking times will change. For a 10-inch pan, the cheesecake will be thinner and will bake faster. Start checking at 40-45 minutes. For a smaller, thicker cheesecake in an 8-inch pan, you’ll need to increase the baking time, possibly to 65-75 minutes, and watch the jiggle test carefully. The key is that the filling needs to reach the same internal doneness, regardless of pan size.
What other fruits could I use with this caramel cheesecake?
The caramel and cheesecake base is incredibly versatile! Instead of apple, try swirling in pear butter, mashed roasted peaches, or a berry compote. For a tropical twist, use mango puree and a coconut cookie crust. For more inspired cheesecake flavor combinations, you can explore endless ideas from classic to creative, building your dessert repertoire with each bake.
Ready to Bake Some Happiness?
This Caramel Apple Cheesecake is more than a dessert; it’s a memory maker. It’s the centerpiece of the table, the reason for the happy silence, and the recipe your family will ask for year after year. Don’t let the chilling time intimidate you—it’s just the cake’s beauty sleep. The active work is straightforward and so rewarding. Whether you’re a baking novice or a seasoned pro, this recipe is your ticket to a stunning, delicious success. Remember, focusing on everyday meals that bring joy and balance is what home cooking is all about. So, tie on your apron, preheat that oven, and get ready for the compliments to roll in. Happy baking!
Equipment
- Grand bol
- Fouet
- Spatule
- Moule à charnière
- Papier sulfurisé
Ingredients
- 1.5 tasses miettes de biscuits Graham
- 0.25 tasses sucre granulé
- 0.5 tasses beurre fondu
- 24 oz fromage à la crème, ramolli
- 1 tasses sucre granulé
- 3 oeufs
- 1 cuil. à café extrait de vanille
- 1 tasses crème aigre
- 0.5 tasses sauce caramel
- 1 tasses garniture de tarte aux pommes
- 1 pomme, hachée
- q.s. sauce caramel et miettes de biscuits Graham pour garnir au goût
Instructions
- Préchauffez votre four à 163°C et graissez le fond et les côtés d'un moule à charnière de 9 pouces.
- Dans un bol moyen, mélangez les miettes de biscuits Graham et 1/4 tasse de sucre, puis ajoutez le beurre fondu et remuez jusqu'à obtenir une texture semblable à du sable mouillé. Pressez au fond du moule préparé.
- Dans un grand bol, battez le fromage à la crème ramolli et 1 tasse de sucre jusqu'à ce que le mélange soit lisse. Ajoutez les œufs un par un, en mélangeant juste jusqu'à ce qu'ils soient incorporés. Ajoutez l'extrait de vanille et la crème aigre et mélangez jusqu'à consistance lisse.
- Versez un peu plus de la moitié de la préparation du cheesecake sur la croûte, puis déposez des cuillerées de garniture de tarte aux pommes et de sauce caramel sur la pâte, en tourbillonnant doucement avec un couteau.
- Versez le reste de la préparation par-dessus et lissez la surface.
- Faites cuire pendant 50 à 60 minutes, jusqu'à ce que les bords soient pris mais que le centre tremble légèrement. Éteignez le four, entrouvrissez la porte et laissez refroidir à l'intérieur pendant 1 heure.
- Déplacez le cheesecake sur une grille pour refroidir complètement à température ambiante, puis couvrez légèrement et réfrigérez pendant au moins 4 heures, de préférence toute la nuit.
- Démoulez délicatement le moule à charnière, décorez avec de la sauce caramel, des pommes hachées et des miettes de biscuits Graham restantes. Tranchez et servez.
Notes
Nutrition

Hi, I’m Olivia Parker, the founder of BakingSecret.com and a lifelong lover of all things sweet and homemade. I grew up in a small town in Oregon, where the smell of fresh cookies in my family’s kitchen sparked my passion for baking. Over the years, I turned that passion into a mission: to help home bakers feel confident, inspired, and creative.
After studying food science and working in several artisan bakeries across the U.S., I decided to create a space where everyone from beginners to seasoned bakers can find reliable recipes, expert tips, and a warm, welcoming community. BakingSecret.com is my way of sharing the magic of baking with the world. When I’m not testing new recipes, you’ll find me exploring farmers’ markets, collecting vintage cookbooks, or perfecting my sourdough technique.